C6 Corvette Version 2 PAL Installation
(updated 2/15/16)
Introduction
This web page provides details and photos for installing the new Version 2 PAL in your C6 Corvette.
There are three ways of installing the PAL, depending on your XM radio option and the year of your car.
You can click on each Option to go directly to those instructions.
Option 1: For most C6s, which are equipped with an XM radio receiver.
Click here for Installation Examples
Option 2: For C6s without the XM receiver, but with the XM harness installed at the factory.
Option 3: For C6s without the XM harness.
Click here for lots of Frequently Asked Questions about the PAL
C6s with an XM radio receiver
 First, find your XM receiver:
A. FOR COUPE/Z06 OWNERS
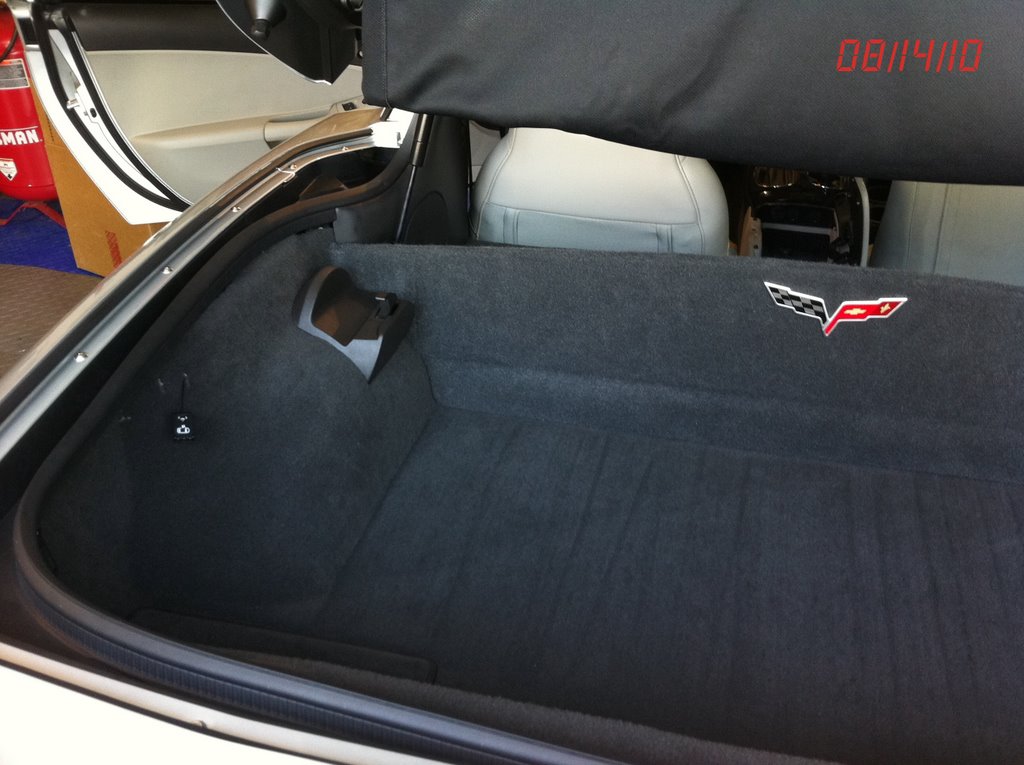
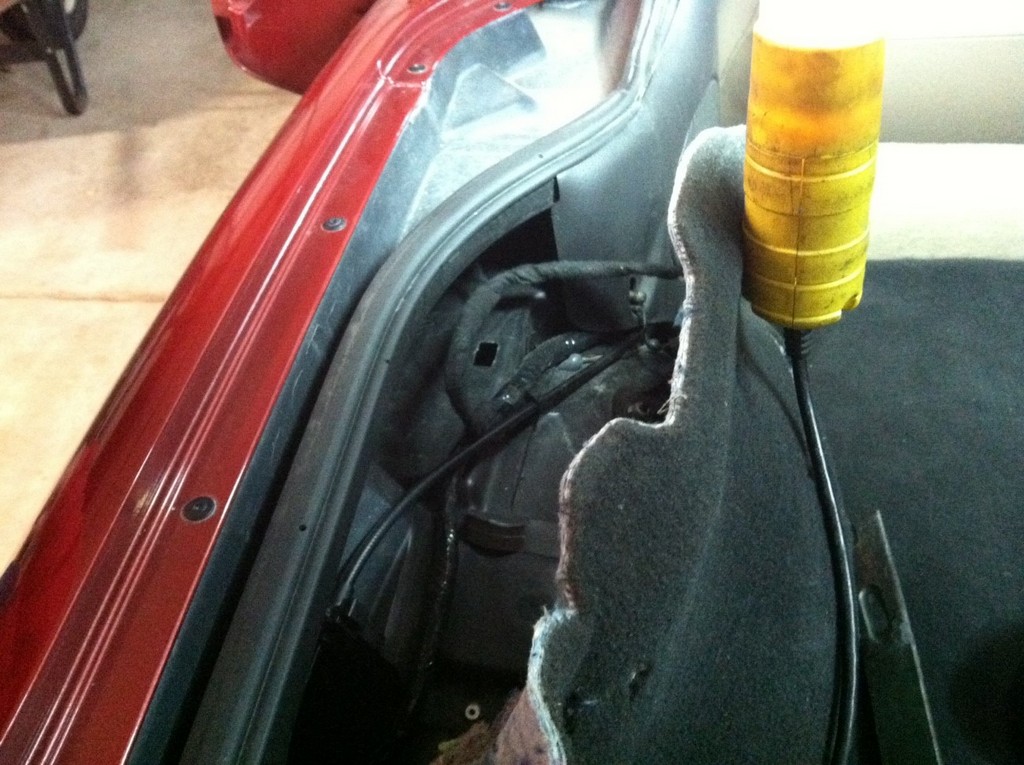
Your XM receiver is located above the left rear wheel well:
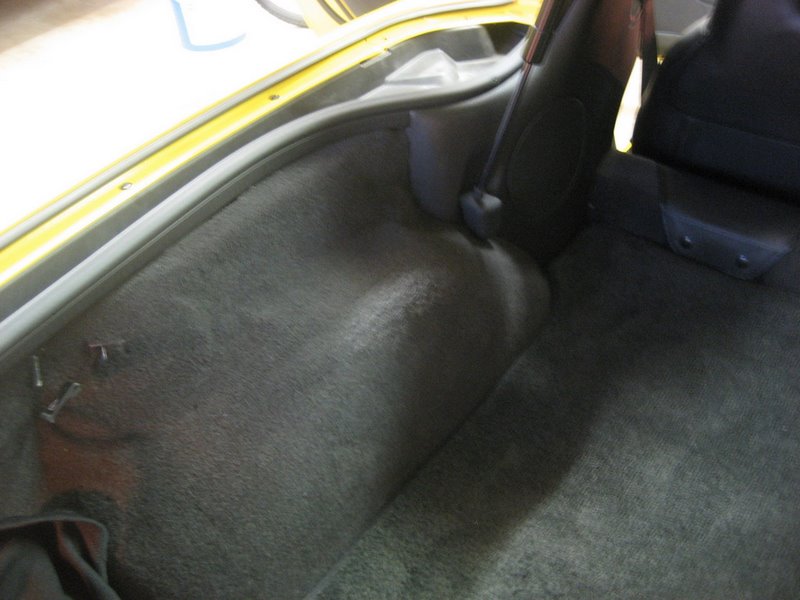
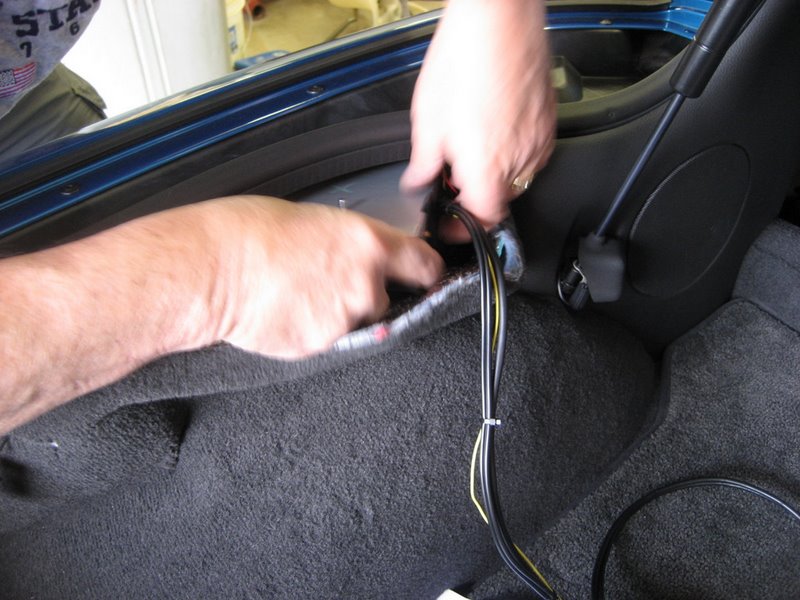
Pull back the carpet:
On the coupe, you may have the extra top storage brackets. You may have to remove the left one.
Here are three photos from forum member John Beidl showing the coupe roof storage bracket:
Lift up (pull hard if necessary):
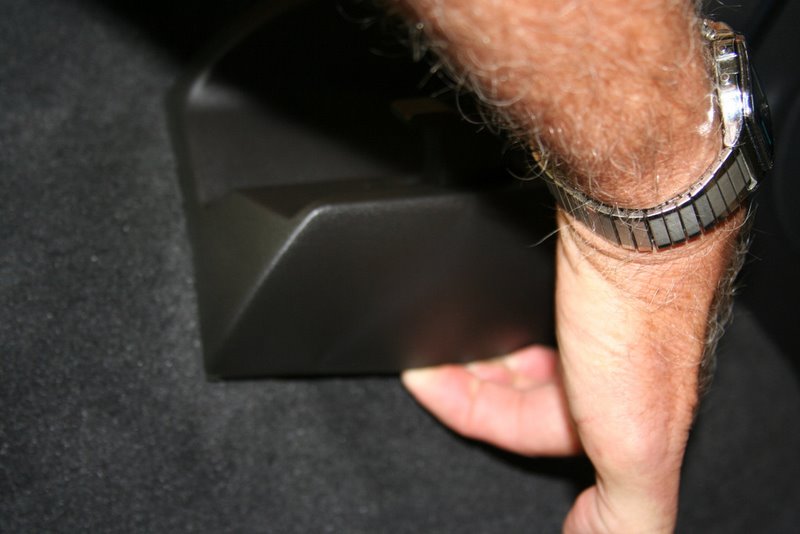
Here are the clips that show how the bracket is held in place:
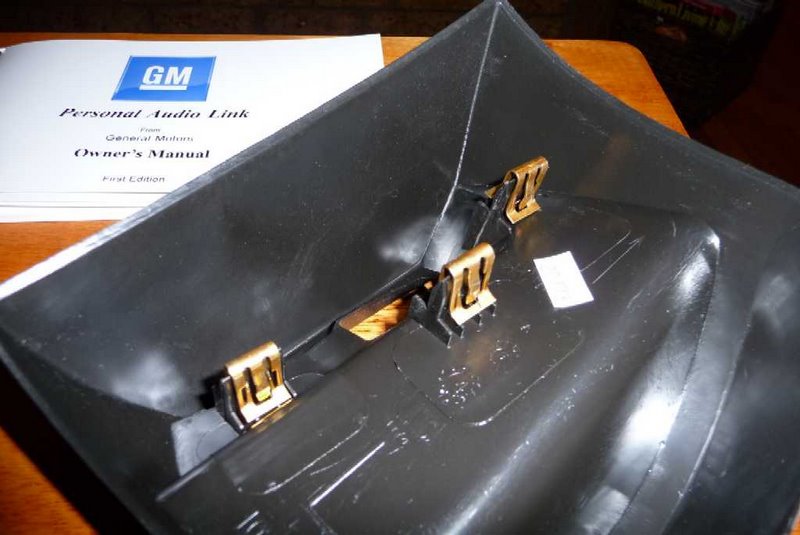

Here are the two plastic clips that hold the receiver in place:
Unclip the receiver and lift it out - there are three mounting studs (one shown) that are not used in the coupe/Z06s that get in the way a bit, but the receiver will come out. After it's out, I'd suggest you also remove the plastic tray (see the clip into the fiberglass?) just so you can see how it and the receiver mount. The tray is very easy to get back in, and understanding how it is mounted will help you reinstall the XM receiver.
Pull out the receiver:
B. FOR CONVERTIBLE OWNERS
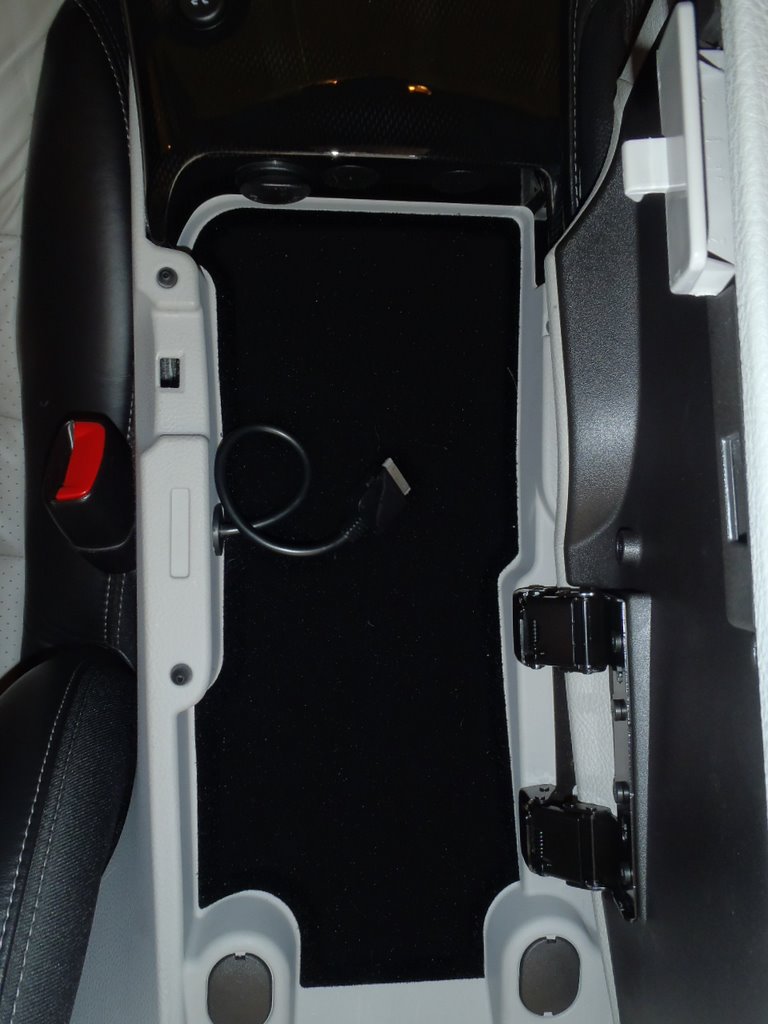
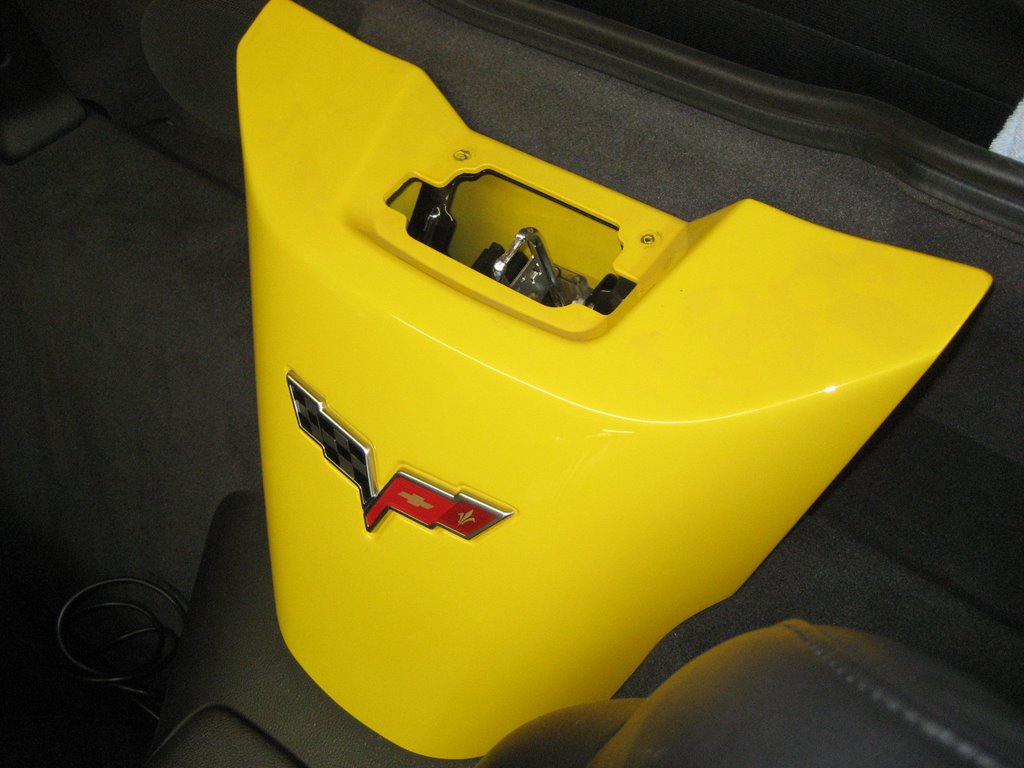
To get to your XM receiver, you need to remove your waterfall between your seats:
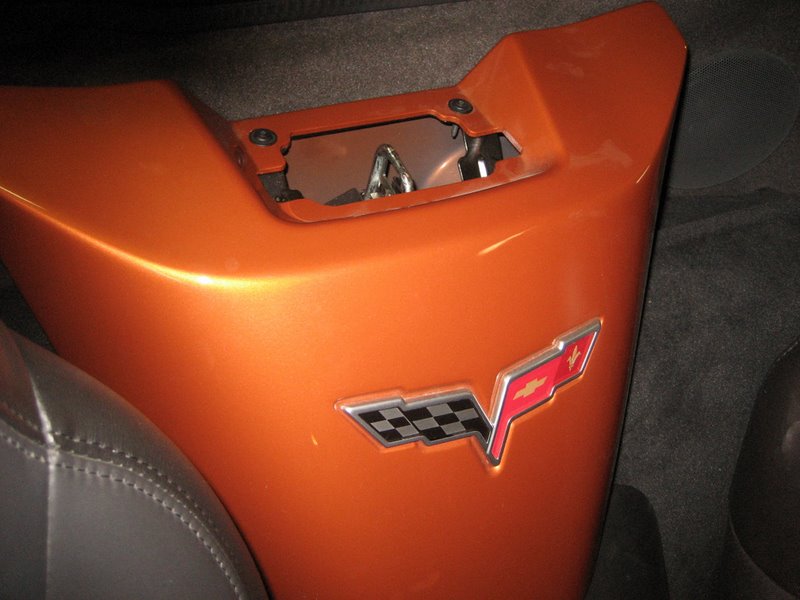
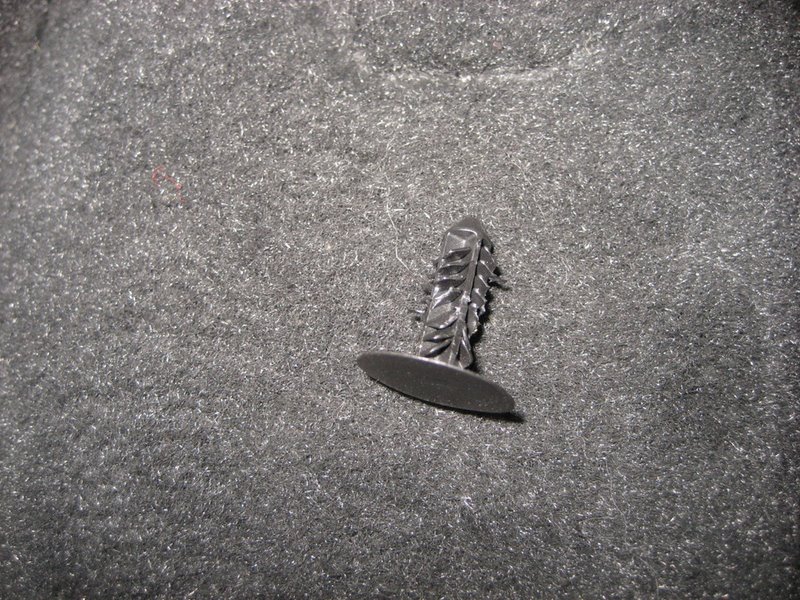
The waterfall is held in by two T15 Torx screws at the top and three plastic pins:
Two of the plastic pins are behind the dividing wall that is in front of the storage area:
If you put your top half way down and look behind the waterfall, you'll see both of them.
The center part of the pin must be pulled out with a small screwdriver to release it:
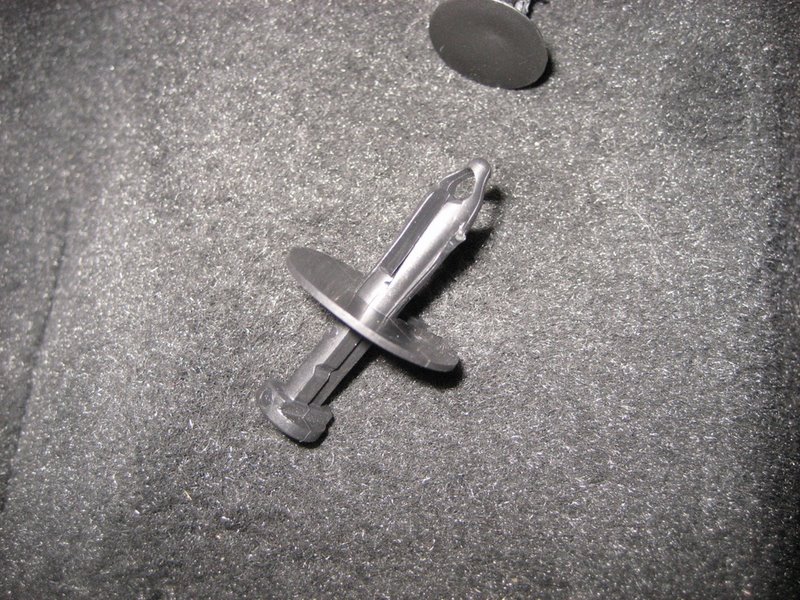
Once the center is pulled out, the main part is able to squeeze together and you can pull the entire pin out.
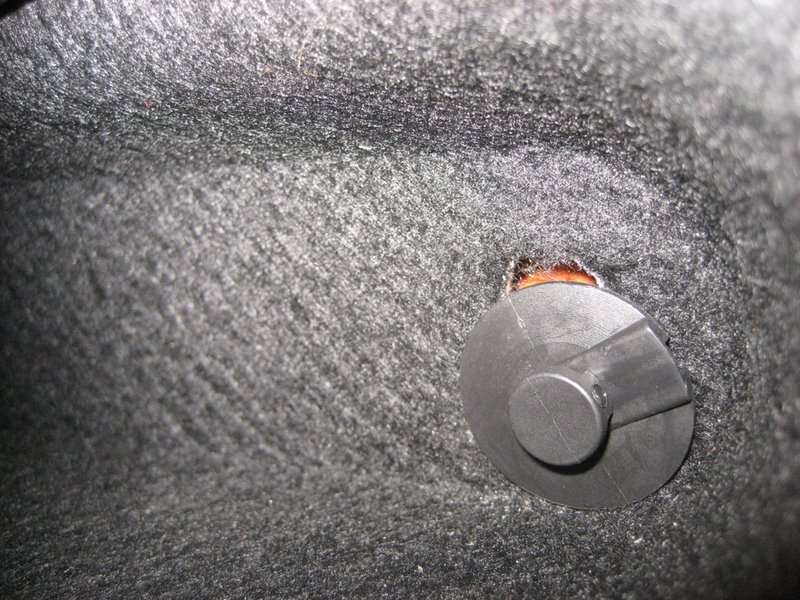
The third pin is on the passenger side of the waterfall:
This one is a bit hard to grab because the head lays flat against the painted waterfall, so don't damage the paint.
Get something flat behind the head (fingernails?) and pull to get it partially out. Then use some bent needlenose pliers to pull out the entire pin. Just pull hard and it will come out.
Once the three plastic pins are out and the two Torx screws removed, the waterfall lifts out.
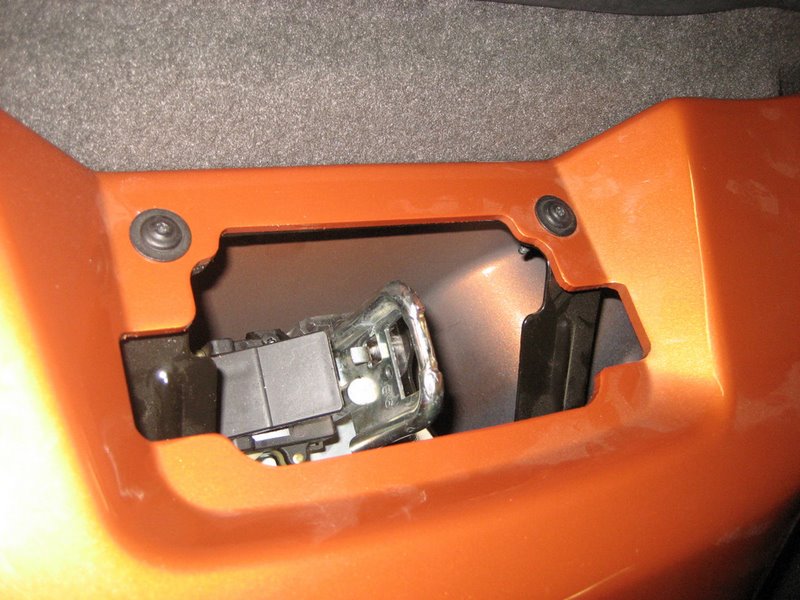
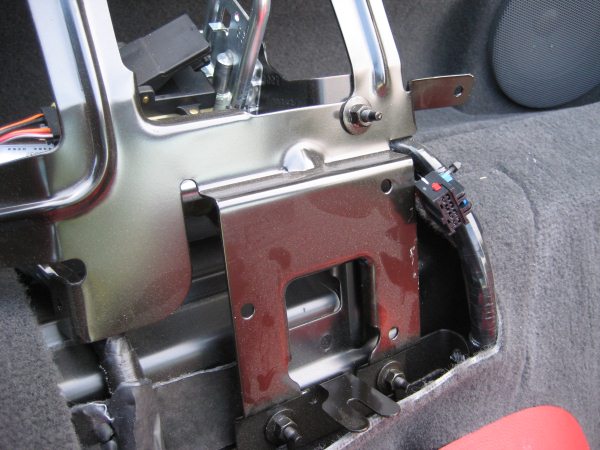
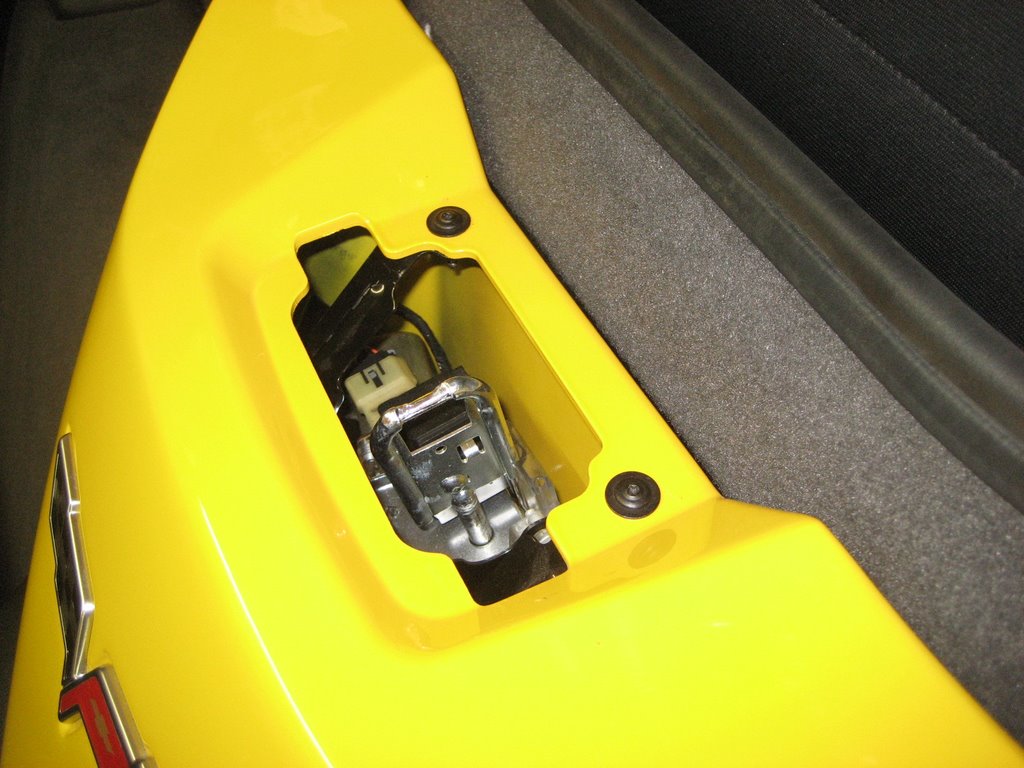
Here is where you'll find the XM receiver (Yazaki connector is pulled out in this photo):
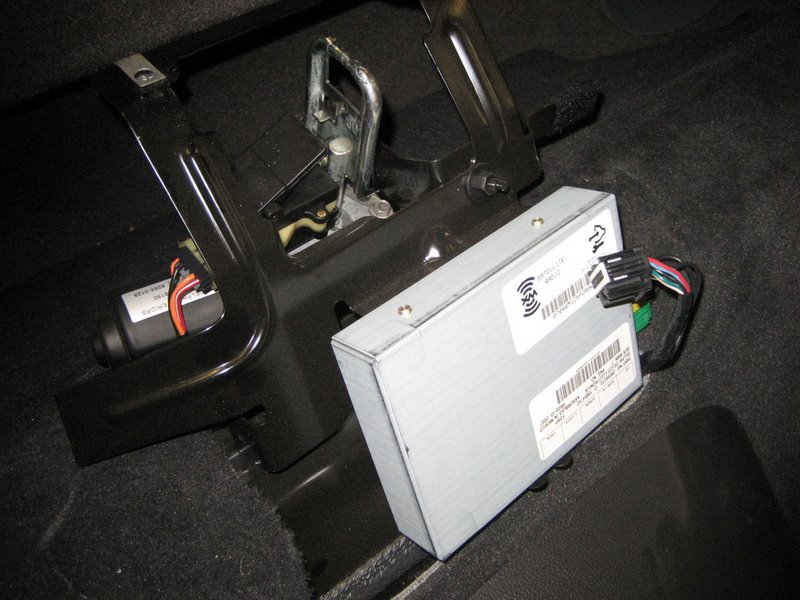
Convertible owners can leave the receiver in place.
It is bolted to the bracket using the same studs that get in the way of coupe/Z06 removals.
NEXT (for
all C6s),
OK, that was pretty simple for convertible owners and really simple for coupe/Z06 owners.
The same basic steps are used for all C6s to connect the PAL.
Photos from both installations will be shown.
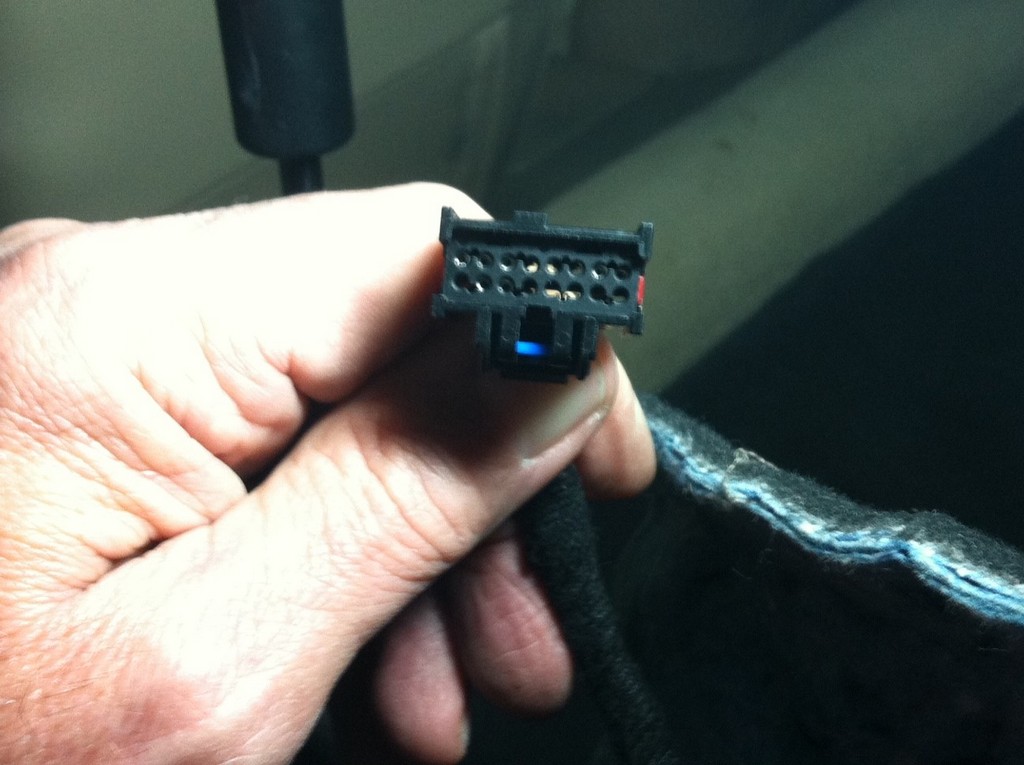
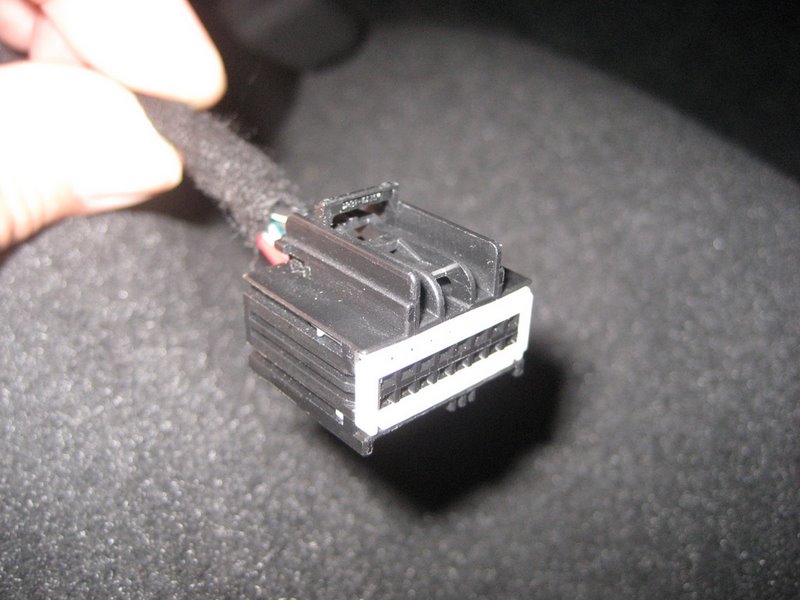
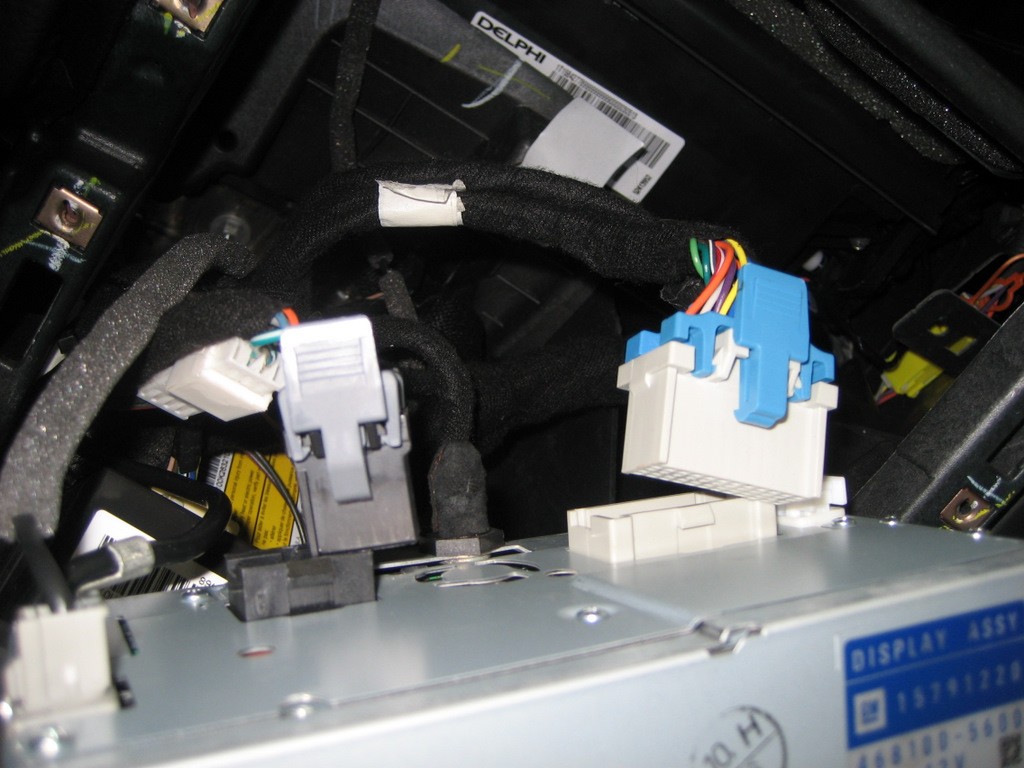
Here's a closeup of the 16 pin Yazaki connector:
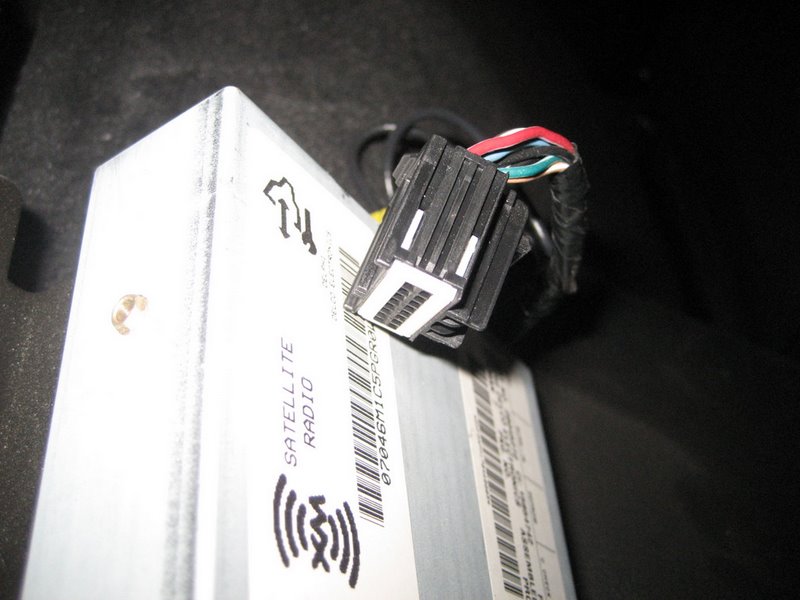
It's the same connector as in the coupes and Z06s.
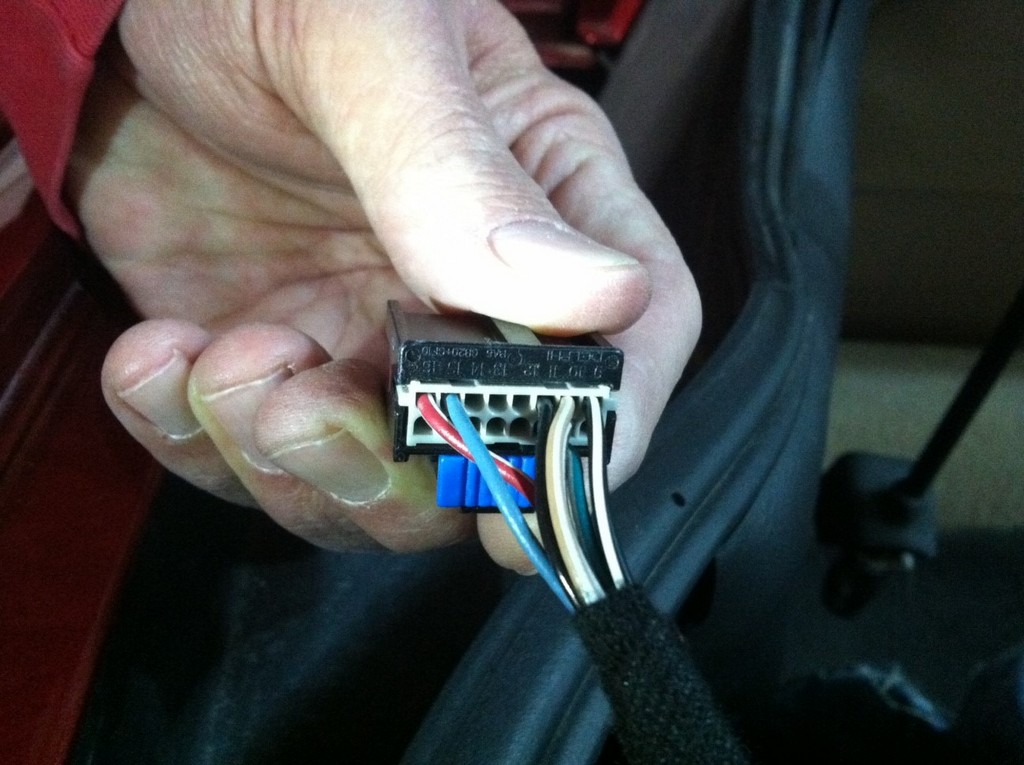
Some early C6s may use the 16 pin Delphi connector:
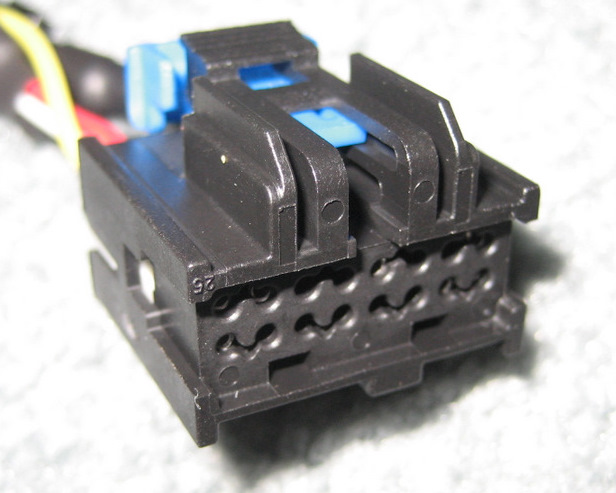
Pull out the connector.
(Note you may have to first unlock the blue locking tab):
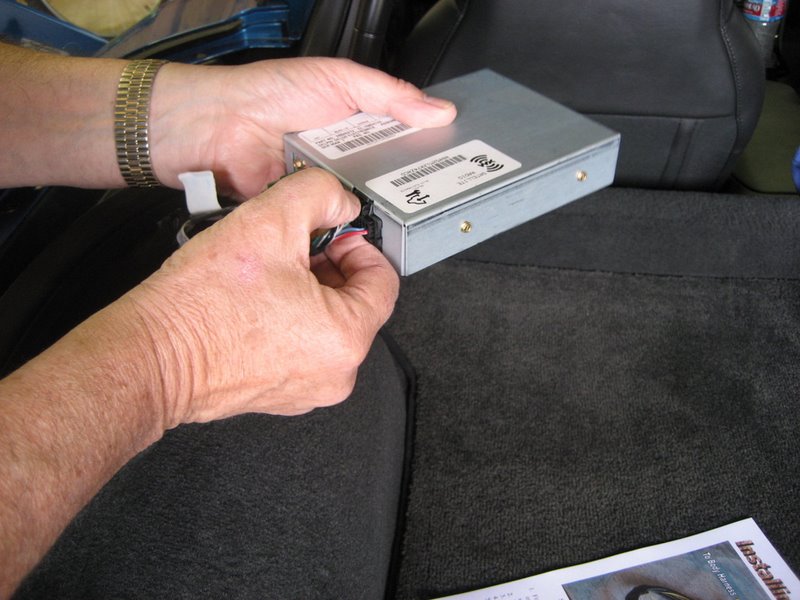
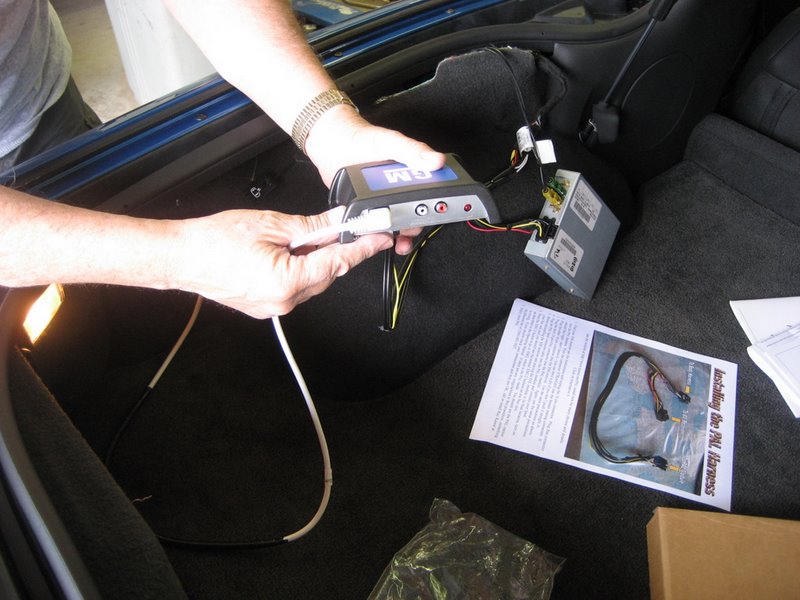
Next, plug in the new harness:
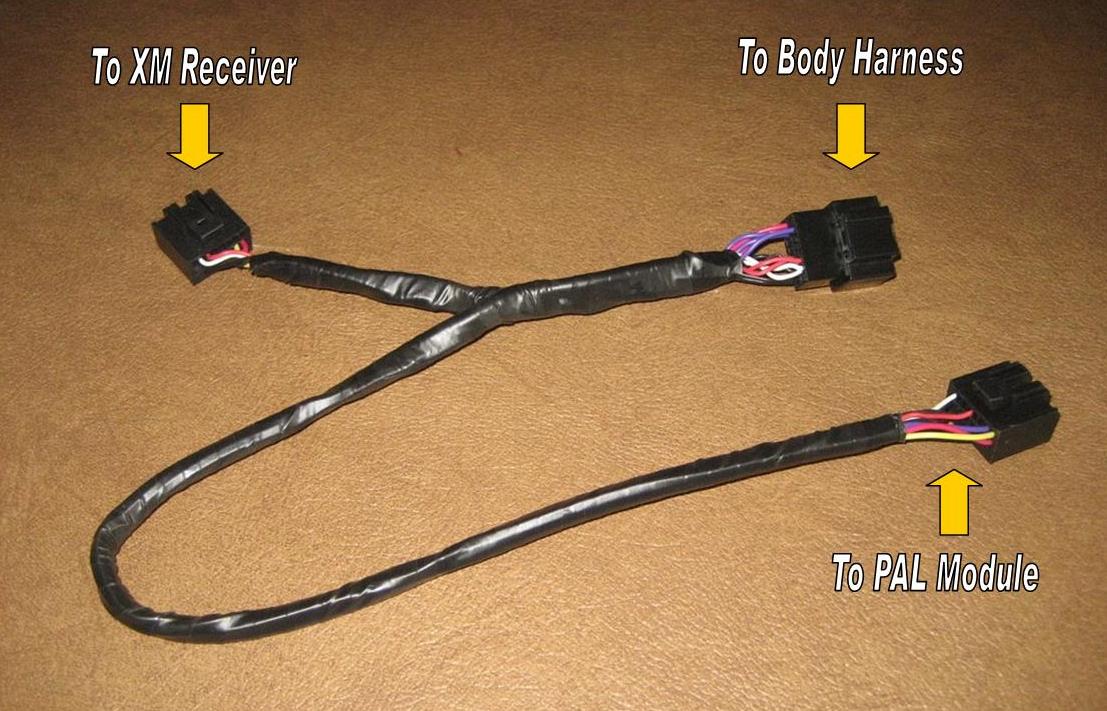
Note that the connectors for the XM receiver and the PAL module are identical.
But they are wired differently, so you MUST not mix them up!
The connector on the short end of the cable goes to the XM receiver.
The connector on the long end goes to the PAL module.
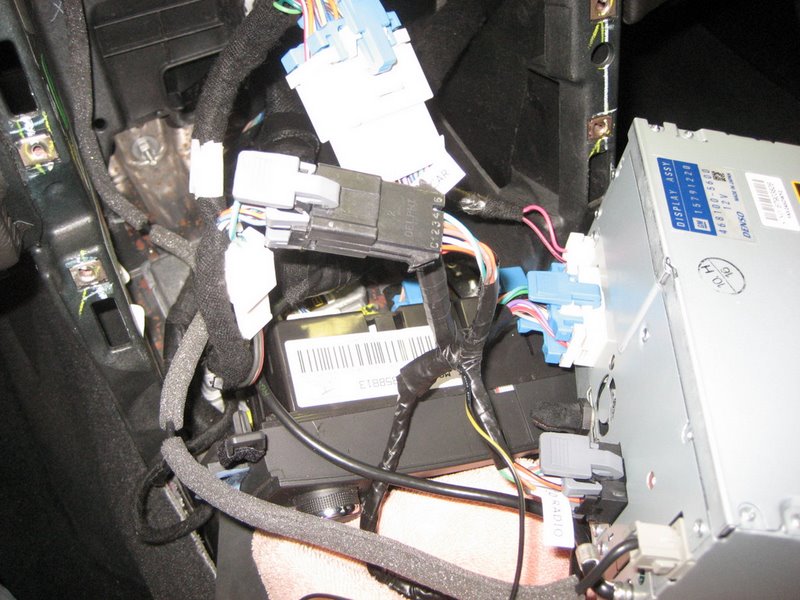
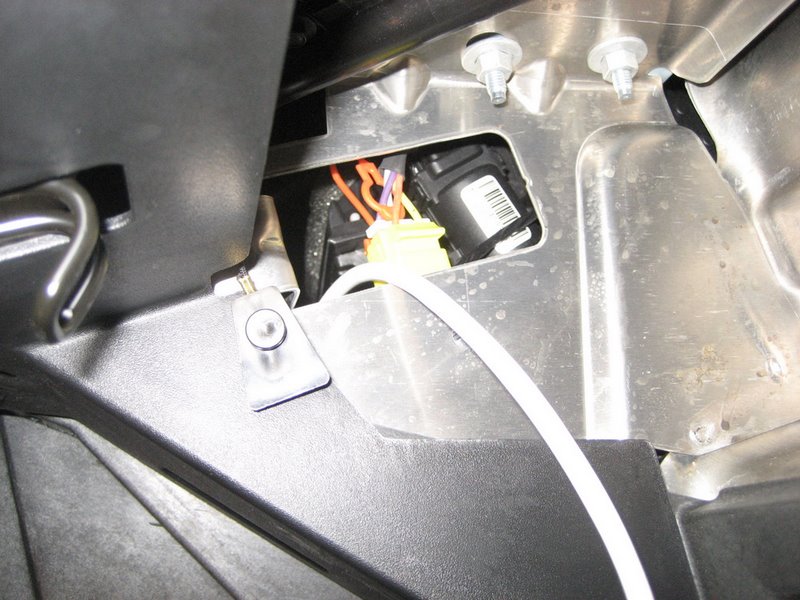
Here, the harness is connected to the XM receiver and the body harness:
(The above photo shows an old model of the harness, but they connect the same.)
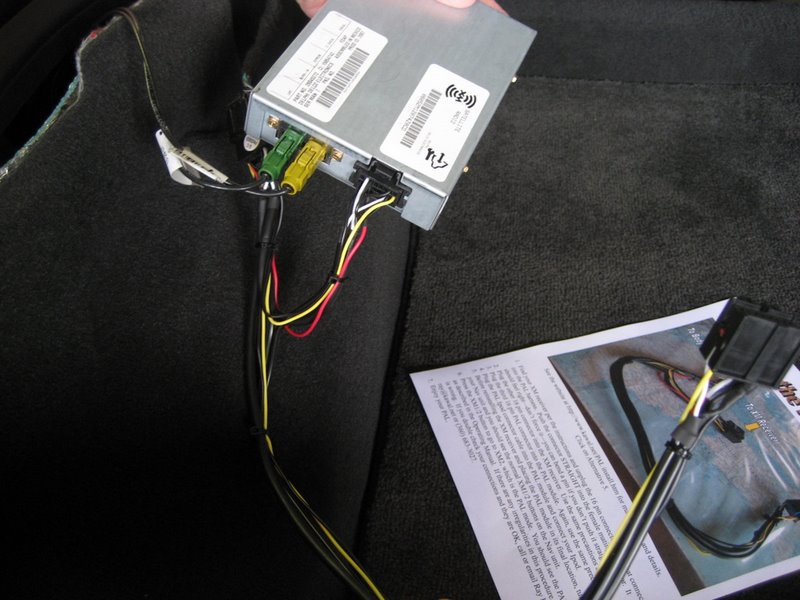
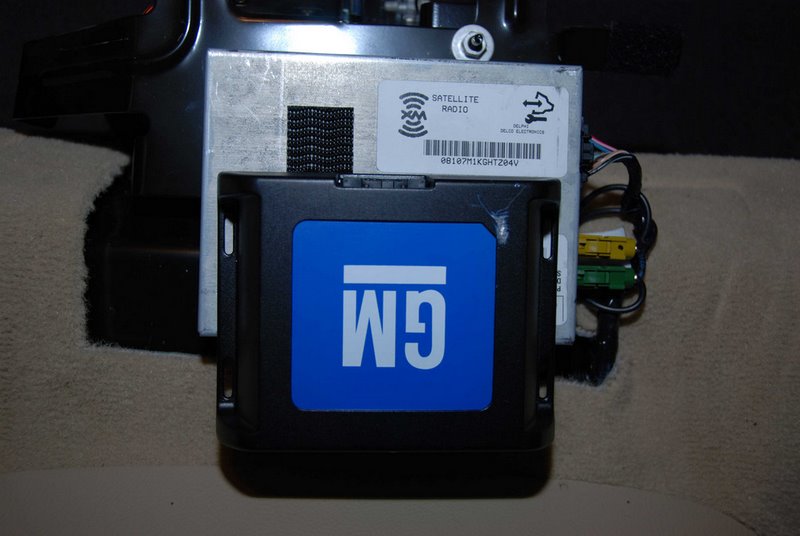
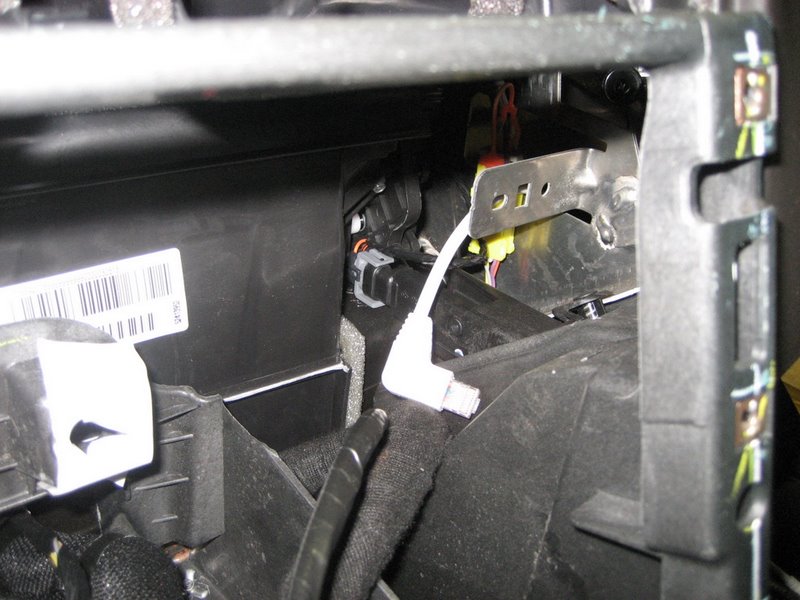
Then connect the PAL module:
Here is a convertible photo:
Note the above photo shows the PAL and XM receiver connected in a convertible,
but there could be a placement problem (due to a rivet in the waterfall cover) as noted further below.
So don't mount your PAL quite yet in the convertible.
In the coupe/Z06 you will have to later disconnect the PAL to mount it (as shown in following photos), but we are connecting it to make sure everything works. It just takes a few seconds.
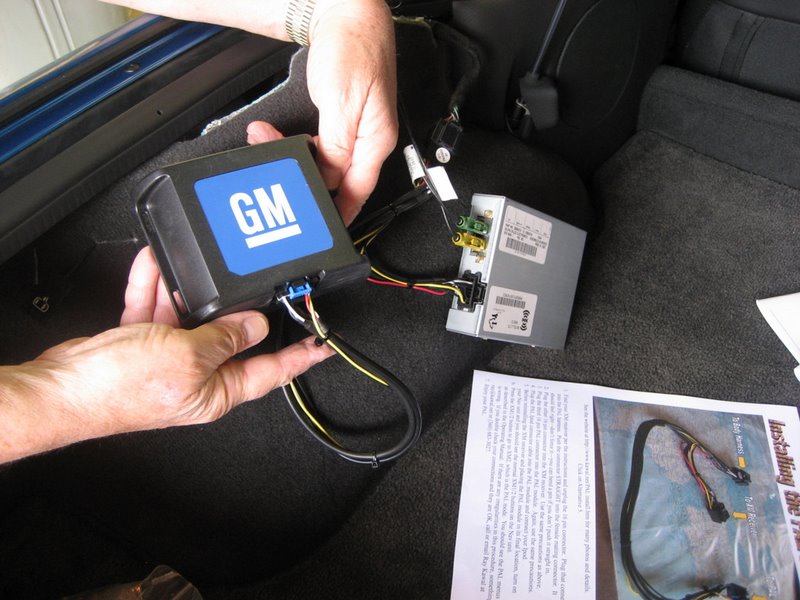
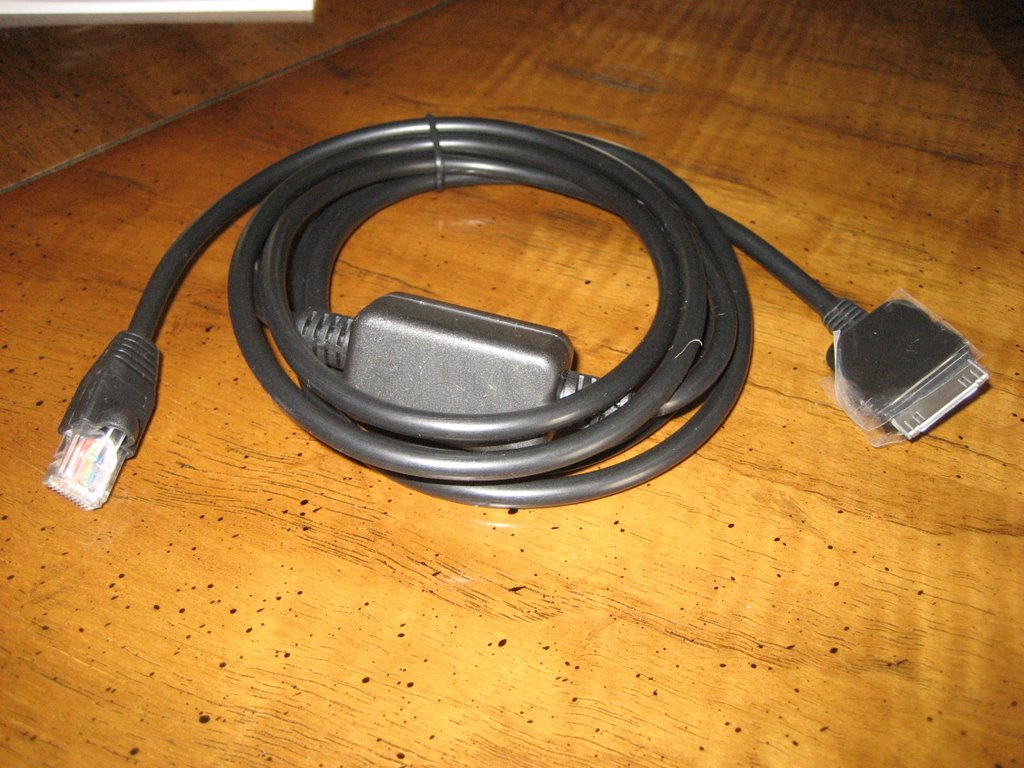
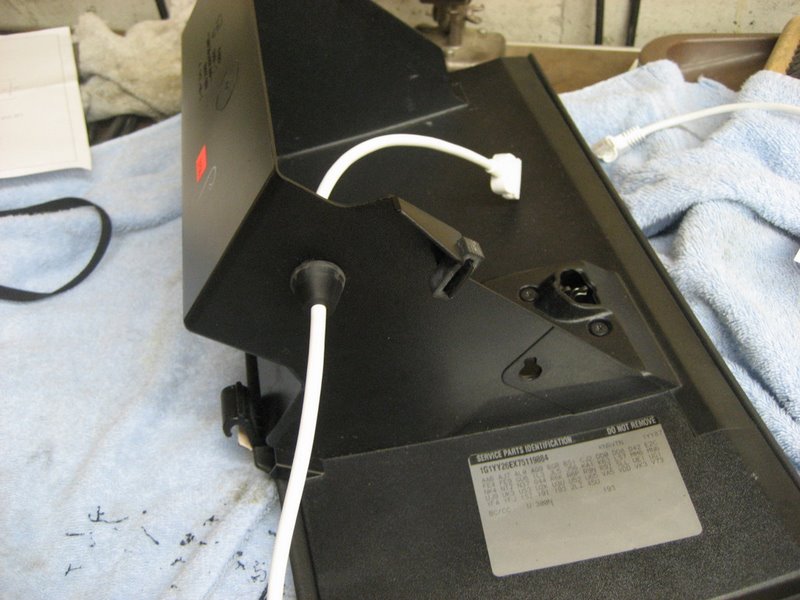
Next, connect the PAL iPod cable :
The above photo shows the original white iPod cable.
Here is the new 5v iPod cable:
Plug the iPod cable into the PAL module:
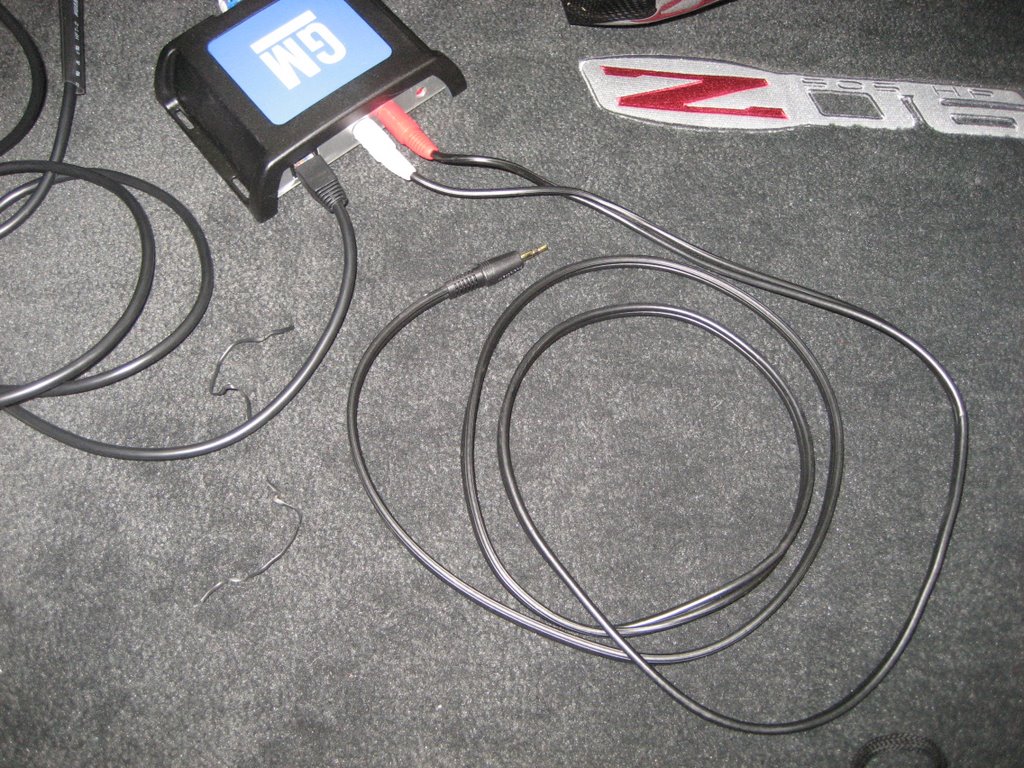
Shown in the photo above is the iPod cable plugged into the PAL module on the left.
(On the right is an Auxiliary Input cable that you may wish to install as an option.)
Now connect your iPod and your PAL should be fully operational.
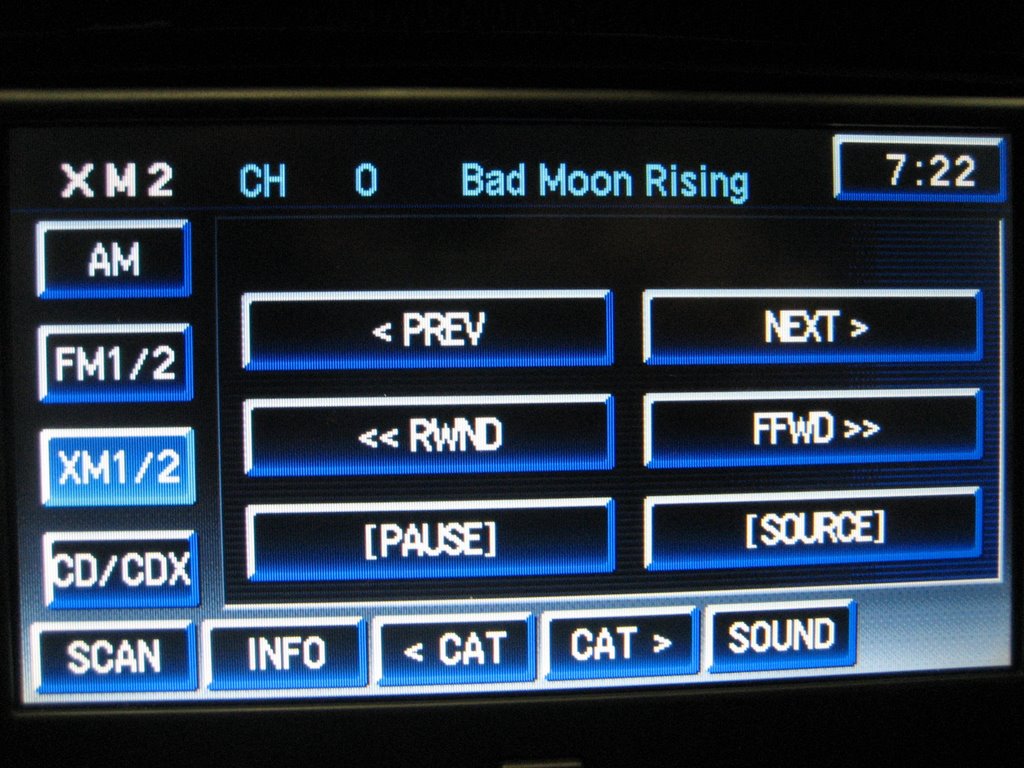
Once you connect your Ipod to the new cable, put your Vette in Accessory mode and turn on the Nav unit or radio. You'll see the normal screen with XM1/2 buttons on the left. Push the XM1/2 button to go to XM2 - this is the PAL mode. Here is the Nav screen with the PAL menu:
If you have a non-Nav radio, push the BAND button until you get to XM2:
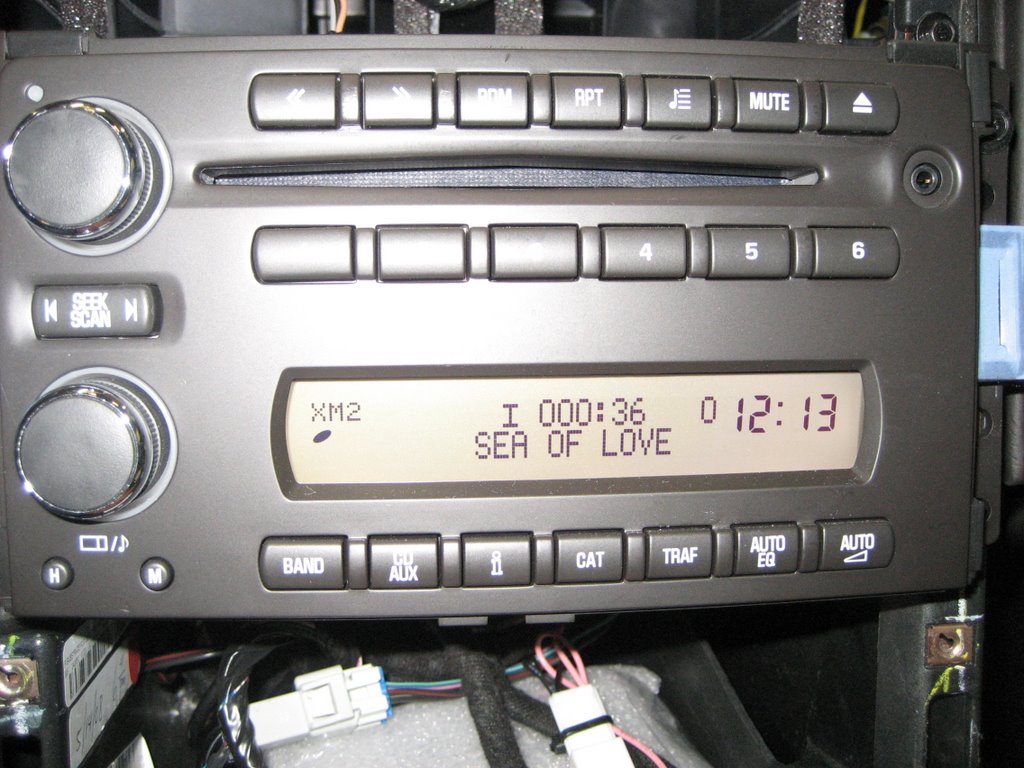
Your PAL should be fully operational at this point.
If everything is OK, proceed with the final mounting of the PAL module and the routing of the iPod cable to your choice of location.
1. In the coupe/Z06,
at this point, your PAL is fully operational. The Operating Manual will lead you through how it works.
To get this far, we've spent no more than 5-10 minutes.
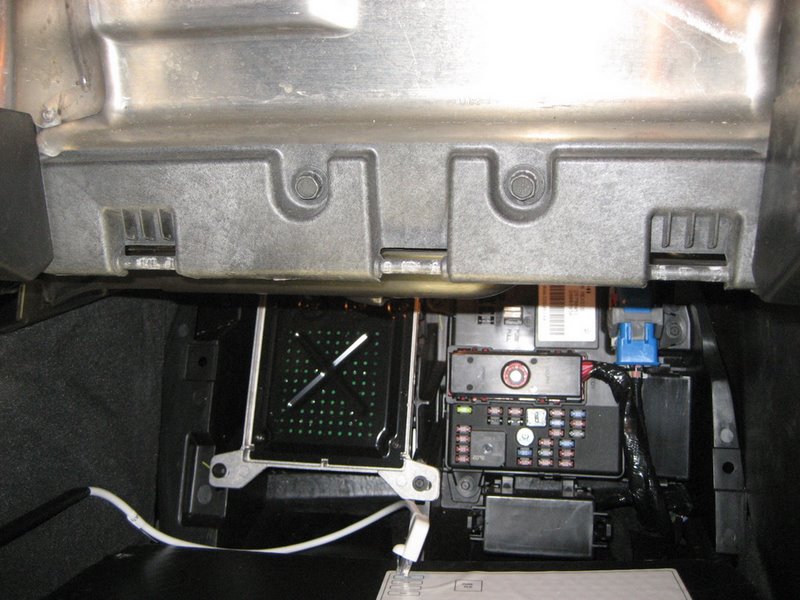
OK, the PAL works, so we've got to reinstall the XM receiver and hide the PAL module.
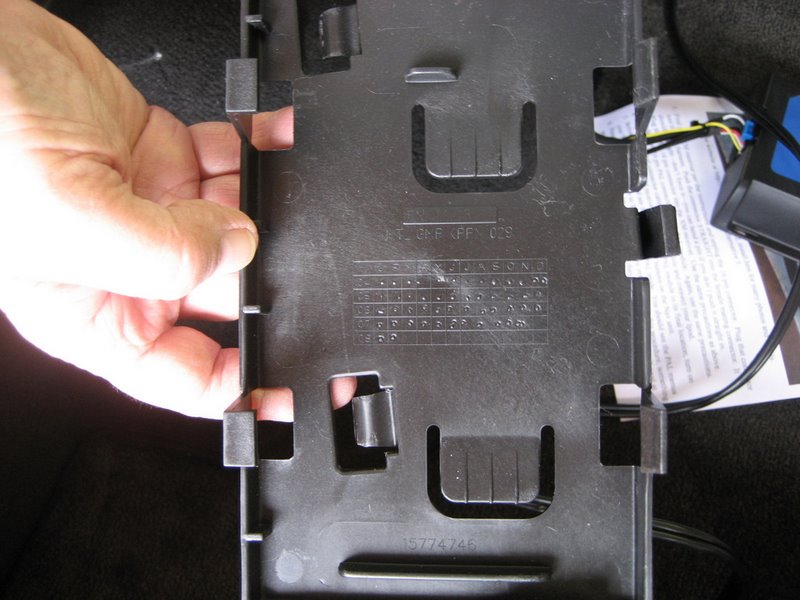
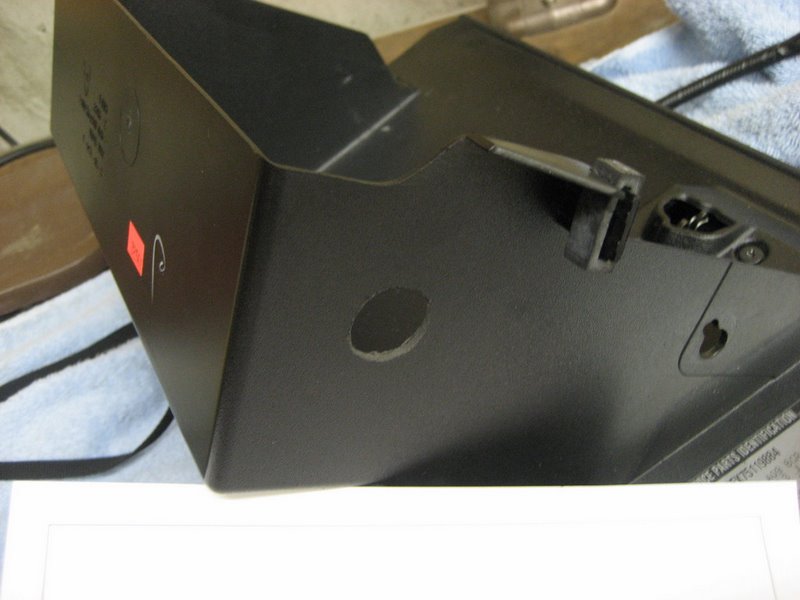
Pull out the plastic XM receiver mounting tray and examine it:
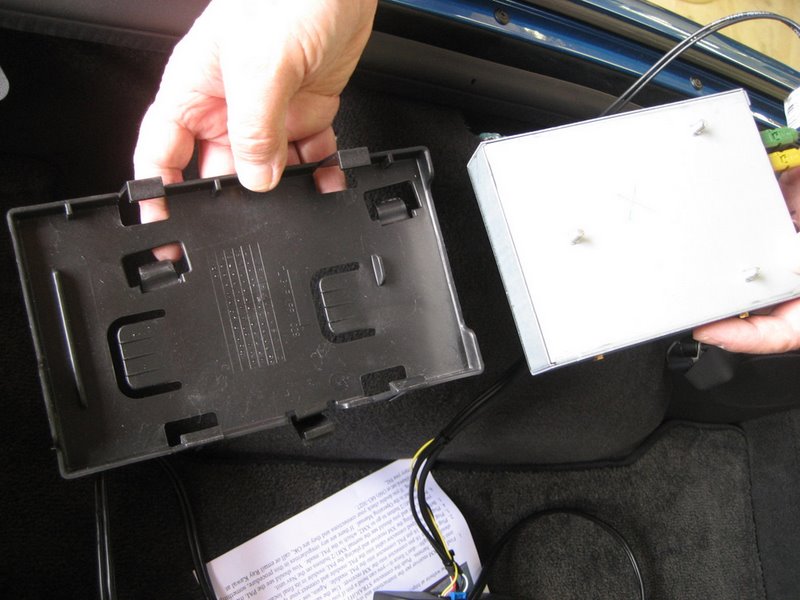
The receiver locks in place between the tabs just above and just below the two U shaped cutouts:
Here's how it's mounted in the tray:
For reinstalling the XM receiver, first disconnect the PAL module (leaving the XM receiver connected) and move all of the cables out of the way. BE CAREFUL of those cables and wires - treat them with reasonable care - you don't want to break a wire or pull a terminal out of the connector. Again, those pesky mounting studs might make you swear a little:
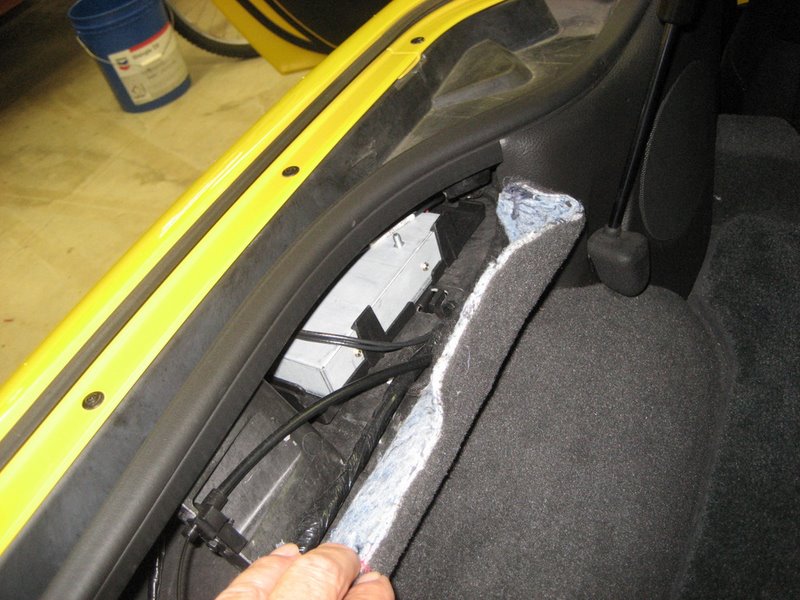
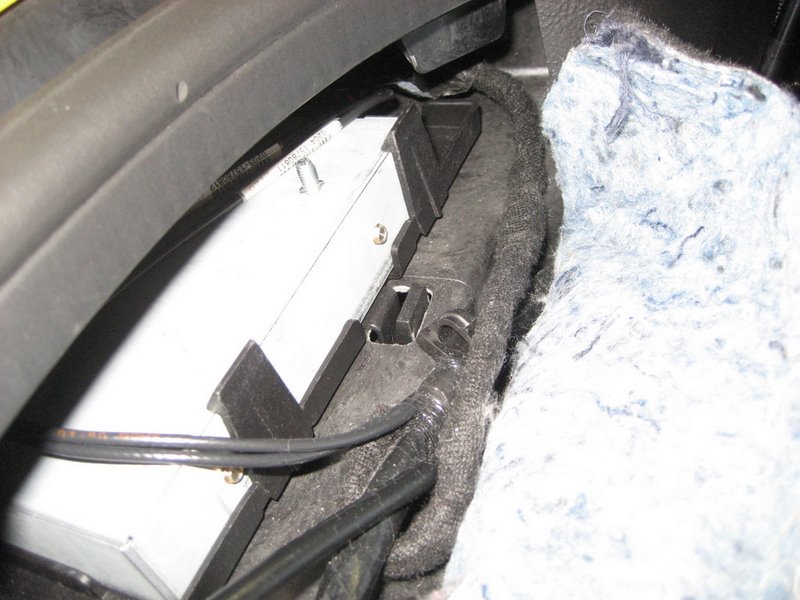
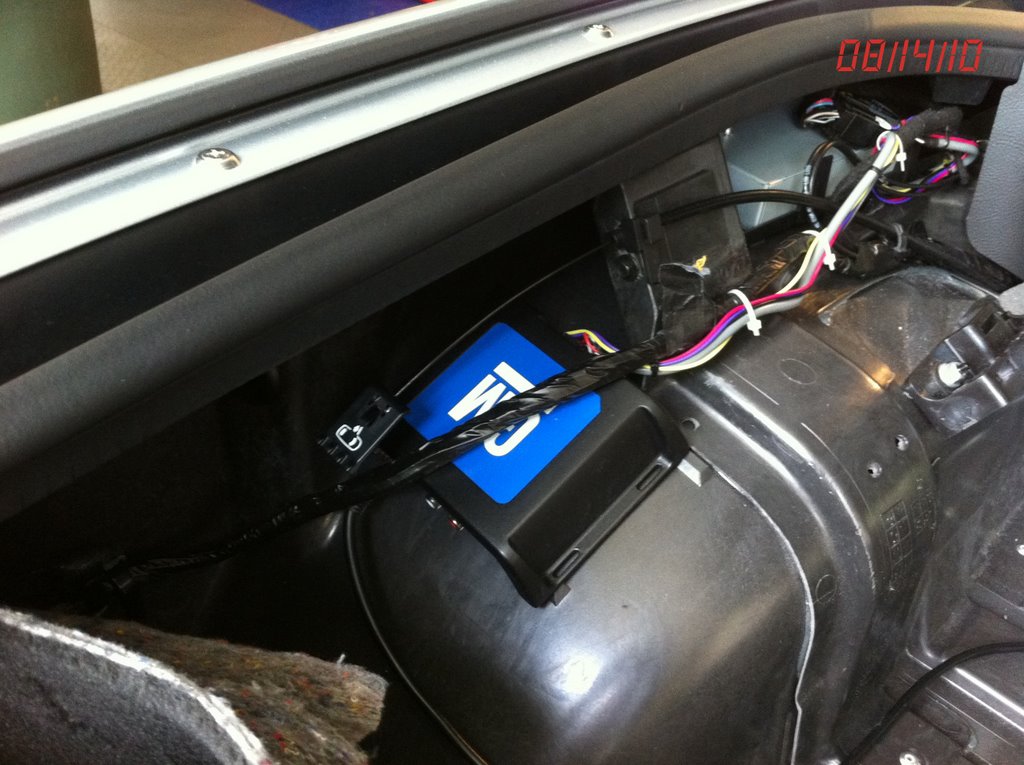
Route the PAL connector behind the structure shown. Pull it gently out and tuck the remaining XM receiver cables in above the receiver:
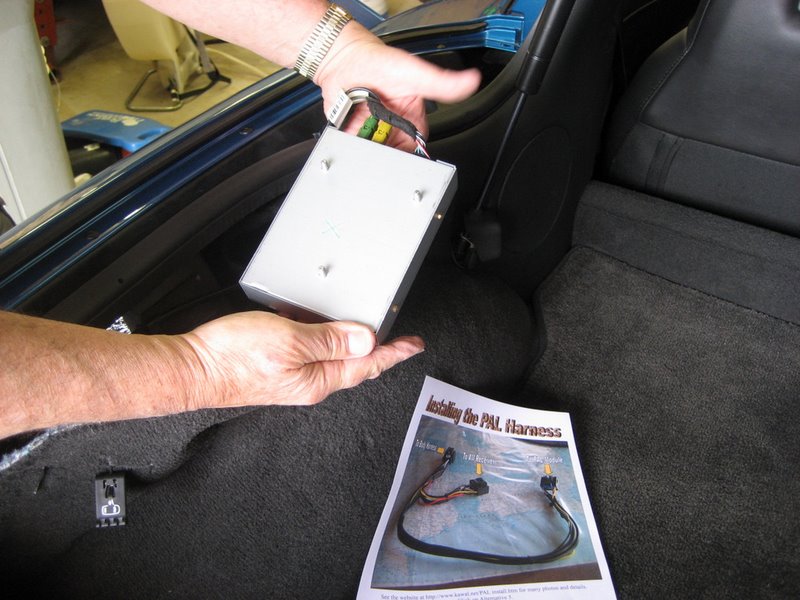
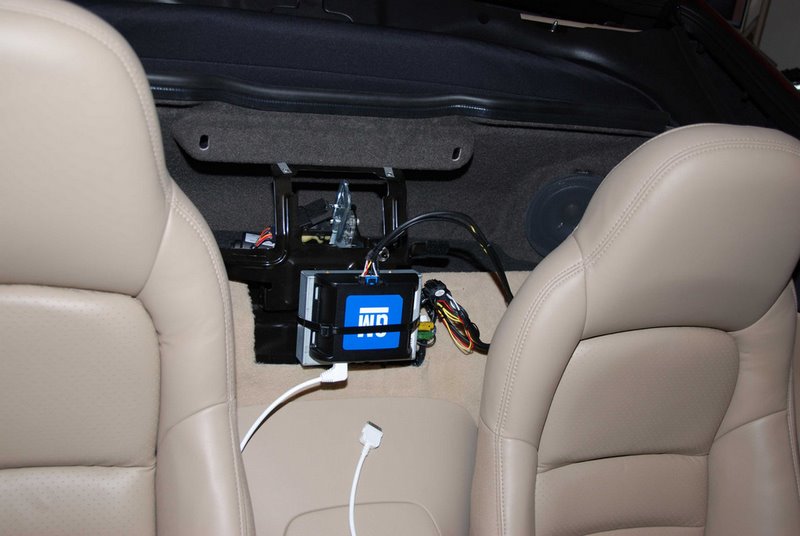
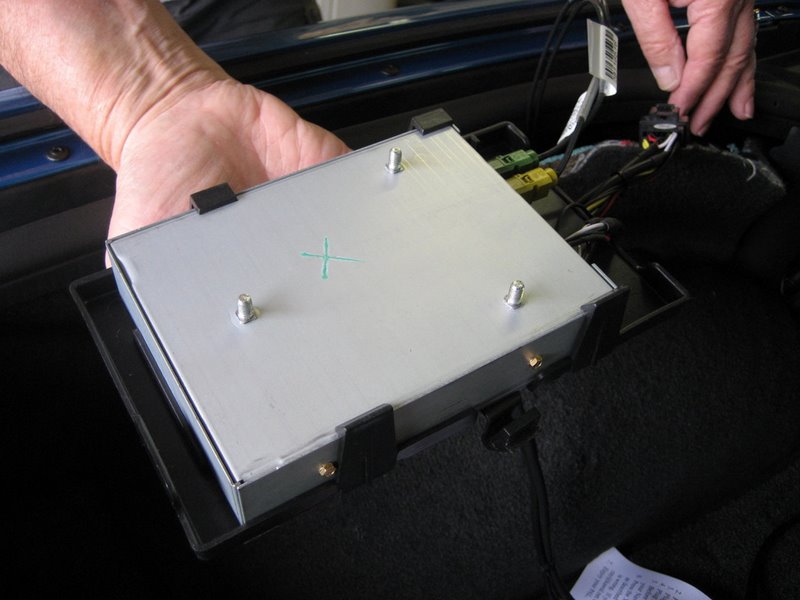
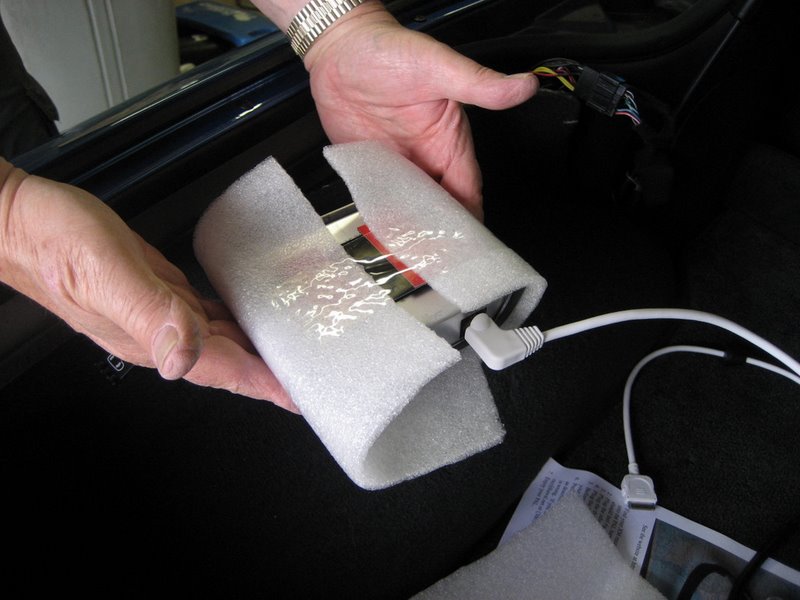
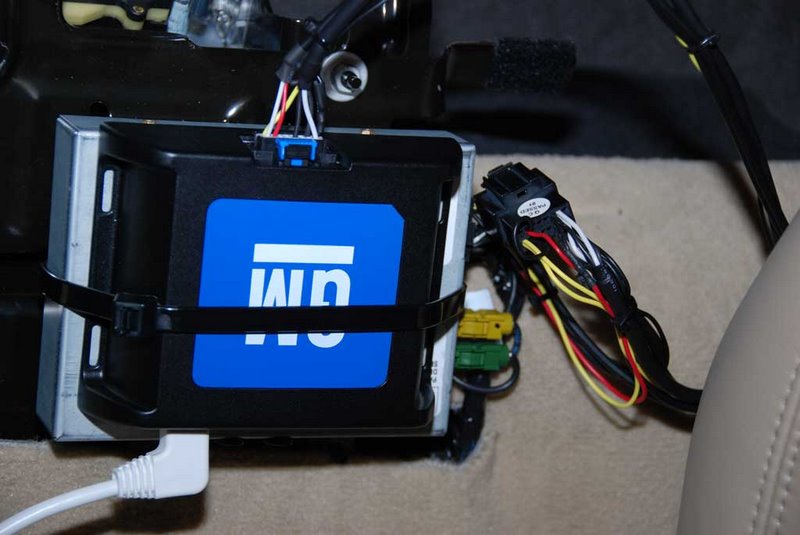
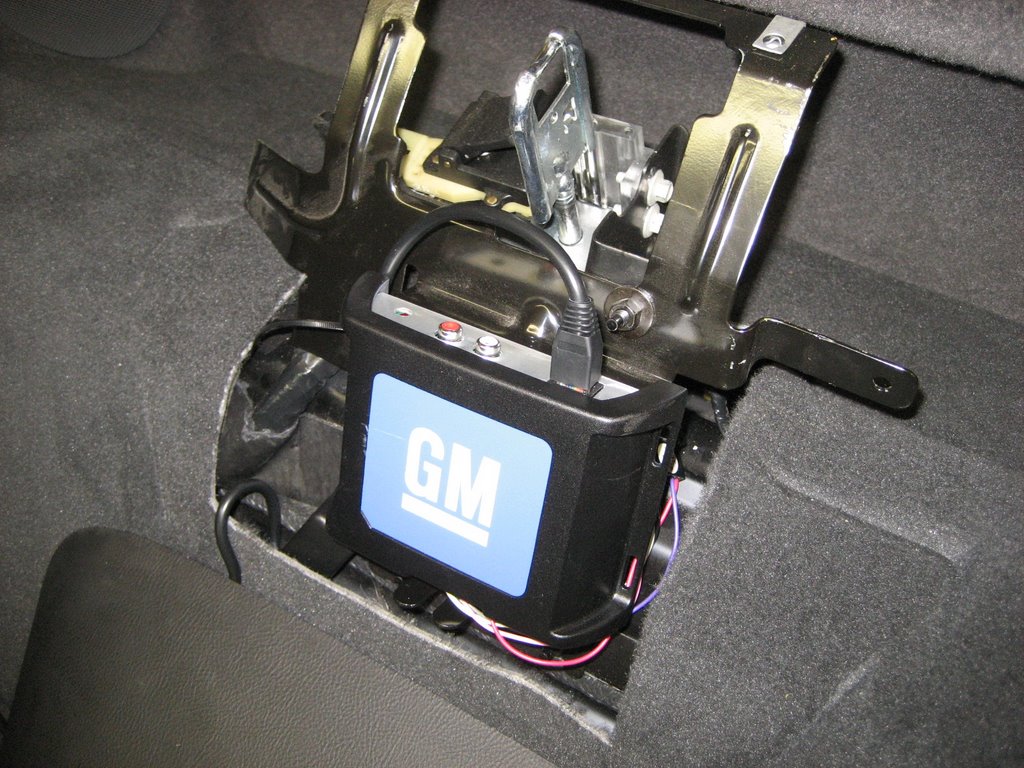
Again, reconnect the PAL module. There is no solid mounting method for the module, but if you add some padding, it will fit nicely in back of the XM receiver area:
Here it is in place:
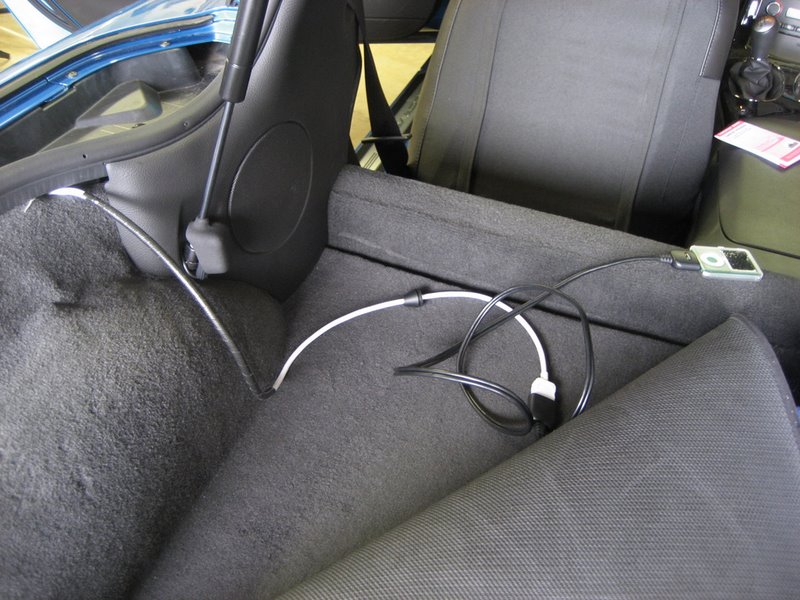
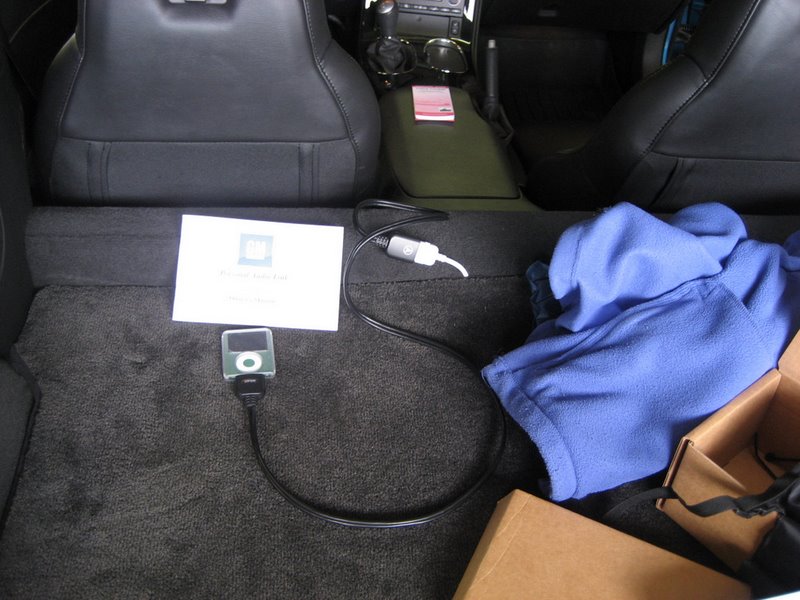
At this point a personal choice must be made - where do you want your iPod?
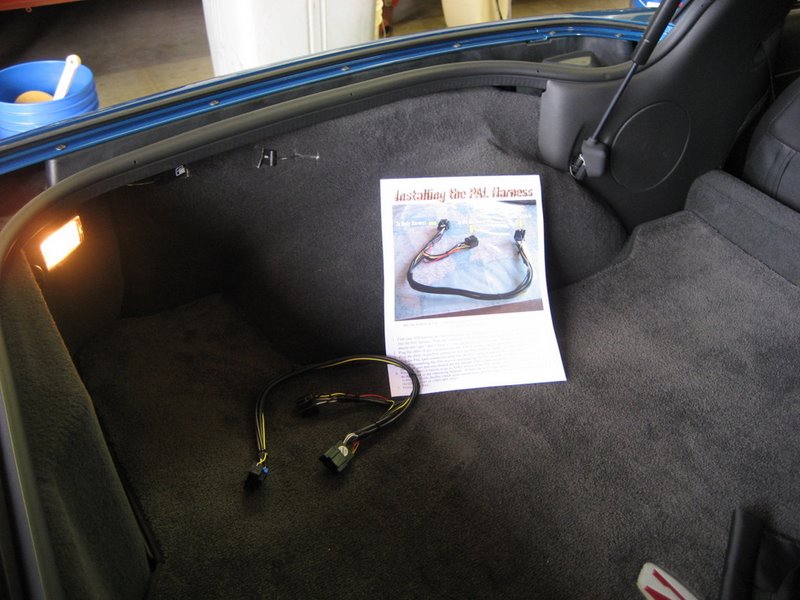
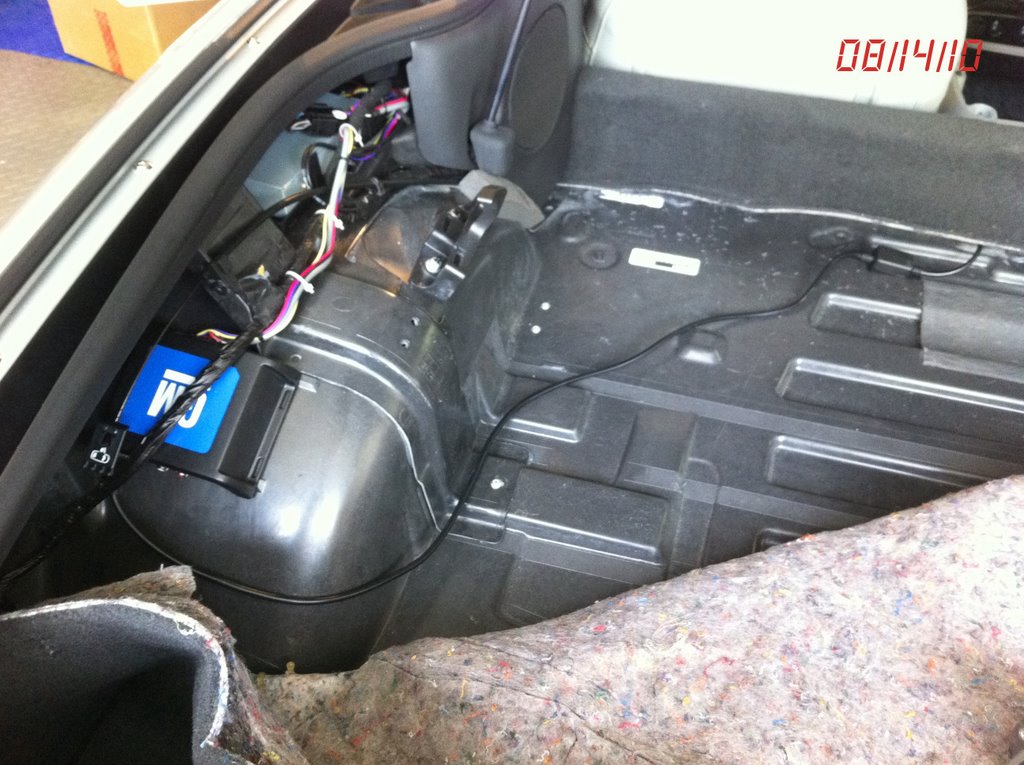
If you want it in the left rear storage compartment, that's easy - just route the iPod cable under the carpet to back there.
If you want it near the center console, route the cable forward, along the existing cables.
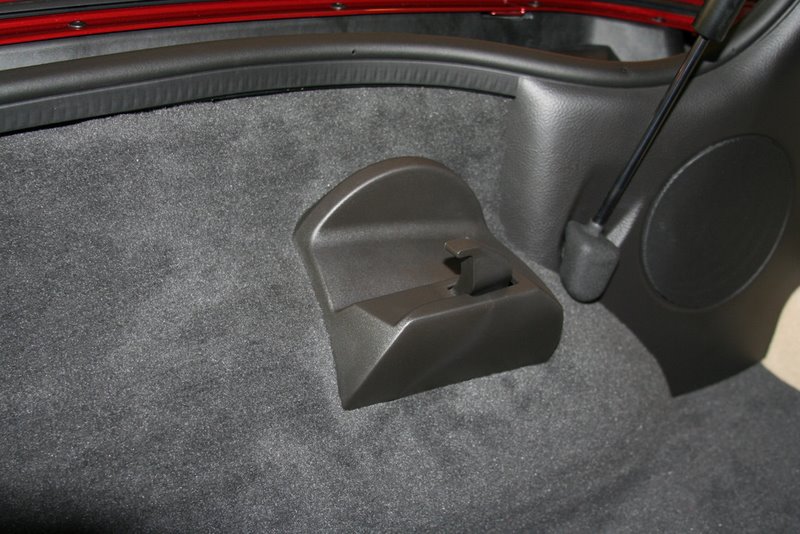
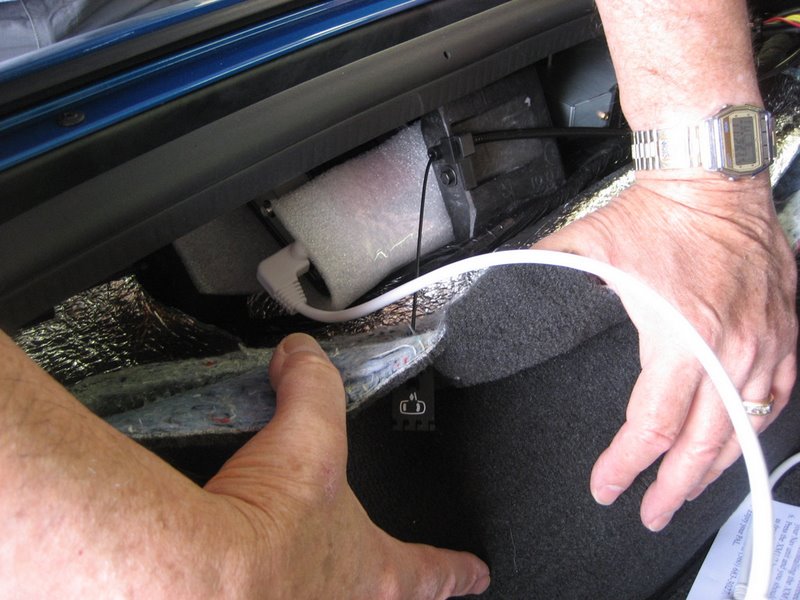
Push the side carpet back in place, hiding the XM receiver and PAL module:
(The photos above and below show the original iPod cable.)
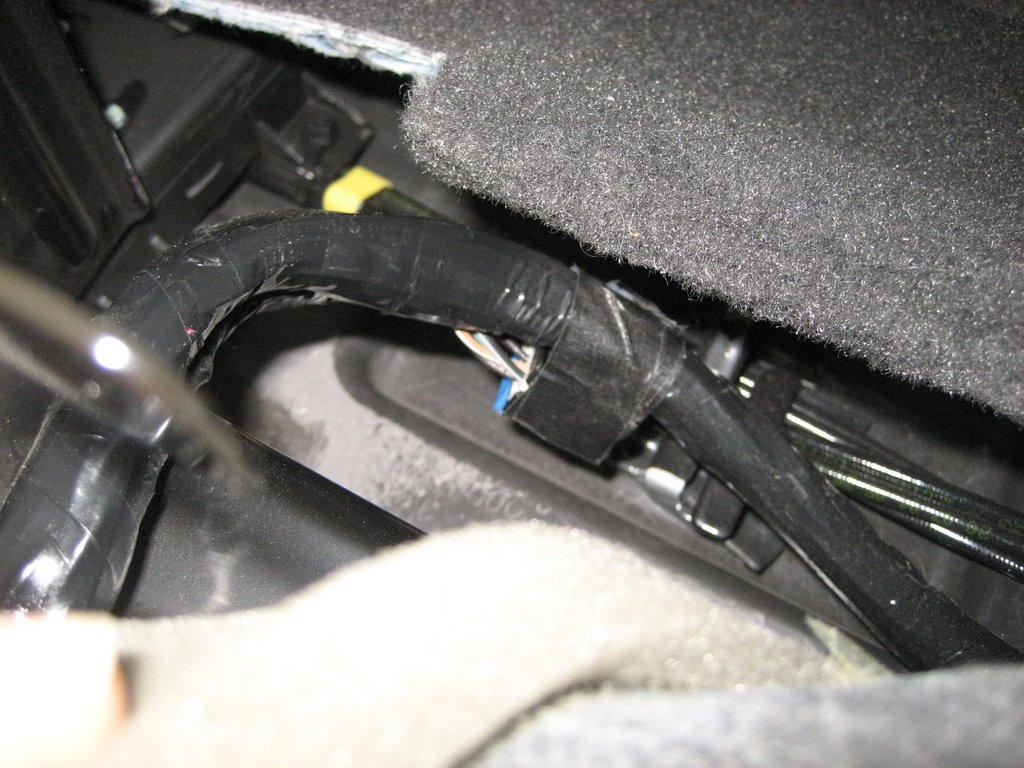
Here is the Ipod cable under the rear carpet:
2. For the convertible,
mount your PAL module using the velcro tape directly to your XM receiver and use the new harness to connect them together.
Plug in the PAL iPod cable into the PAL module and run the cable forward to your choice of locations for your iPod.
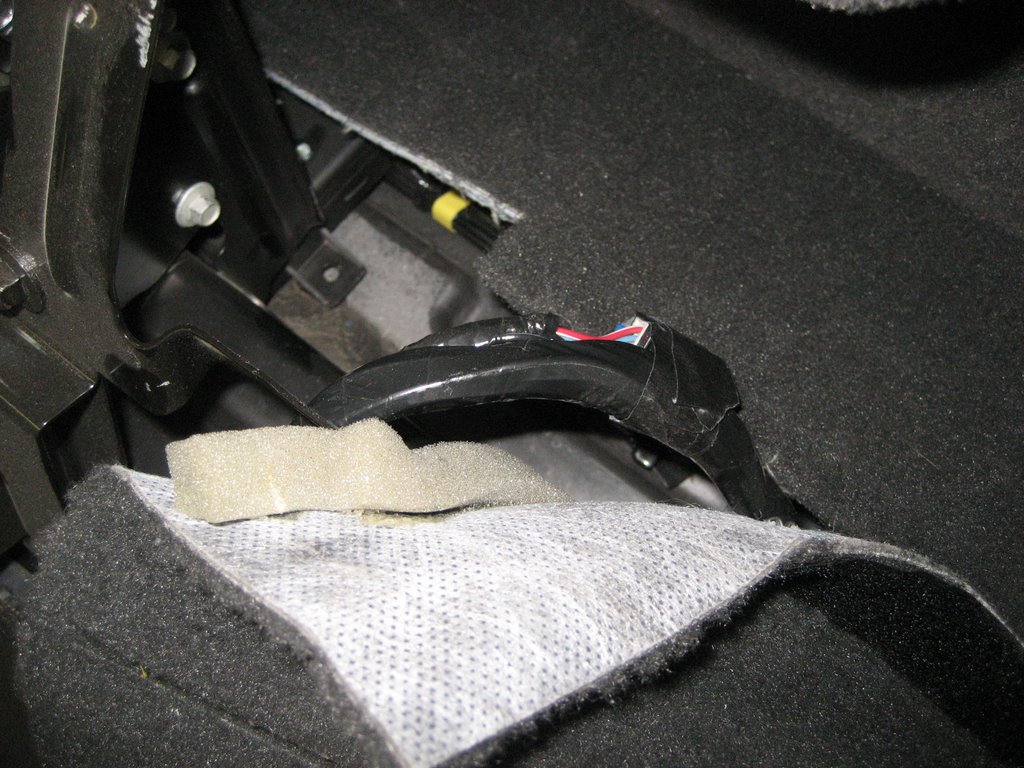
Remember this photo?
There could be a minor problem here:
A closer view:
When reinstalling the waterfall, you might find some interference:
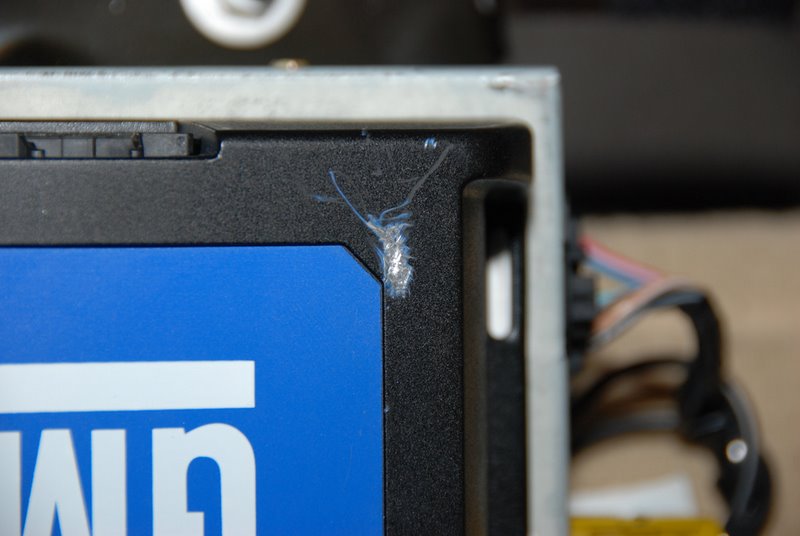
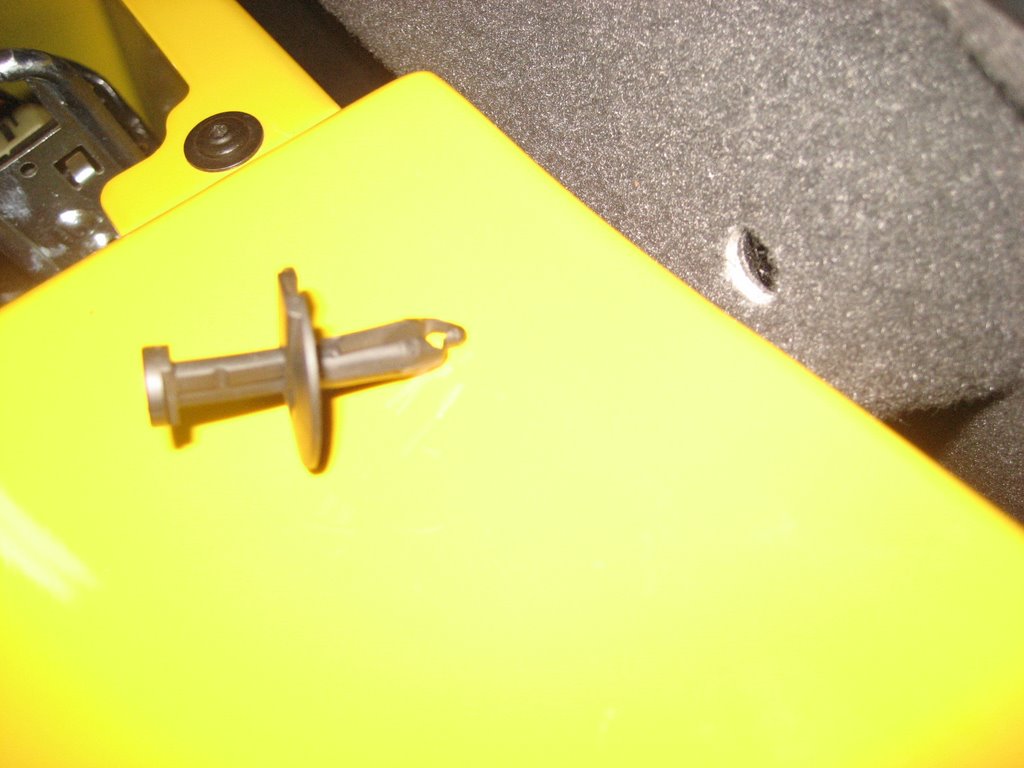
The Corvette emblem mounting pins protrude through the waterfall:

A closeup:
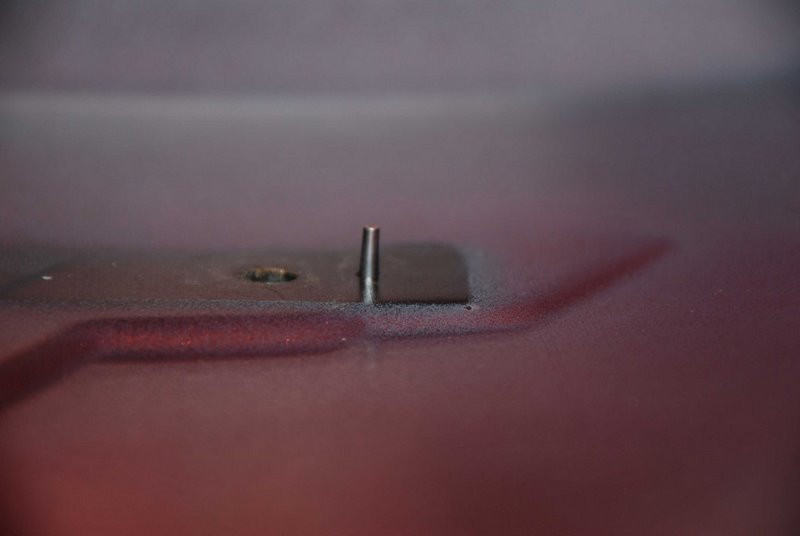
This might be enough to cause interference with the PAL module. If this happens, move the module down:
There could be other positions in which the PAL module won't interfere with the waterfall, but you should check your fit before you reinstall it.
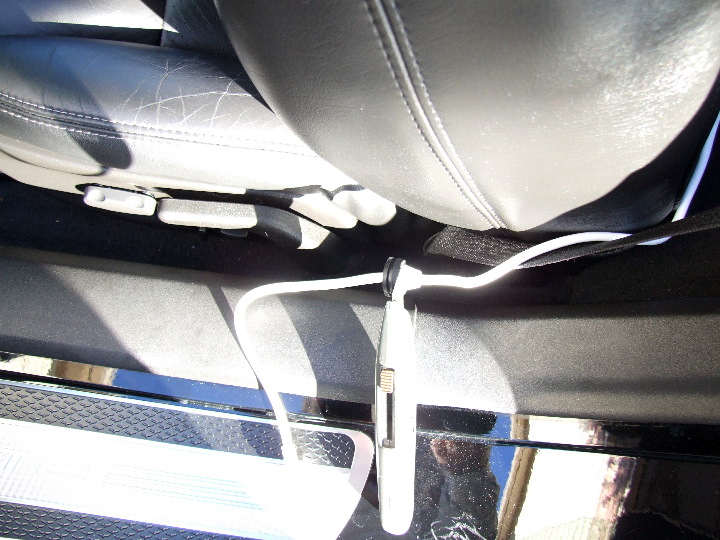
Route your iPod cable to the location of your choice.
Where do you want your iPod?
Here's one choice:
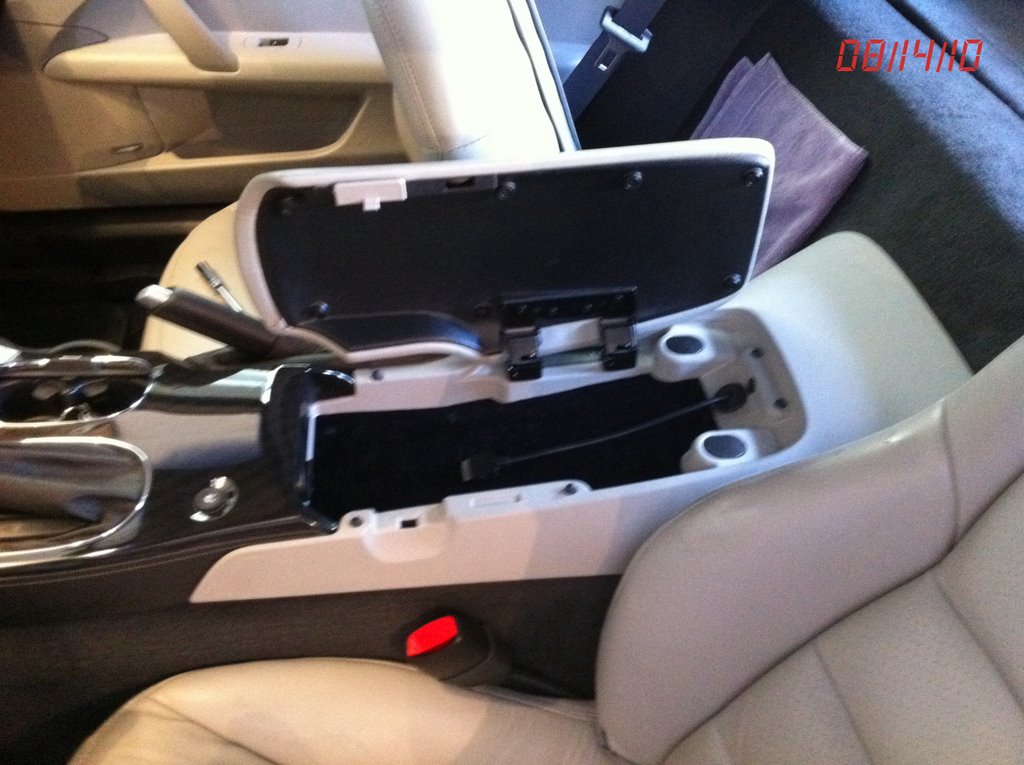
You can also place it in the console:
The console door will close easily without squashing the cable.
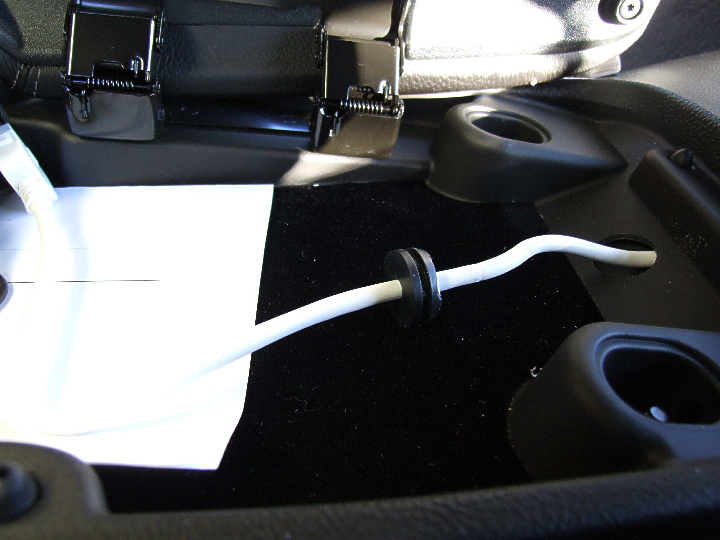
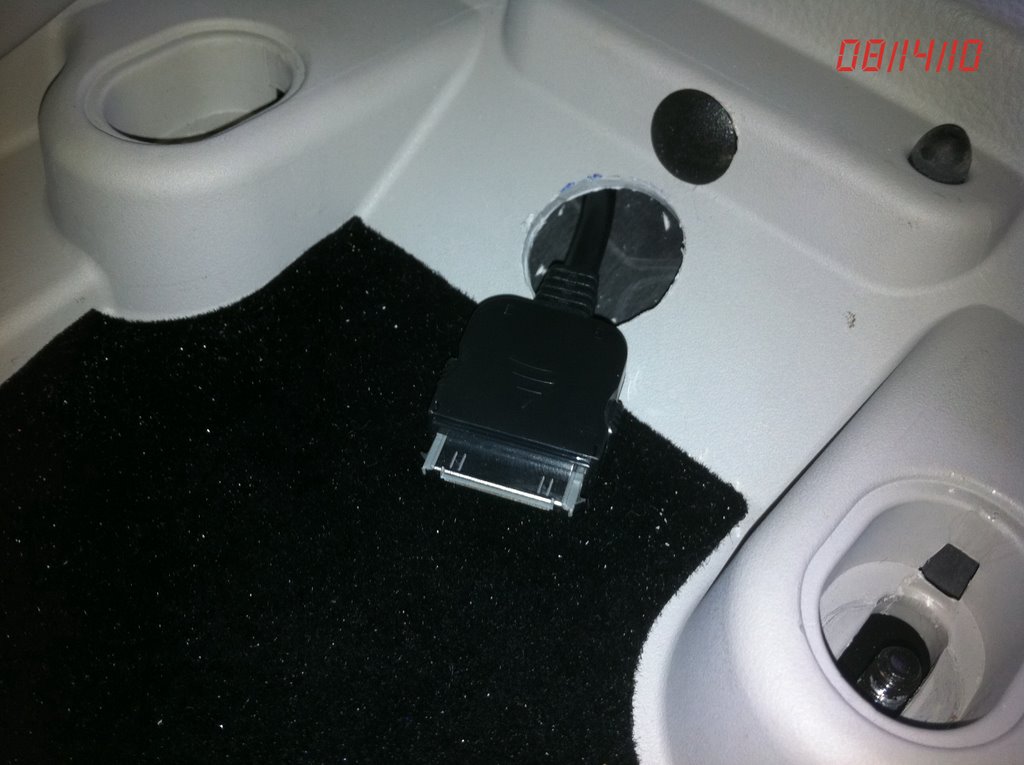
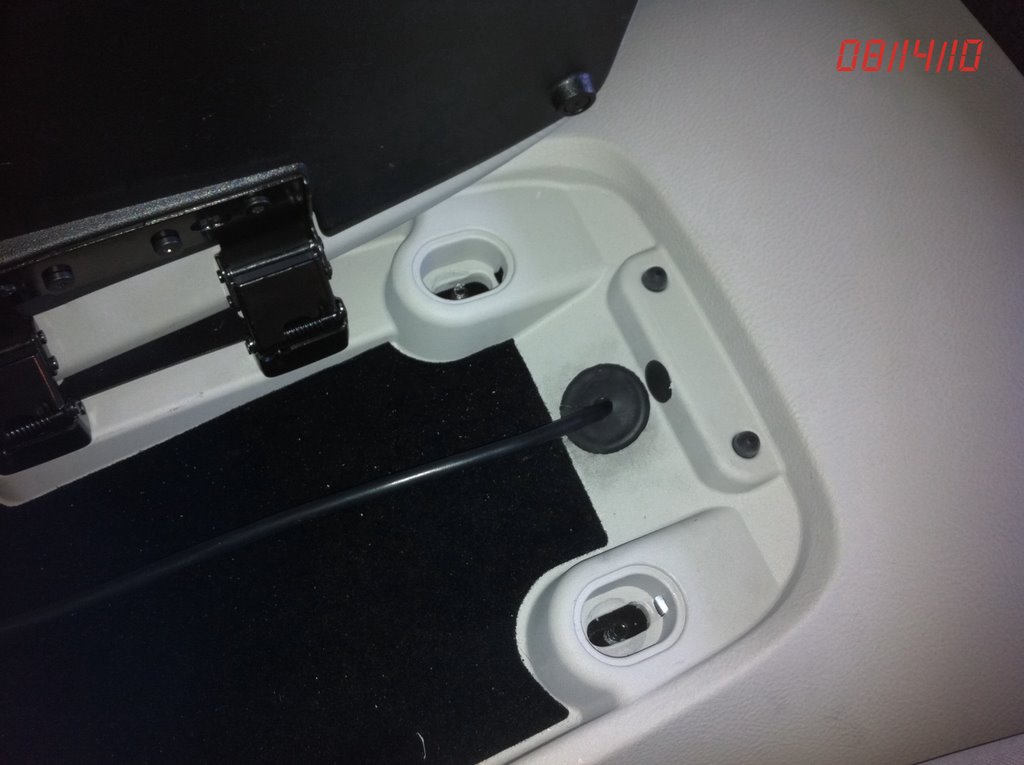
You can also drill a hole in the console and use the grommet supplied in the Version 2 PAL kit.
Here is one location that works well:
(Photo courtesy of forum member Robert Walkowicz)
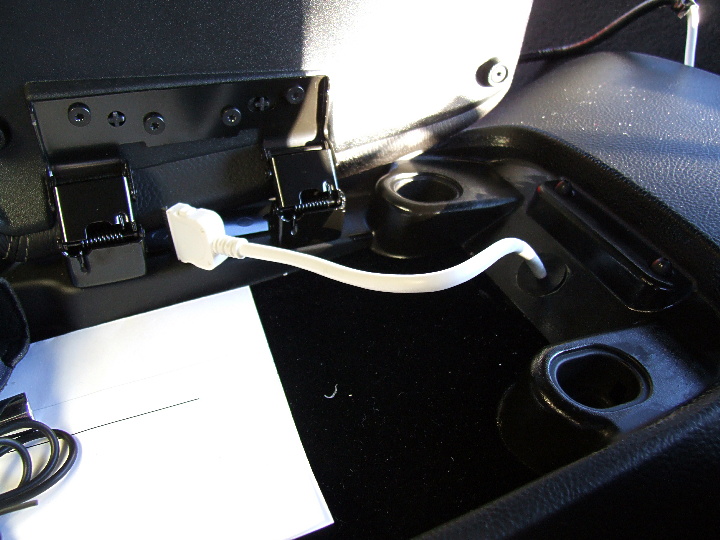
The space where the iPod cable enters the console is hollow, and you can run the iPod cable along the driver's side wall into the console.
Drill a 1" hole to accommodate the grommet and pass the 30 pin iPod connector through the hole.
Split the grommet on one side to pass it over the iPod cable.
You can also drill a hole in the back of the console as shown in the following photos, but be careful you don't squash the iPod cable - there is very little room between the console and drive tunnel below it. Place a spacer next to the cable so it doesn't get mashed!
A few owners have complained about noise and other weird PAL symptoms. If the cable gets squashed, there are ten tiny wires in the cable that can get damaged and you will have problems.
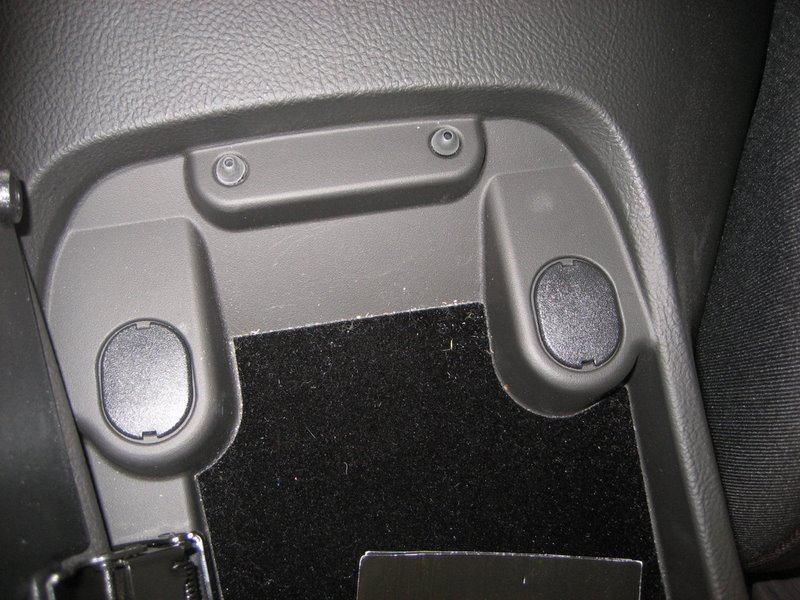
Take out the two screw covers shown above to remove the bolts and lift the rear portion of the console:
Here's another suggestion from Corvette owner Jon Sobieski:

Jon routed his cable in his coupe from the XM receiver area under the back speaker, over the hump, behind the seat to the side of the console. From there, he ran it under the carpet on the side of the console to behind the lock for the cover. He drilled a 1/4" hole under the power plug so it isn't visible, then used a saw blade to make the hole into a big enough slot that the iPod connector would pass through. This route has the advantage that the iPod cable is protected from getting mashed along its route.
Jon also decided to install an auxiliary in cable from the two RCA jacks on the PAL module. He used one of the console rear hold down bolt holes without any drilling necessary. The plug on his cable was a big large but he was able to trim it enough to get it through.
The above are a few examples of how to run the iPod cable to a location of your choice.
The new 8' iPod cables are long enough to reach this area from the XM receiver area.
You can run the cable along the console and drill a 1" hole to accommodate the grommet supplied in the PAL kit.
Pass the 30 pin iPod connector through the hole, then split the grommet (if you use it) on one side to slide it over the iPod cable.
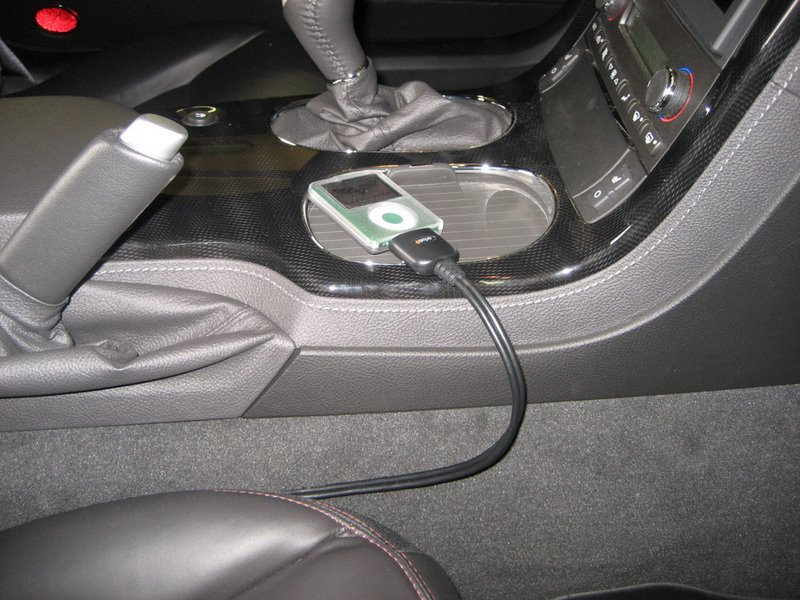
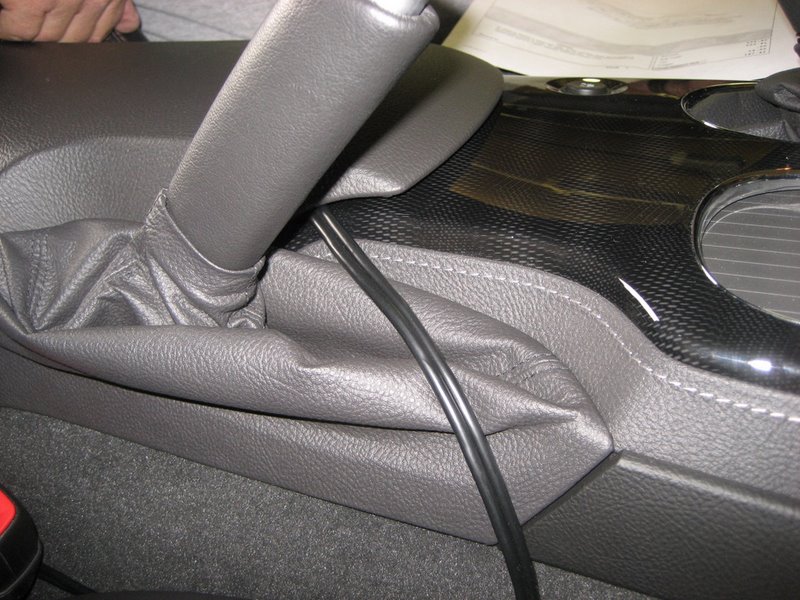
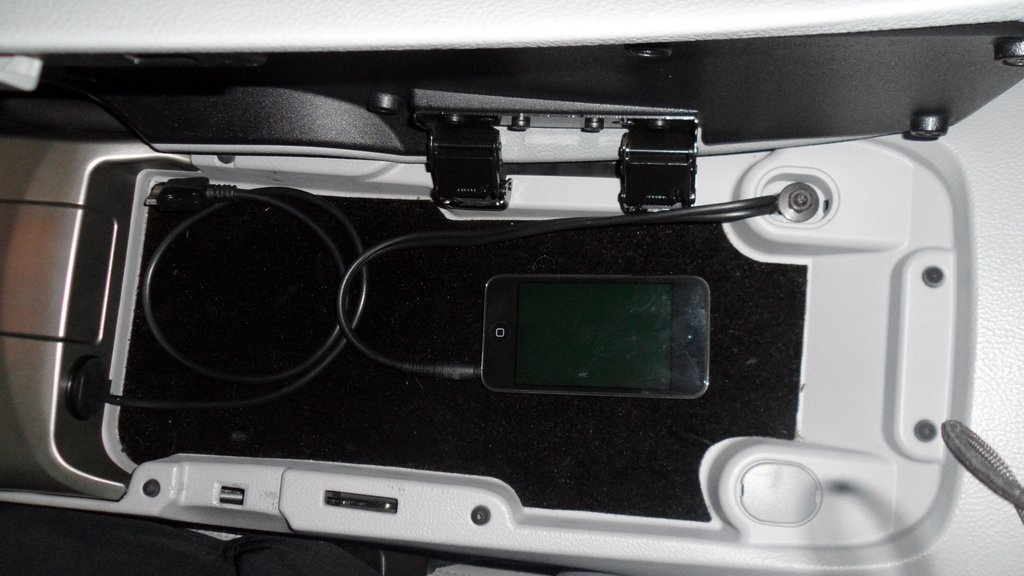
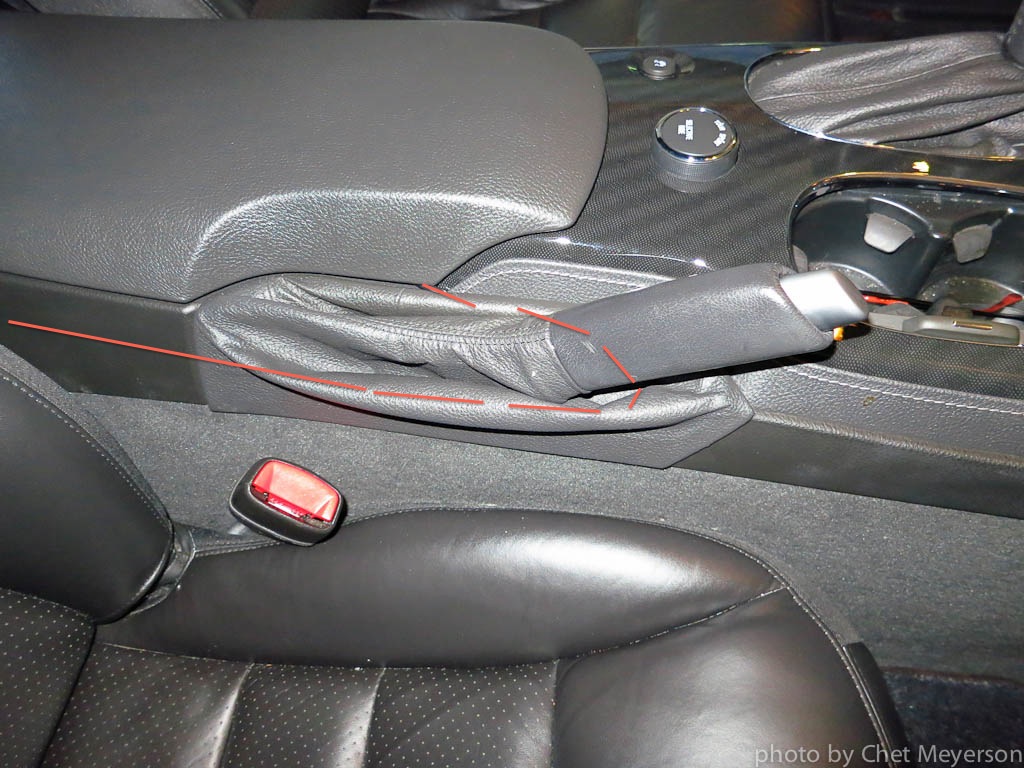
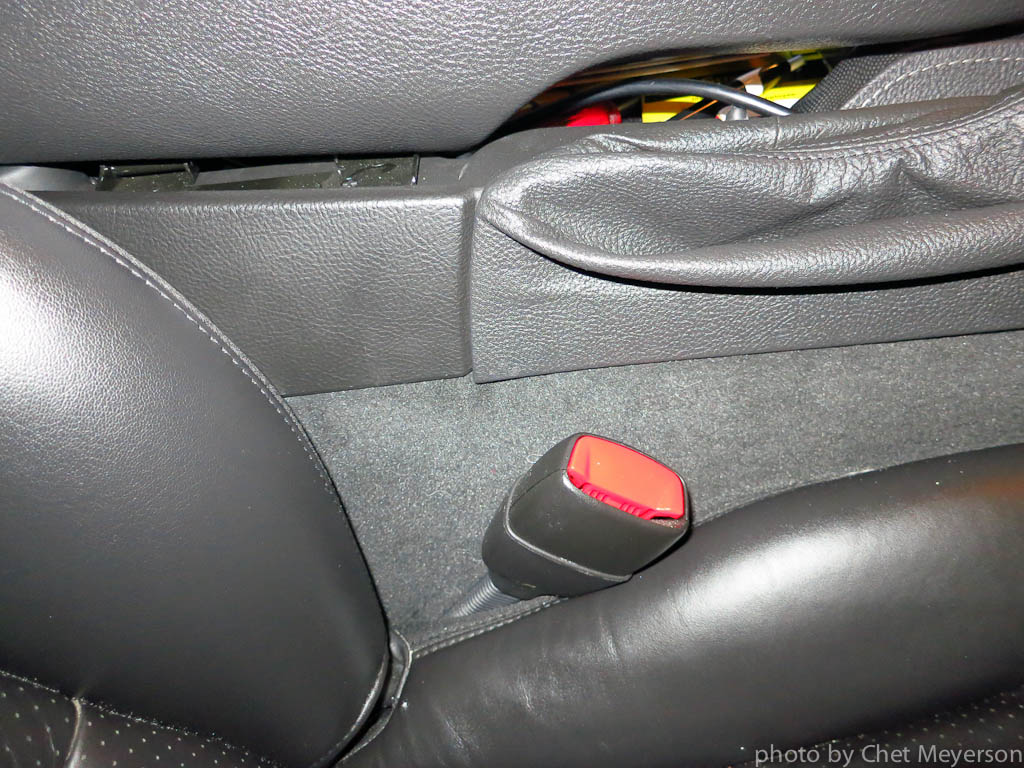
Here's another example from Chet Meyerson, who routed his iPod cable into his center console without drilling any holes. Note he came around the console and next to his e-brake handle:
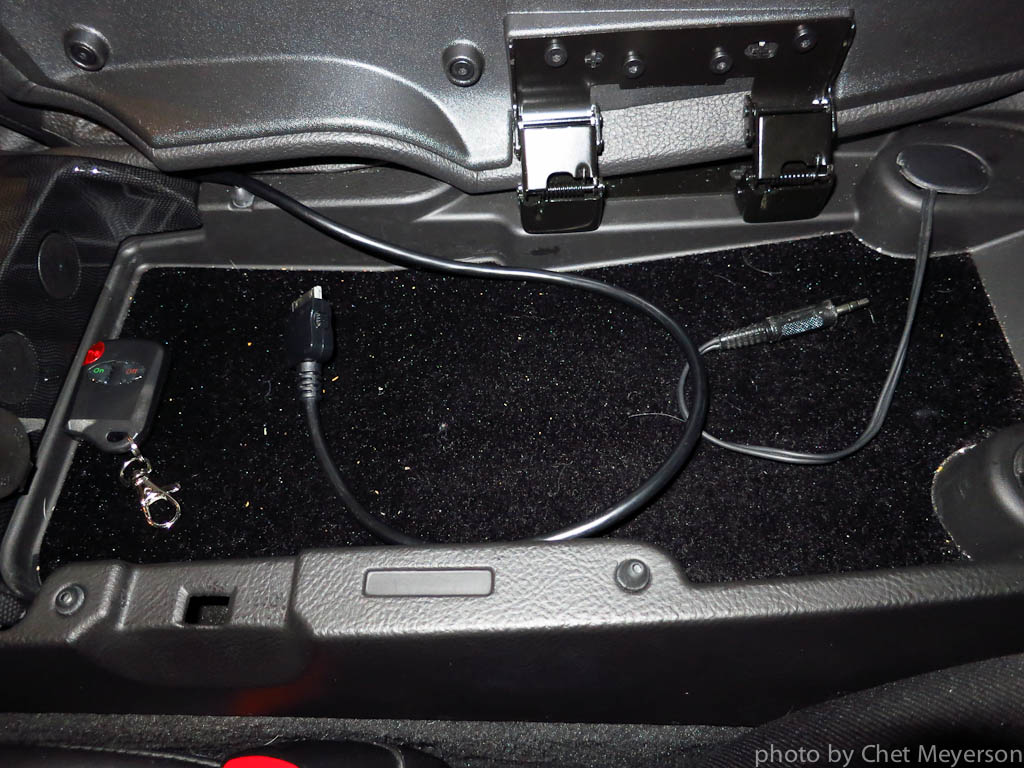
In the above photo, also note that Chet also installed the optional auxiliary in cable, using one of the rear console bolt holes.
Here's the routing of his iPod cable:
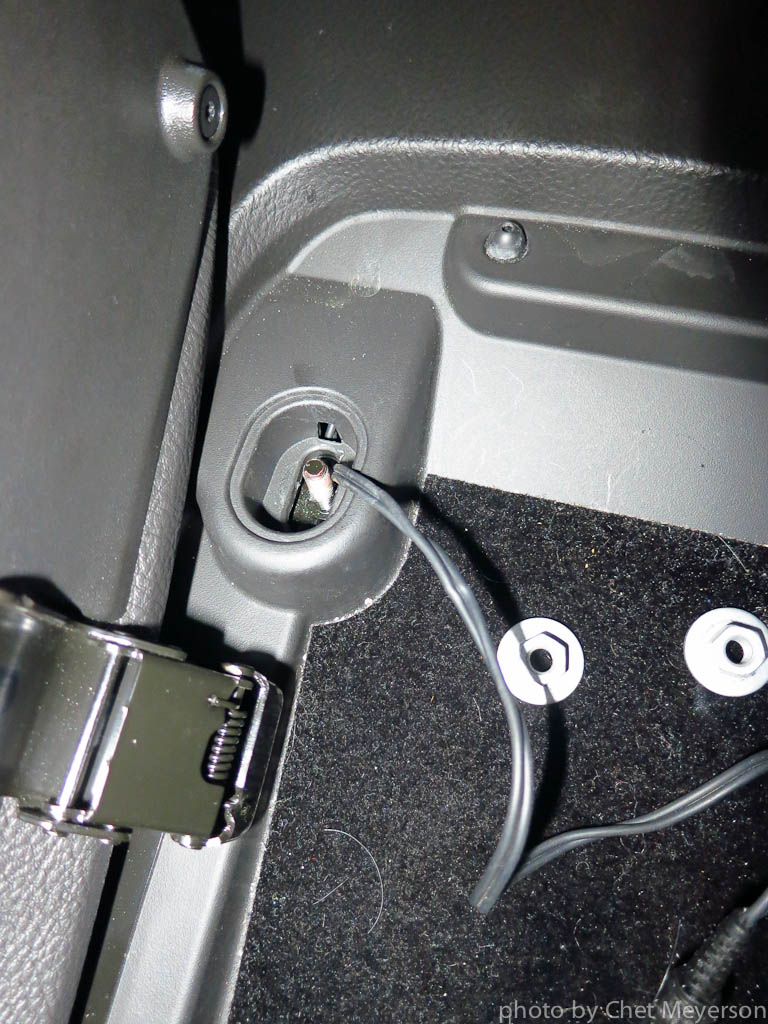
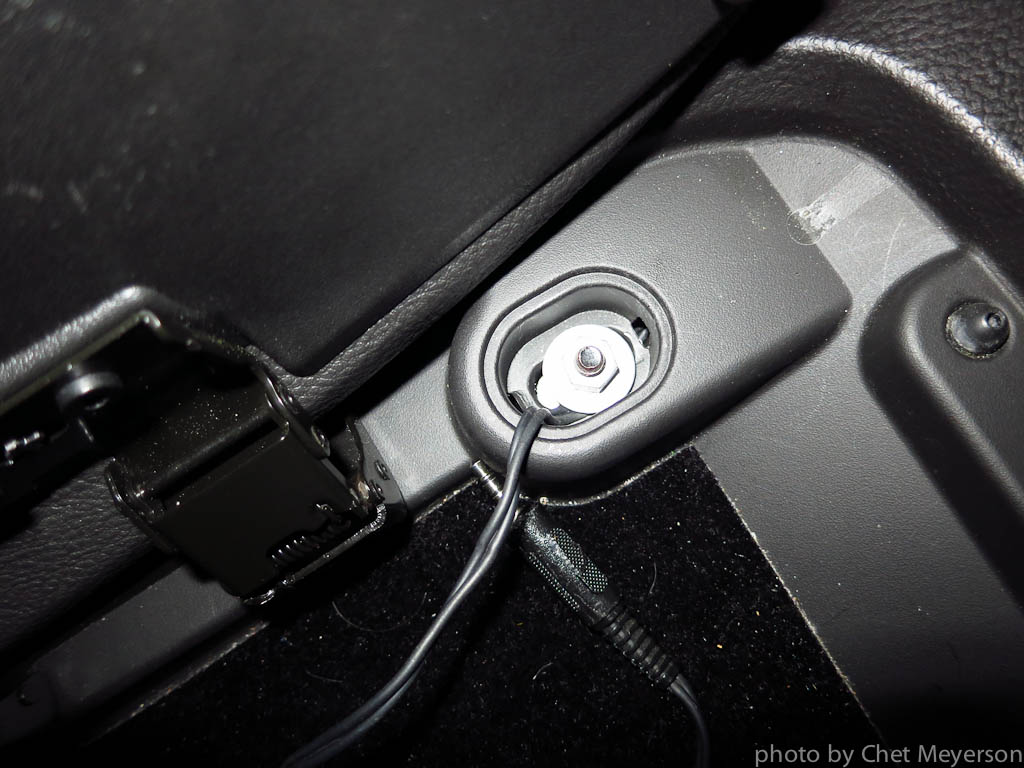
Here's the iPod cable into the console:
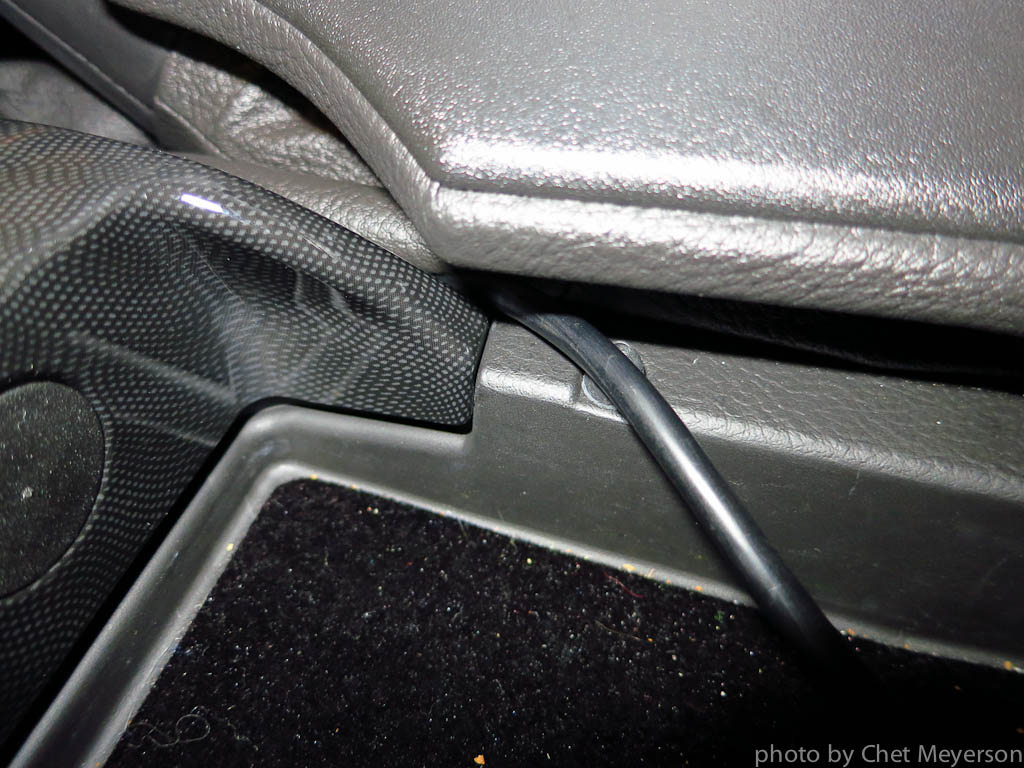
Note the cable is hardly noticable, yet it doesn't get mashed (very important):
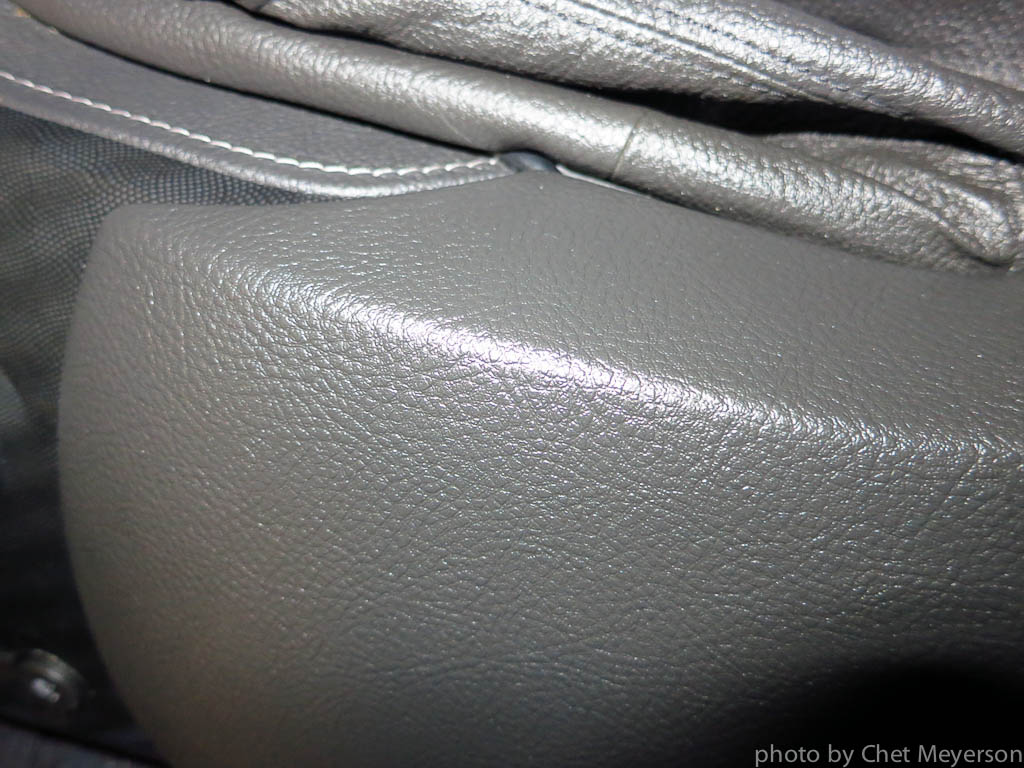
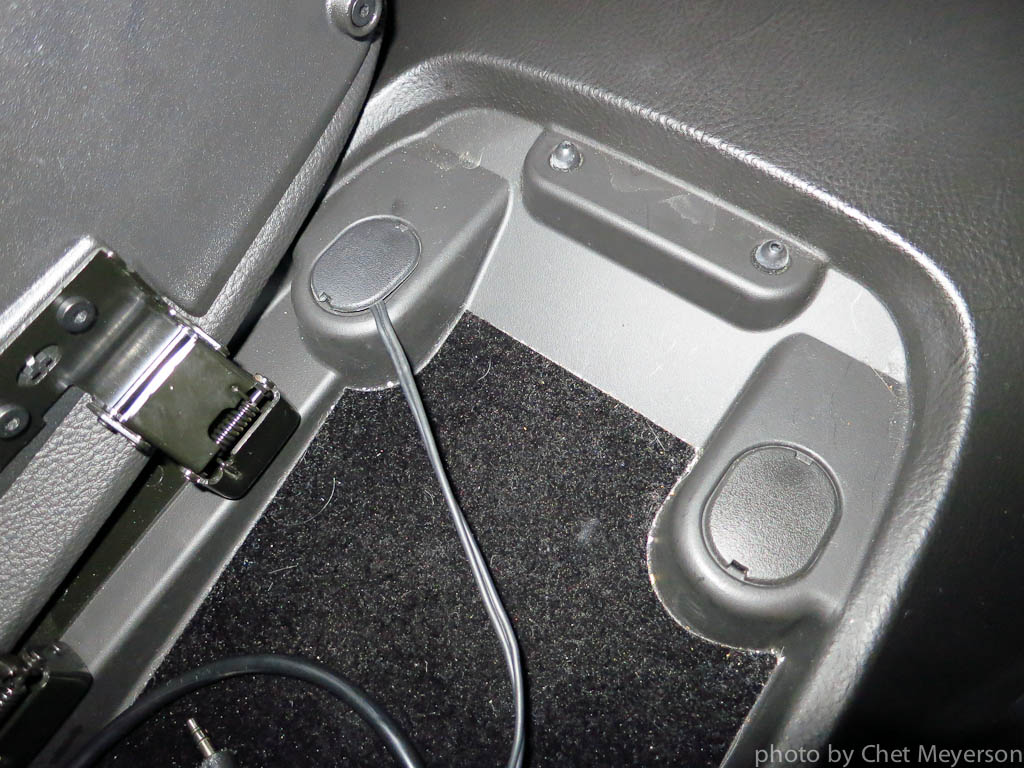
Here's how Chet brought in the auxiliary in cable:
Here are some photos from forum member Bob Williams who installed a Version 2 PAL kit in his coupe:
(BUT see the CAUTION below the photos!)
The above photo shows the older 6' iPod cable which was a bit short to reach the center console unless you angled the cable across the rear area.

Note that Bob chose to enter his console from the rear. If you choose that alternative, be very careful not to squash the iPod cable.
There are ten tiny wires in the iPod cable that can be damaged if the cable is mashed.
There is very little room between the console and the drive tunnel.
If the cable is squashed, noise and other weird problems with the PAL can occur.
A few guys shimmed up the console on both sides of the iPod cable so the console can't mash the cable. One guy used ice cream sticks.
Anything you can do to protect the iPod cable will prevent about 80% of potential PAL issues.
C6s without an XM radio receiver,
but with an XM harness
Instructions for this installation is identical to Option 1, except you will use a different installation harness:
1. FOR COUPE/Z06 OWNERS
Don't give up looking for the factory 16 pin connector, especially if you have an '05. Here it is hidden in a coupe:
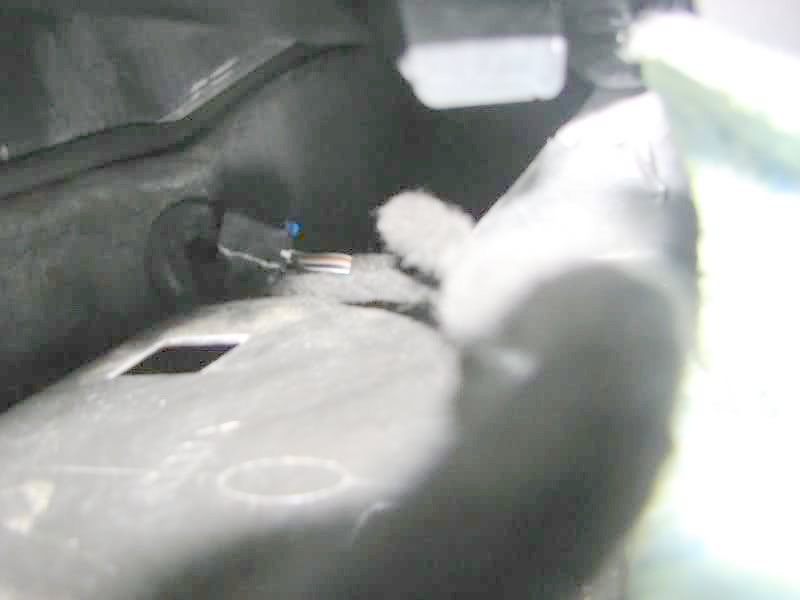
There is often black electrical tape around it:
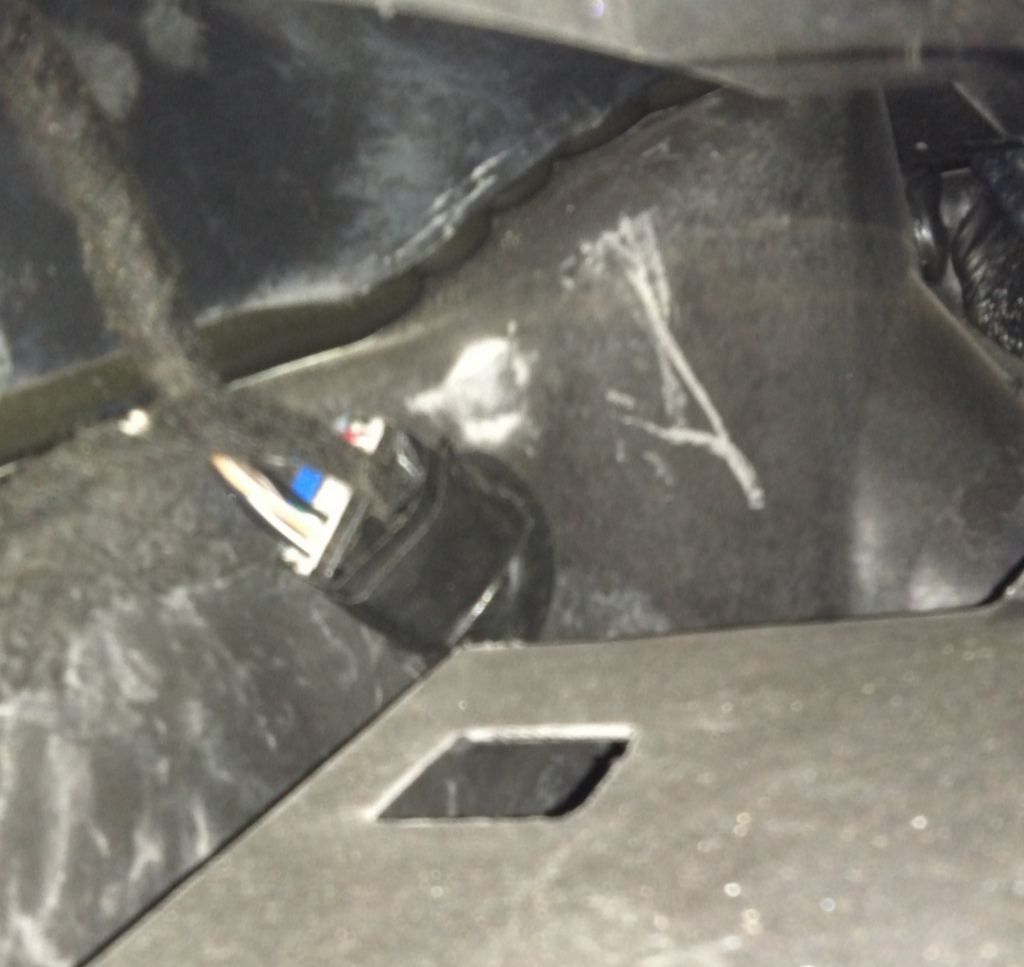
You will likely not have the XM receiver tray, but you will have the Yazaki or Delphi 16 pin connector:
It's often taped up, so it might be hard to see.
Above photos courtesy of Steve McKinney, Fishers, IN
or
Plug the XM harness into the new installation adapter harness,
then the adapter harness into the PAL.
All this adapter harness does is provide the proper wiring for the PAL, which is different from the XM receiver.
Mount the PAL in the XM receiver location and route your iPod cable to your choice of location.
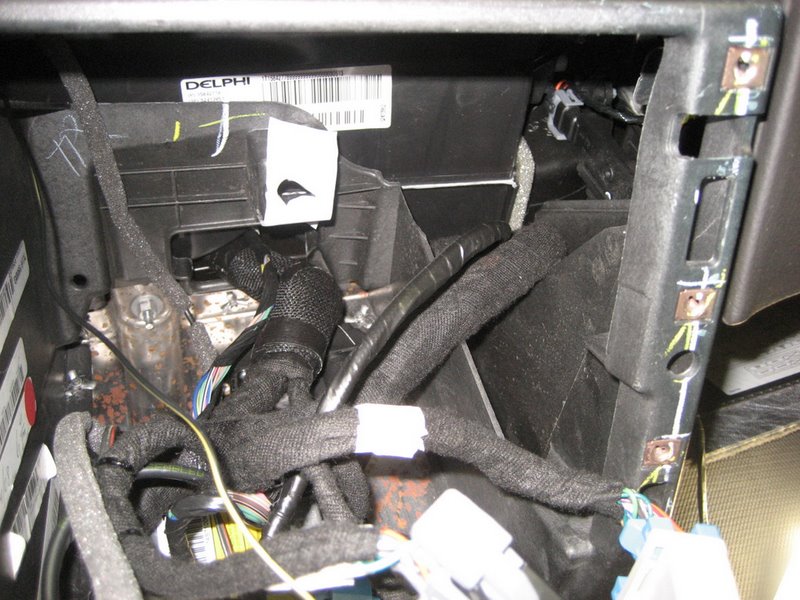
2. FOR CONVERTIBLE OWNERS
Remove your waterfall following the Option 1 details,
and your car should look like this:


But don't give up if you don't see the connector here. Look at the following photos:
The connector is pretty well hidden under the tape.
Untape it and plug in the new adapter harness to this connector,
then plug the adapter harness into the PAL.
Mount the PAL module on the XM bracket:
Connect your iPod cable and run it to your choice of location.
Install your waterfall and you're done!
The two plastic pins hold the back of the waterfall to the carpet through the hole shown:
Enjoy your PAL.
C6s without an XM harness
Without an XM receiver harness, the only place to connect your PAL is behind the radio or Nav unit.
This means you will have to remove your center console and radio (or Nav unit).
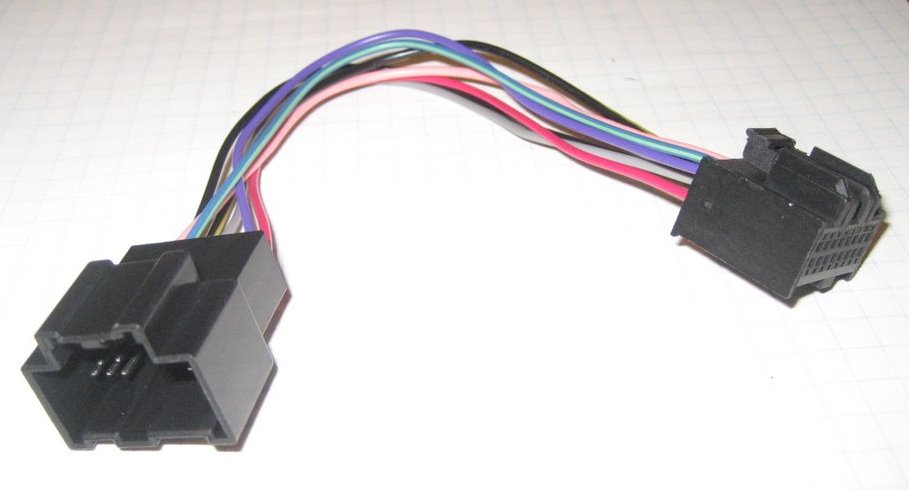
Here's what your installation harness looks like:
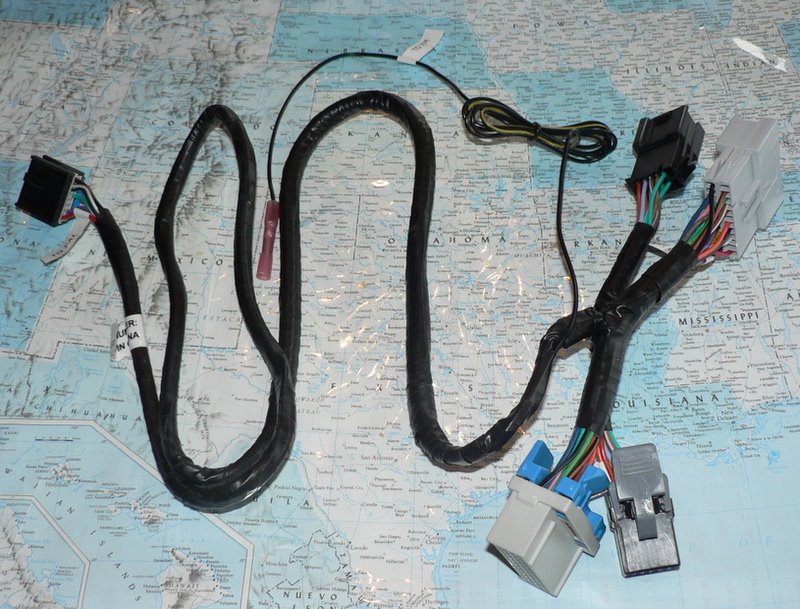
The above harness is the original PAL harness supplied with the original PAL kits.
It required a relatively difficult splice to be made to the Corvette body harness above the foot pedals.
This splice was necessary for connecting to the XM receiver.
Since you do not have an XM receiver, this difficult part of the installation is omitted completely.
The remaining part of the installation isn't all that much work.
So let's get to the installation of the PAL wiring harness. You must remove the Nav unit or radio to make the connections. So the center console must be removed. This isn't difficult, but it does take some time and patience.
Here are the tools you need:
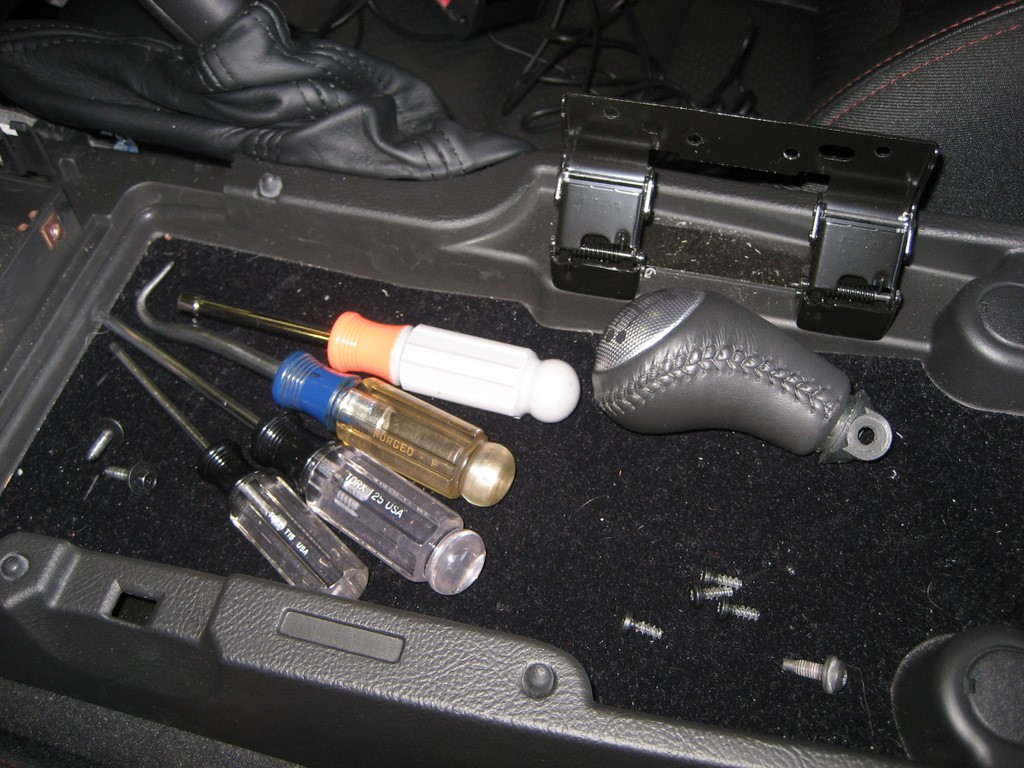
First use the T15 Torx driver to remove the four screws shown above to allow the console lid to be removed. Use the T25 Torx driver to remove the shifter knob (if you have a manual transmission). If you have an A6, you do not need to remove the shift lever, but you must move the shifter out of PARK toward the rear of the car. Press the Ignition Switch to Accessory to move it and you get to listen to the dinging for a while. As a caution, if you are not on level ground, chock the wheels or set the ebrake.
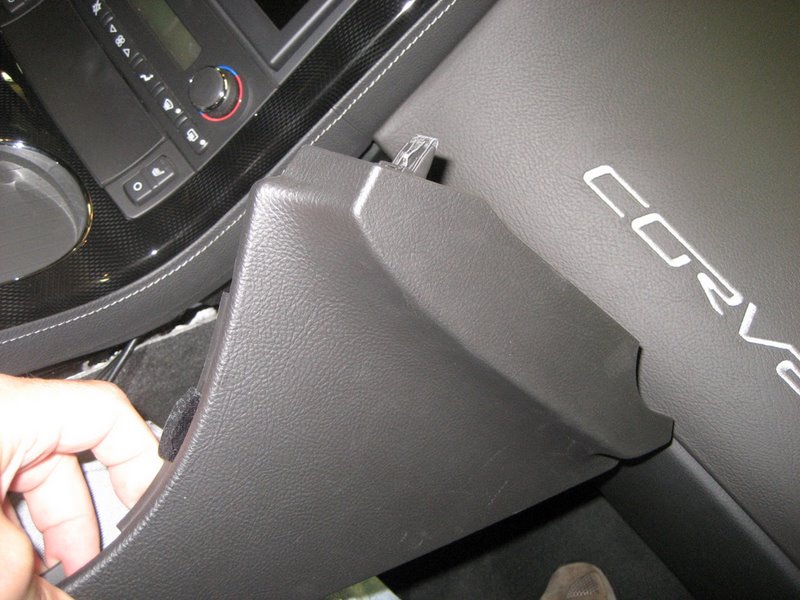
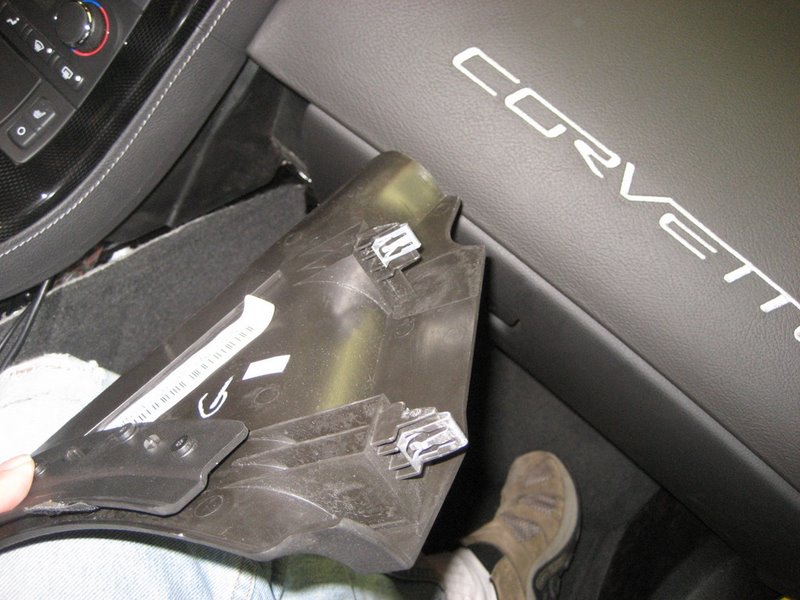
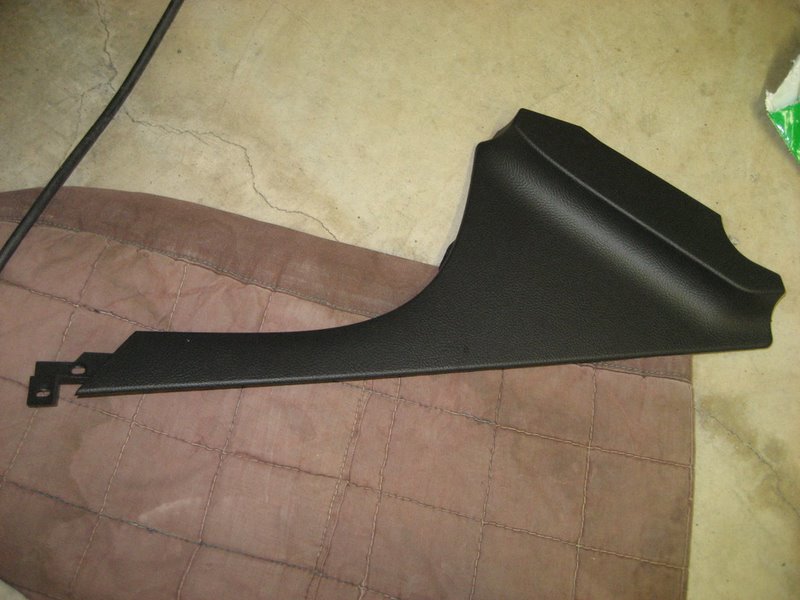
Use the 7mm nut driver to remove the two 7mm screws from the right side of the console - these are accessible by lifting up on the e-brake boot on the right. When you remove these two screws, you can then remove the right console trim plate by pulling down at the rear.
Next remove the two 7mm screws at the rear of the center console.
Lift up on the rear of the center console and it will come loose from the dash. Pull the shift lever back to allow the console to clear the shift lever (manual or automatic). At this point the only thing preventing removal of the console is the wiring. This is the tricky part. First pull the connector at the hazard warning switch near the top. Then pull the seat heater switch connectors (if you have them). Finally, pull the connector at the traction control switch - on this one, you lift a retaining tab rather than push the tab. The hardest connector to pull, if you haven't done it before, is the power plug (cigarette lighter) connectors. On these you must push a tab to release the connector - sometimes the tab is at the top, sometimes at the bottom. In the photo above, the bent awl works well for pushing the release tab.
You don't have to remove all of the plugs if you can maneuver the console onto the passenger seat with part of the wiring harness still attached. Once you know how, it is a bit easier just to remove the whole thing and get it out of your way.
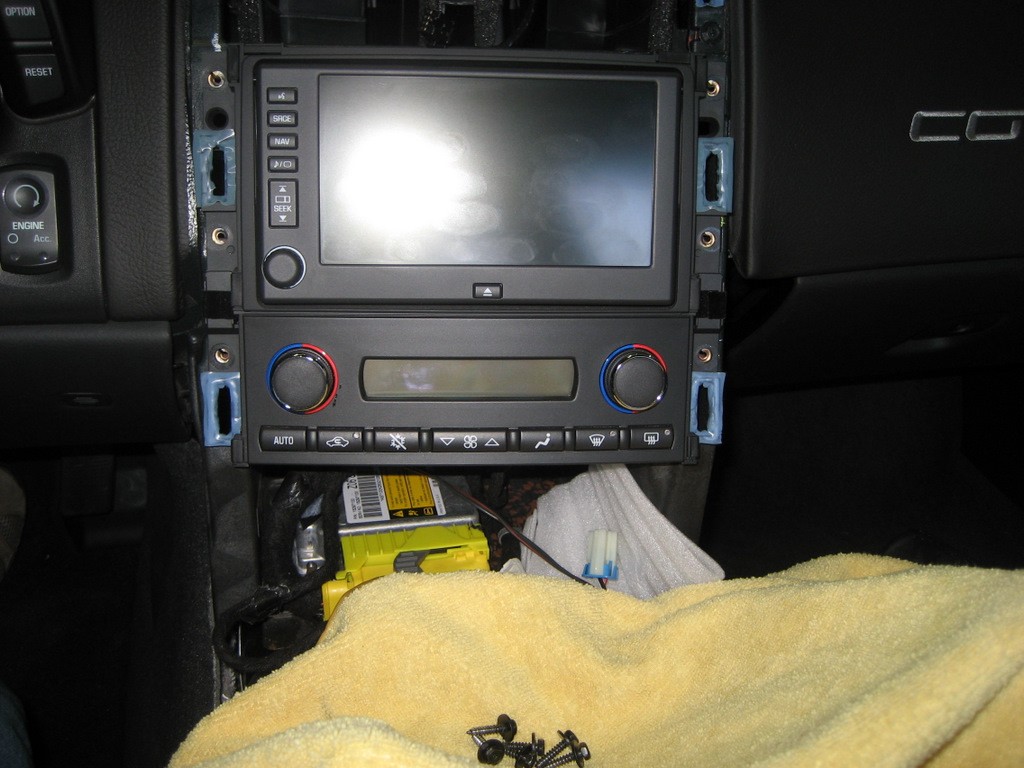
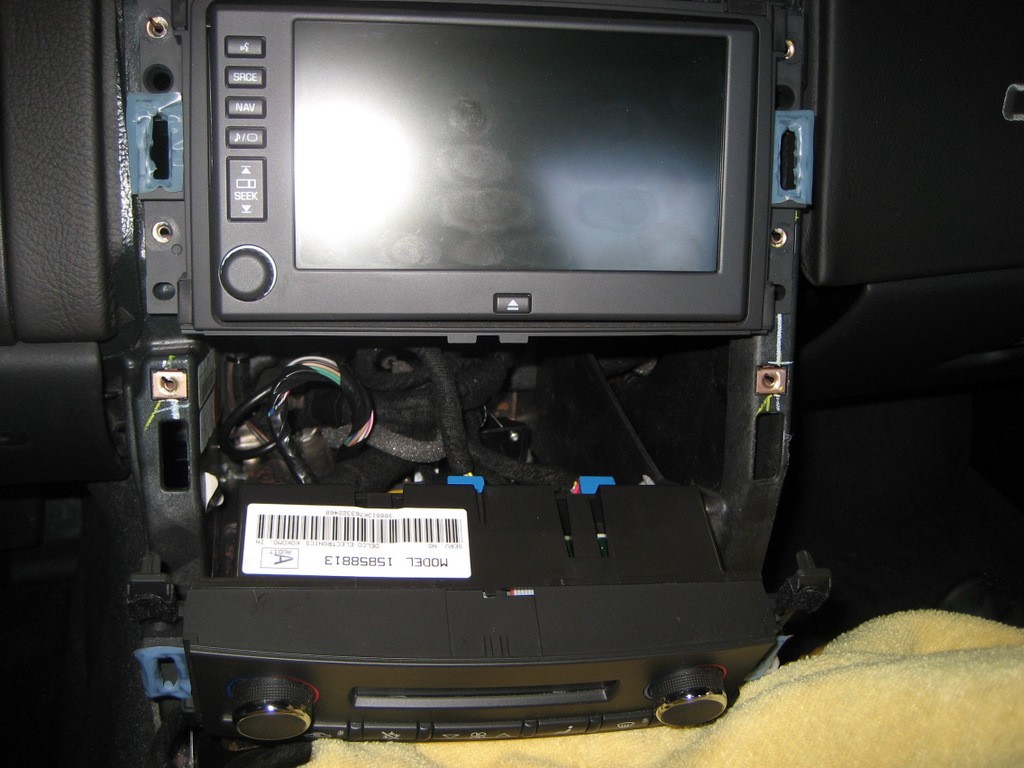
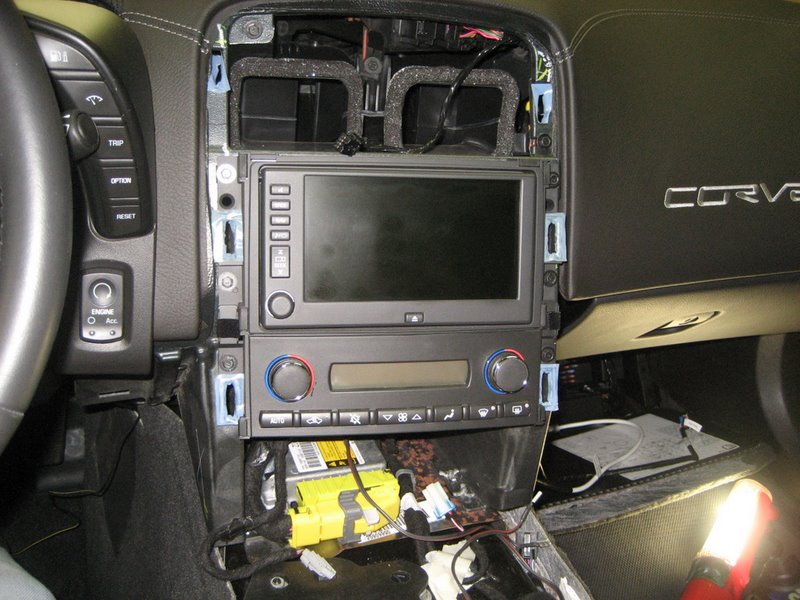
With the console removed, here is what it looks like:
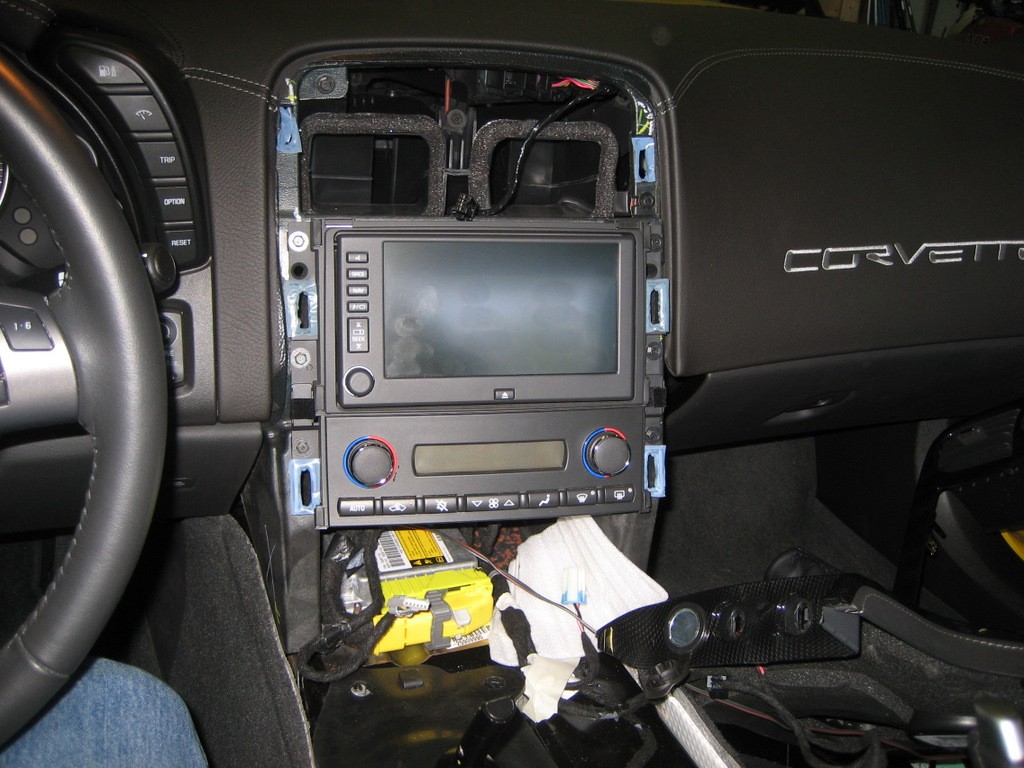
If you don't have Nav, the US8 and US9 radios are mounted identically.
This may look daunting, but it is quite easy to pull the console once the connectors are removed.
NOTE: When you are pulling out the radio or Nav unit, be SURE to protect the face with towels or something similar. Tugging on connectors can often lead to the radio or Nav unit hitting something hard like a shifter. If you scratch the face of your radio, you cannot get replacement parts for it!
Here is the console sitting on the passenger seat:

In the next photo, you can see the six 7mm screws removed that hold the HVAC controls and the radio in place:
A soft towel laying on the shift lever protects the units from being scratched when you remove them.
First, pull out the HVAC module:
It comes right out once the two screws are removed.
Next, pull out the radio unit and you'll see the two plugs in back:
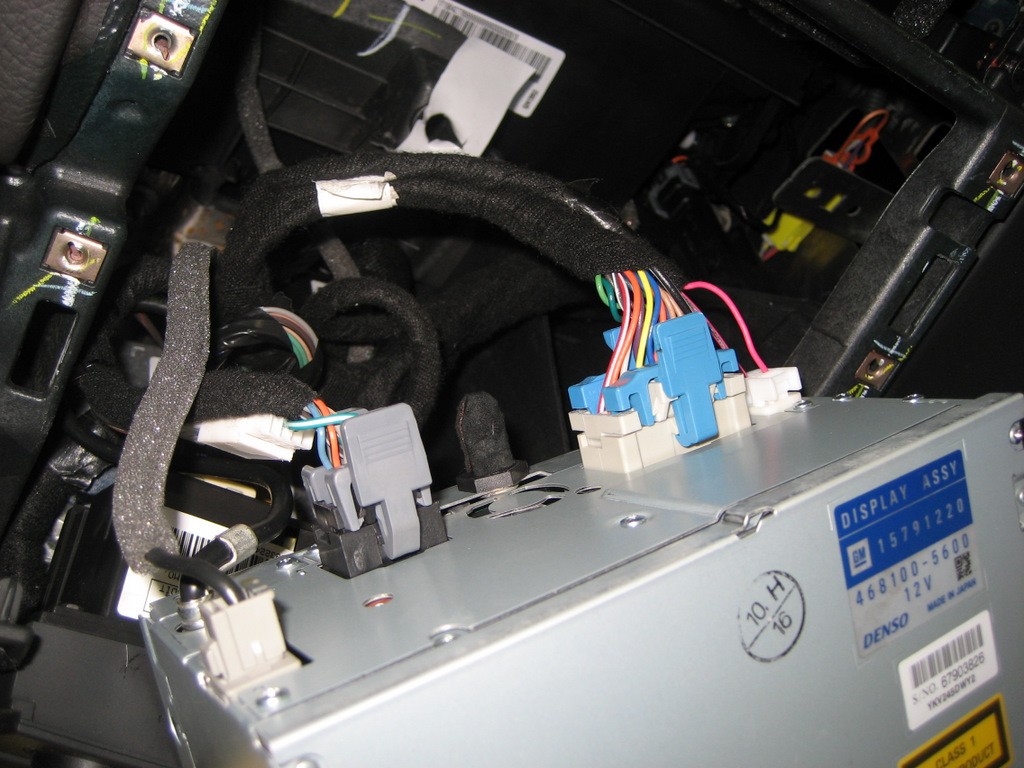
Here's another photo from the rear:

Both the 24 pin plug on the left and the 12 pin plug on the right must be pulled.
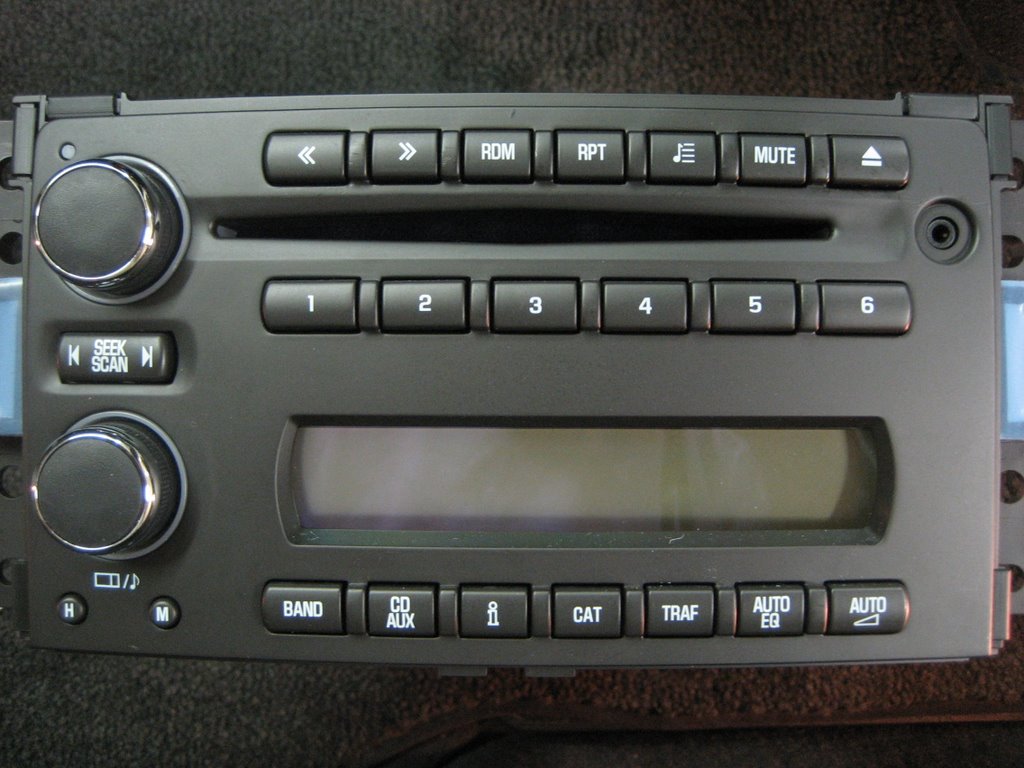
Here is the US8 radio from the front:
And from the rear:
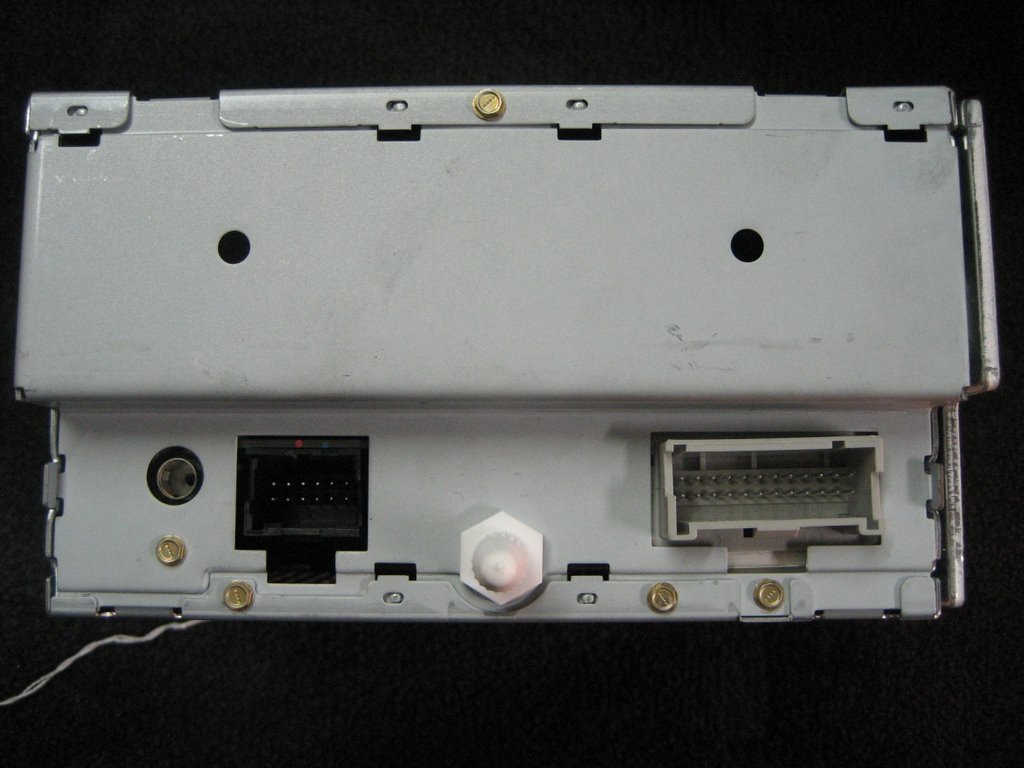
The 24 and 12 connectors are identical to the Nav radio connectors.
Push down on the tabs and pull.
(Sometimes the connectors are pretty tight, so wiggle them as you pull hard):
Next, plug in the PAL wiring harness:
The male connectors you pulled from the radio plug into the female connectors on the harness.
Then plug the male connectors on the harness into the radio.
Tape up the black/yellow wire to the harness bundle so it doesn't get in the way.
You won't need to connect this wire.
Route the harness cable with the PAL connector down towards the right:
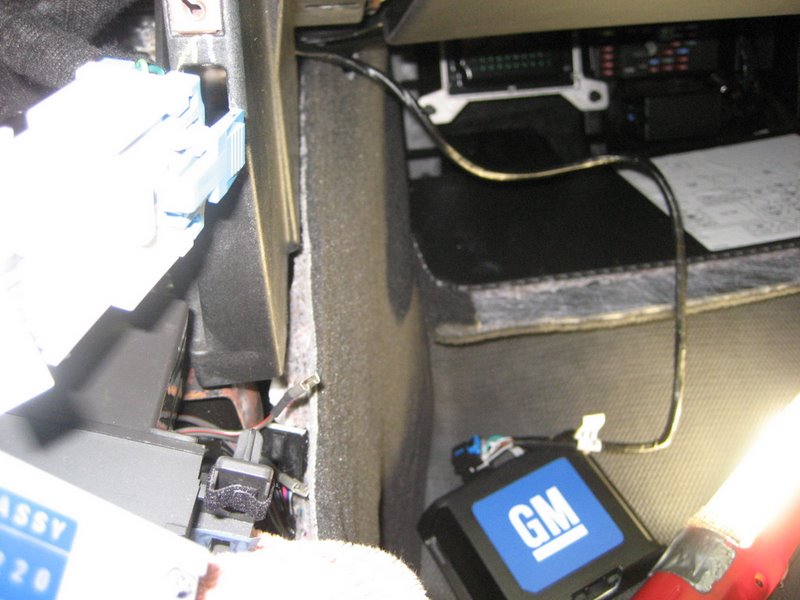
In the photo above, the PAL module is lying on the floor.
But it will be mounted under the amplifier in the fuse panel (shown behind the harness in the photo).
Optional Glove Box iPod Location
At this point, you need to decide where you want to locate your iPod. The original PAL was designed to have the iPod installed in the glove box. The following optional instructions are for mounting in the glove box using a grommet after drilling a hole in the glove box compartment.
Most owners will likely choose instead to mount their iPod in the center console. The new iPod cable is 6' long instead of the original 4' long cable, so you have plenty of flexibility regarding location.
Do not reinstall the radio unit at this time because you will need access to the center cavity to route the Ipod cable from the glove box.
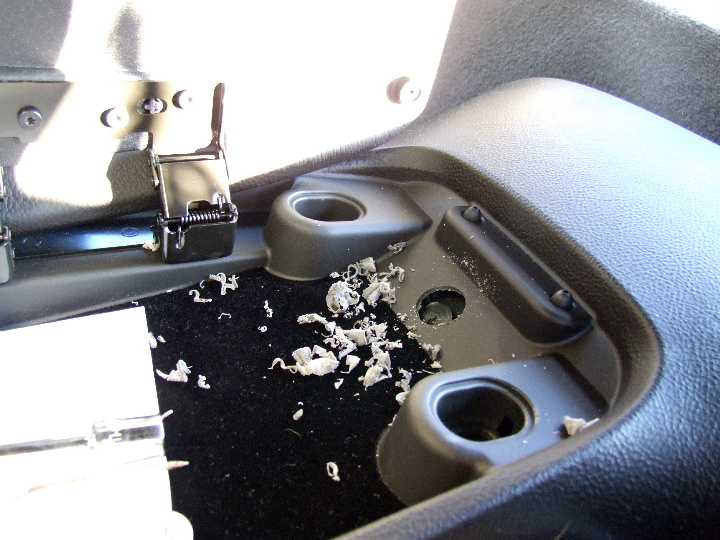
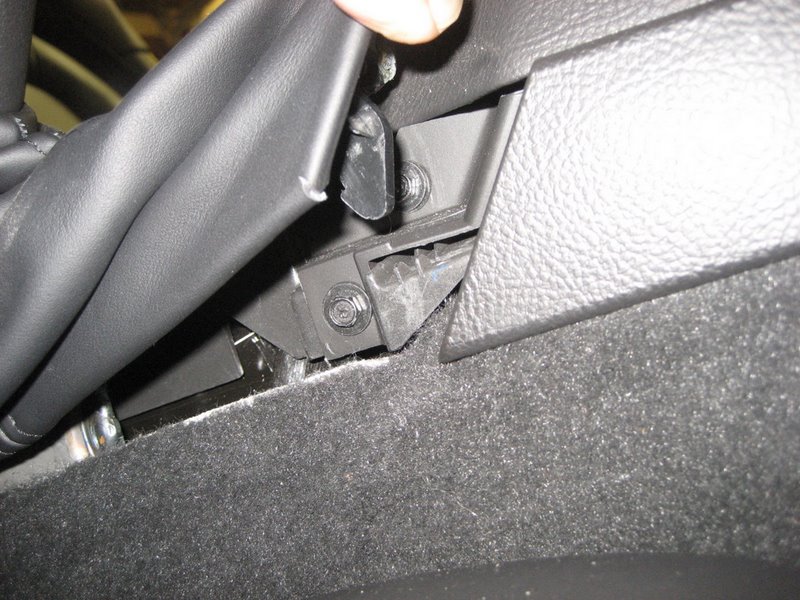
The installation instructions direct you to remove the glove box, but if you haven't done it before, the following photos may help. The glove box is hinged to the instrument panel on three pins (shown in the center of the photo):
These tabs latch onto the pins:
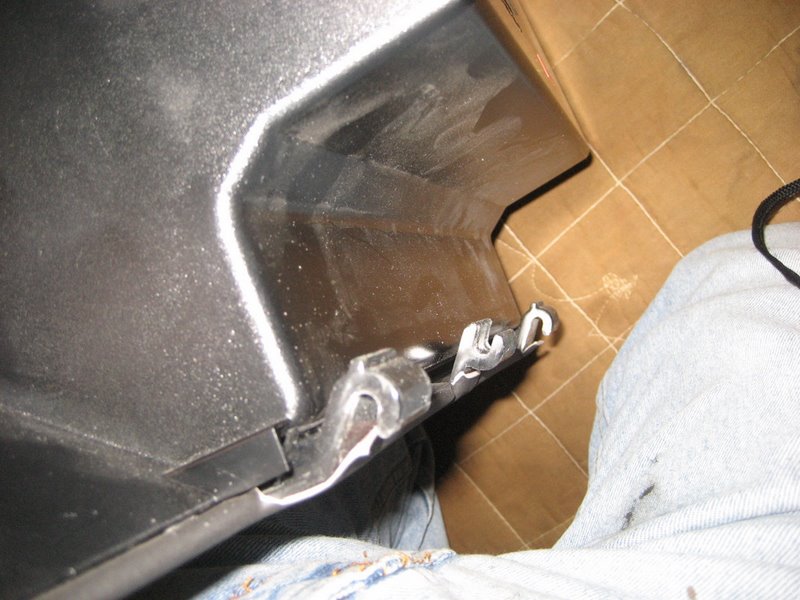
First push up on the right side to release the right tab from its pin. Then push up on the left side to release that tab. Then pull down to release the center tab and the glove box will come out. You will need the glove box out to modify it for the Ipod cable.
Notice the supplied template is different from the one in the instructions:
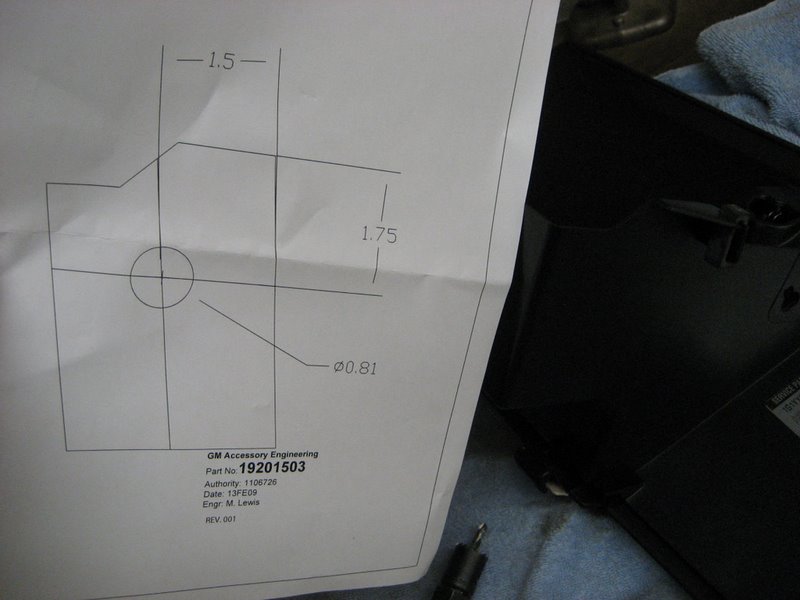
Hold it up against the side of the glove box to see where the hole goes:
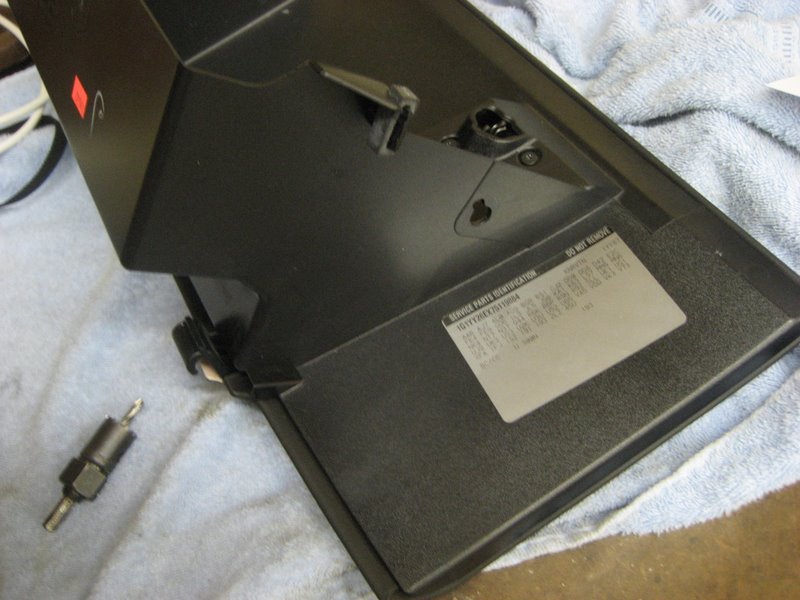
Drill a 13/16" hole here:
And push the Ipod cable in place:
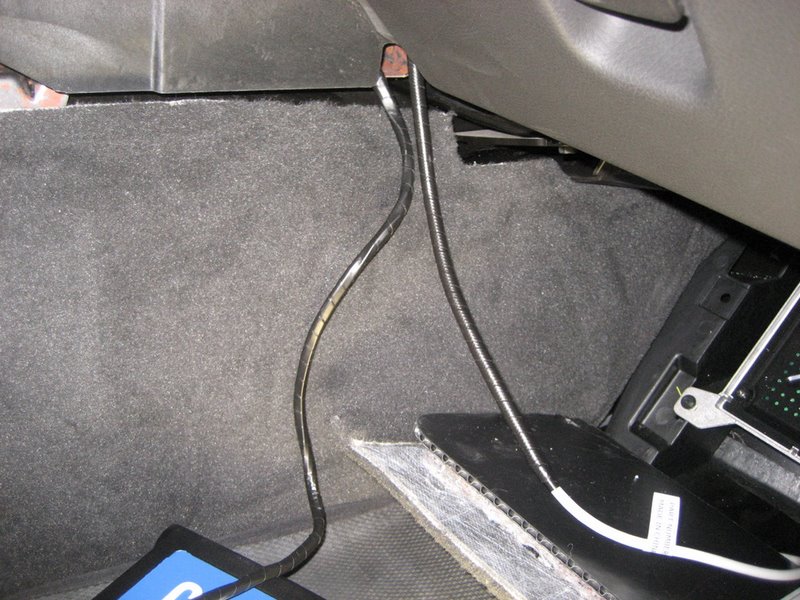
Next, route the cable through the instrument panel:
Here, the taped section is pulled through and routed down alongside the cable with the 16 pin connector:
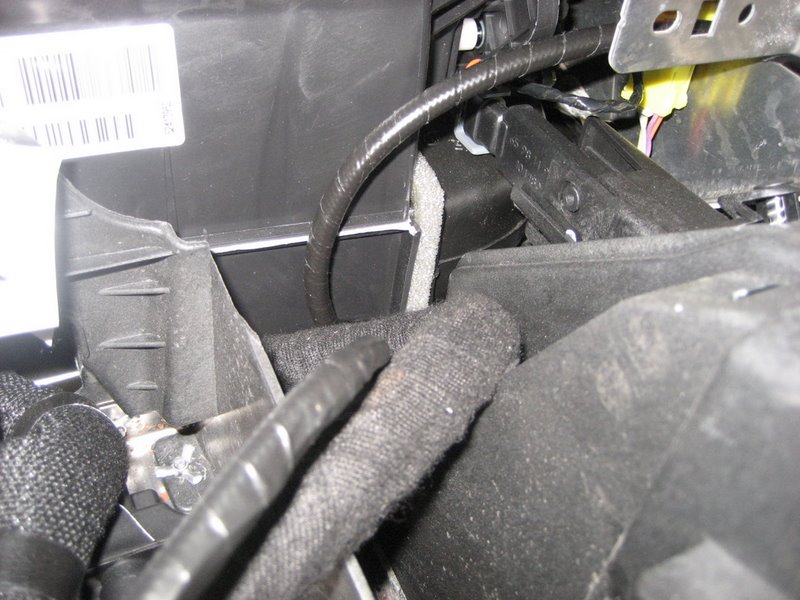
Pull both cables out at this location:
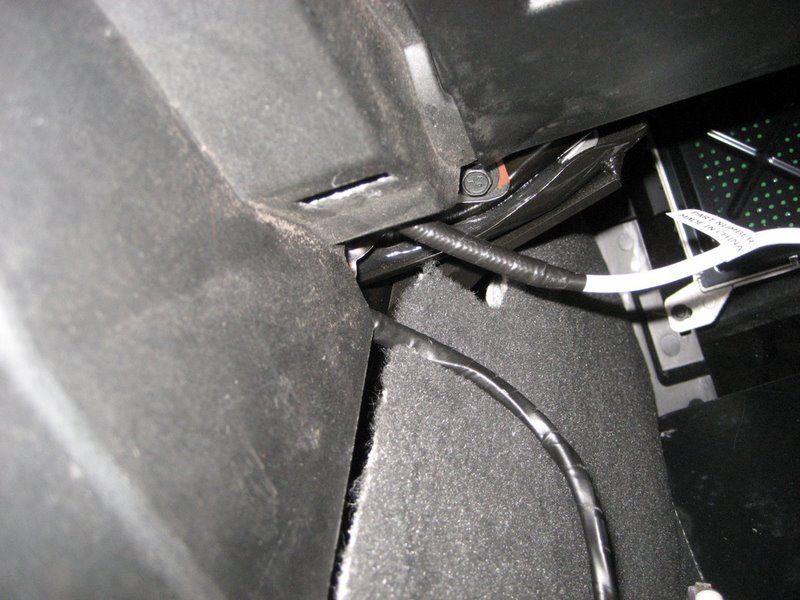
Reinstall the glove box with the Ipod cable routed through here:
Another view also showing the second cable with the 16 pin connector:
Here are both cables pulled through:
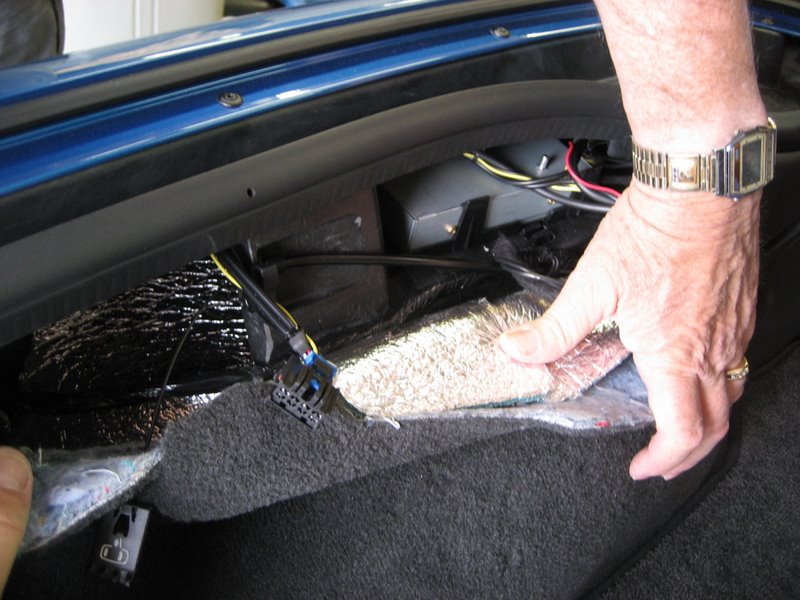
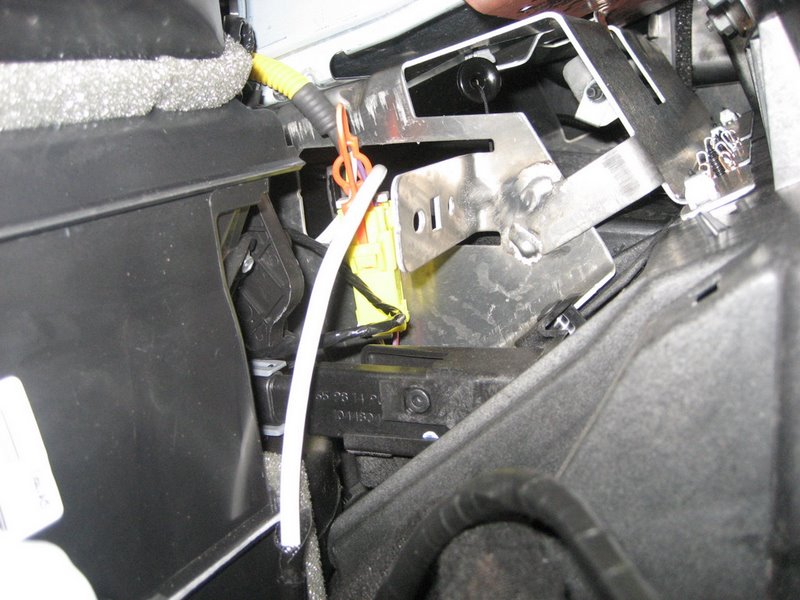
Pull back the side carpet and route them under the foam block:
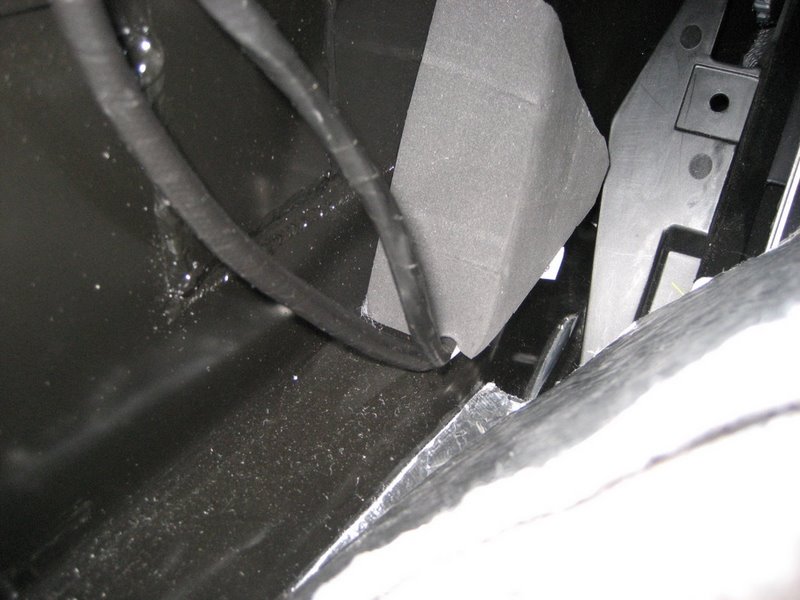
Fish them back under and behind the electrical panel (it isn't easy!):
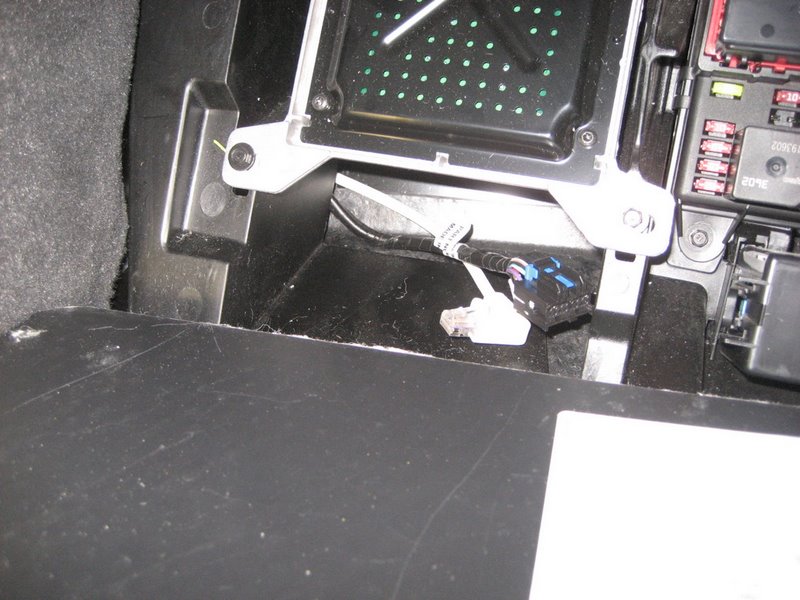
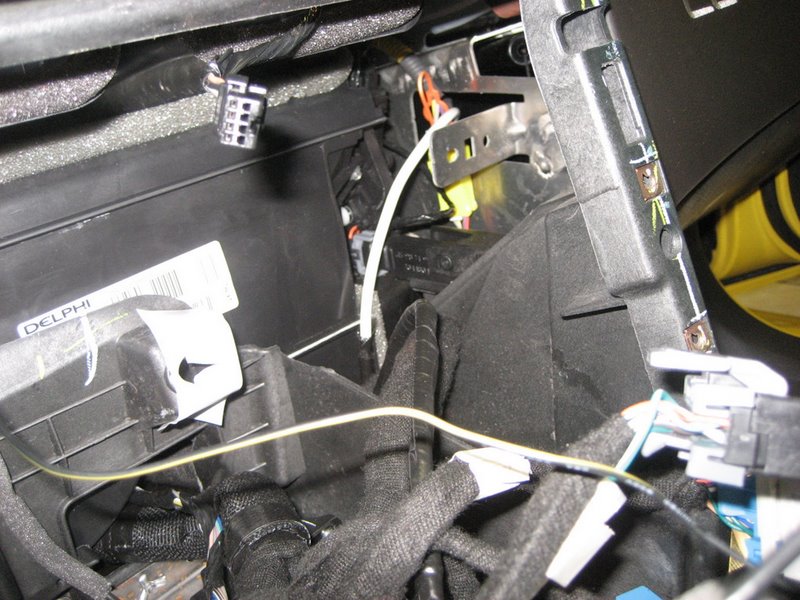
Finally, plug them into the PAL module and stick the module in place:
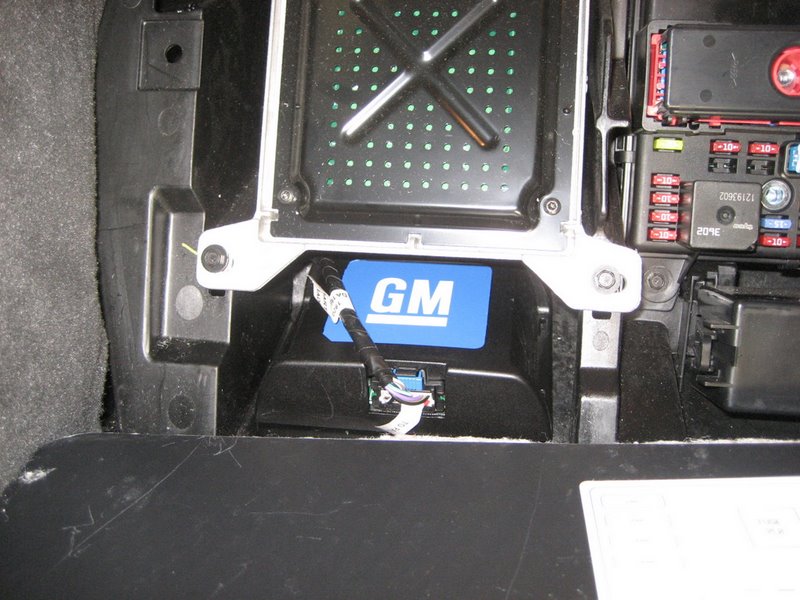
If you choose to mount your iPod in the center console instead, simply run the new iPod cable into the center console area shown above, and back towards the console lid. Or, you can bring the iPod cable out along the carpet area if you prefer to keep it between the console and passenger seat.
Now that all of the module wiring is done, you can finally reinstall the radio or Nav unit. Making sure the connectors don't get crunched, push the Nav unit back in place and loosely screw in the four 7mm screws holding it in place. Also reinstall the heater controls:
As a hint, before tightening the six screws holding the Nav unit and heater controls in place, push up hard to take any slack out of the screw holes. I found if you do not, sometimes the ash tray will very slightly contact the bottom of the heater controls and not close perfectly.
Your installation is complete.
Enjoy the PAL.
Click here for lots of Frequently Asked Questions about the PAL
Please don't use the forum PMs because my inbox just keeps getting filled up and I have to delete the PMs.
Email is much better!