AUX-1C Console Mod Option
(updated 11/22/20)
For Vette owners who want to have their Auxiliary Input Port in the console, similar to the new 2011-13 Corvettes with the new USB Nav radios, you might like this option.
By adding one of my new audio pods in your existing console, you console can look like this:
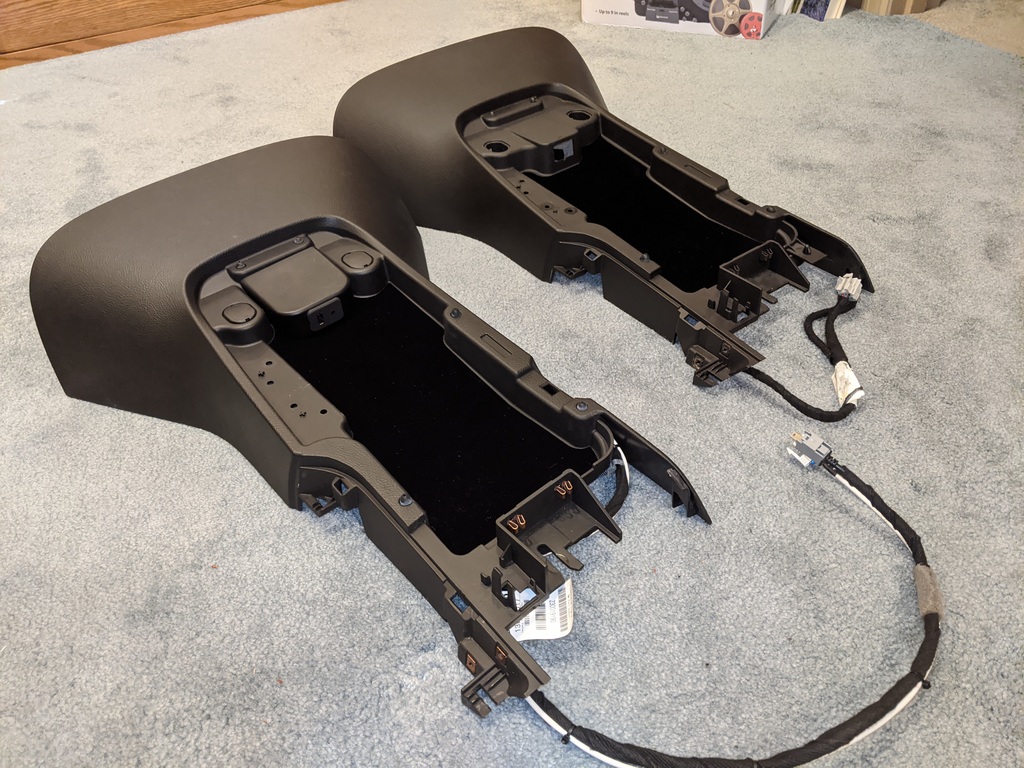
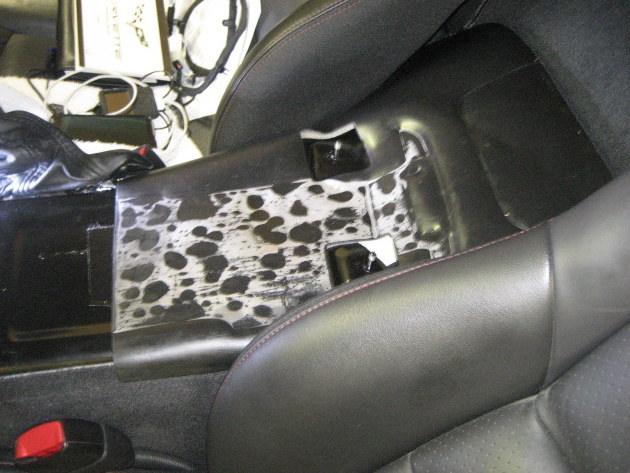
On the left, is an original OEM console with the new audio pod next to the OEM USB console on the right:
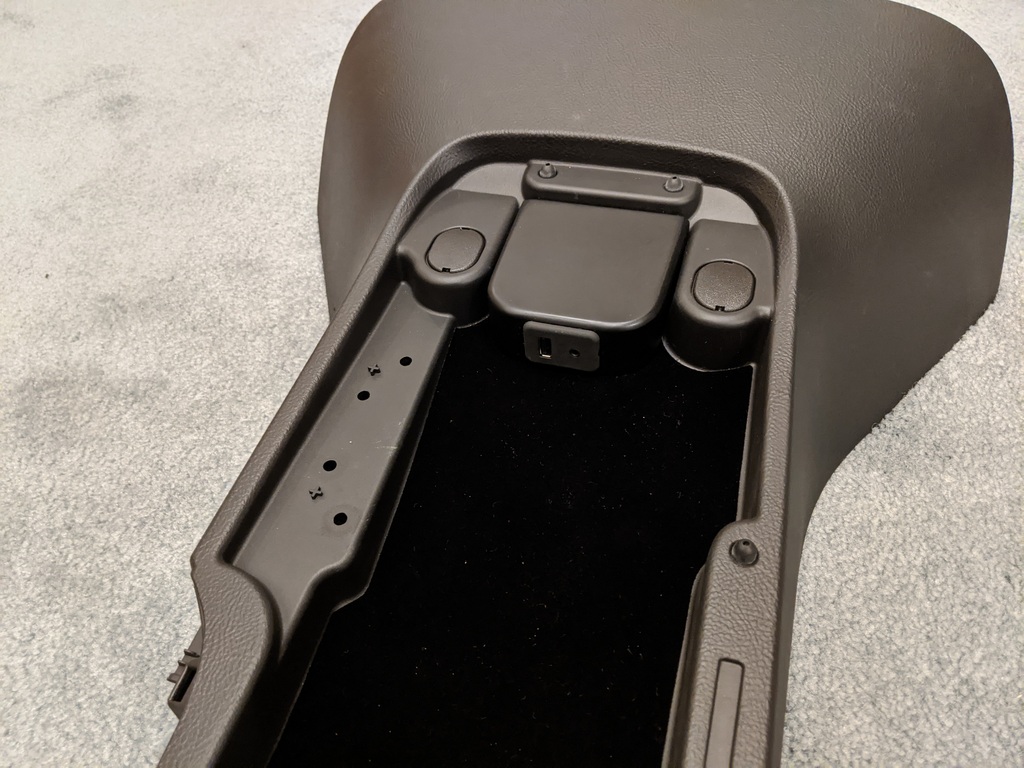
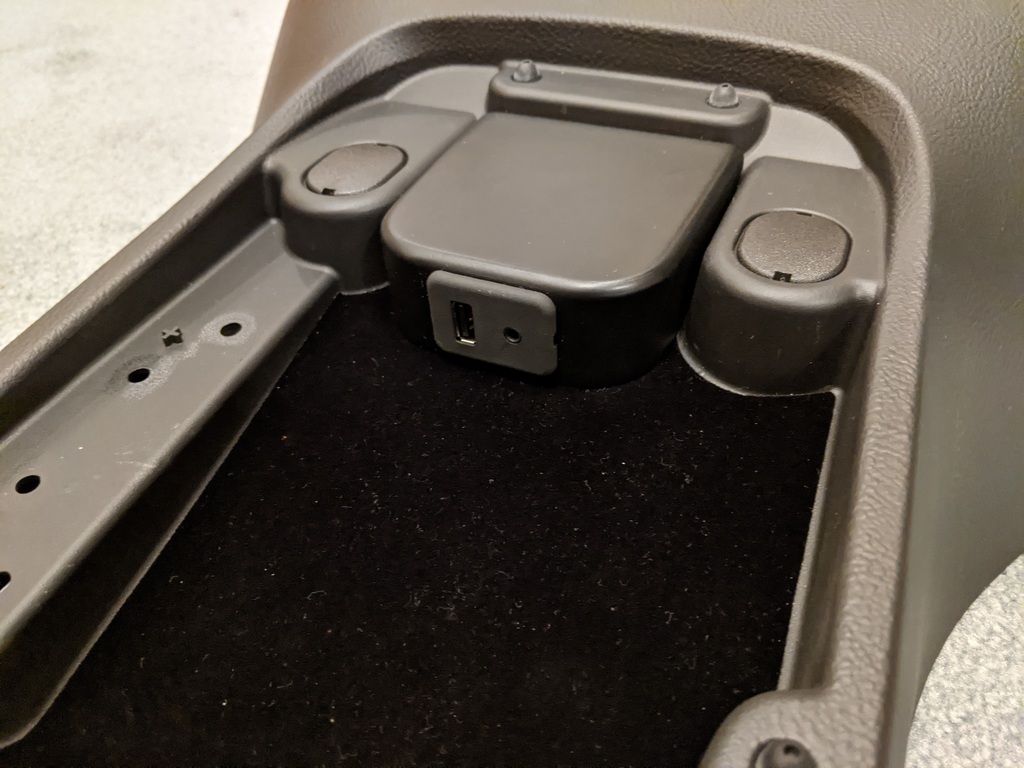
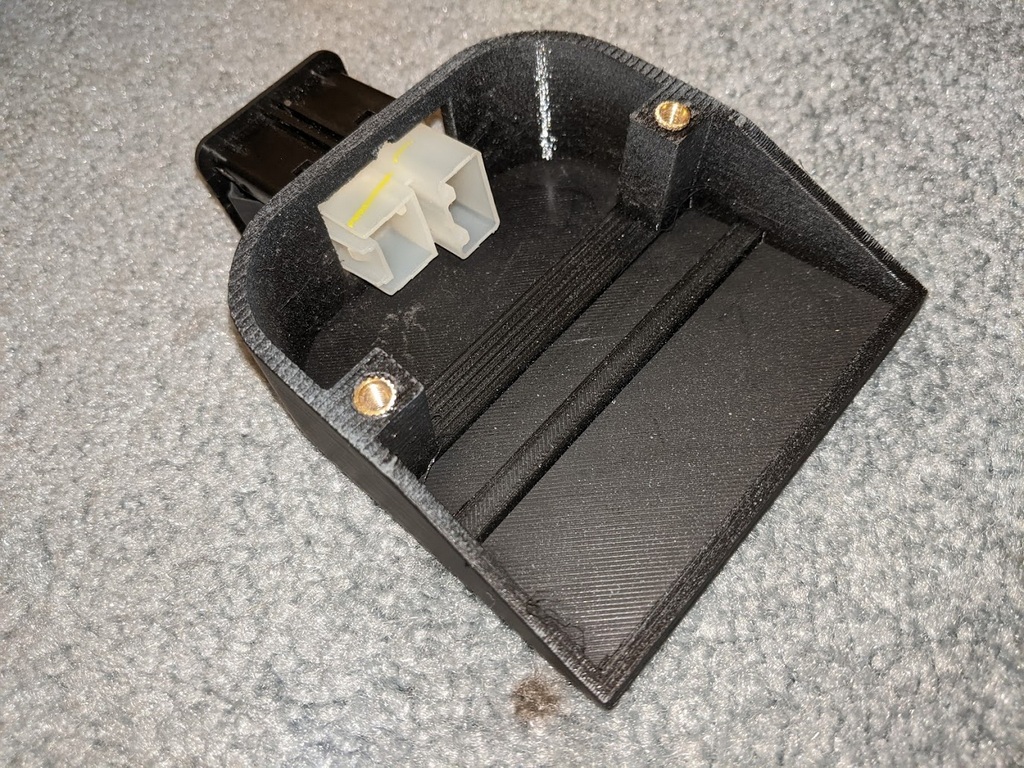
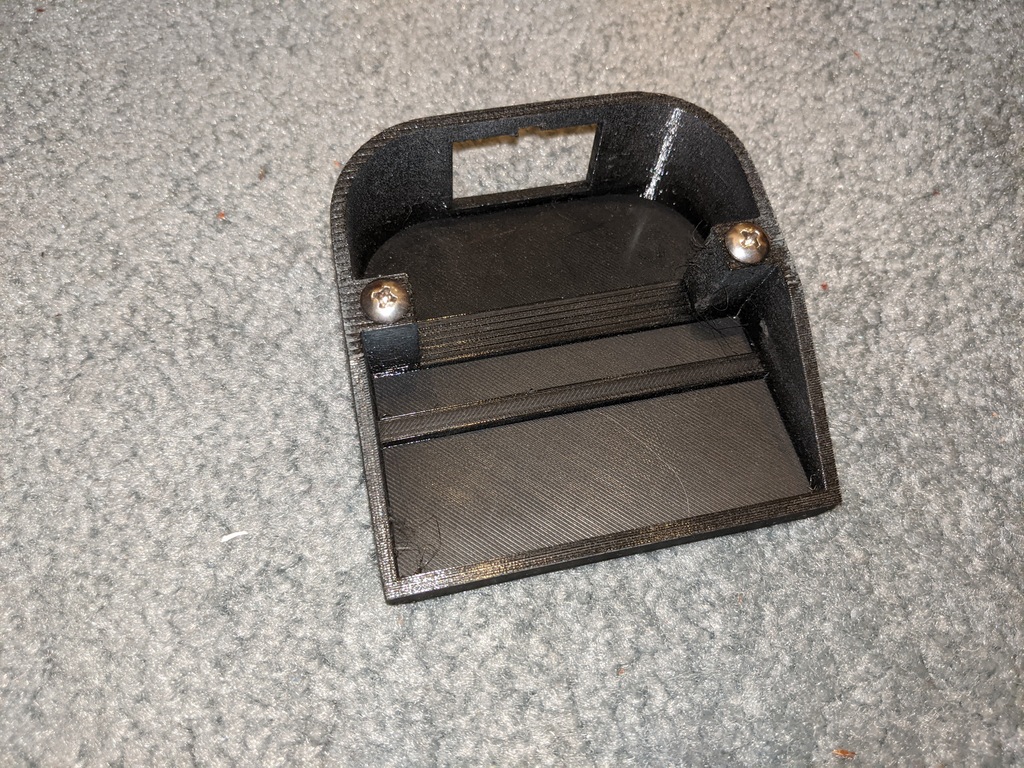
Here are some close-up views of the new installed audio pod:
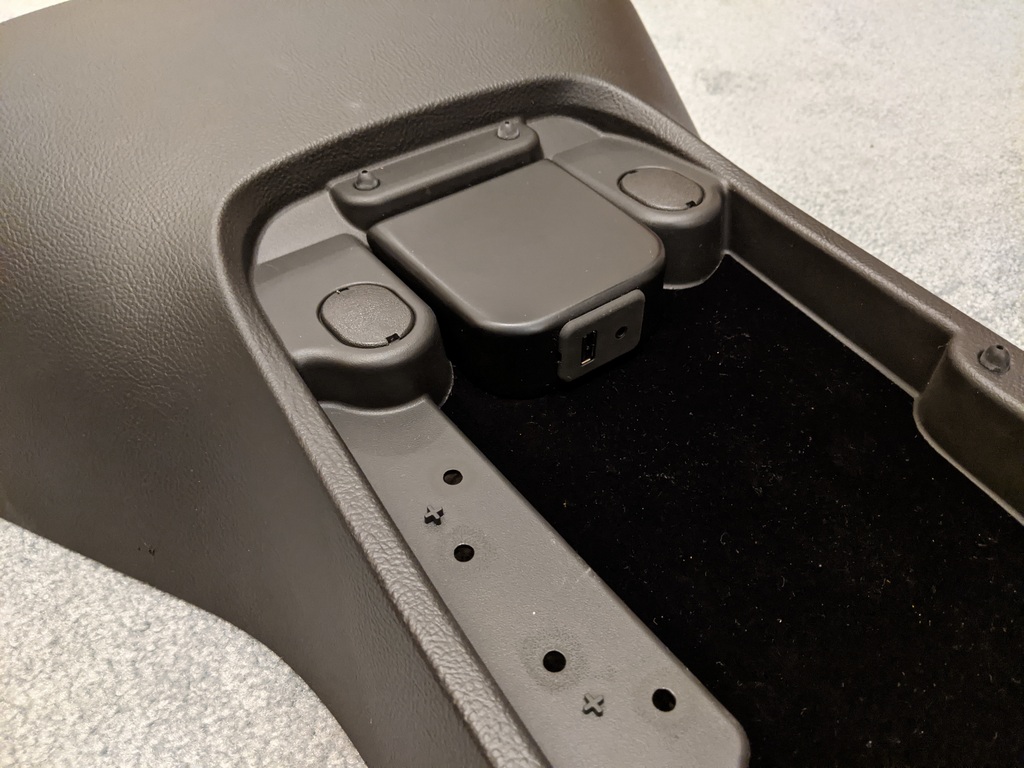
Each pod is sanded, primed, and painted, then the mounting holes have threaded inserts for the mounting screws. The pods are painted to match the ebony interiors of C6 Corvettes. The pods can easily be repainted by owners of Vettes with other color interiors if desired, but the ebony pods will go with the black felt bottoms of OEM consoles and look nice without repainting, as well. The pods are hidden inside the consoles of course, when the consoles are closed.
![]() NOTE
NOTE
The GM port shown in the audio pod is designed to be used with the 2011-13 USB Nav radios; however, with the correct wiring, the 3.5mm jack can be used with this harness kit. The USB jack on the left will NOT be connected, although it is available for connection as a USB charging port if you elect to do so. The back of the USB port has a Mini-B USB jack. The 3.5mm jack on the right will be your new auxiliary input connected with the AUX-1C harness. This harness is connected at your XM receiver, the same as other AUX-1 harnesses. A shorter version AUX-1C VRT, is designed for convertibles, because the XM receiver is right behind the waterfall, above the console. Please note that the GM port is NOT included in the kit as described below, but see below for GM part numbers.
Here is the AUX-1C harness kit:

It is connected at the XM receiver, the same as all other AUX-1 harnesses. But instead of having a loose plug or jack for your music device connection, this kit allows the use of the GM port used with the newer USB Nav radios. Here are the ports you can use:

You will need to purchase one of the above ports from GM or Amazon or eBay or other online source.
Choose either the black port (GM part number 25832462) or the white port (GM part number 20870101).
Either of these should cost around $20.
Here is the rear view of the port:
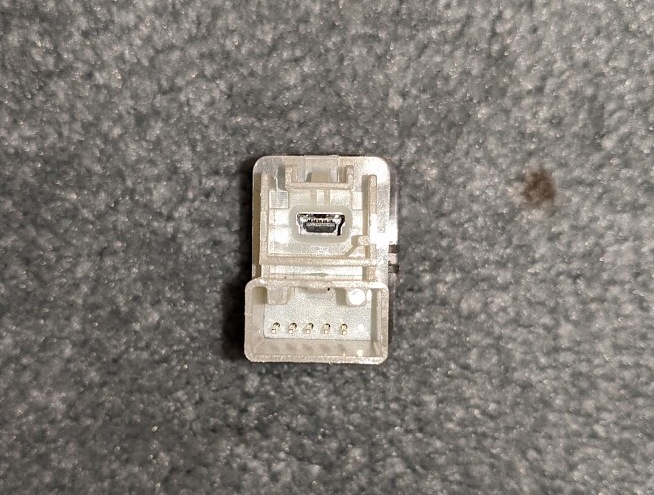
The AUX-1C connector will use the bottom pins.
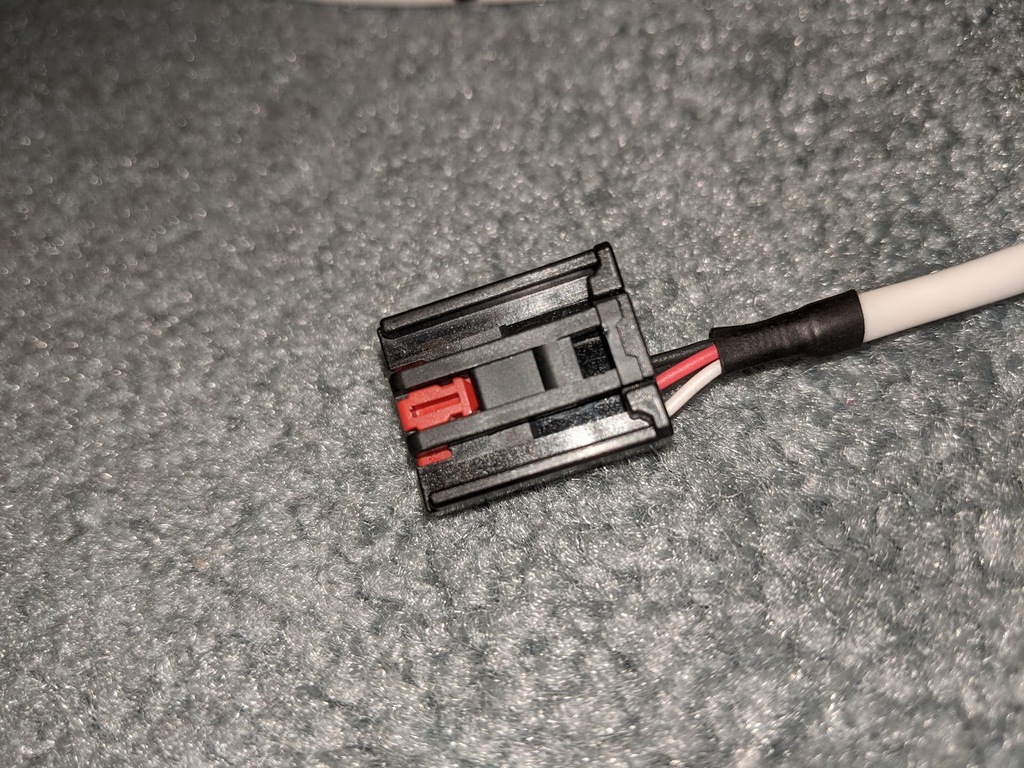
Here is the OEM connector on the harness to plug into the port:
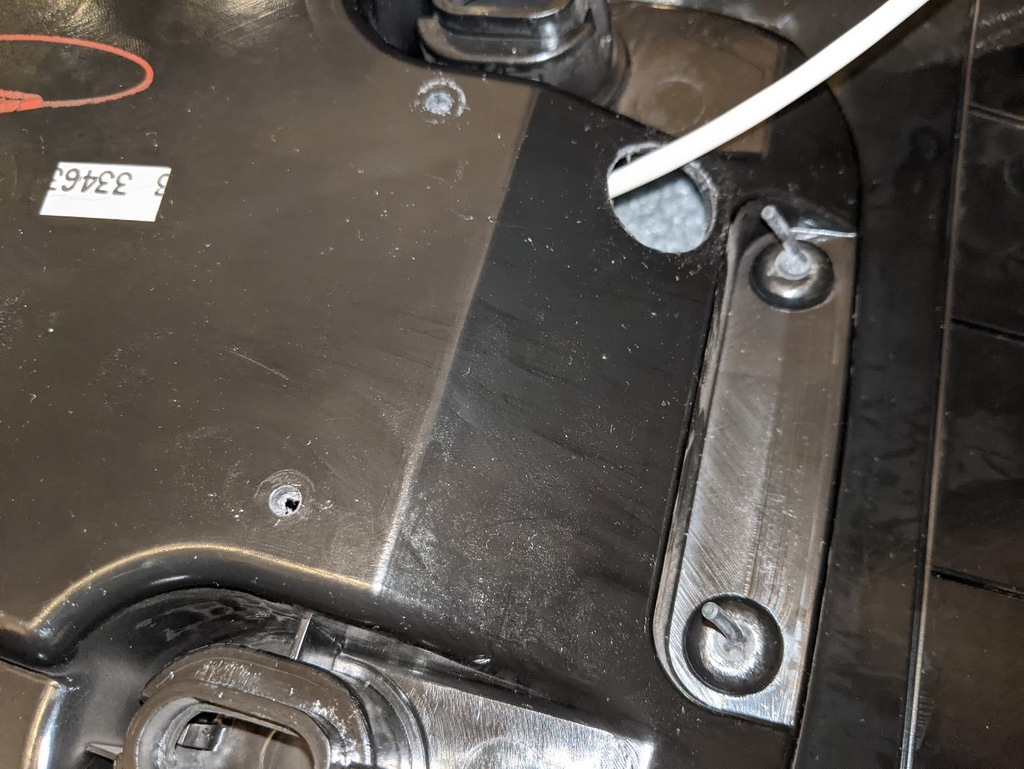
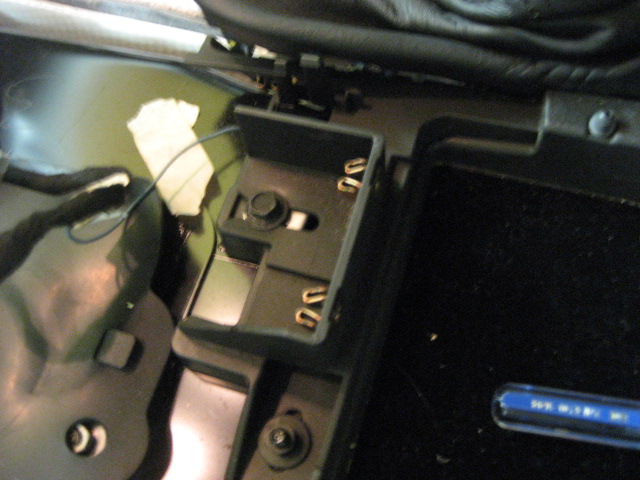
To install the new AUX-1C harness, you will need to make two simple modifications necessary to accommodate the new audio pod and wiring harness:
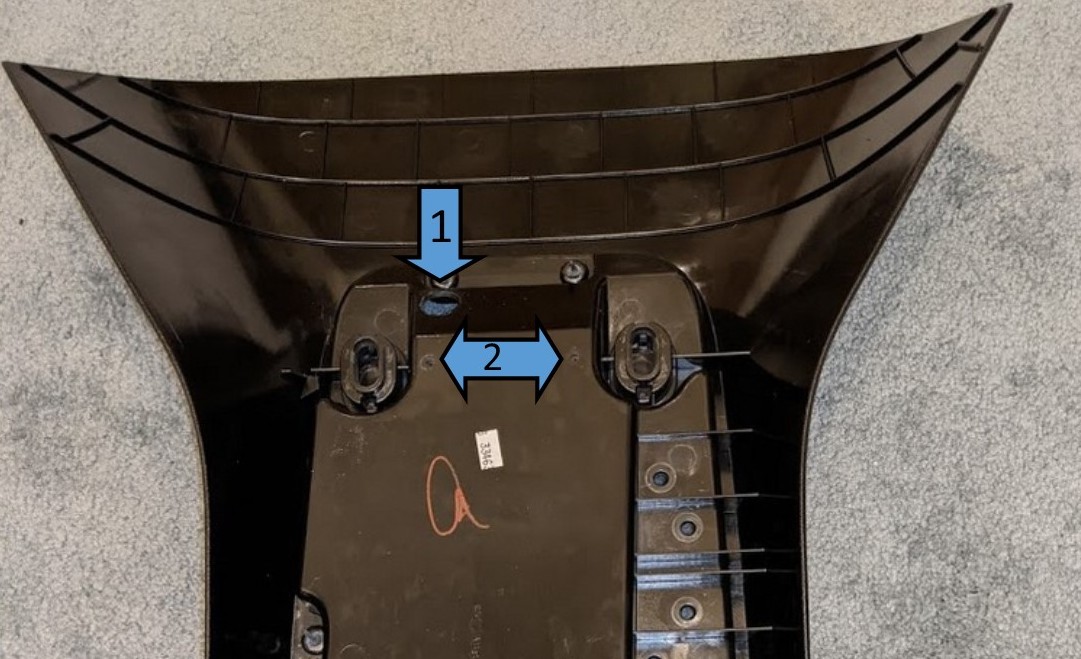
Modifications 1 and 2 shown above are done from the top:
A 3/4" hole is drilled as shown to allow the wiring to pass through to the USB/Aux port.
Two 5/32" holes are drilled for the pod mounting screws. A piece of chalk is included to rub on the screw head to locate the holes on the felt bottom.
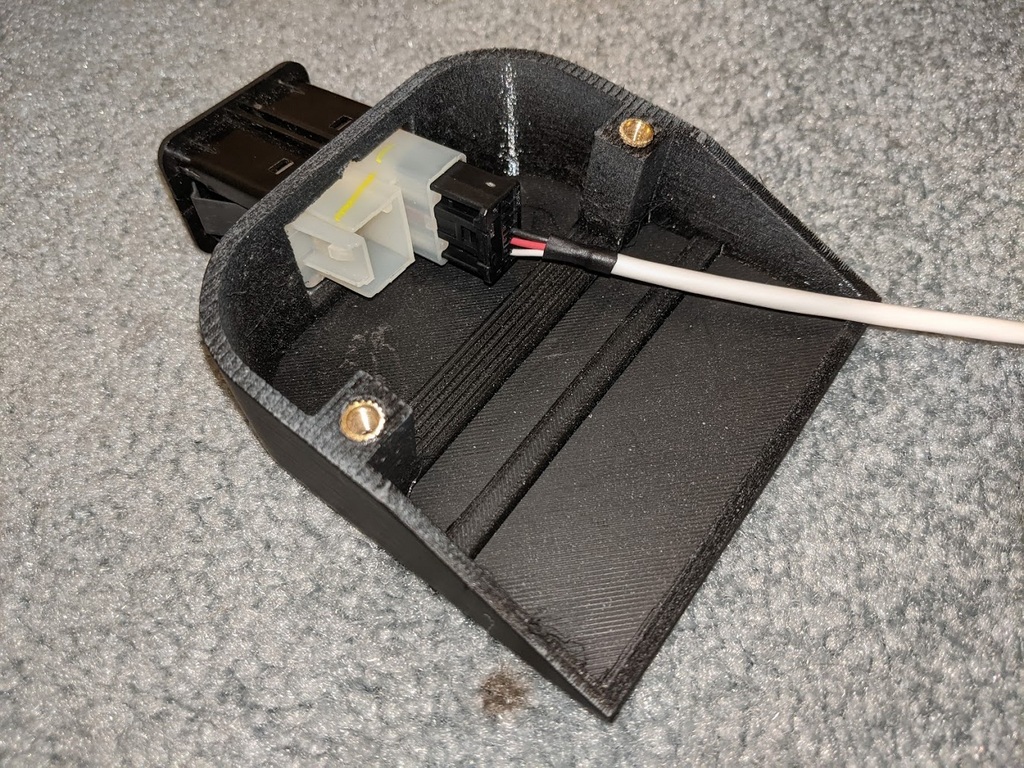
Run the harness cable through the 3/4" hole like this:
Insert the port into the audio pod:
And connect the harness:
Mount the pod to the console with the included screws.
This kit includes the audio pod with mounting screws and the custom wiring harness for connection to the XM receiver.
STEP BY STEP INSTRUCTION DETAILS:
1. Rear Console Removal
Once you have your tools and parts, you'll need to partially remove your center console by following this link:
http://www.kawal.net/centerconsole.htm
You don't have to unplug your console wiring, but you will need to lift the front part of the console high enough to gain access to this 10mm bolt holding the rear console in place:
Remove the two trim covers and the 10mm nuts:
and the console will come out.
2. Insulating Mat
Peel the rubber mat (if attached) off of the bottom of the console and place it on the drive tunnel in the original location.
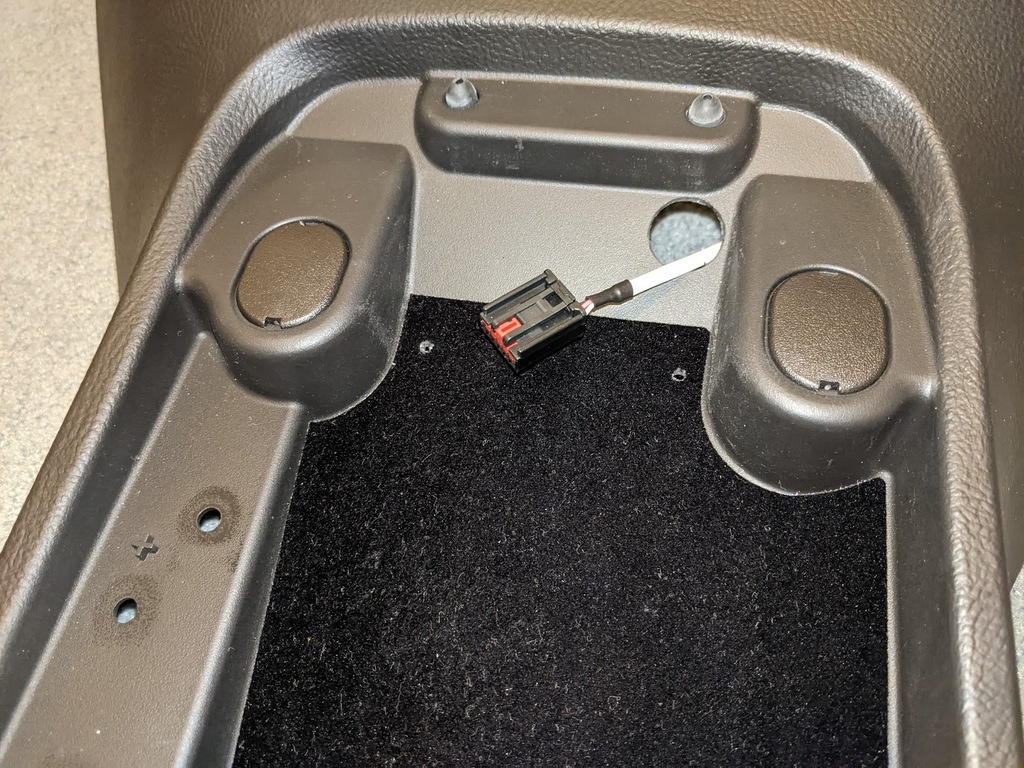
2. Modify your Console
Modify your original console as described in the preceding section by drilling the 3/4" hole and the two 5/32" holes for mounting the pod:
For the two 5/32" holes for mounting the pod, included in the kit is a piece of chalk. Rub the chalk on the two 4mm Phillips head screw heads:
Place the pod in position up against the back of the console and press down to leave chalk marks on the black felt on the console bottom. This will allow you to drill both holes in the exact place for mounting the pod:
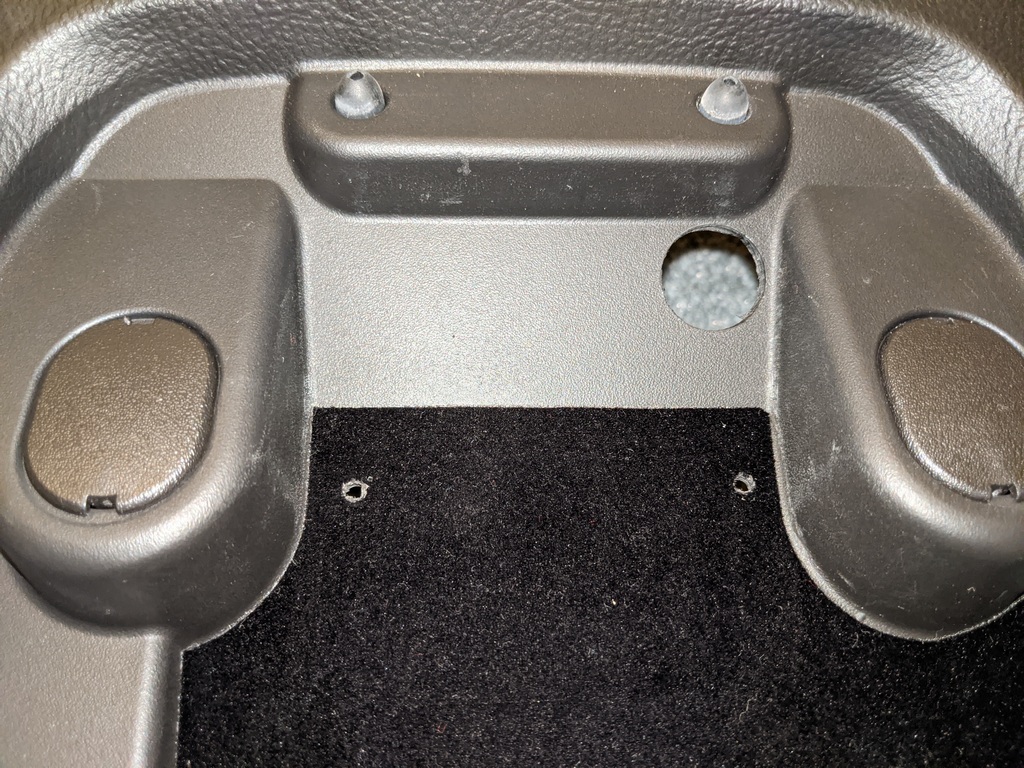
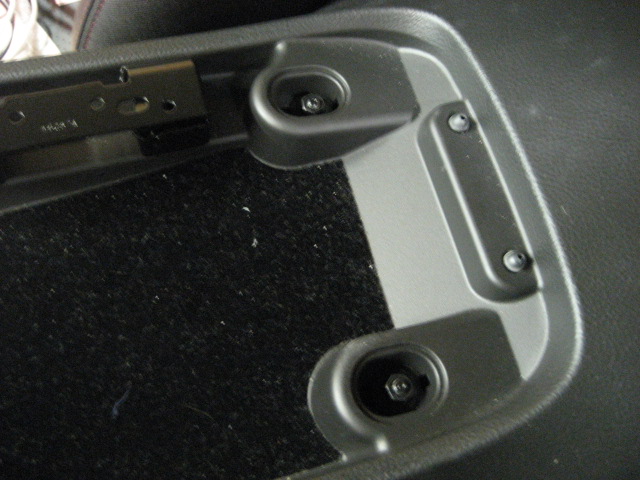
Here are the holes as shown from the bottom:

3. Route the harness through the 3/4" Hole
Route the harness cable through the 3/4" hole like this:
5. Install the USB/Aux Port
Install the USB/Aux port into the pod, then remove the two mounting screws:
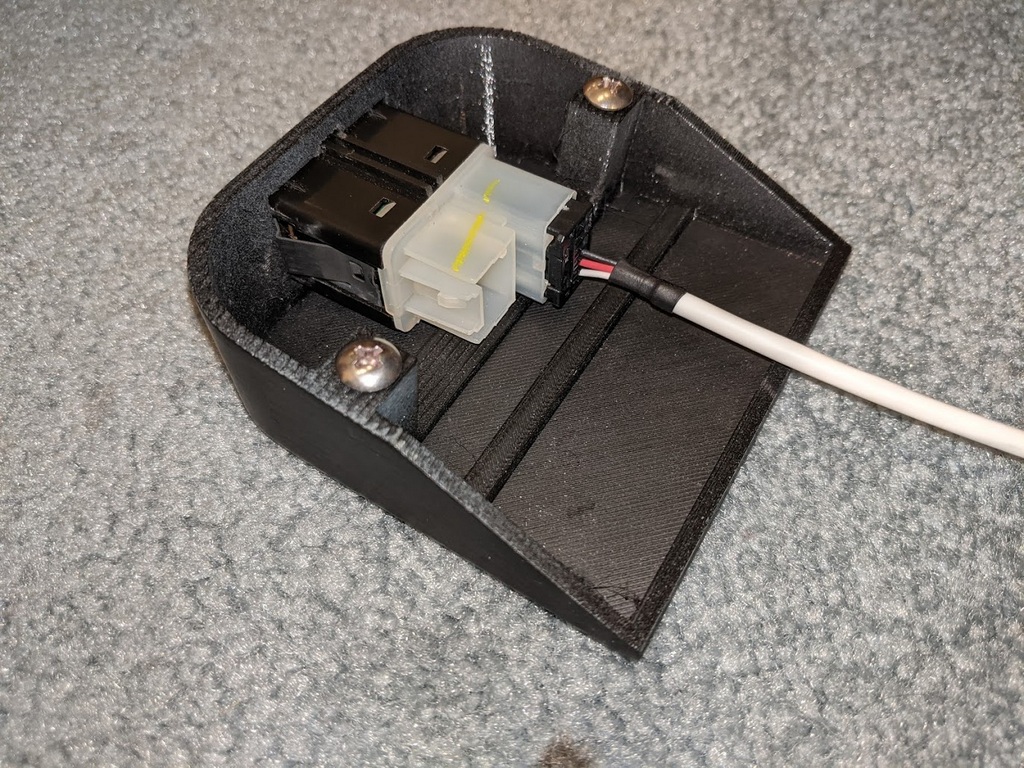
6. Connect the wiring to the Port
Line up the port connectors:
Then plug in the connector:
7. Mount the Pod with the included screws
Reinstall the rear console and run the harness cable to your XM receiver.
It is located behind the drivers seat, above the rear wheel well, behind the carpet in coupes and Z06's. In the convertible the XM receiver is behind the waterfall between the seats.
Follow the XM receiver connection instructions included with the harness kit.