Installation of a Version 2 PAL
in an '06 GMC Sierra truck
(updated 6/14/11)
Other Applications for the Version 2 PAL
Although the Version 2 PAL was originally designed for the C6 Corvette, the latest releases of software permit the use with a number of factory radios in a number of GM vehicles with the Class 2 communication system. Some of these vehicles include the '03-'06 Tahoes, Yukons, Suburbans, Escalades, Avalanches, and full size pickups. Other potential vehicles that can use the Version 2 PALs include '04-'07 CTS/SRX, '04-'09 Trailblazer, '05-'11 Colorado and Canyon, '04-'08 Envoy, '03-07 Hummer H2, '06-'09 Hummer H3, and '05 Grand Prix. Although I have no personal experience with some of these vehicles, this website describes the installation and operation of a Version 2 PAL in an '06 GMC Sierra pickup truck. This should be almost identical to the installation in all '03-'06 full size pickups (including Tahoes, Yukons, etc.).
Please note that each of these vehicles may have slightly different wiring than the C6 Corvette. Do not order a Corvette PAL kit without first emailing me with your vehicle information. I may need some wiring information from the Service Manual for your vehicle or at least a digital photo of your connectors. The wiring differences are usually minor, if at all, but any difference will result in your PAL not working. I will usually have to make a slight modification to the installation harness or include a different harness in the PAL kit.
Introduction
This web page provides details and photos for installing the new Revision 2 PAL in your GM truck.
There are two ways of installing the PAL, depending whether or not you have the XM radio option U2K.
Option 1: For trucks equipped with an XM radio receiver.
Option 2: For trucks without an XM radio receiver.
Click here for lots of Frequently Asked Questions about the PAL
Trucks with an XM radio receiver (RPO Option U2K)
First, find your XM receiver:
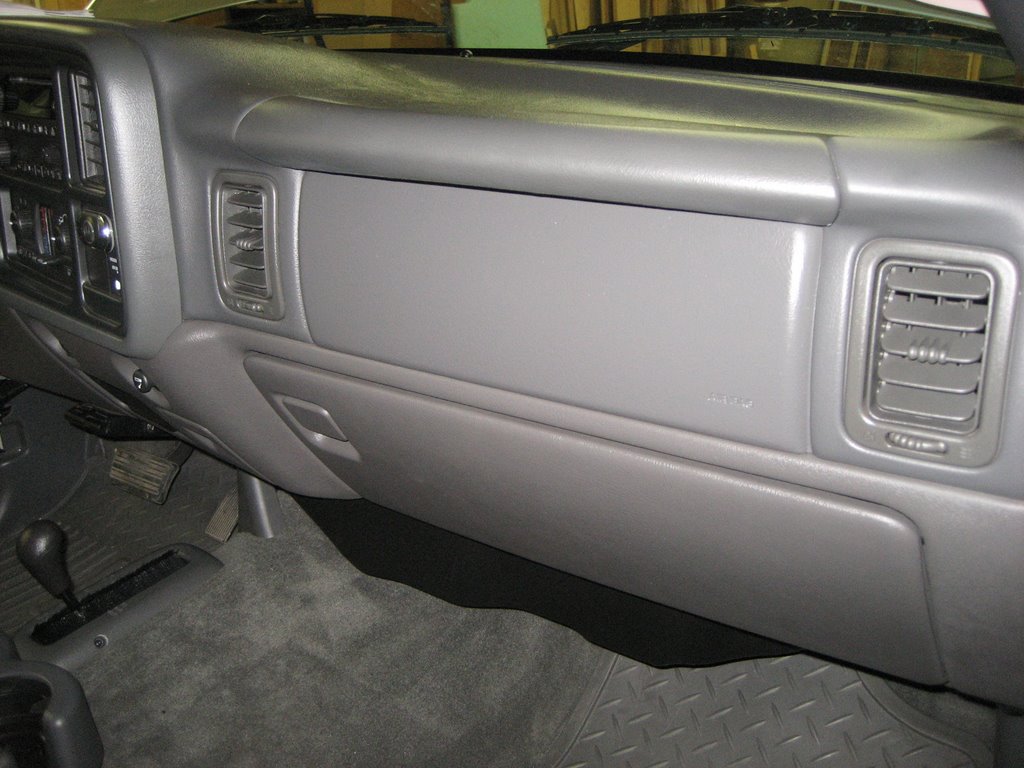
Open your glove box and take a look at the stop on the right:
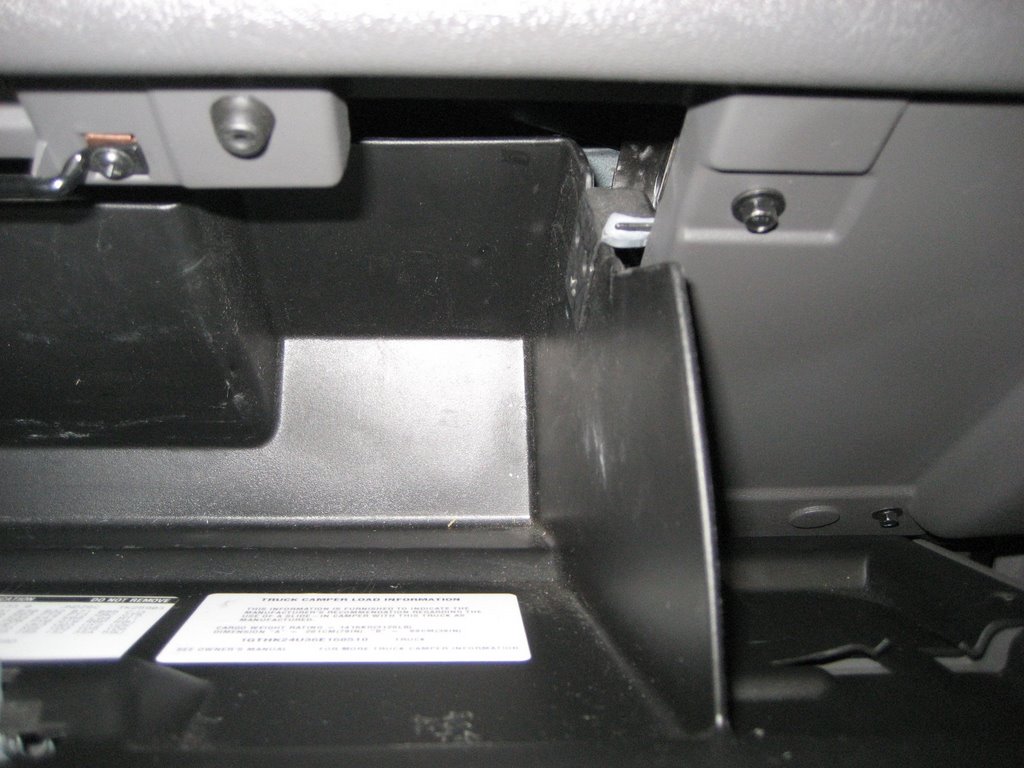
Deflect the stop to the left to allow the glove box to fall open:

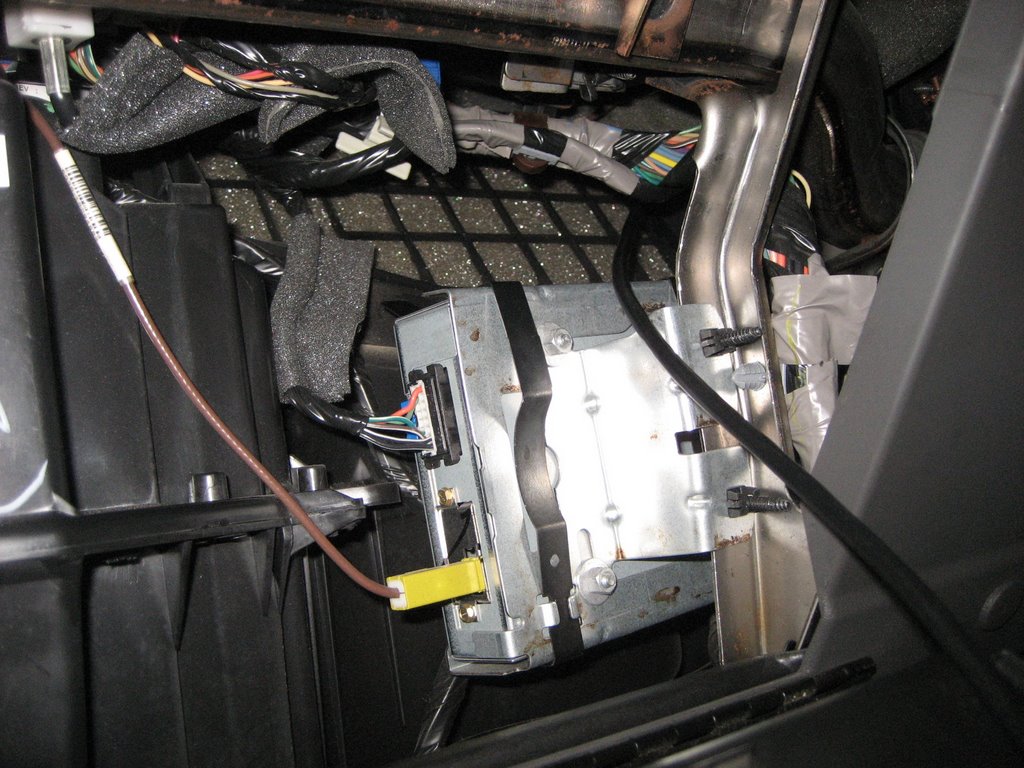
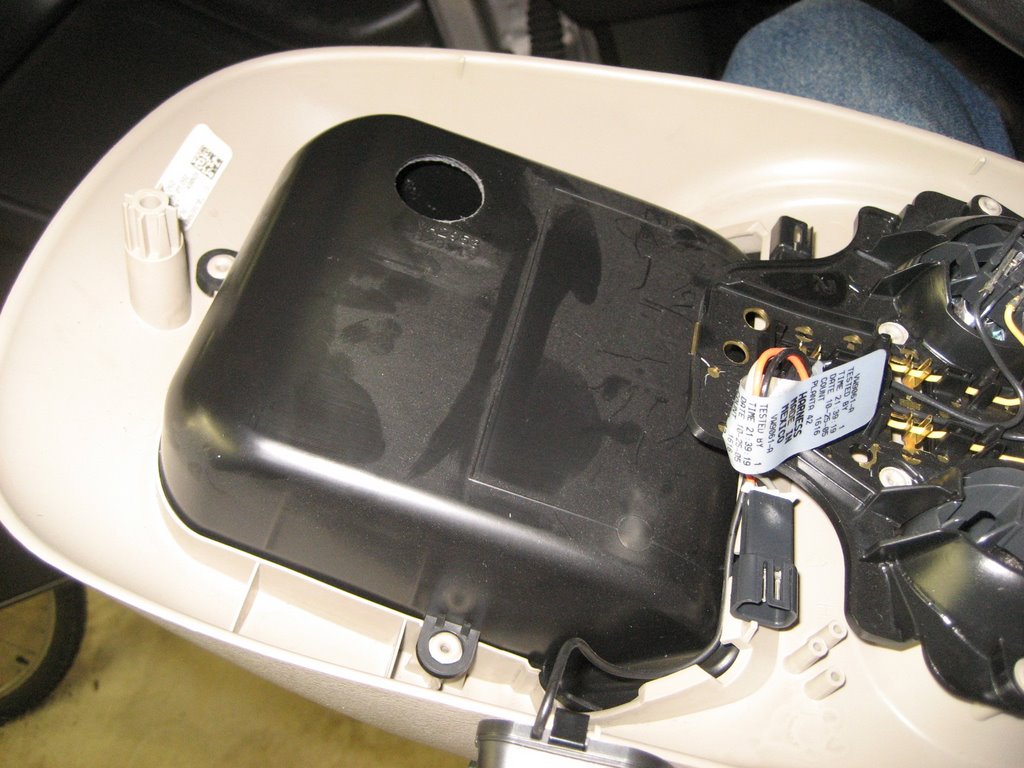
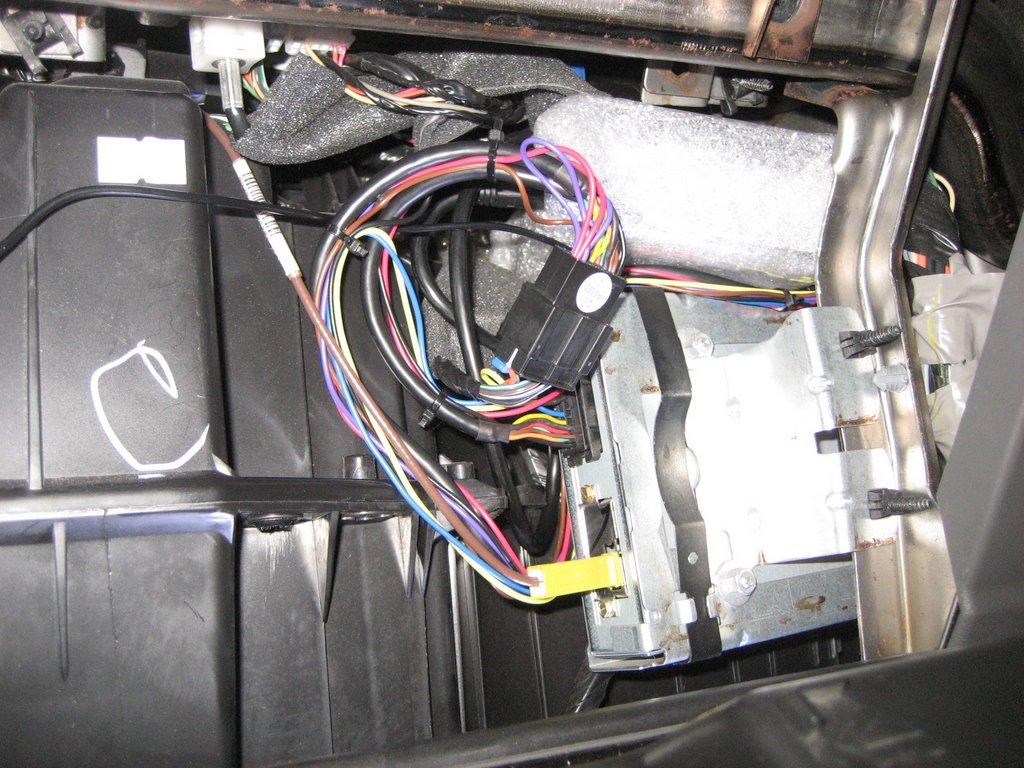
Here is your XM receiver:
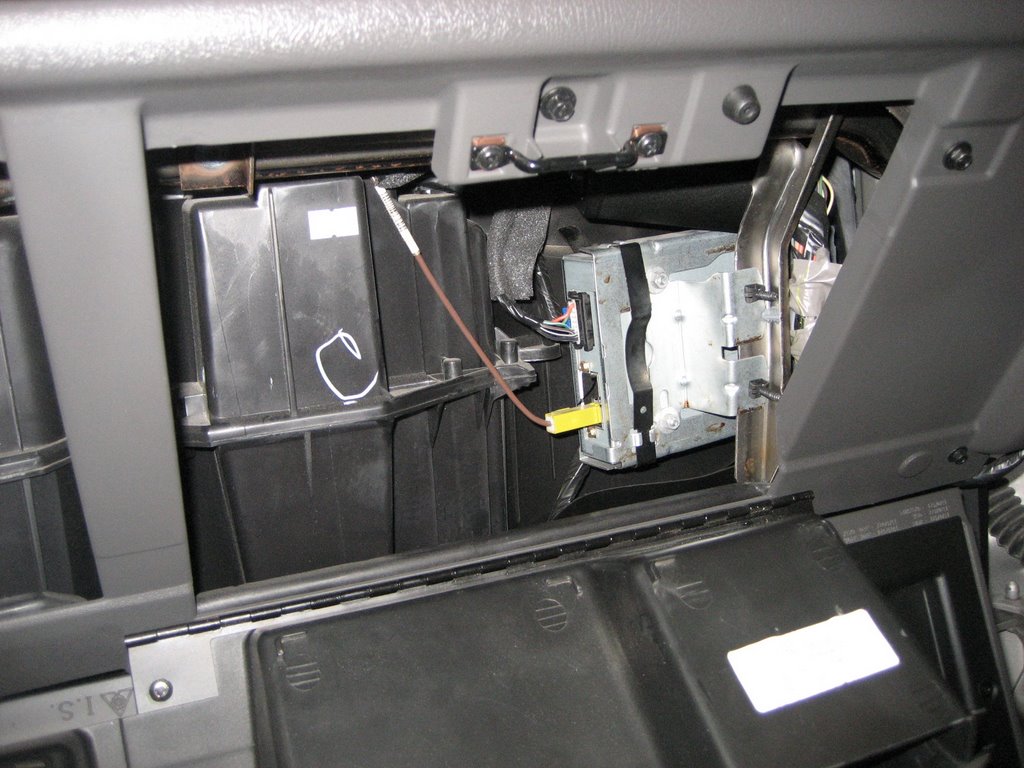
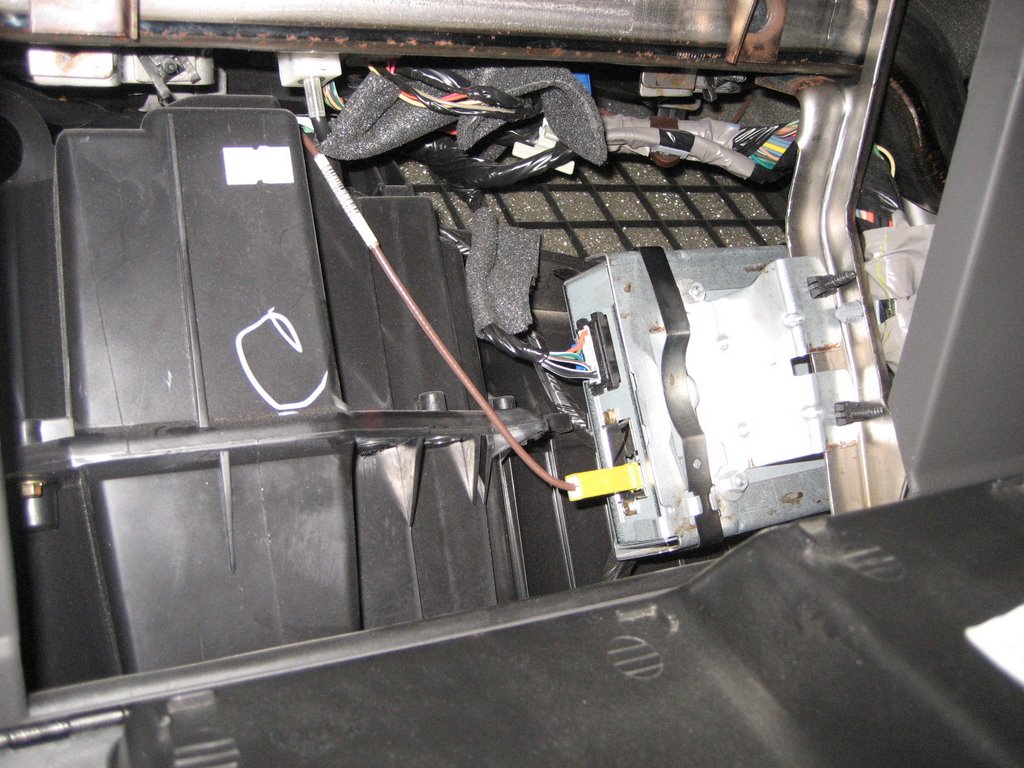
Here is the space above the XM receiver where the PAL module can be installed:
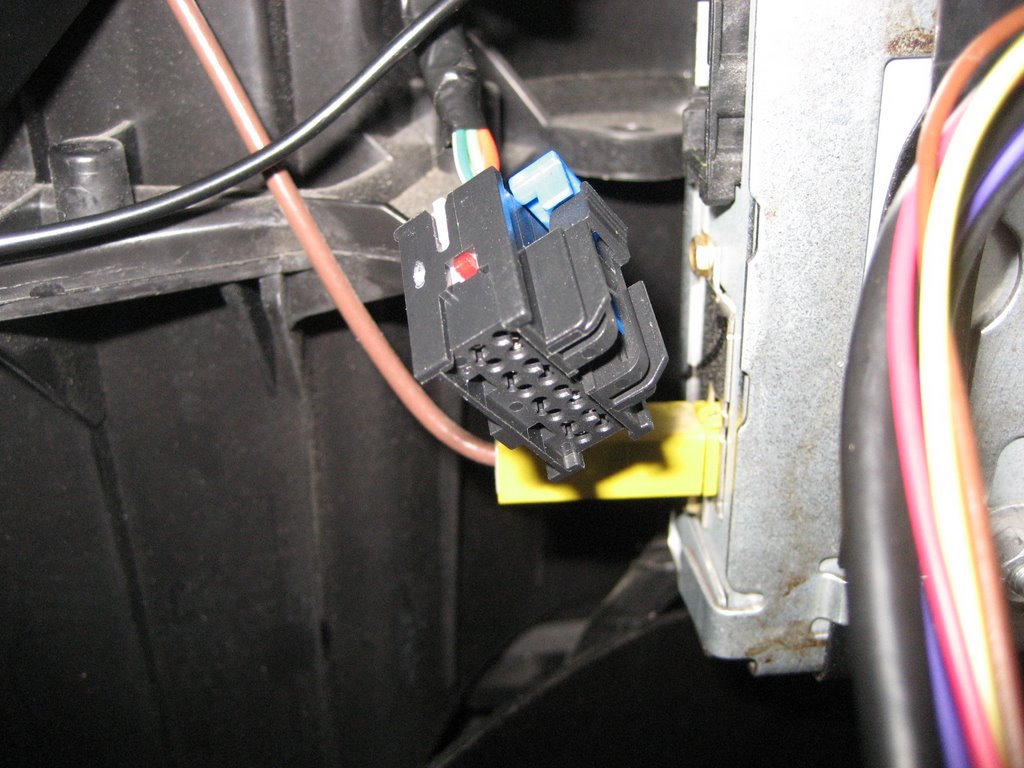
Unplug the 16 pin connector from the XM receiver. See the blue tab lock? You must pull that back as shown to be able to push down the connector locking tab before you can remove the connector:
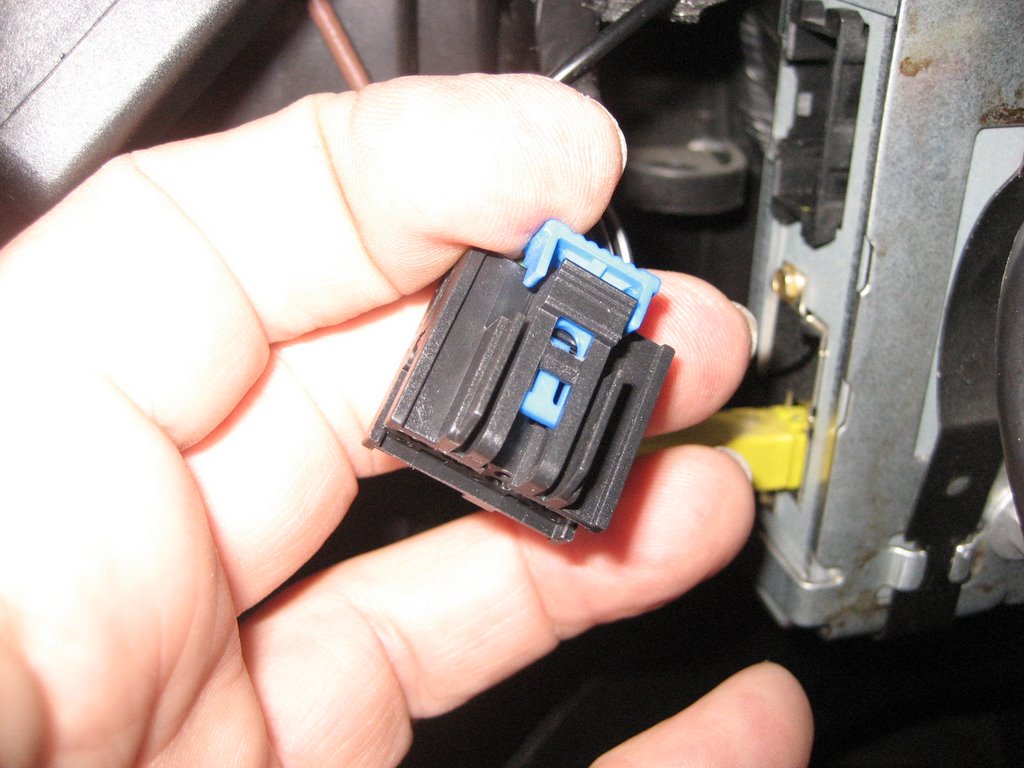
Here is another view of the connector after it is removed from the XM receiver:
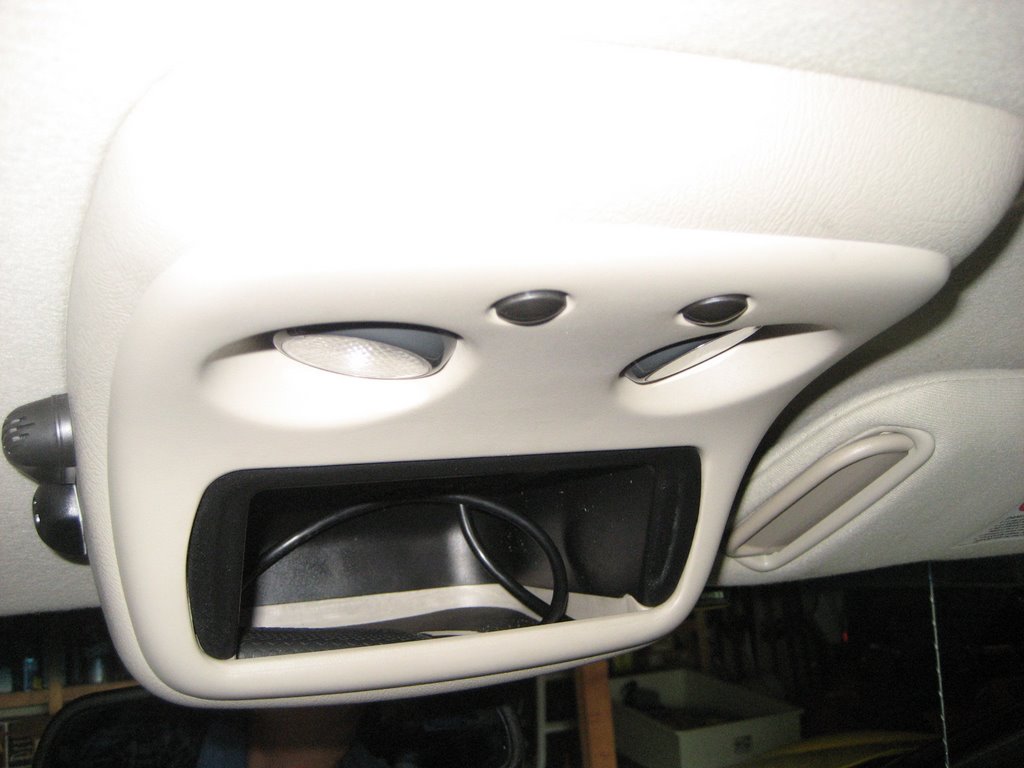
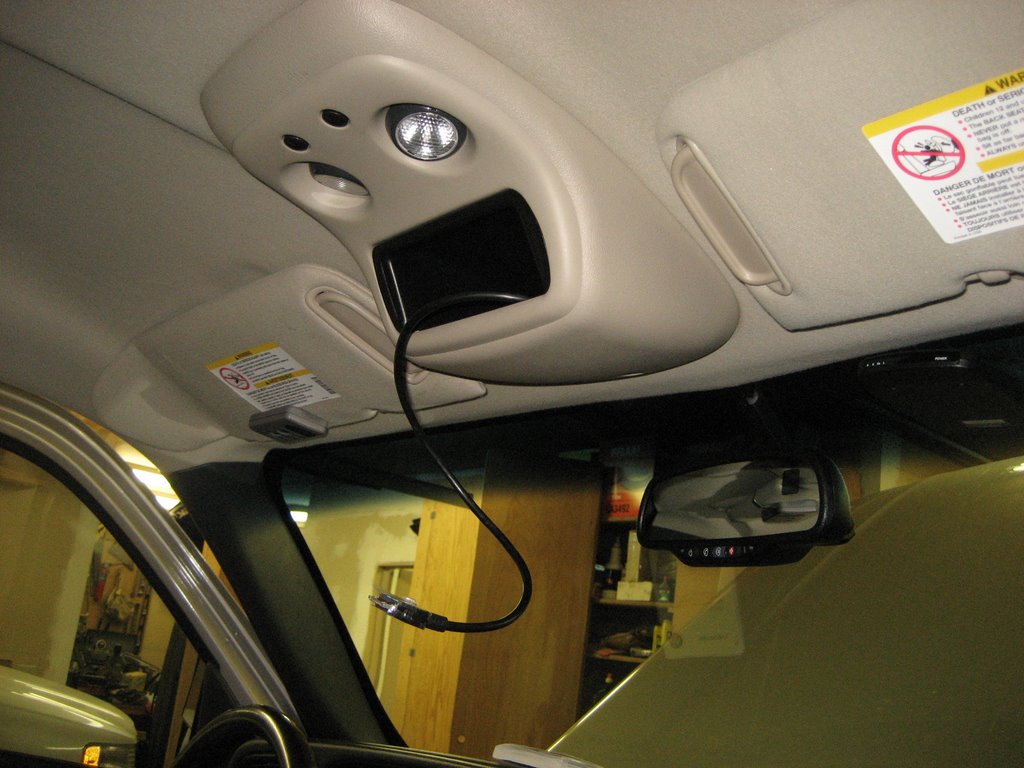
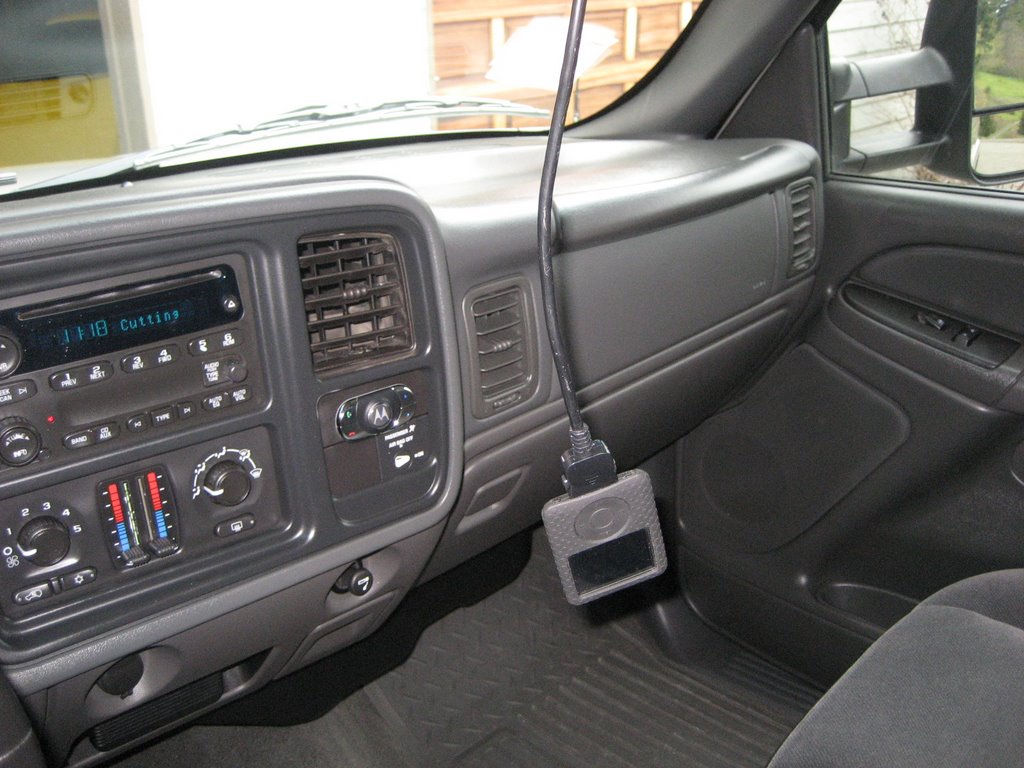
Now you must decide where you want to keep your iPod.
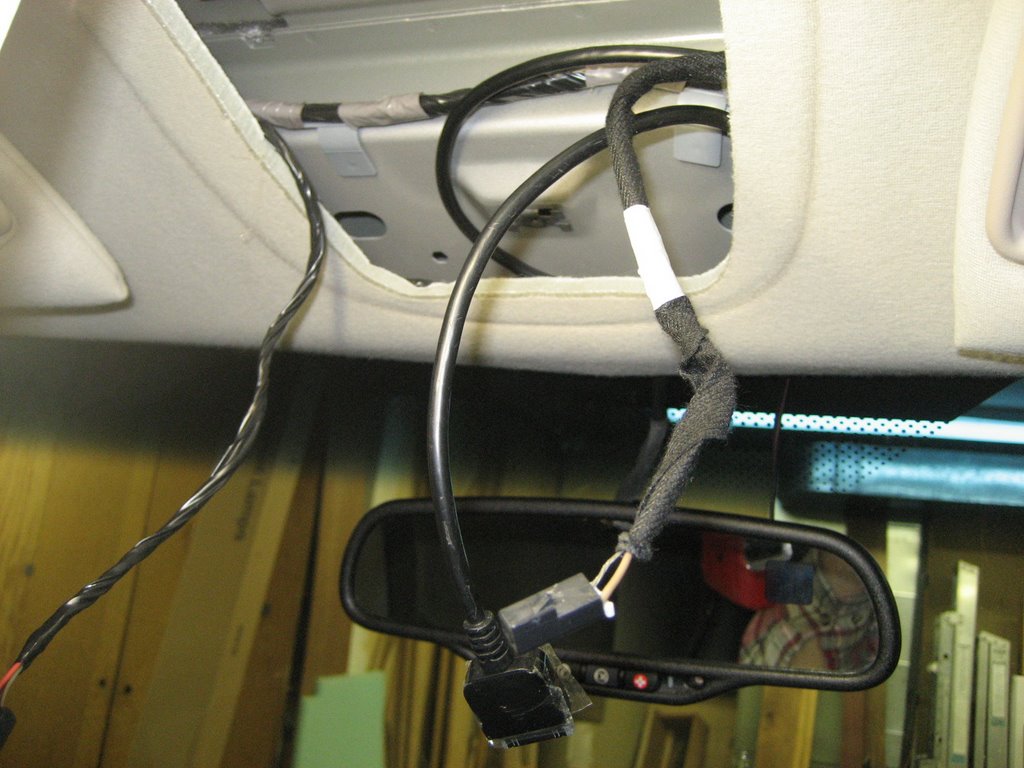
I chose the upper roof console, but you can choose most anywhere the 8' iPod cable will reach:
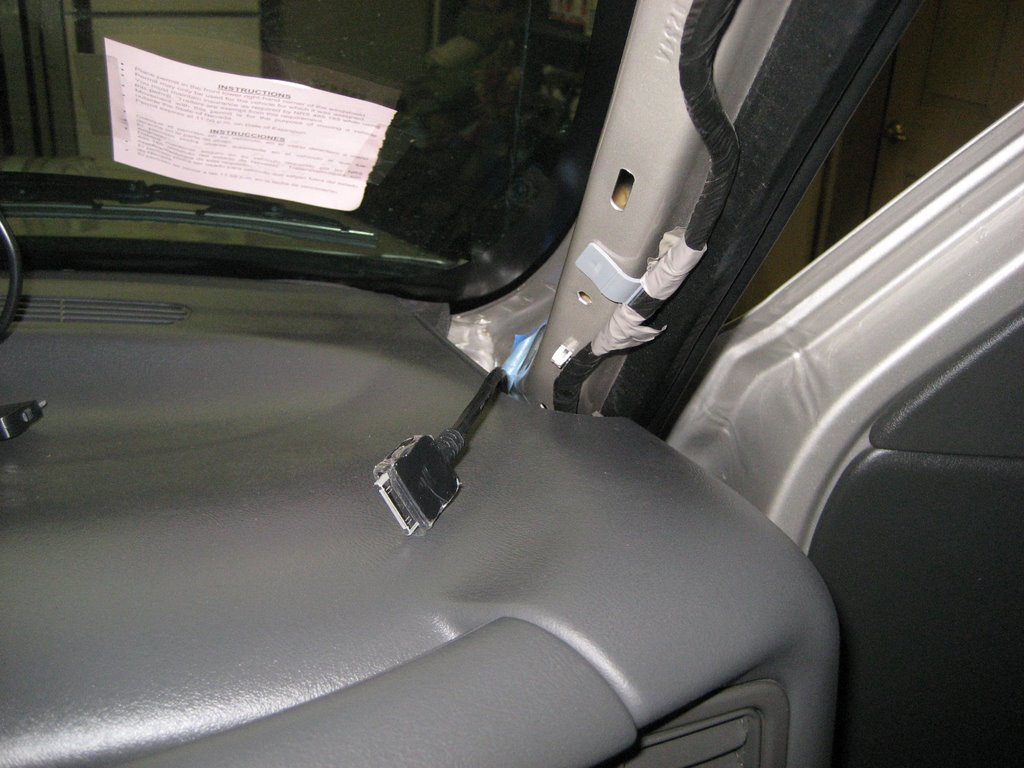
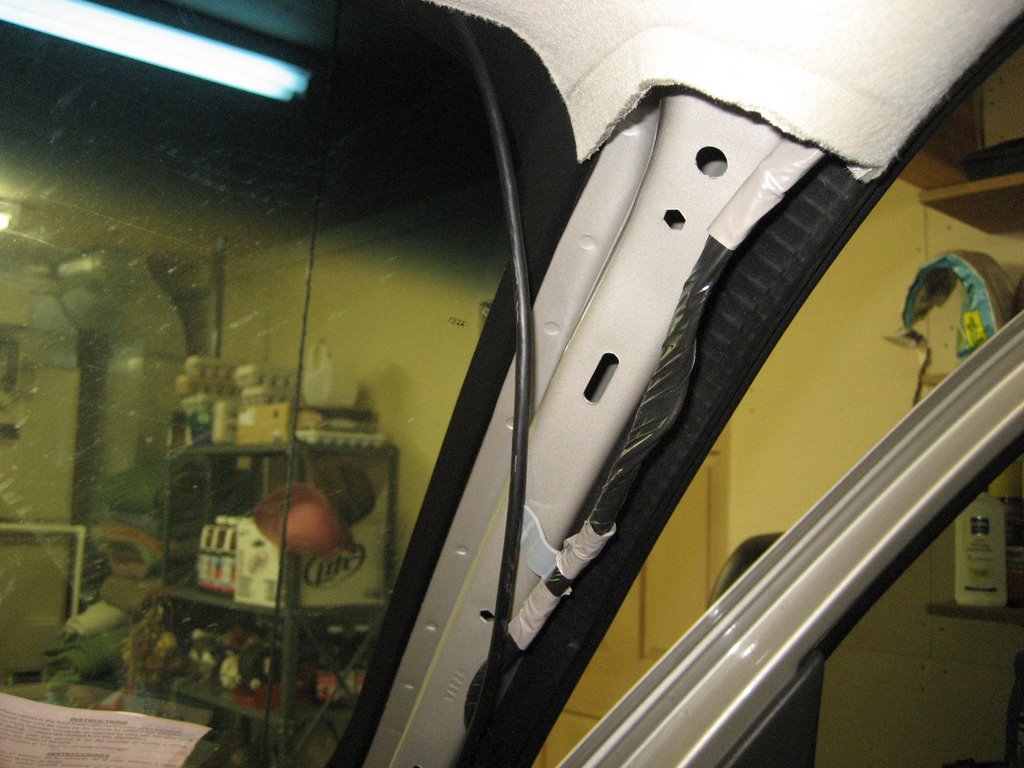
To route the iPod cable to the roof console, you will remove the trim on the windshield pillar:
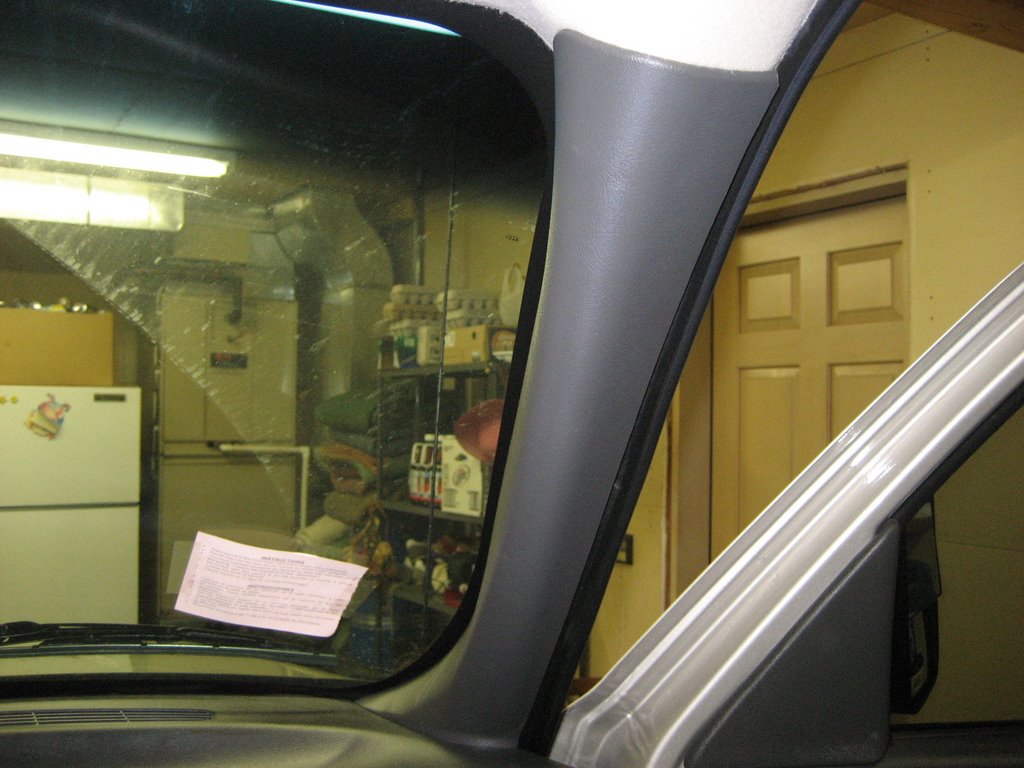
It's easy to remove - just pull on the trim to unseat the single clip:

Pull out the trim:
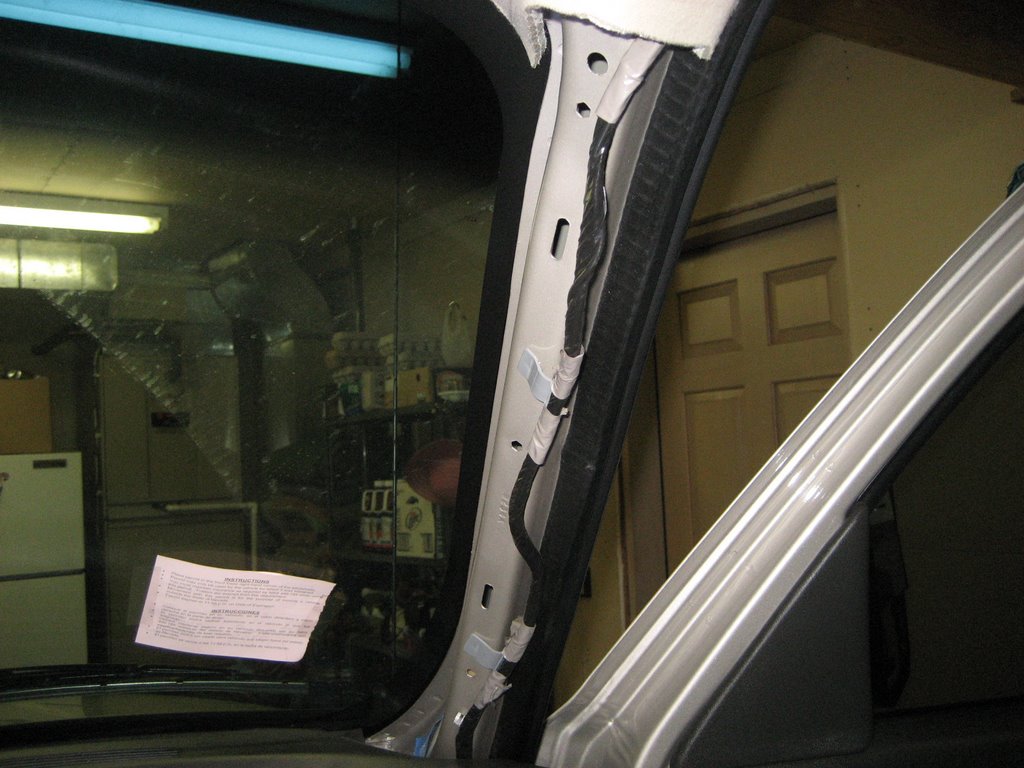
Route the iPod cable from the XM receiver area to the pillar area. I found it easiest to push a plastic strap down from the top and tape the iPod cable to it, so you can pull the cable up from the bottom.
The area above the XM receiver is pretty small, so it's hard to get your hands in there:
Here is the iPod cable from the bottom:
Pull the cable until about this much is left at the bottom:
Remove the overhead console by removing the single screw near the front of the console. Pull it down and the two clips near the rear will pull out. Also remove the sun visor bracket with a single Torx screw so the headliner can drop down a bit.
Feed the iPod cable above the headliner through the console opening:
Here's the iPod cable near the pillar:
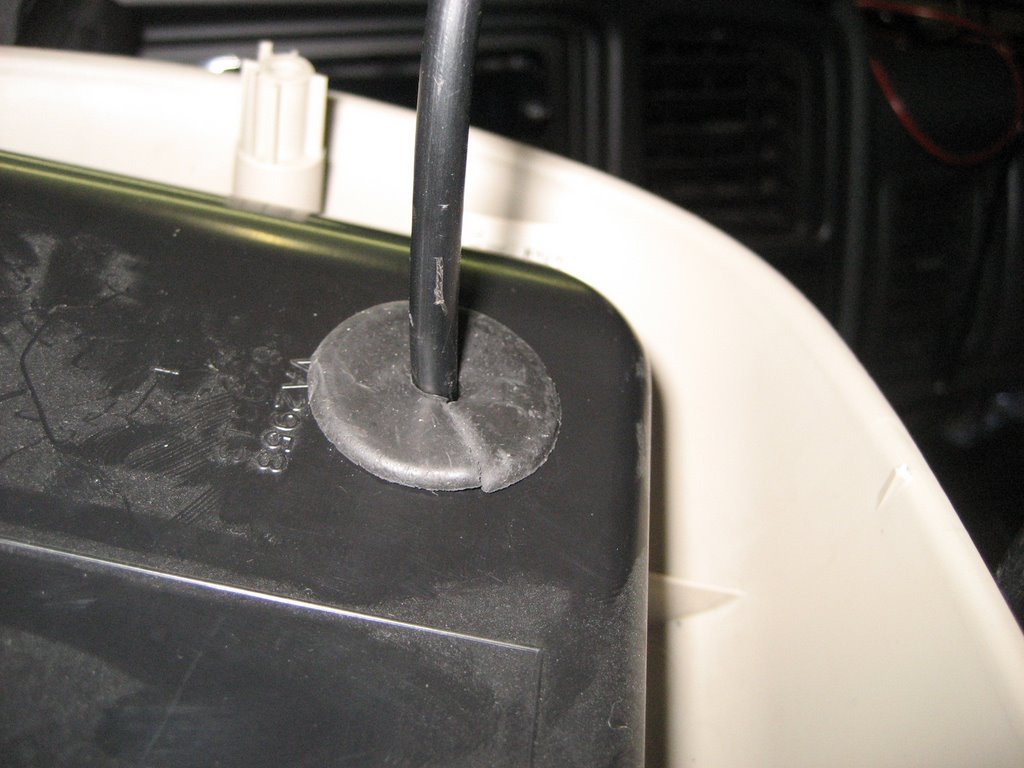
Reinstall the trim. I chose to drill a 1" hole in the console to bring the iPod cable through:
Using the supplied rubber grommet, feed the iPod cable into the console:
Reinstall the console with the single screw:
OK, now we install the PAL module.
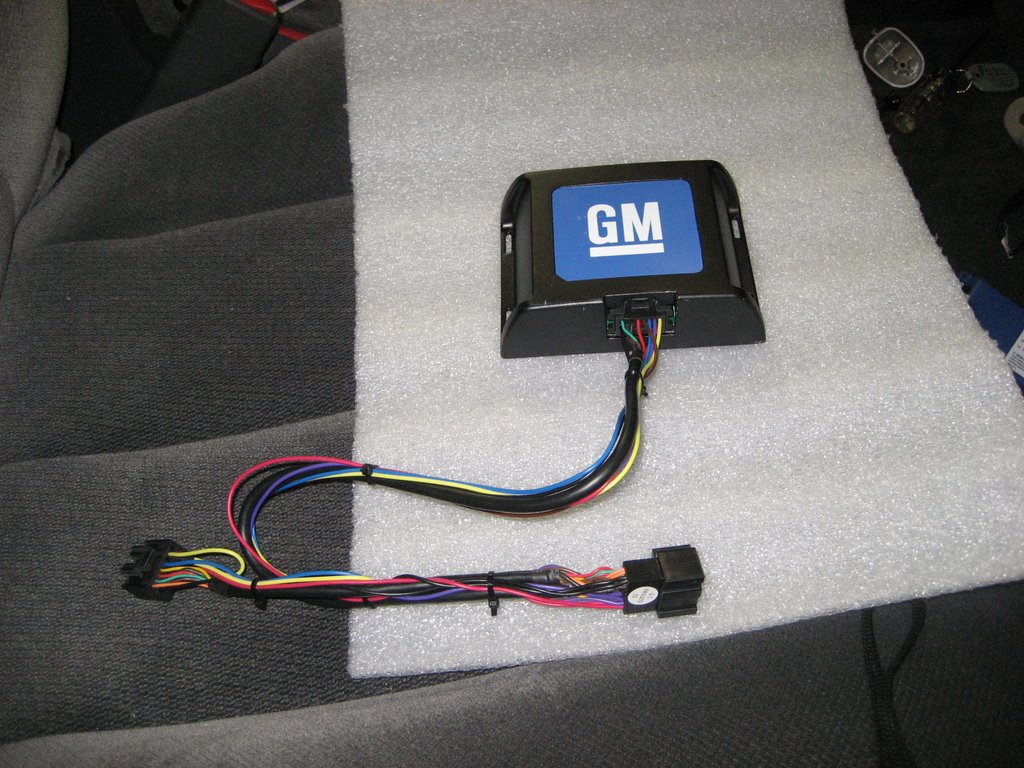
Plug in the installation harness:
The module must fit in the small area above the XM receiver, and you don't want it to rattle around.
I chose some foam padding I had laying around to wrap the module.
Wrap the module and cut a hole for the iPod cable connection:
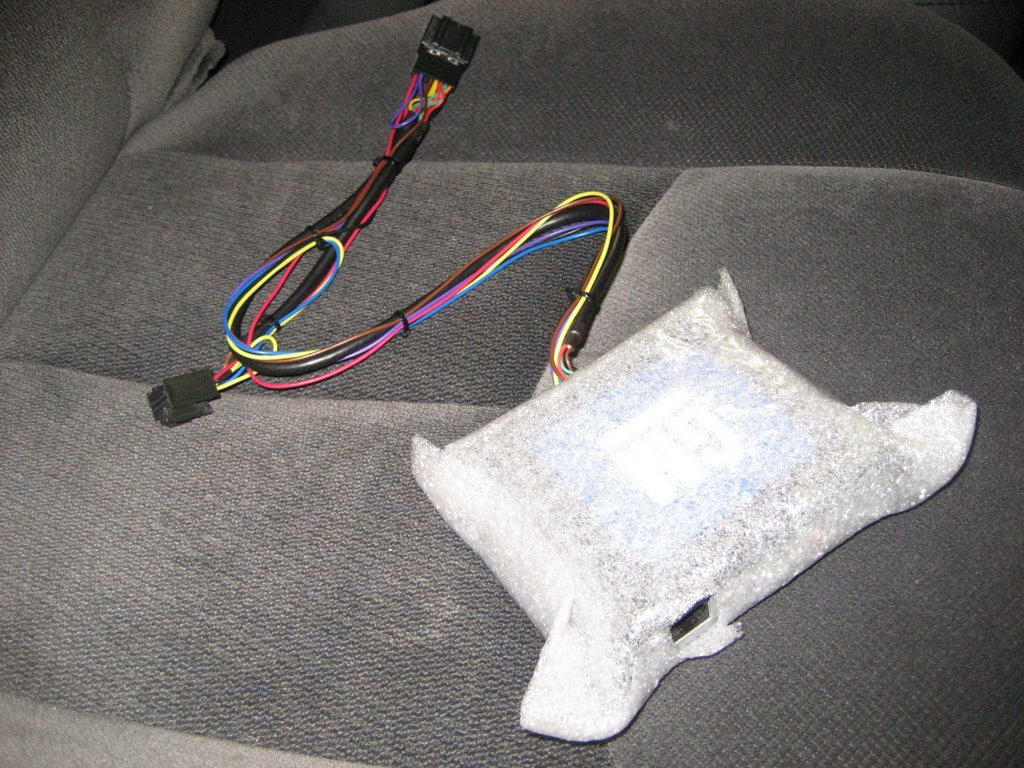
First, connect the iPod cable to the module and push the module in place above the XM receiver.
It fits better if the module is upside down.
Do not kink the iPod cable and make sure the RJ50 connector is locked in place:
Then connect the installation harness to the XM connector and the XM receiver:
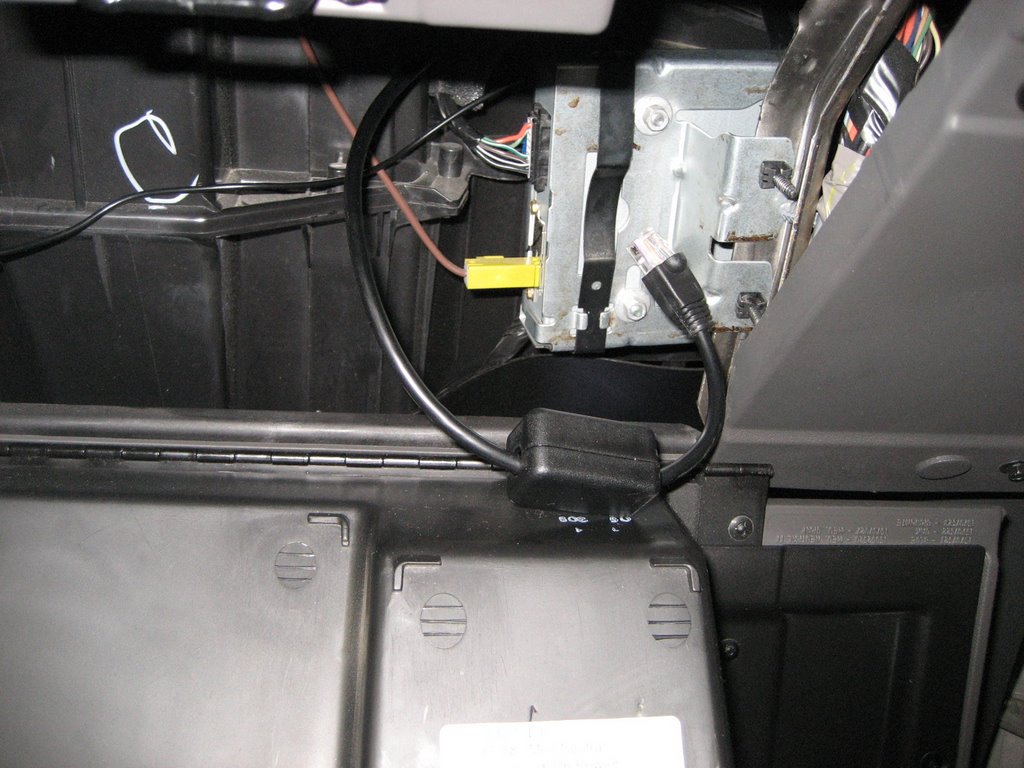
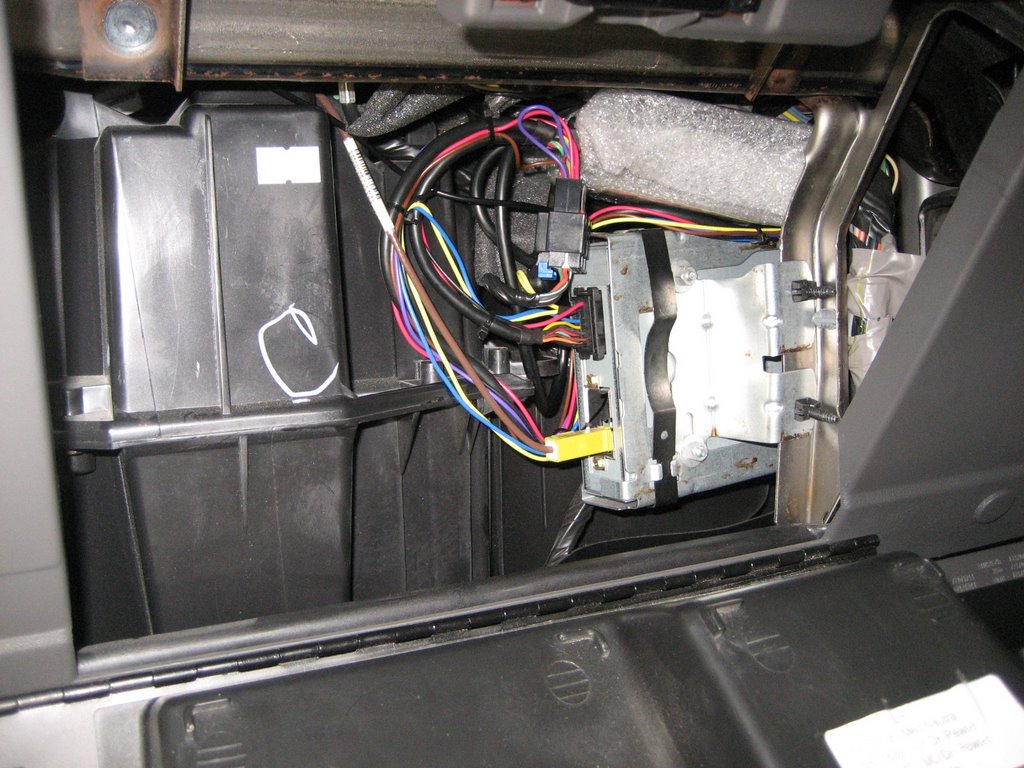
Push the module in place and neatly tuck the iPod cable and installation harness behind the XM receiver as shown.
Be sure the iPod cable is not kinked or putting any side pressure on the RJ50 connector:
Make sure the glove box does not interfere with the wiring, then close it up:
Connect an iPod to the iPod cable:
Here is the non-Nav radio in the '06 truck:

Use the BAND button to get to XM2.
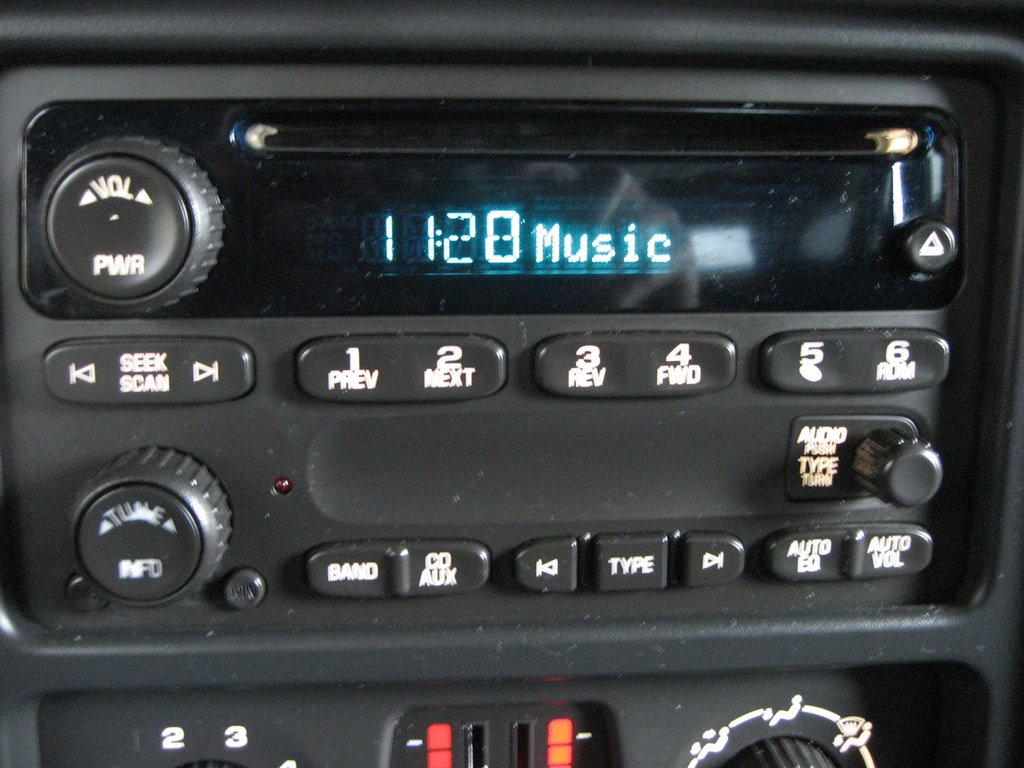
This is the Playing Menu.
From then on, you use the Left/Right SEEK/SCAN button and the bottom tuning knob for controlling the PAL.
Holding down the Right SEEK/SCAN button until it beeps will get you to the Music Menu:
Use the Tuning Knob to scroll through your search choices: Playlists > Artists > Albums > Genres > Songs > Podcasts > Source.
(Audiobooks is under the Genres menu.)
When you get to your choice, push the Right SEEK/SCAN button. Then again use the Tuning Knob to scroll through the next level of menu choices.
Press the Right SEEK/SCAN button to select and the Left SEEK/SCAN button to back out.
From the Playing Menu, access the Settings Menu by holding down the Left SEEK/SCAN button until you hear a beep:
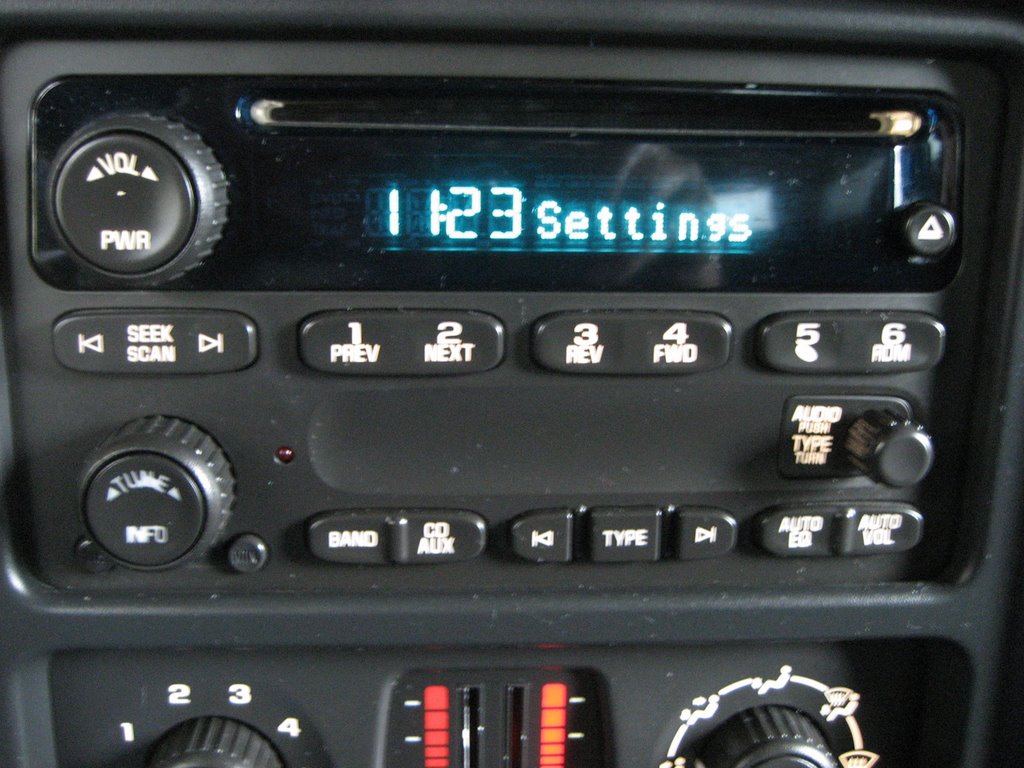
Like the Music Menu, use the Tuning Knob to scroll through your choices: Language > Display > Repeat > Shuffle > Q-Links > Version.
Once again, when you find your choice, select it with the Right SEEK/SCAN button. Then again use the Tuning Knob to find your next choice.
The Left SEEK/SCAN button will back you out.
One of the choices is Q-Links:
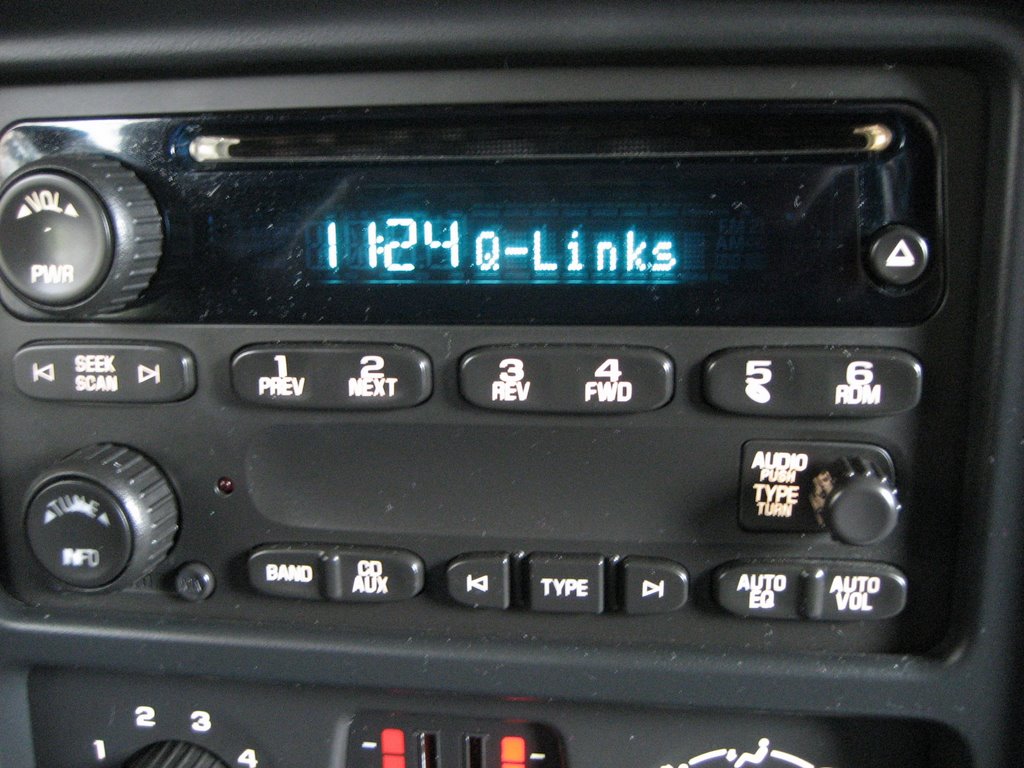
Again, use the Tuning Knob to find your choices: Playlist > Artists > Albums > Genres > Songs > Podcasts > Music (menu) > Settings (menu) > Direct (mode) > Aux (mode) > PAUSE > Fast Forward > Rewind.
When you see your choice, you can assign any one of the six preset buttons below the display to remember one of these choices. Just press and hold down the preset button to remember that choice.
Have fun with your PAL.
Trucks without an XM radio receiver
First, open your glove box and take a look at the stop on the right:
Deflect the stop to the left and allow the glove box to fall open:
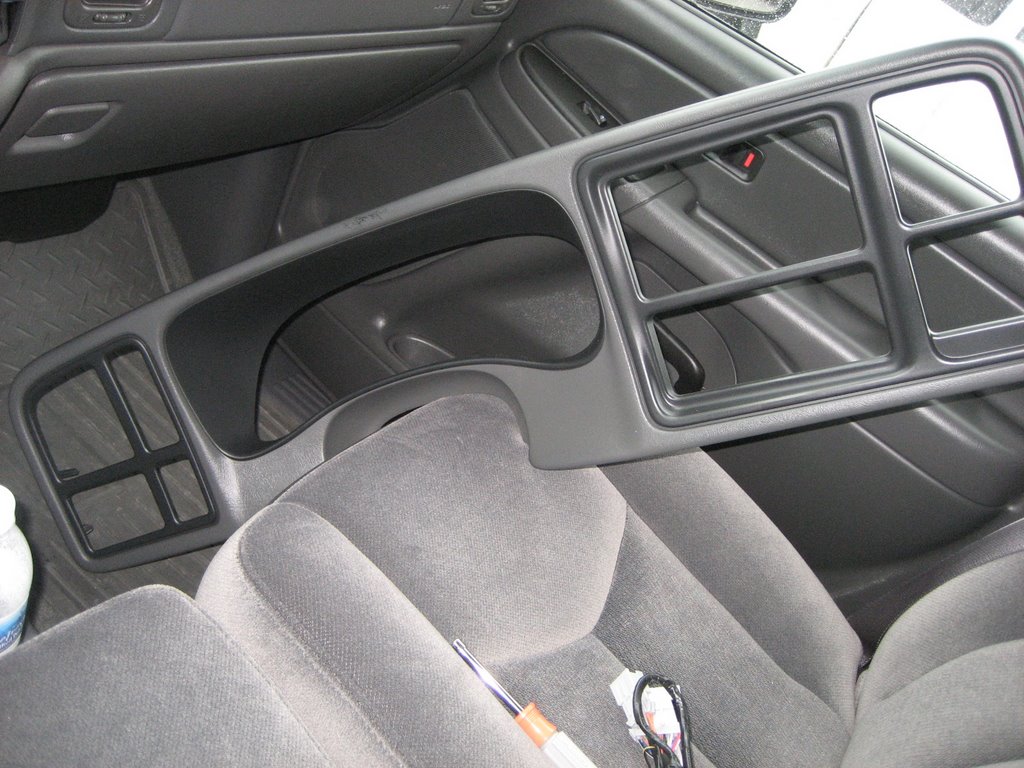
Verify you do not have an XM receiver. Note the photo below is from an '06 WITH an XM receiver.
This should be empty space and the area in which you can store your PAL module:
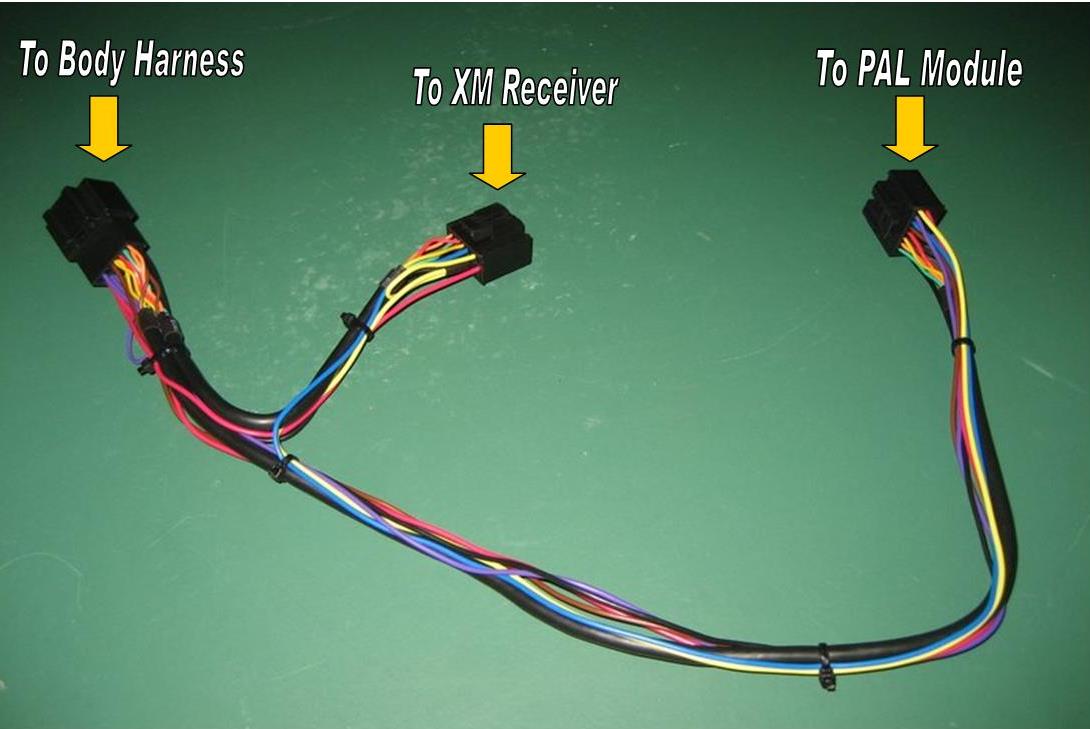
Without an XM receiver, you will need to connect your PAL with this harness:

The connector on the far right plugs into the PAL module.
The four connectors on the left connect between the radio and the body harness that is currently plugged into your radio.
Here's another shot of the harness:

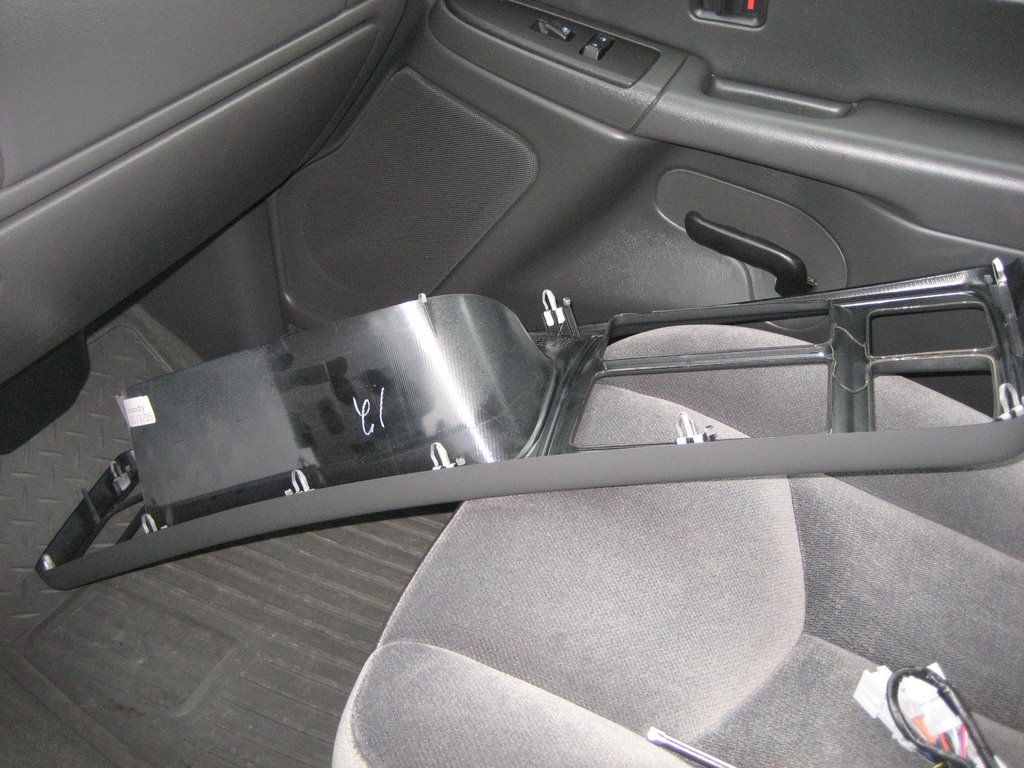
To connect to your radio, first pull off the bezel:
Lower your steering column all the way, then lower your gear shift lever all the way down (you'll need your ignition key).
Just pull on the bezel and it will pop out.
Deflect the bezel as necessary in the instrument cluster area to clear the dash.
Here's the bezel from the back:
Here's the dash with the bezel off:
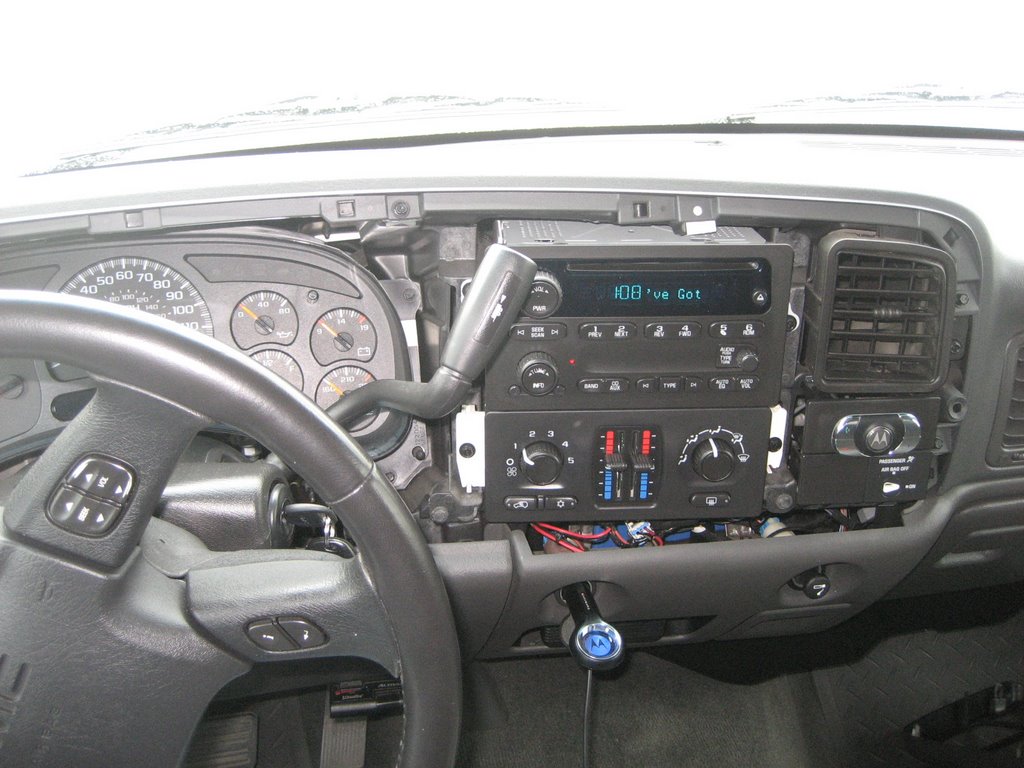
This gives you easy access to the radio and other components.
Here's the radio up closer:
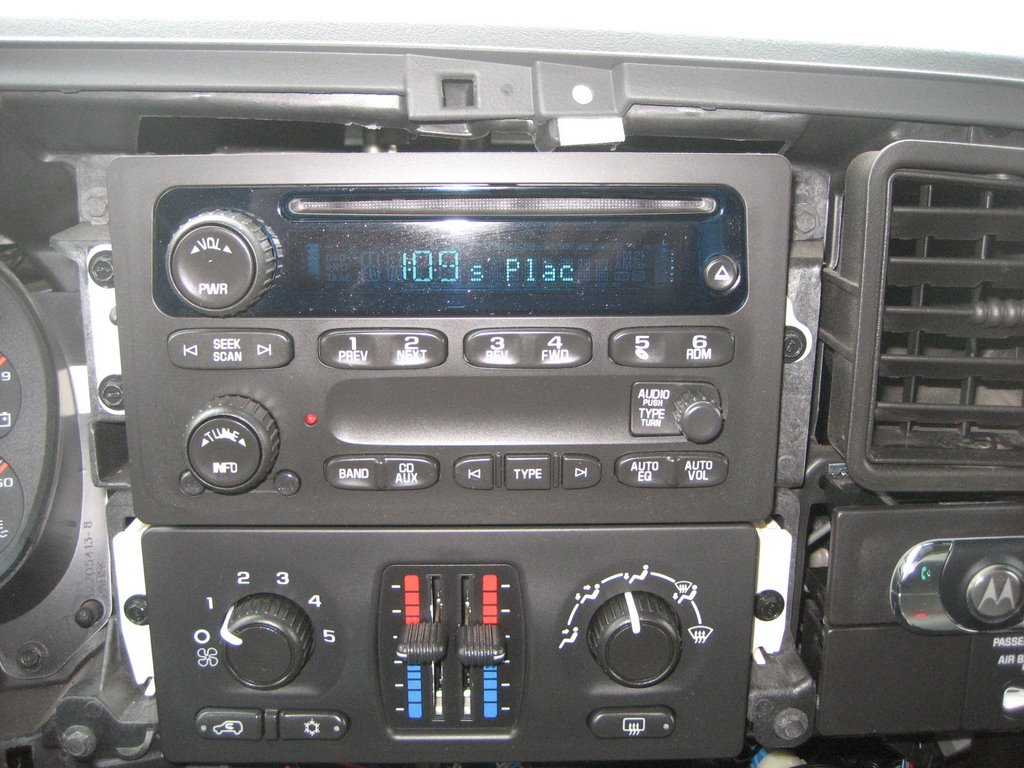
You'll need a 7mm nutdriver to easily remove the three screws holding the radio in place.
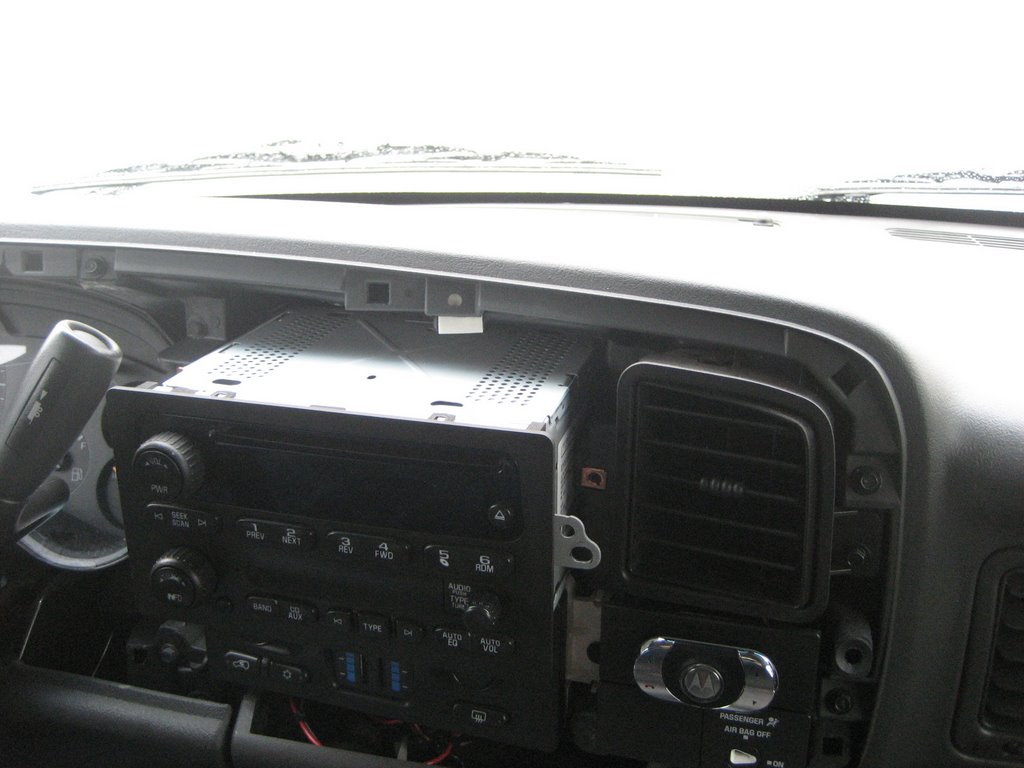
Pull out the radio:
Here is the back of the radio with the body harness plugged in:
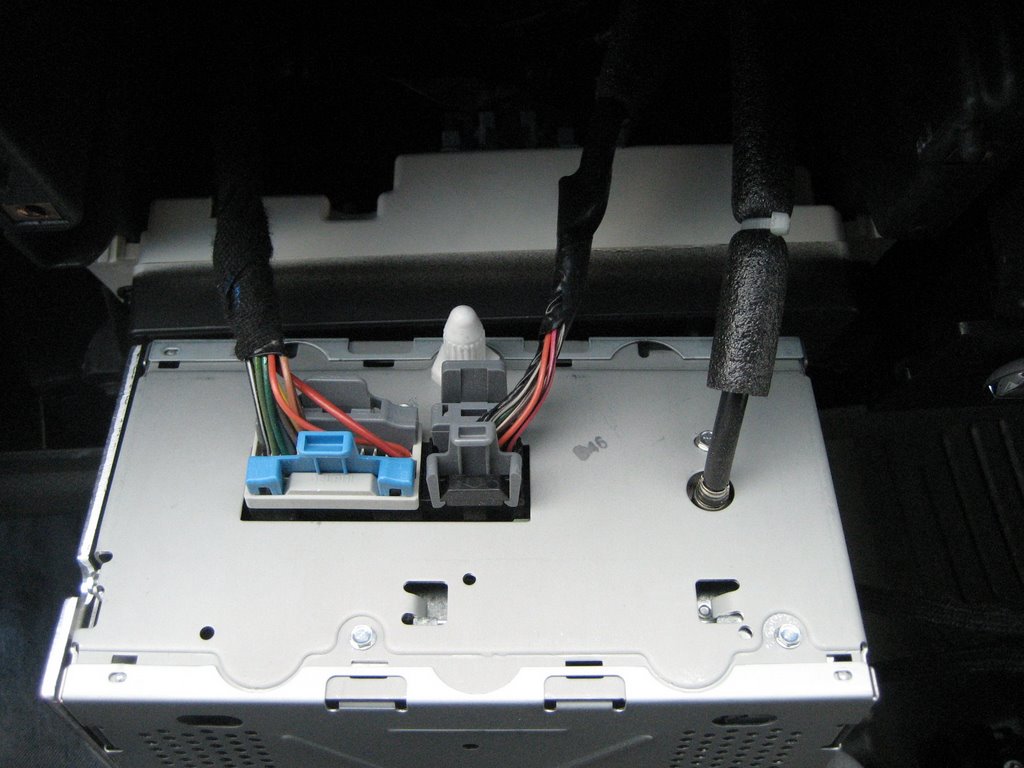
Pull out the antenna cable on the right, then squeeze the tabs on the 24 pin and 12 pin connectors and pull them out of the radio.
They will likely be pretty tight, but with the locking tabs squeezed, pull straight out.
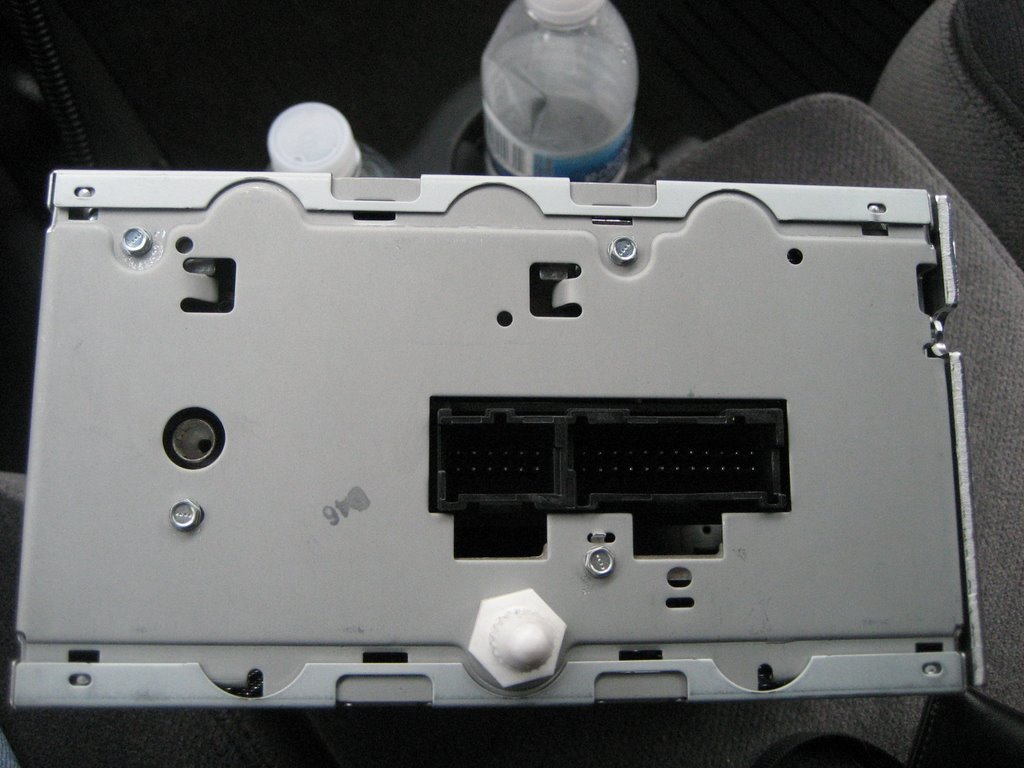
Here's the back of the radio:
Here's the body harness in the dash:

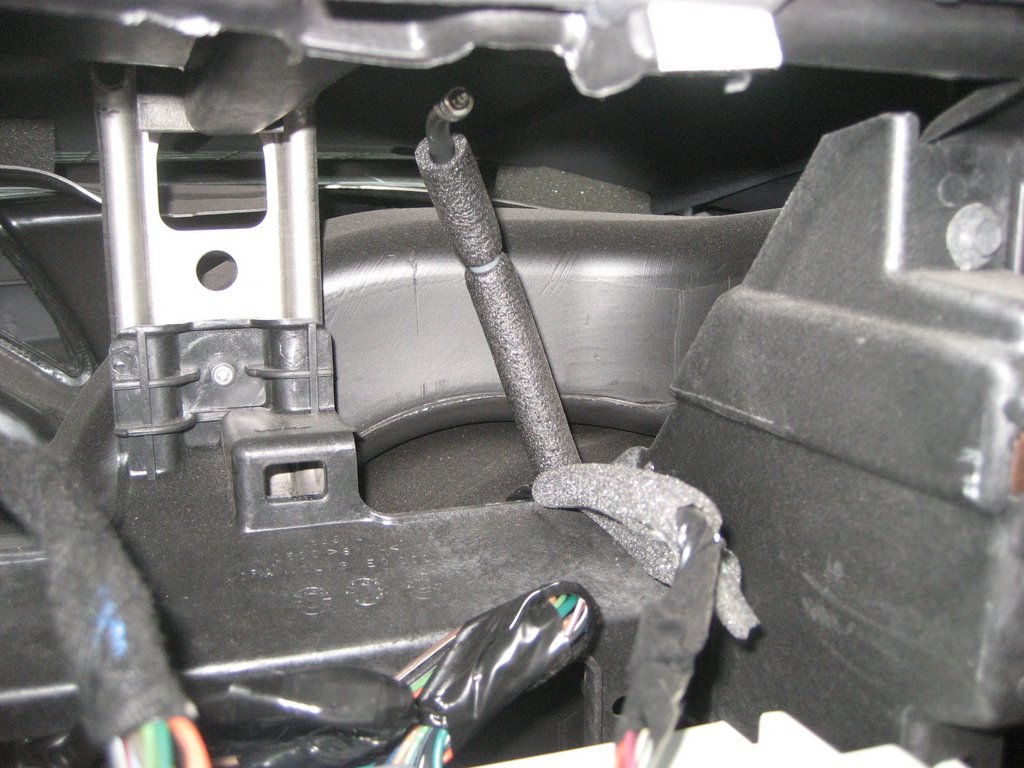
Here's space behind the radio where you'll want to route the PAL installation harness through to the glove box area:
Connect the PAL harness to the body harness:
Route the long end of the harness with the PAL connector to the glove box area.
Shove the PAL harness wiring back into the space behind the radio.
You can ignore (or even cut off) the black/yellow wire attached to the PAL harness. It isn't used with a "no XM" vehicle.
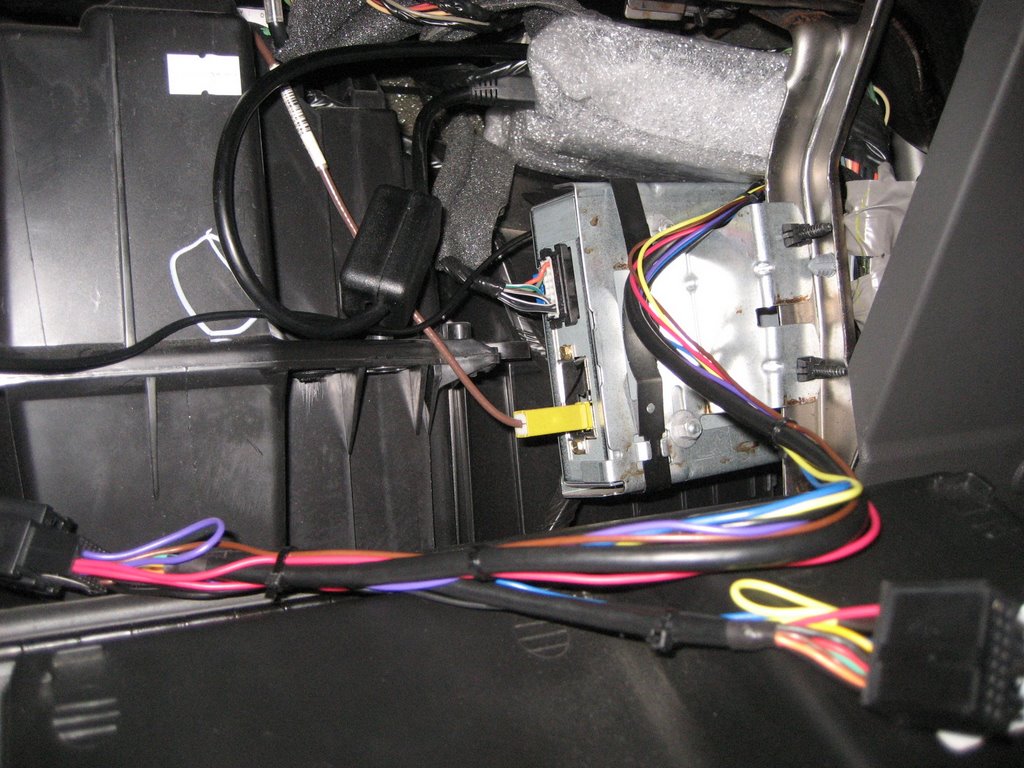
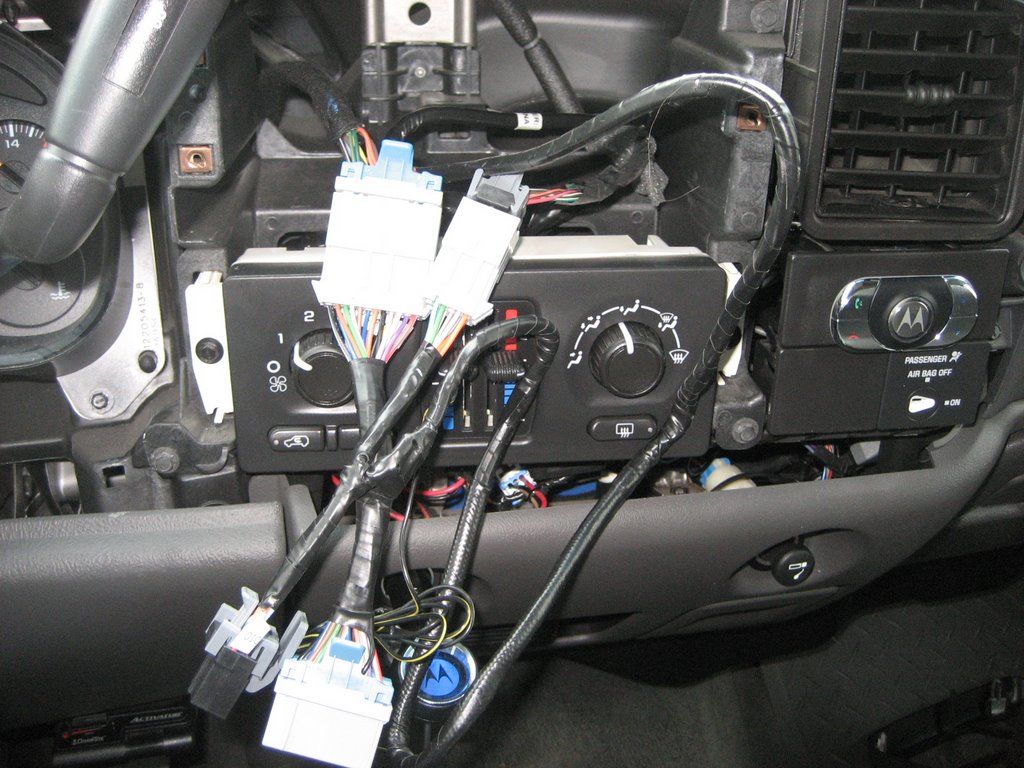
The photo below shows the PAL harness connected to the radio, the same way the original connectors from the body harness were connected:
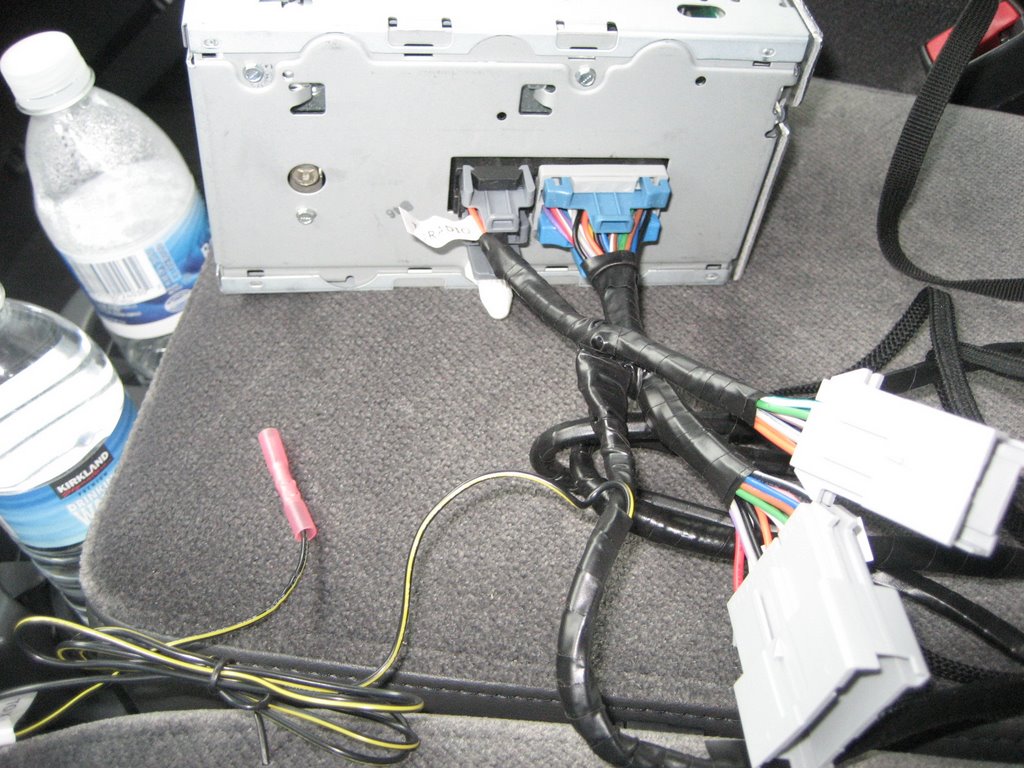
The photo above shows the connection as the radio is laying on the seat, but you will connect the radio after the PAL harness is connected in the dash.
Also, note the black/yellow wire - ignore it or cut it off.
With the radio connected (don't forget the antenna cable!), push the radio in place and secure it with the three 7mm screws.
Reinstall the bezel.
Continue the installation of the PAL module as shown in Option 1 (Trucks with an XM radio receiver), except connect the PAL module using the harness you just routed from the radio area.
Enjoy the PAL.
Click here for lots of Frequently Asked Questions about the PAL
Please don't use the forum PMs because my inbox just keeps getting filled up and I have to delete the PMs.
Email is much better!