C6 Z06 Corvette Battery Charger Plug
(updated 3/28/11)
Click here for
main website
This modification allows a convenient way
to charge the Z06 battery without having to open the hatch or hood.
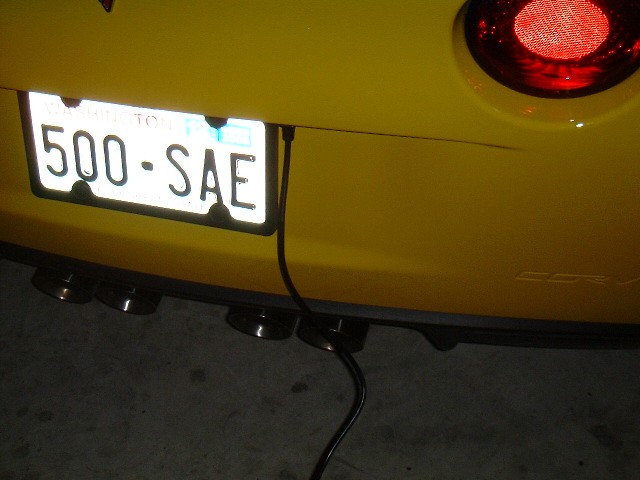
This photo shows the new battery charger
cable connected to the Z06 for charging:
I just updated this site to include my friend Steve's
similar modification:
See below for more details of Steve's installation.
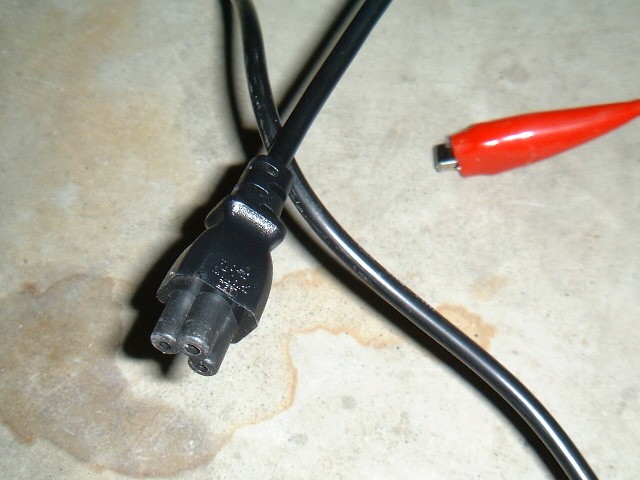
Here's the connection cable:
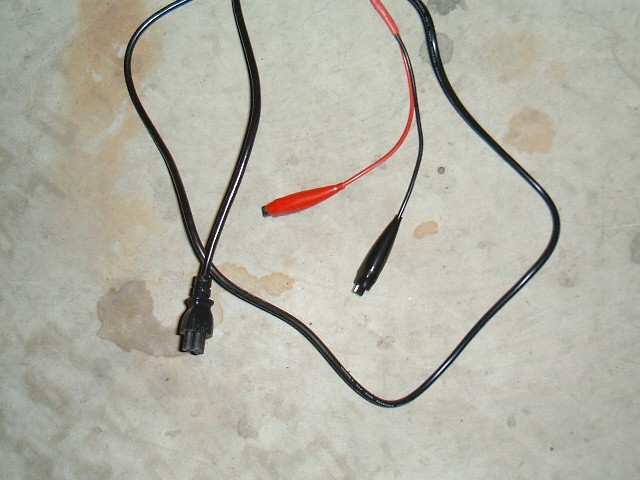
I used a power cord with a connector I had lying
around, taken from some appliance I threw away.
You
can use about any sort of cord, as long as you have a mating connector that will
fit in the license plate light opening.
I
soldered on two alligator clips for connection to any battery charger.
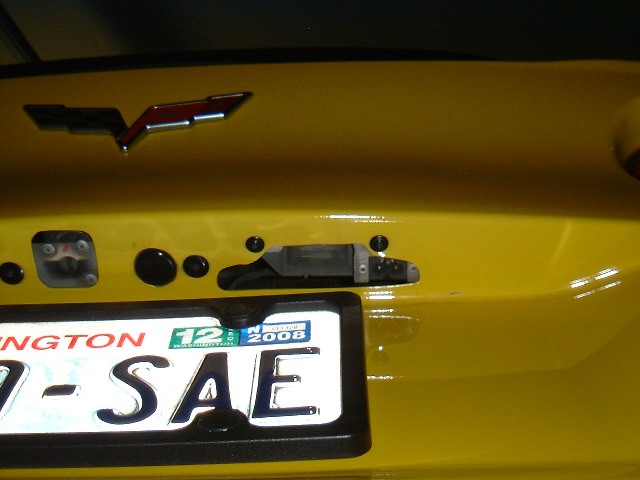
Here's the cable plugged in:
See the connector up in the license plate light opening?
It's easy to get the license plate light out by simply removing the
inside right taillight.
Those two screws hold the light bracket in place.
You'll need to figure out some sort of bracket to hold the
new plug to the light bracket.
Once you get the bracket out you can study it and screw or
rivet your modified bracket.
It doesn't have to be anything complicated - just something
to hold the plug in place.
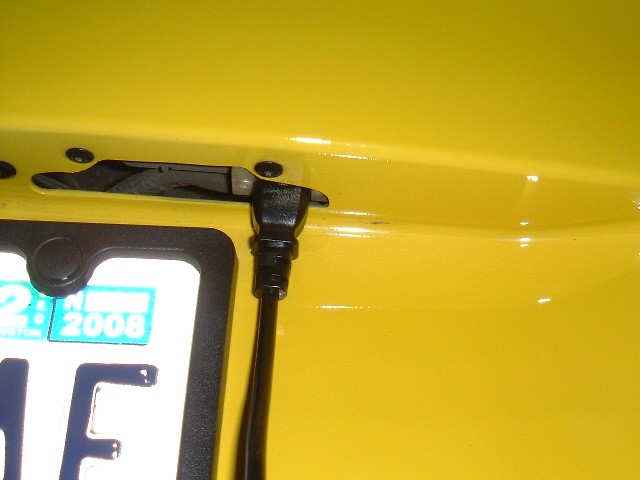
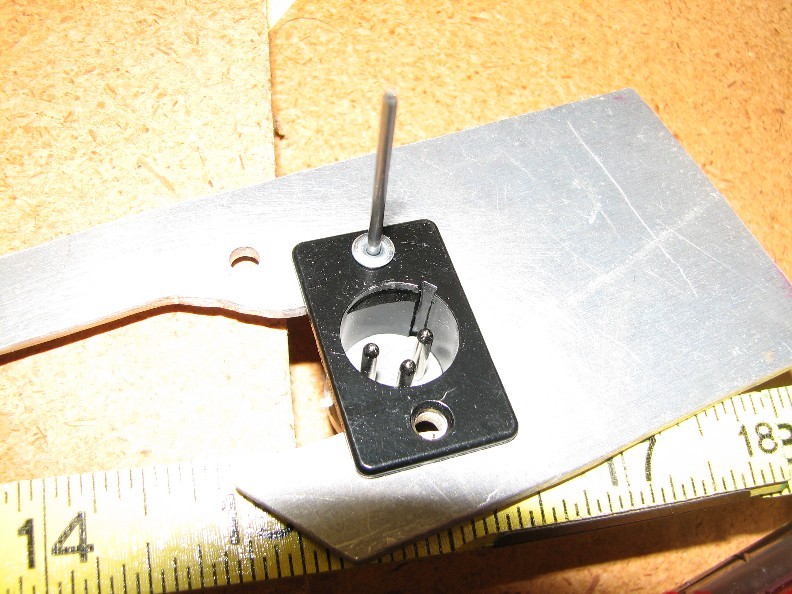
Here's a closeup of my plug:
But you can use any sort of two wire plug. Mine
happened to be a three wire plug, but I just cut one wire off.
I used this one because I can't plug it in incorrectly.
Here's a view of the battery connection:
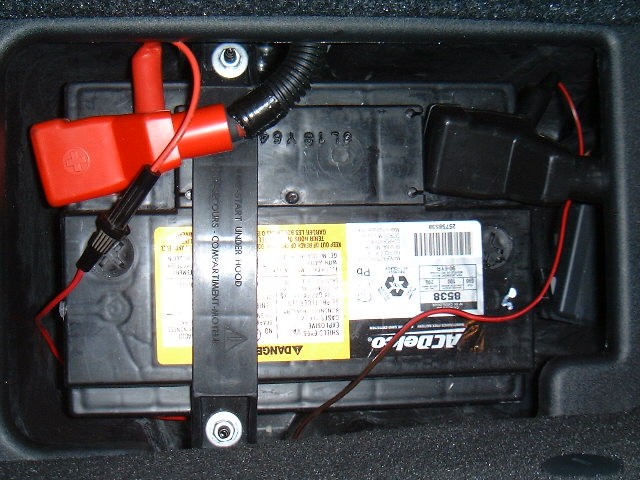
Once your taillight is out, you can get to into the battery
compartment easily.
Run your two wires into the compartment with an alligator
clip on each wire, then connect it to the battery terminals.
I put a fuse in my positive lead, just in case I
accidentally touch the two wires together outside the car when the cable is
plugged in.
Leave the wires connected all the time and you have a
permanent plug-in connection at the license plate.
OK, that's how I did mine. Now
here is Steve's writeup for his Z06:
A Z06 External Battery
Tender Port--Another Approach
I was inspired by Ray
Kawals approach to making an externally accessible, but hidden Battery Tender
port. While Ray used items he had laying around, I was not so fortunate,
and had to round up my materials. This may have too much detail for some,
but I thought Id err on the side of more rather than less. In any case,
read all of this before beginning!!
The real challenge I
faced was finding a panel mount port that was small enough to allow easy access
to the space just to the right of the right license plate light. I also
wanted something which could only go in one way so I wouldnt have a
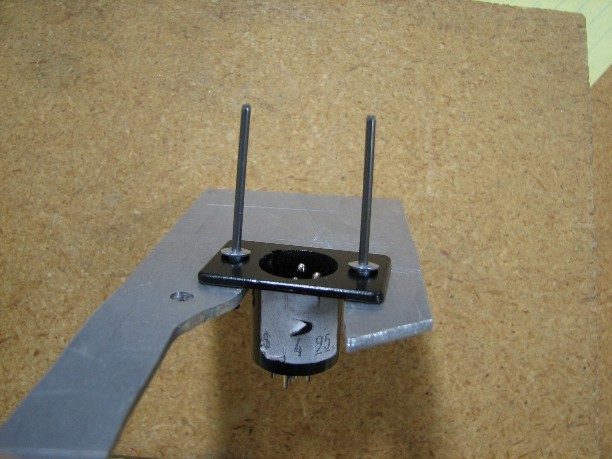
polarity problem. I looked at many different possibilities and finally
settled on an XLR panel mount male plug which I fastened to my bracket using pop
rivets. Note in the picture below that there is a small vertical
slot in the plug which, along with the three pins will only go in one way.
But I am getting ahead
of myself. First I had to make a bracket to hold the male XLR plug.
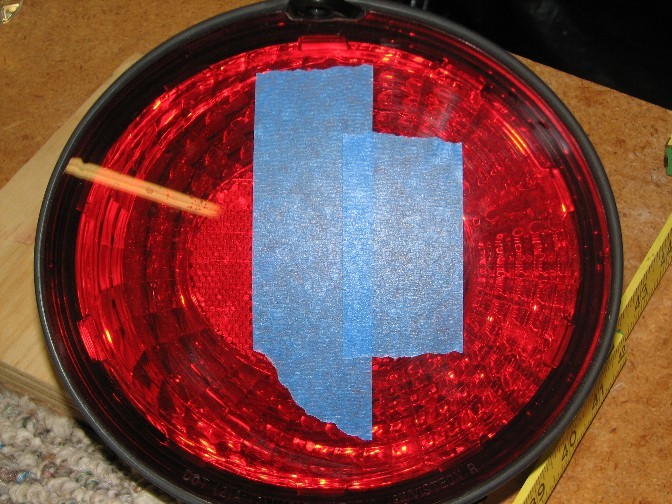
To get access, you remove the inner right hand tail/stop light using a #15 Torx
bit; I would suggest you put some tape ( I used blue painters tape because
that is what I had handy) on the taillight lens to protect it while you are
removing/replacing it. Then pulling on the tab where the Torx screw was,
you can remove the taillight. At this time it is easy to separate the tail
light housing and put it somewhere it wont be damaged.
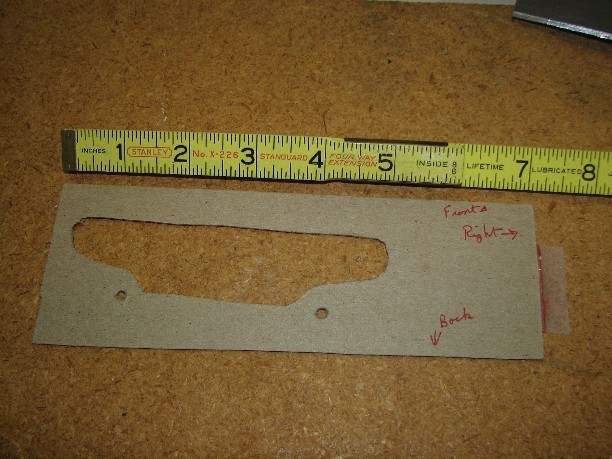
I then removed the
right hand license plate light (use the #15 Torx bit again) and separated the
housing from the light. Using a small piece of stiff cardboard from the
back of a writing tablet (see to the right), I traced the outline of the opening
and the holes where the screws secured the right license plate light housing.
After a lot of checking and rechecking, my resulting template looked like this:
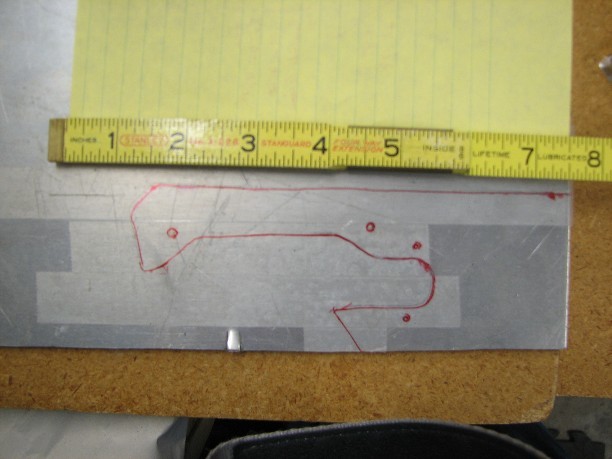
I found some sheet
aluminum (0.10) that would be stiff enough but not too thick. Place
Scotch Magic tape on the aluminum and trace the outline of the template and the
holes to be drilled in it on the tape. (See below).
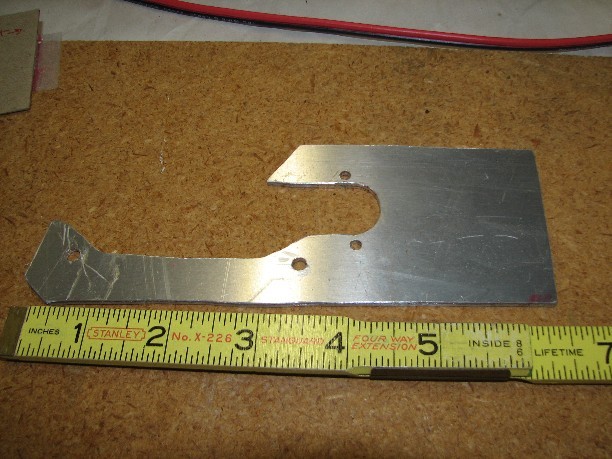
Secure the aluminum sheet to something solid (I clamped the sheet to a radial
arm saw table with a scrap piece of wood to protect the aluminum). Using
an electric scroll saw with a medium or fine metal cutting blade, cut the
aluminum sheet. Smooth the edges to protect you fingers and the car.
Then drill 9/64
holes for the screws securing the license plate light housing and the panel
mount (assuming youll use 1/8 pop rivets). Along the way, continue
to keep checking the fit of the bracket in YOUR car so you dont have to redo
the bracket a second time. When you are done, your bracket should look
approximately like this:
In assembling the
pieces to go on to your bracket make absolutely certain that you have everything
correctly postitioned. Drilling out pop rivets is not hard, but its not
the most fun activity either. Lightly screwing the license light housing
may help in ensuring correct positioning. If you decide to do this,
DONT screw the screws in all the way. Otherwise you may have to get
slightly larger screws.
Wiring: Since I
dont really understand electricity, I tend to build very robust things when
electricity is involved. I used the largest wire size (#14) that could be
soldered into the solder pots of my plugs. Although I may not often
actually plug in a 10 amp charger, I wanted to be able to do so if the battery
went completely flat. I bought separate wires five feet each, of 14 gage
red and black wire to go from the male plug into the battery compartment.
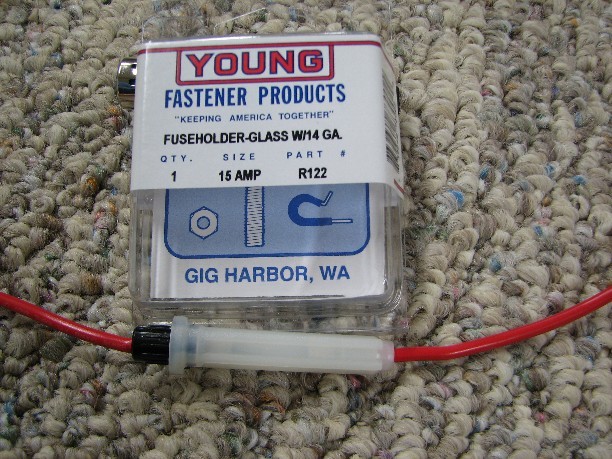
To connect to the battery, I found 2 Claw Clips at Radio Shack.
In addition, as Ray Kawal did, I also included a fuse in the hot side, just in
case. For use with the battery tender, I plan to use 4 amp fuses; with the
charger, Ill switch that to a 15 amp fuse.
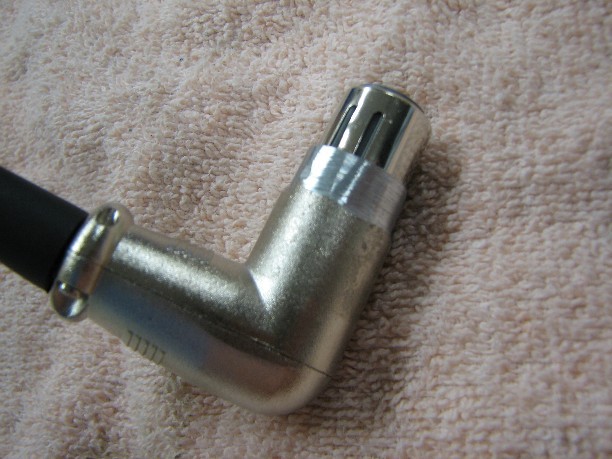
To connect to the male
plug on the car, I found an XLR female L-plug which has a small latch.
That latch really gets in the way, so I removed it. Even with the panel
mounted male plug oriented just right, it was too tight a fit. So I ground
off a portion of the of the plugs shell too. (See below)
For the wire that
connects the above plug to the Battery Tender or charger, I used 14 gage
red/black twin lead that I got from our local electronics store.

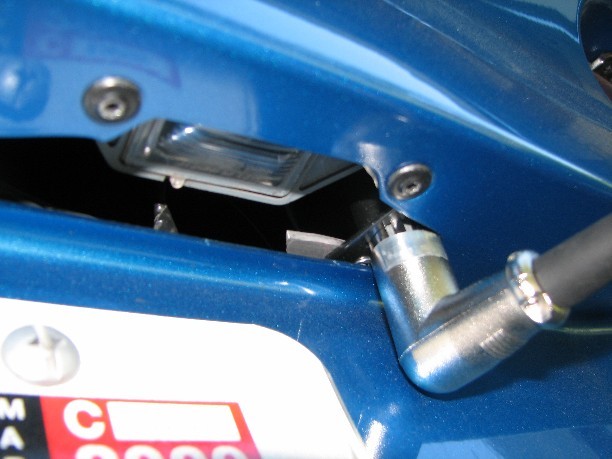
Here are a couple of
pictures of the L-Plug loosely installed on the back of the Vette.
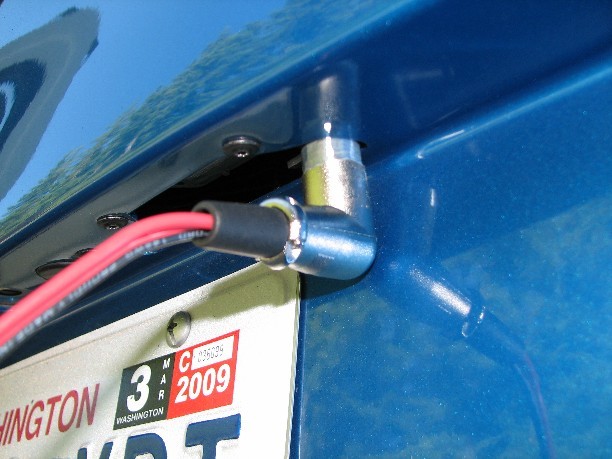
You can see the ground
off portions of the plugs shell in both pictures. Normally this would
be fully plugged-in and you would not see it.
Looking at the battery in the car
(below), you can see the fuse housing on the hot (Red) wire that is underneath
the cars large hot lead (in the top/center of the picture).

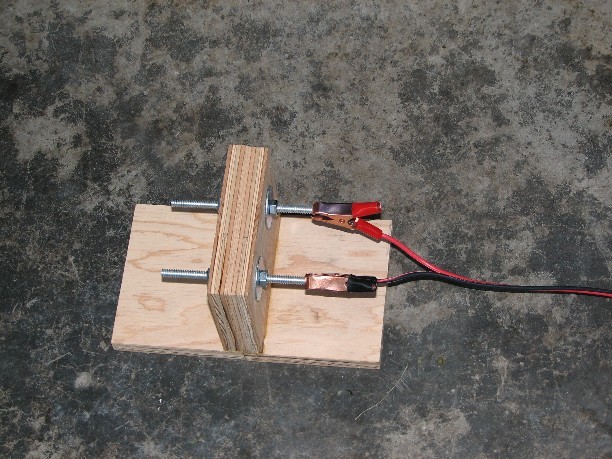
Then because I wanted
to make certain that I didnt accidentally short circuit the battery by having
the + & - leads touch, I build a stand so that the plug's leads could be
clamped on one side of the threaded bolt and the charger/Battery Tender leads
clips to the other side.
Well, thats it.
If you have any questions, you can email me at smy850@comcast.net
The above is Steve's installation
which came out really nice. The tricky part is finding a connector that
will just fit in the license plate light cutout area. Once you find a
connector small enough to fit, make a plate to mount the connector.
You can email me at ray@kawal.net