C6 Console USB/Auxiliary Input Port
(updated 8/3/23)
The USB/Auxiliary Input consoles from 2011-13 C6 Corvettes were a great deal for owners of earlier C6s who want to install the new USB Nav radios in their Vettes. For a while, the USB consoles were available for every color interior. Then the prices went up for the non-ebony consoles and they finally were discontinued. But Vette owners with ebony interiors could still buy the USB consoles for $150, including the console, port, and the wiring harness to connect to the dash area. Now, even the ebony consoles, as well as the harness, have been discontinued.
With the help of a couple of C6 owners, we've come up with a great solution that allows you to add the USB/Aux port in your existing console that looks as good as the OEM USB solution. Brian Smith came up with the idea of adding a "pod" to the existing console in which the USB/Aux port could be installed. With the help of Brian's original hand built metal pod, I worked on a mock-up of one that is very nicely integrated into the original console and looks very similar to the OEM USB console. Making a mock-up is very time consuming and I could never afford the time to build them in sufficient quantities for other Vette owners. But John Beidl, a friend and another Corvette enthusiast, suggested building the pods using 3D printing technology. John is an expert at this, and together we designed and built the first prototypes from my original mock-up. This was a bit challenging because John lives in North Carolina and I live in Washington state (we've never met in person but we have a lot in common). After about a dozen tries and design tweaks, the result is a high quality and sturdily built plastic (PETG if you want to look it up, similar to ABS) pod that looks great in any C6 console.
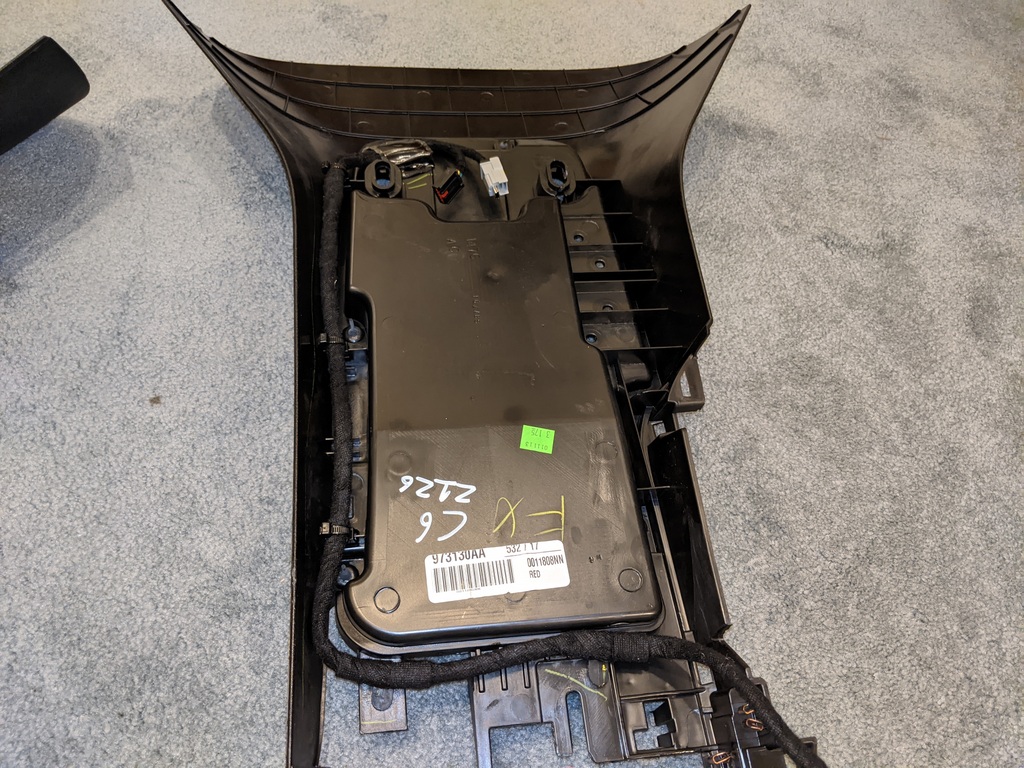
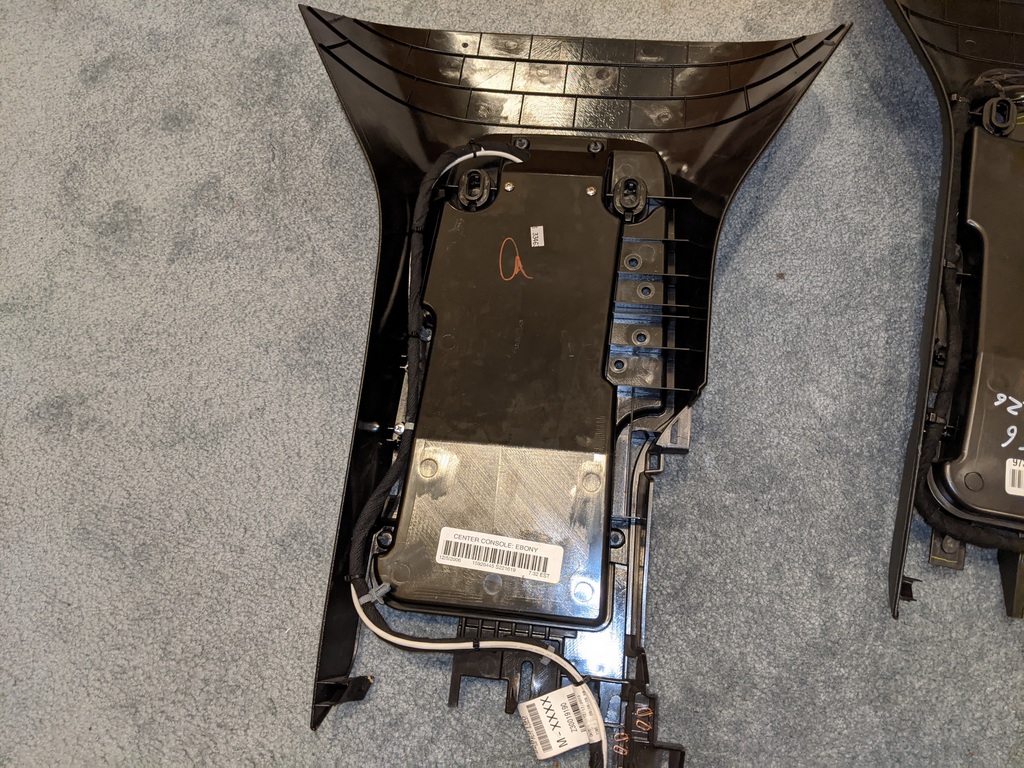
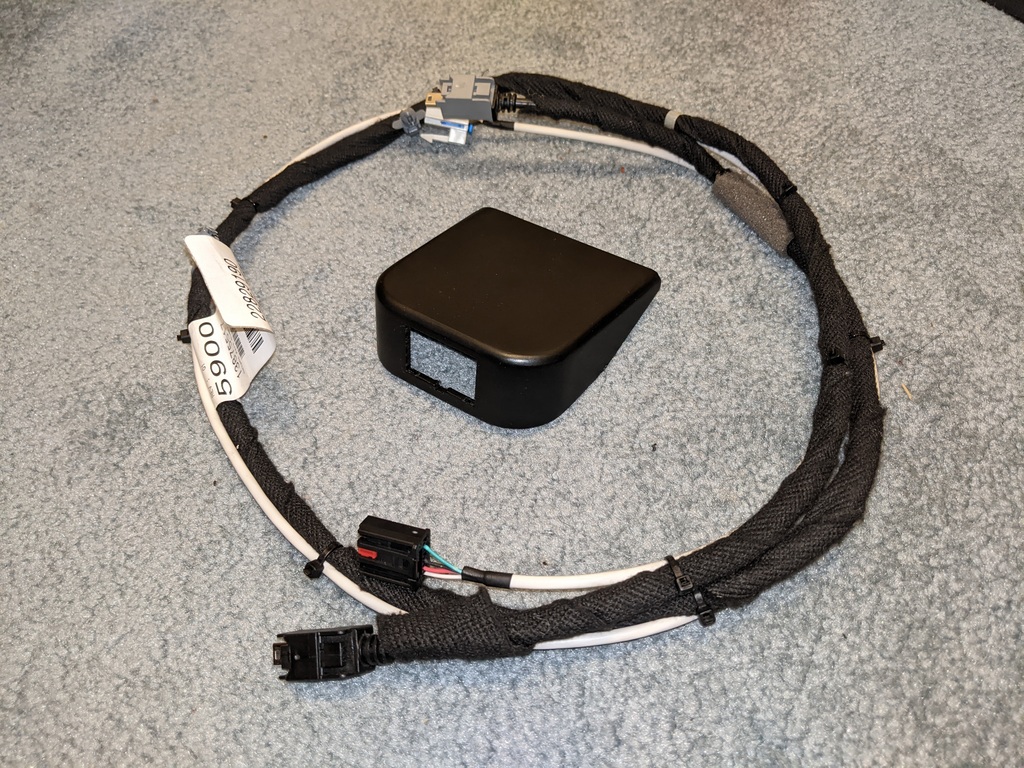
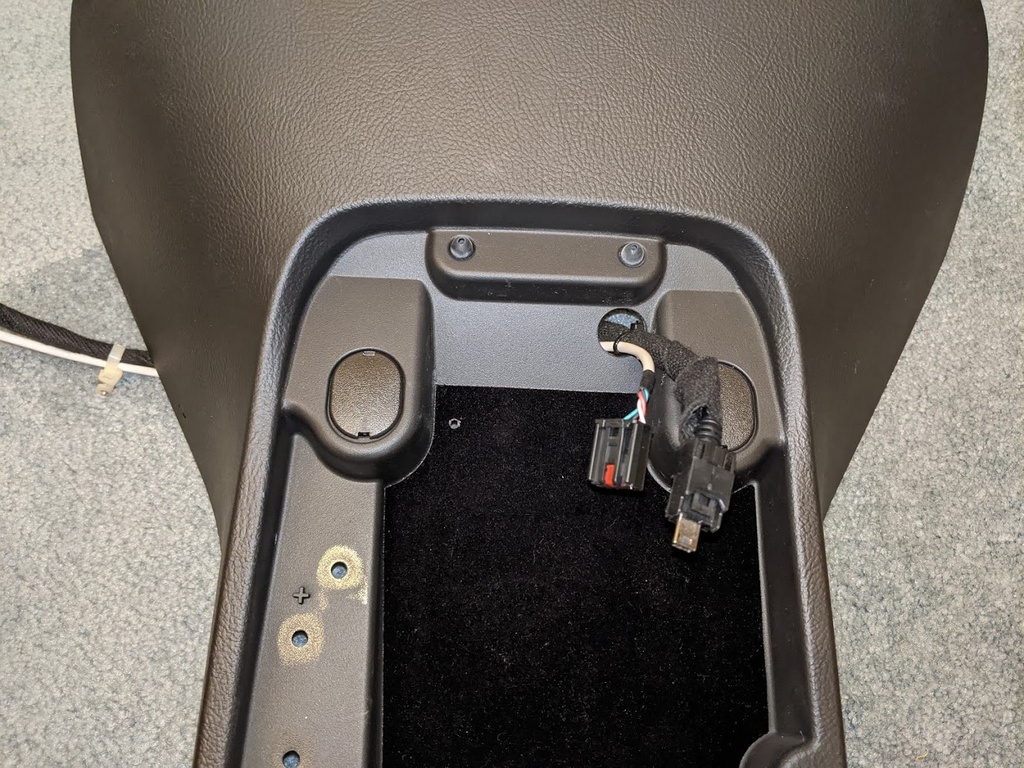
Here's an original OEM console with the new audio pod next to the OEM USB console:
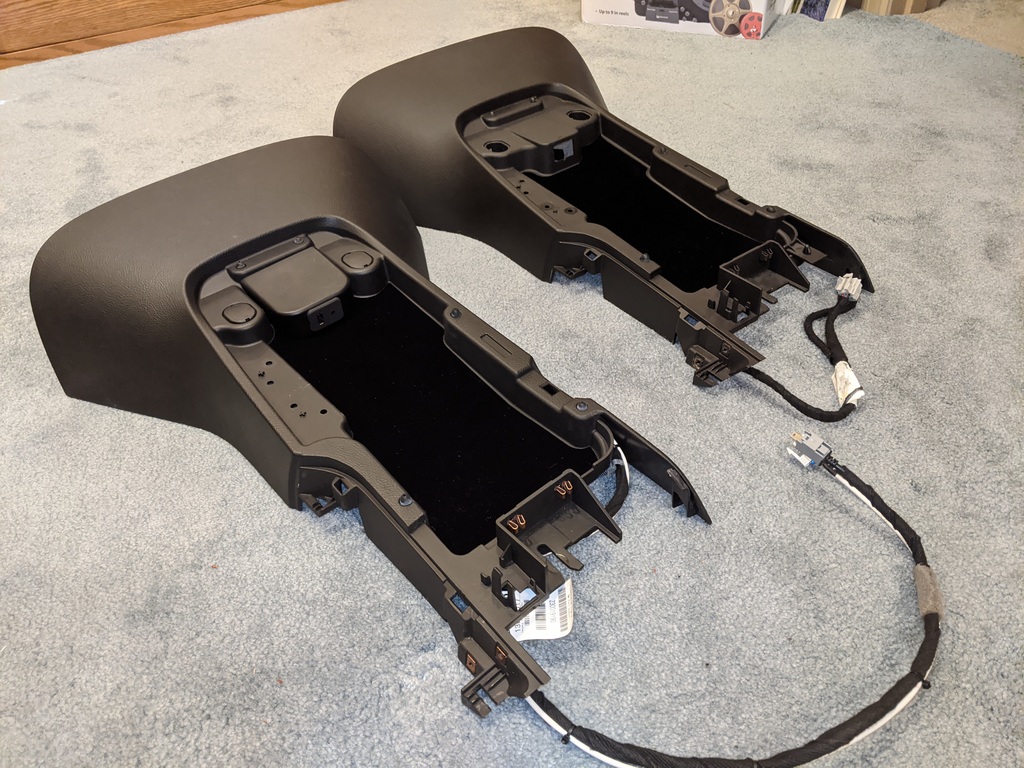
With the addition of OEM quality wiring harnesses, your original console can be fitted with a great looking USB/Auxiliary Input port identical to the now discontinued USB console.
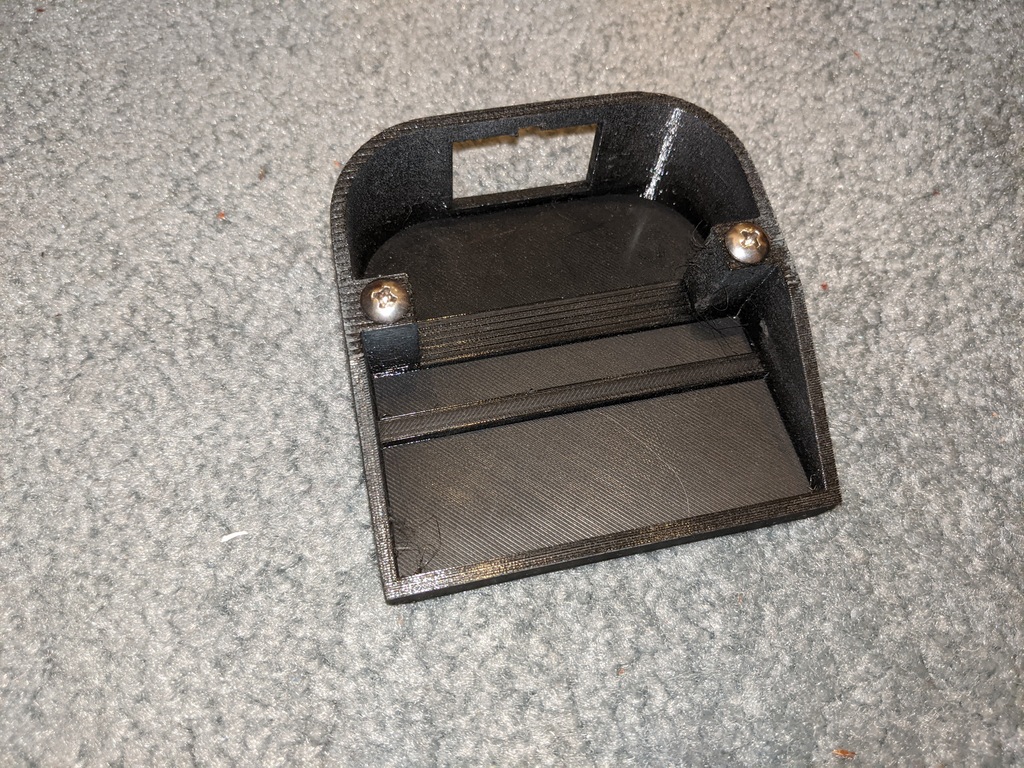
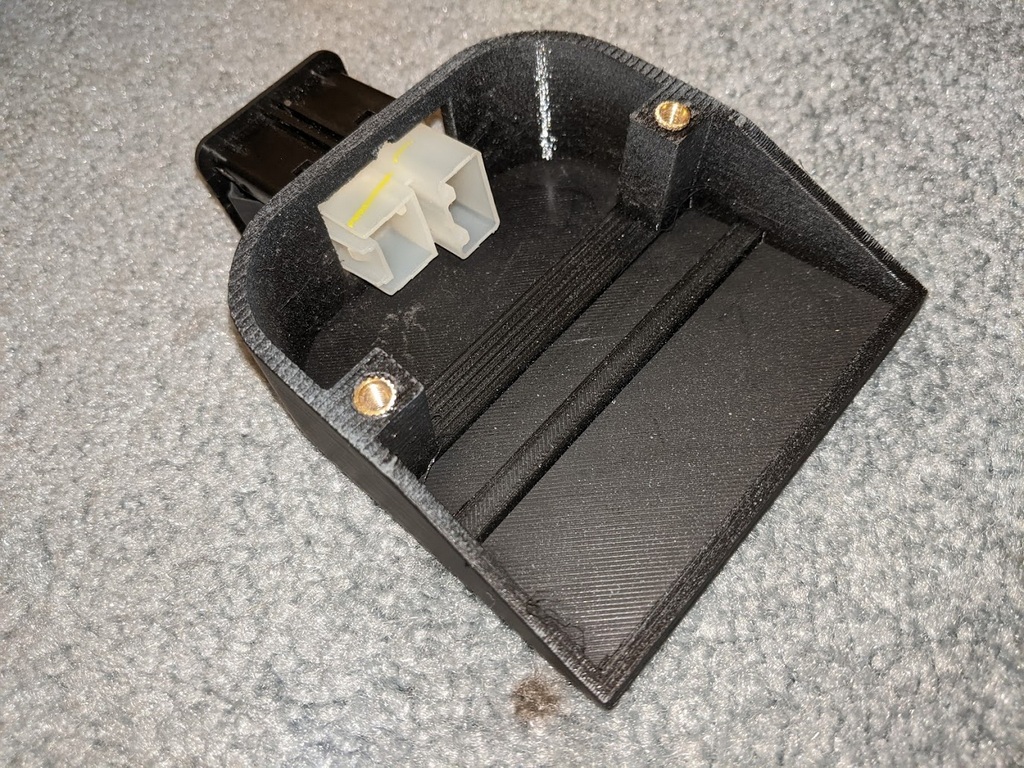
Here are some close-up views of the new audio pod:
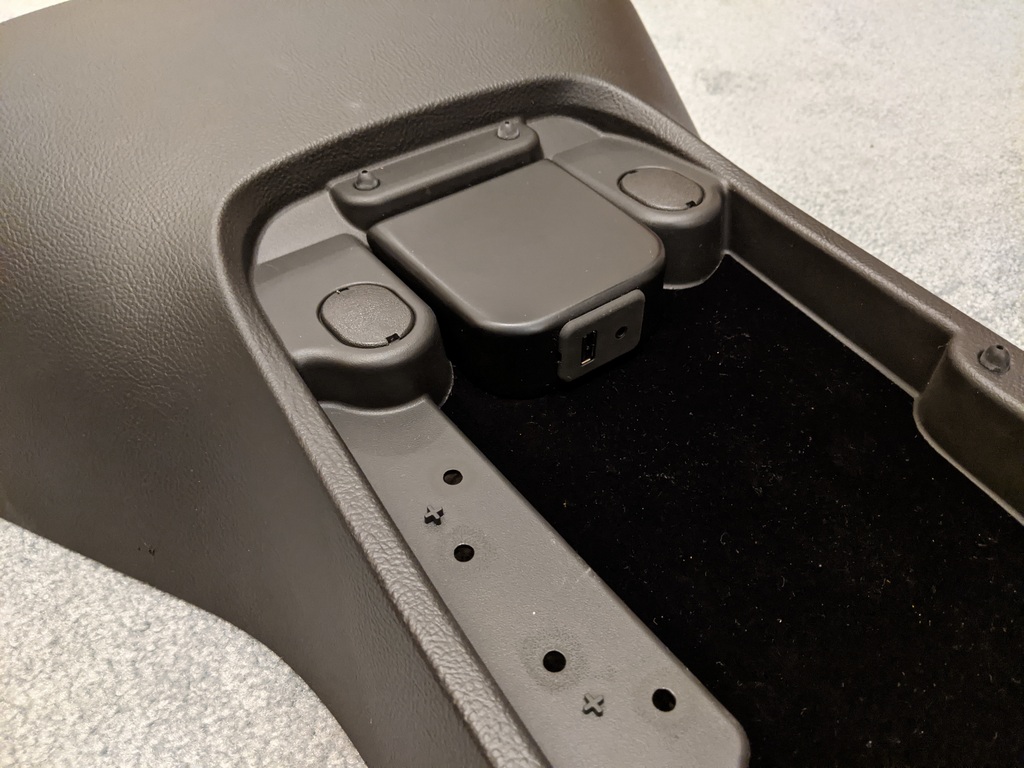
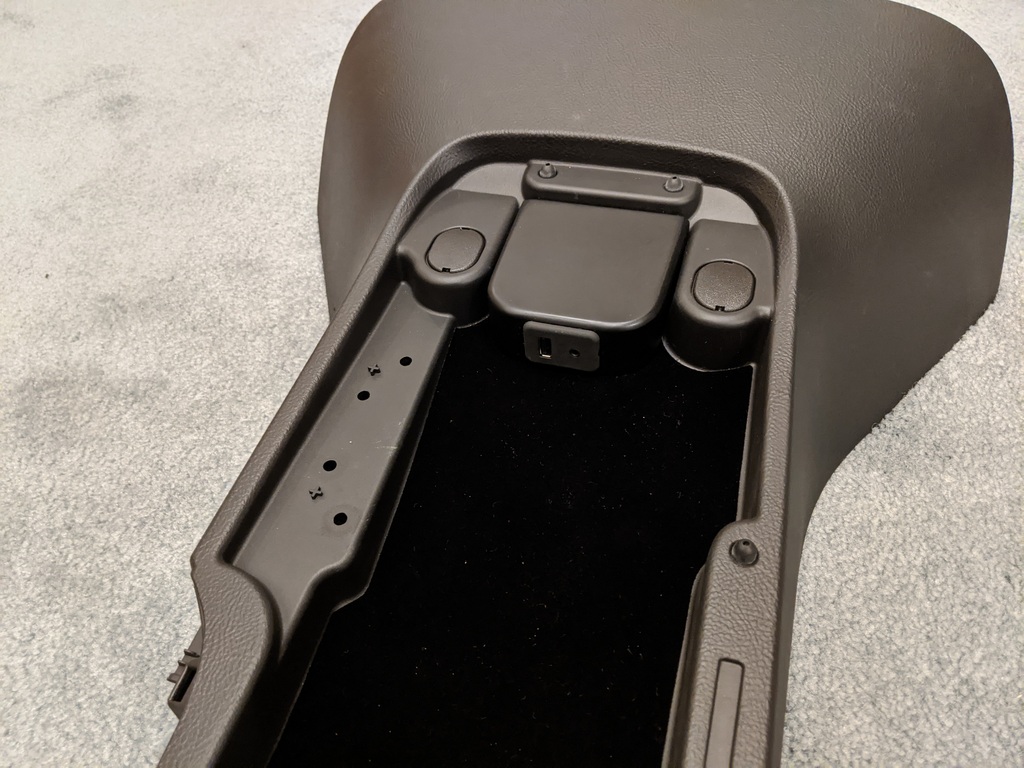
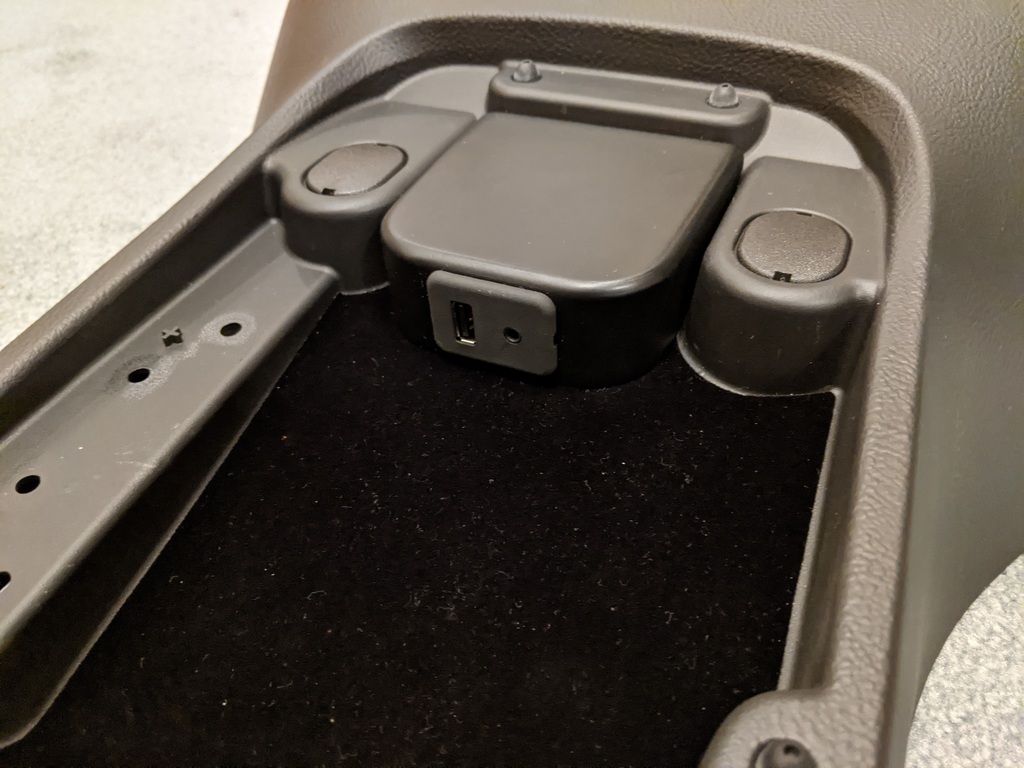
Each printed pod has to be sanded, primed, and painted, then the mounting holes threaded for the mounting screws. I do all of this work for you, then include the pod in a kit, with a custom wiring harness and all fasteners that will connect to the factory wiring for the new USB Nav radio. The pods are painted to match the ebony interiors of C6 Corvettes. The pods can easily be repainted by owners of Vettes with other color interiors if desired, but the ebony pods will go with the black felt bottoms of OEM consoles and look nice without repainting, as well. The pods are hidden inside the consoles of course, when the consoles are closed.
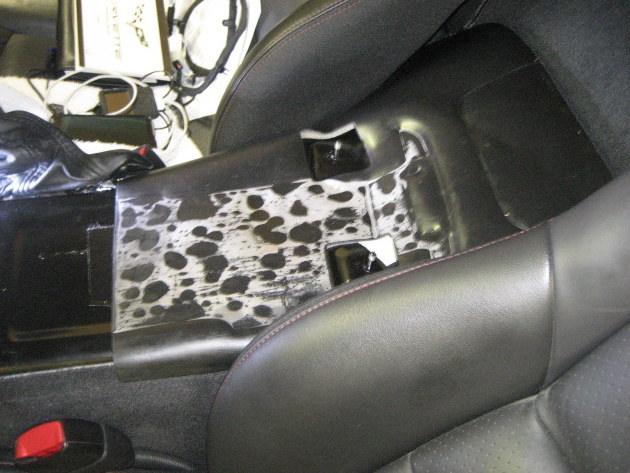
Under the console, here is the OEM USB console wiring:
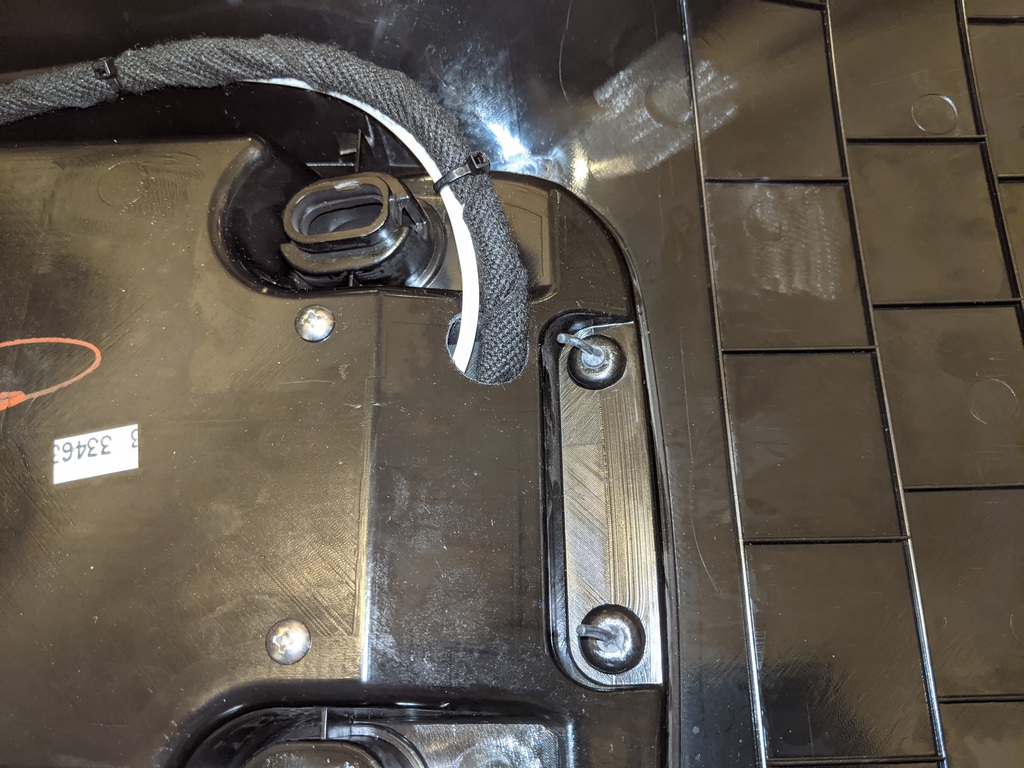
And here is the harness routing after your original OEM console is modified:
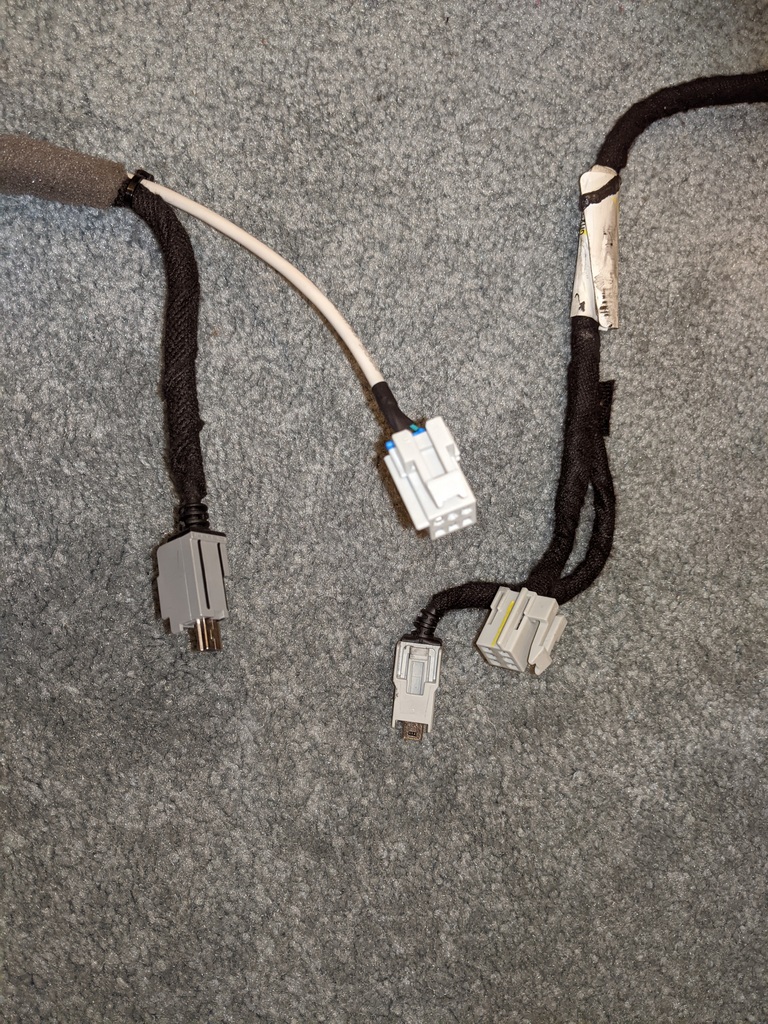
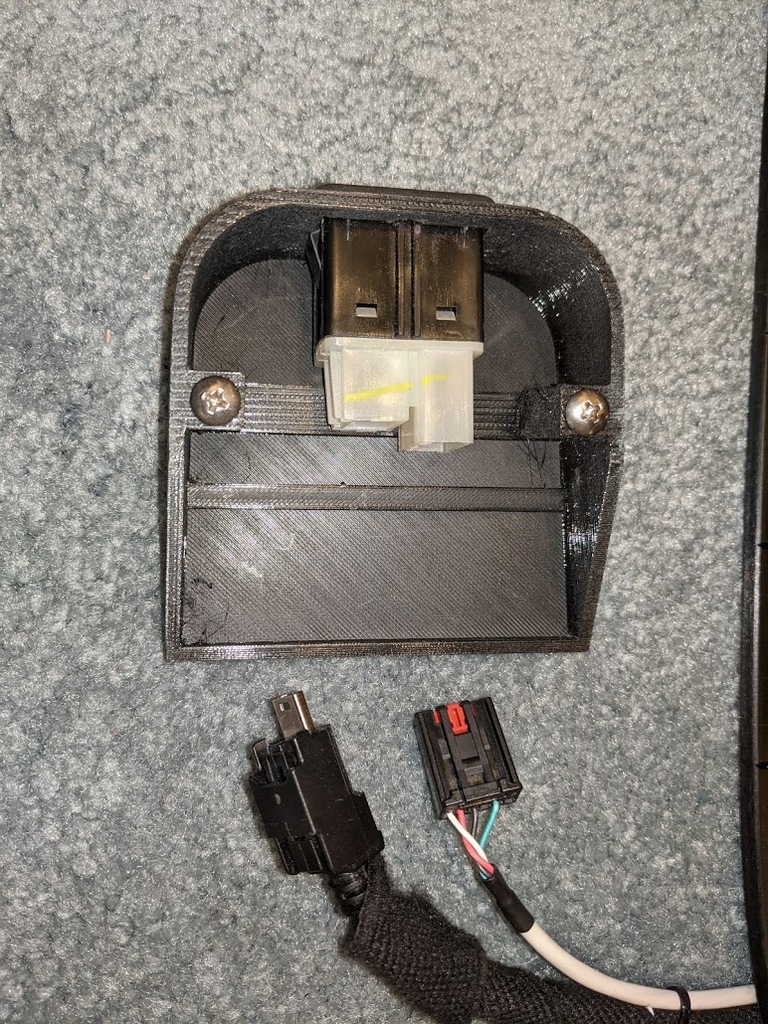
Here are the OEM harness connectors that connect to the dashboard wiring compared to the custom harness connectors on the left.
The exact same connectors are used:
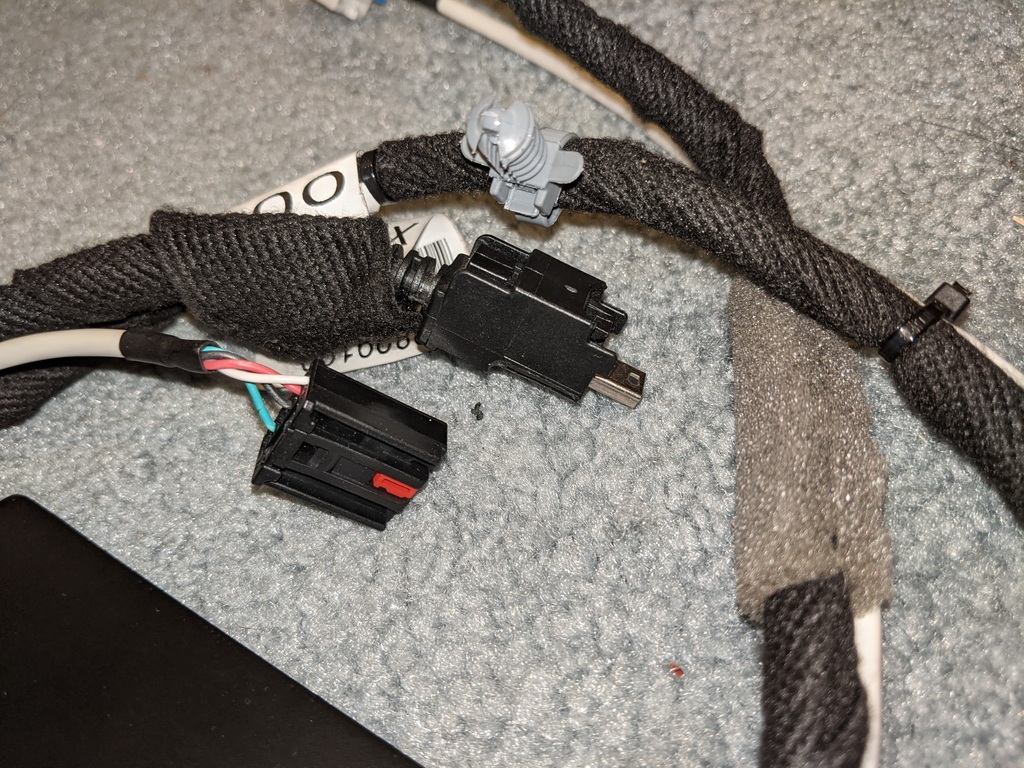
Here are the USB/Aux port connectors - again, the same as OEM:
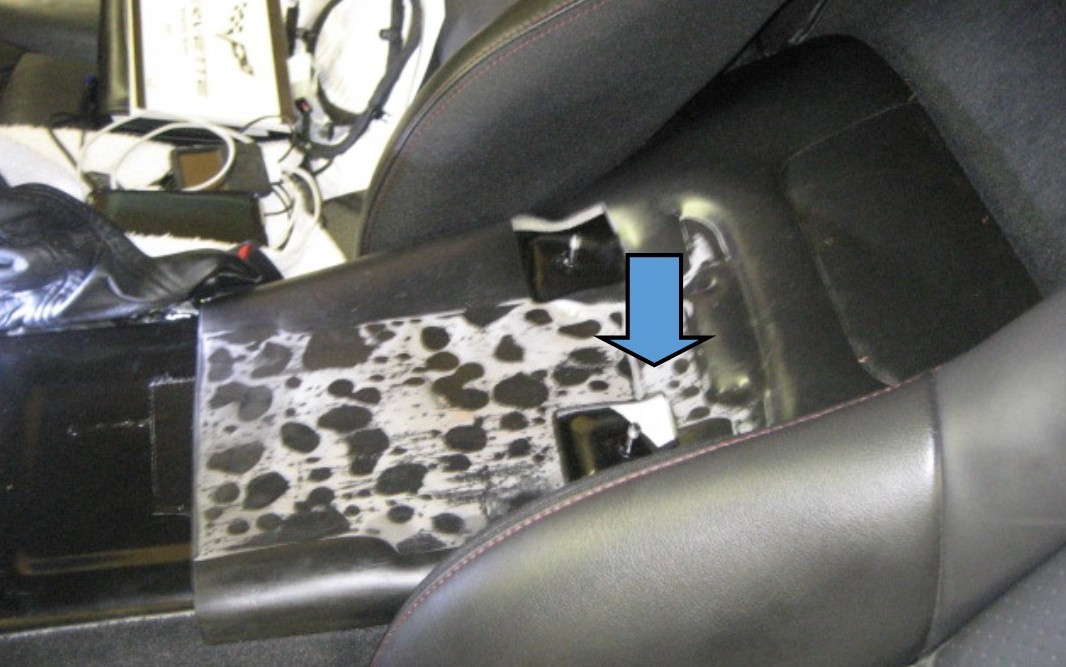
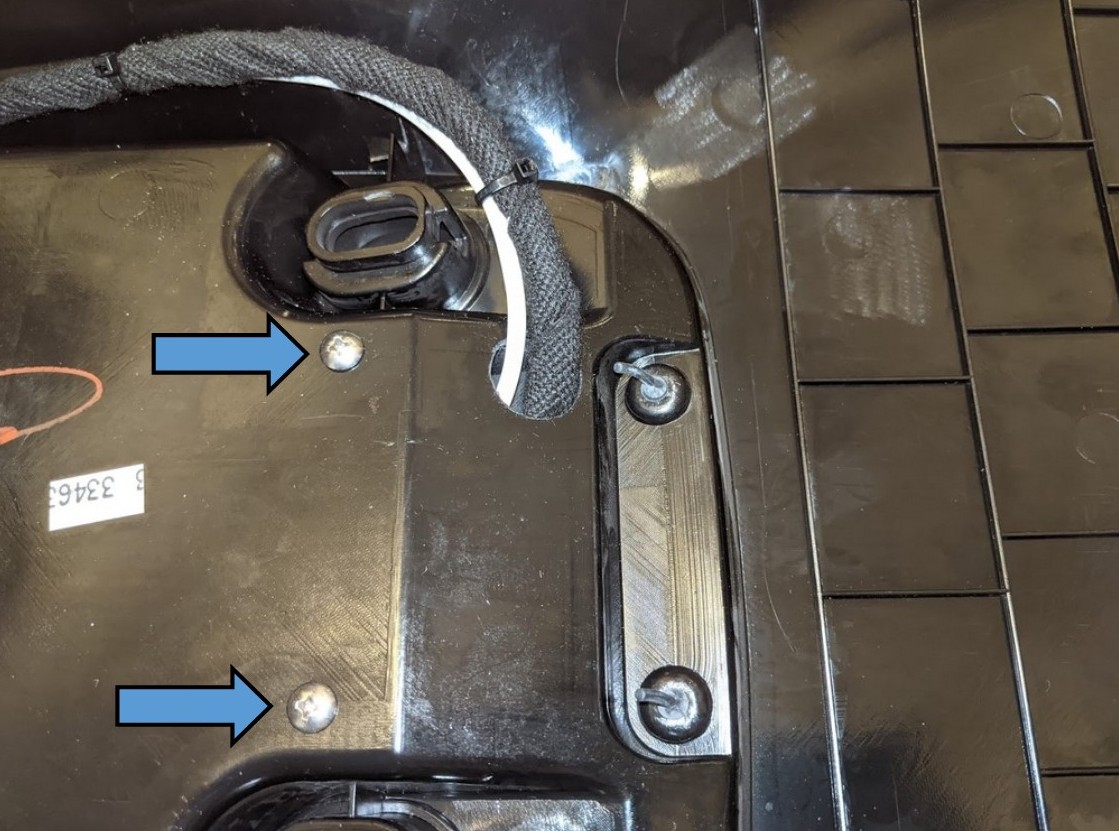
Here are the four simple modifications necessary to accommodate the new audio pod and wiring harness:
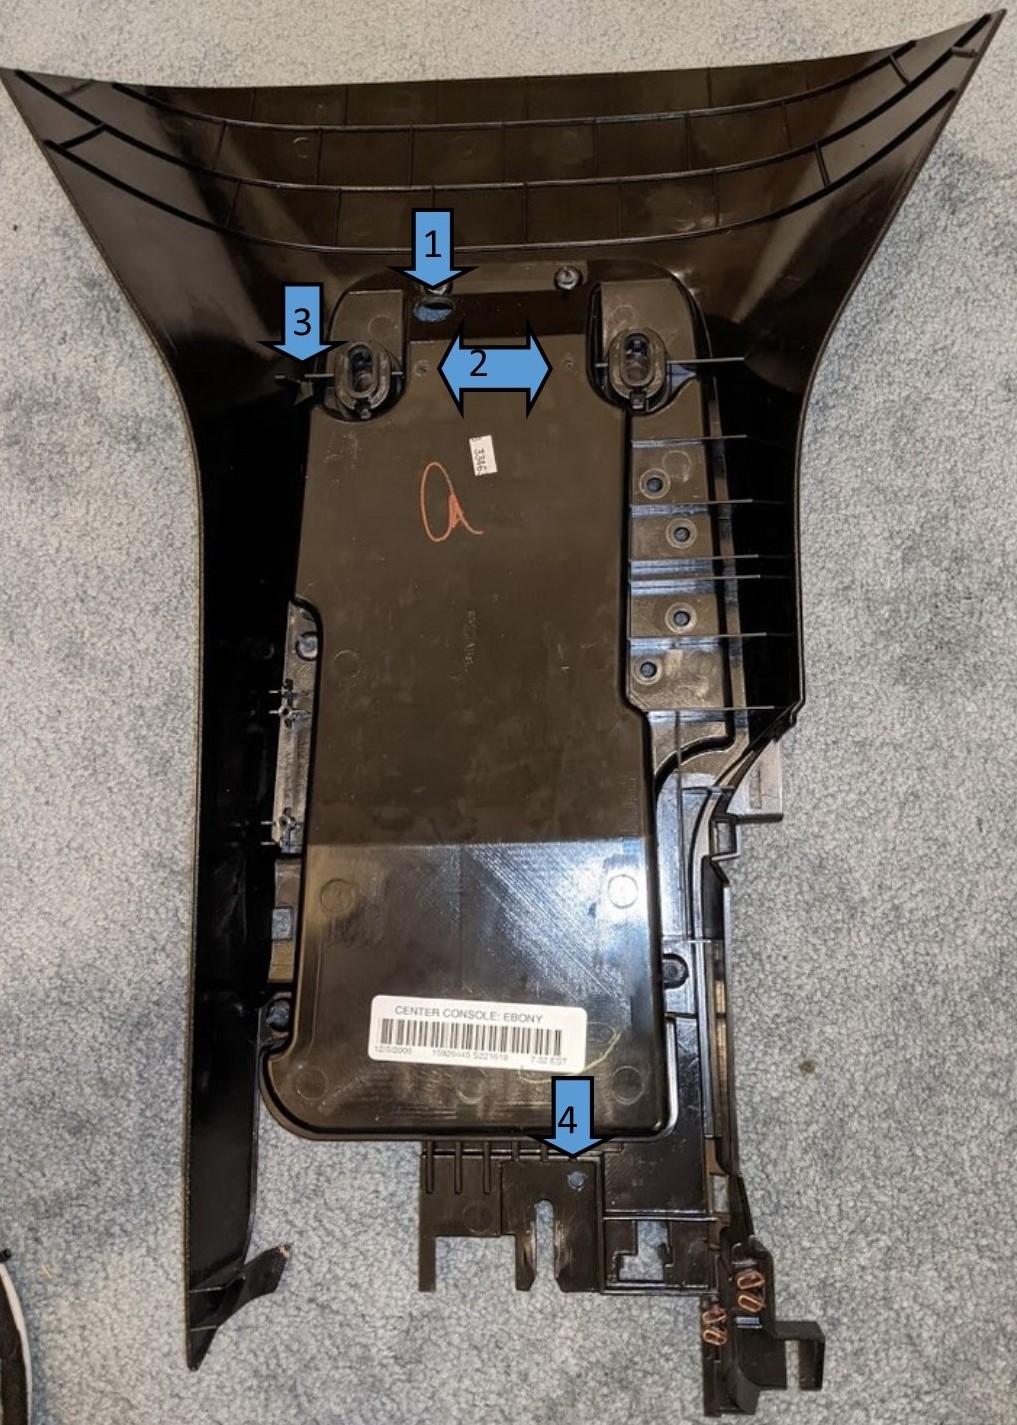
Modifications 1 and 2 shown above are done from the top:
A 3/4" hole is drilled as shown to allow the wiring to pass through to the USB/Aux port.
Two 5/32" holes are drilled for the pod mounting screws.
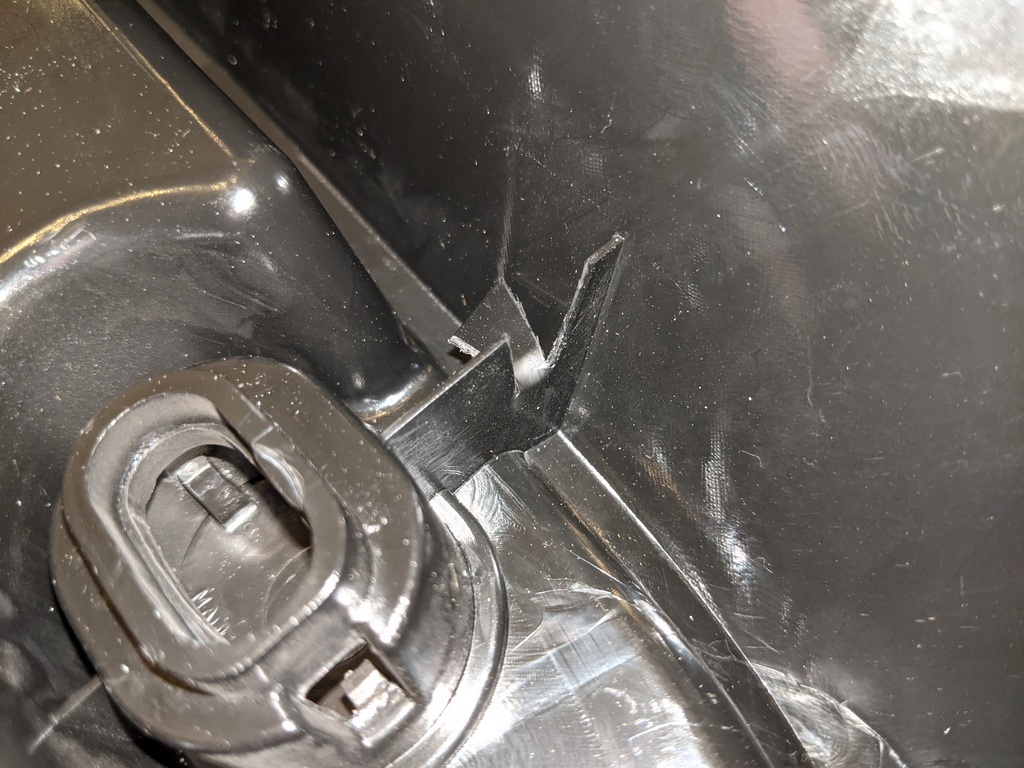
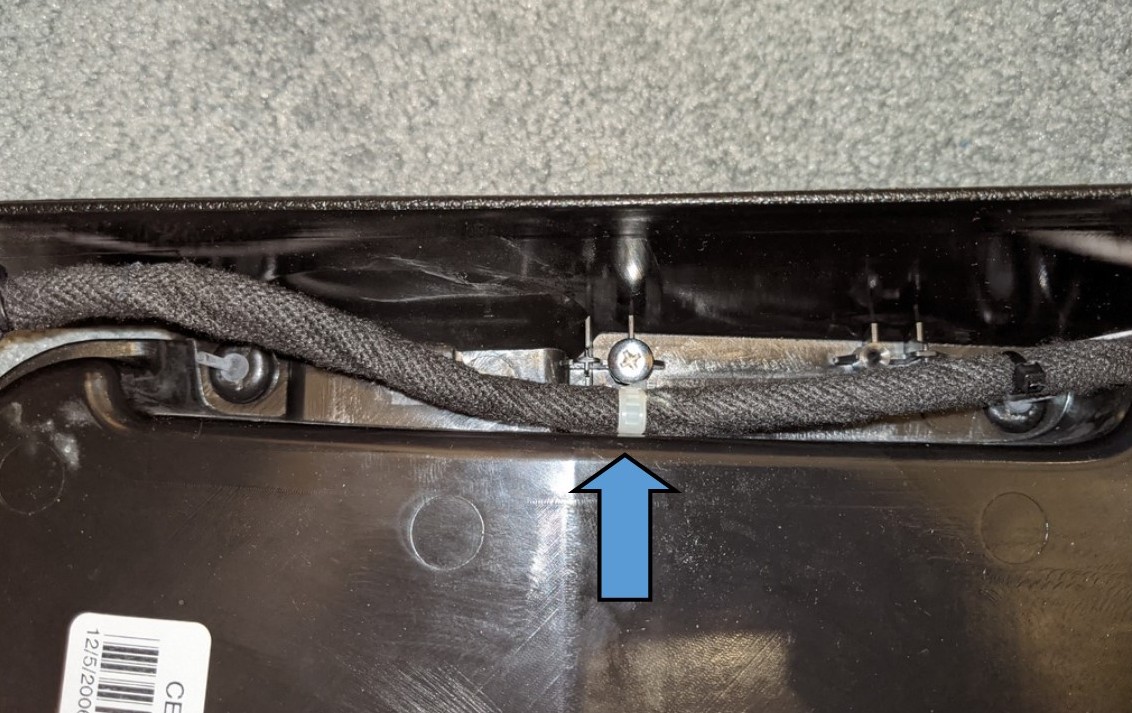
Modifcation 3 is done under the console to allow clearance for the wiring harness:
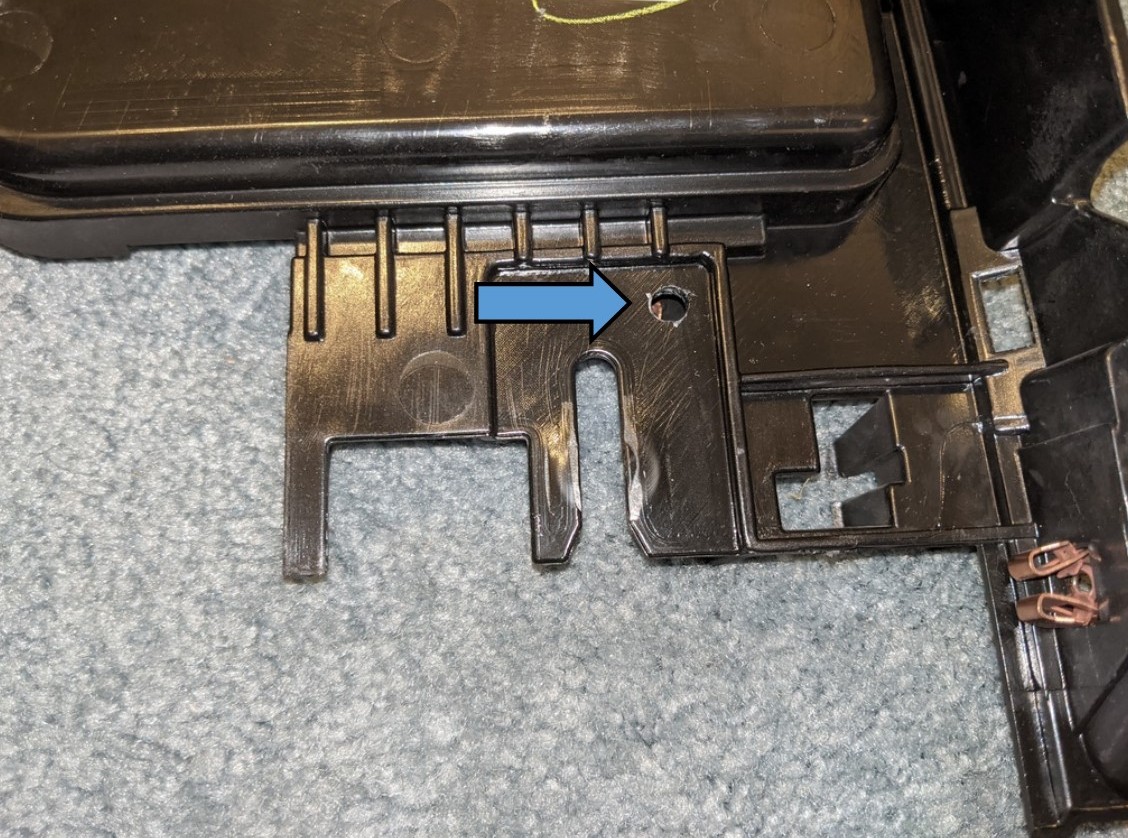
Modification 4 is a 1/4" hole drilled to accommodate the harness clip:
Here is what you need to install this audio pod kit:
1. Tools Needed:

A 3/4" holesaw. A 1/4" drill bit. A 5/32" drill bit. A Phillips head screwdriver. A pair of diagonal cutting pliers.
2. Purchase from GM or Amazon or eBay or other online source:

Choose either the black port (GM part number 25832462) or the white port (GM part number 20870101).
Either of these should cost around $20.
3. Order my USB Nav Console Mod kit (NAV-7) on my Ordering Page:
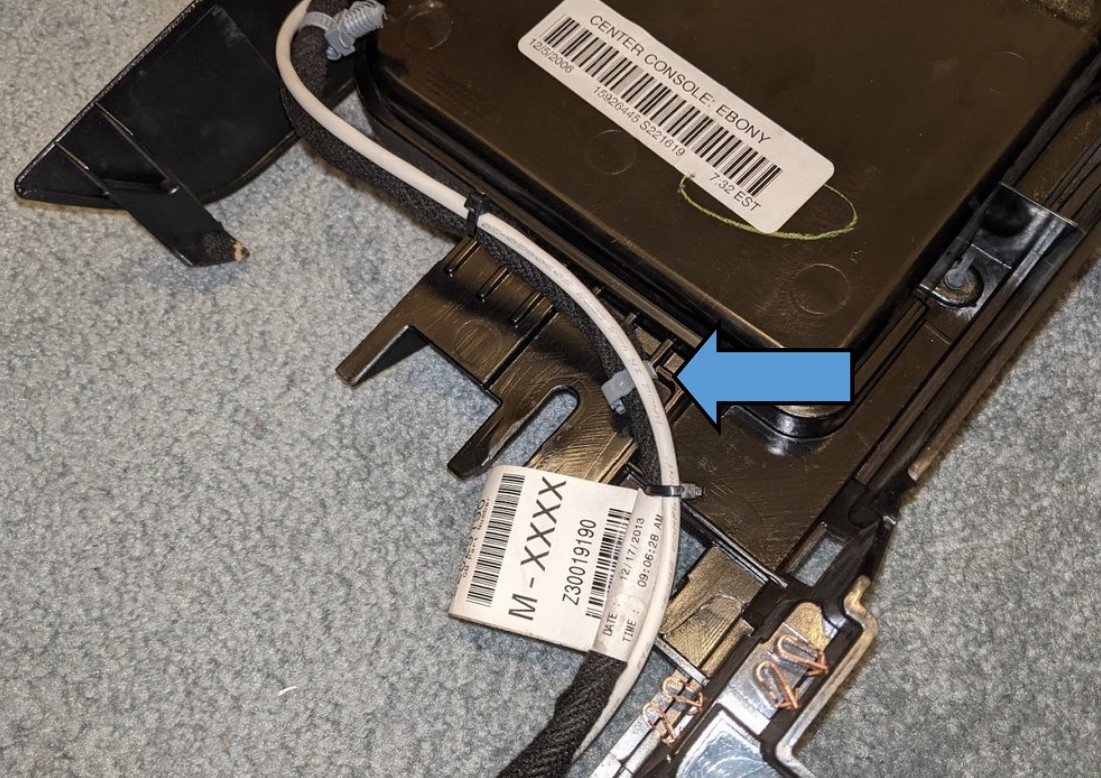
PLEASE NOTE THE PHOTO BELOW:
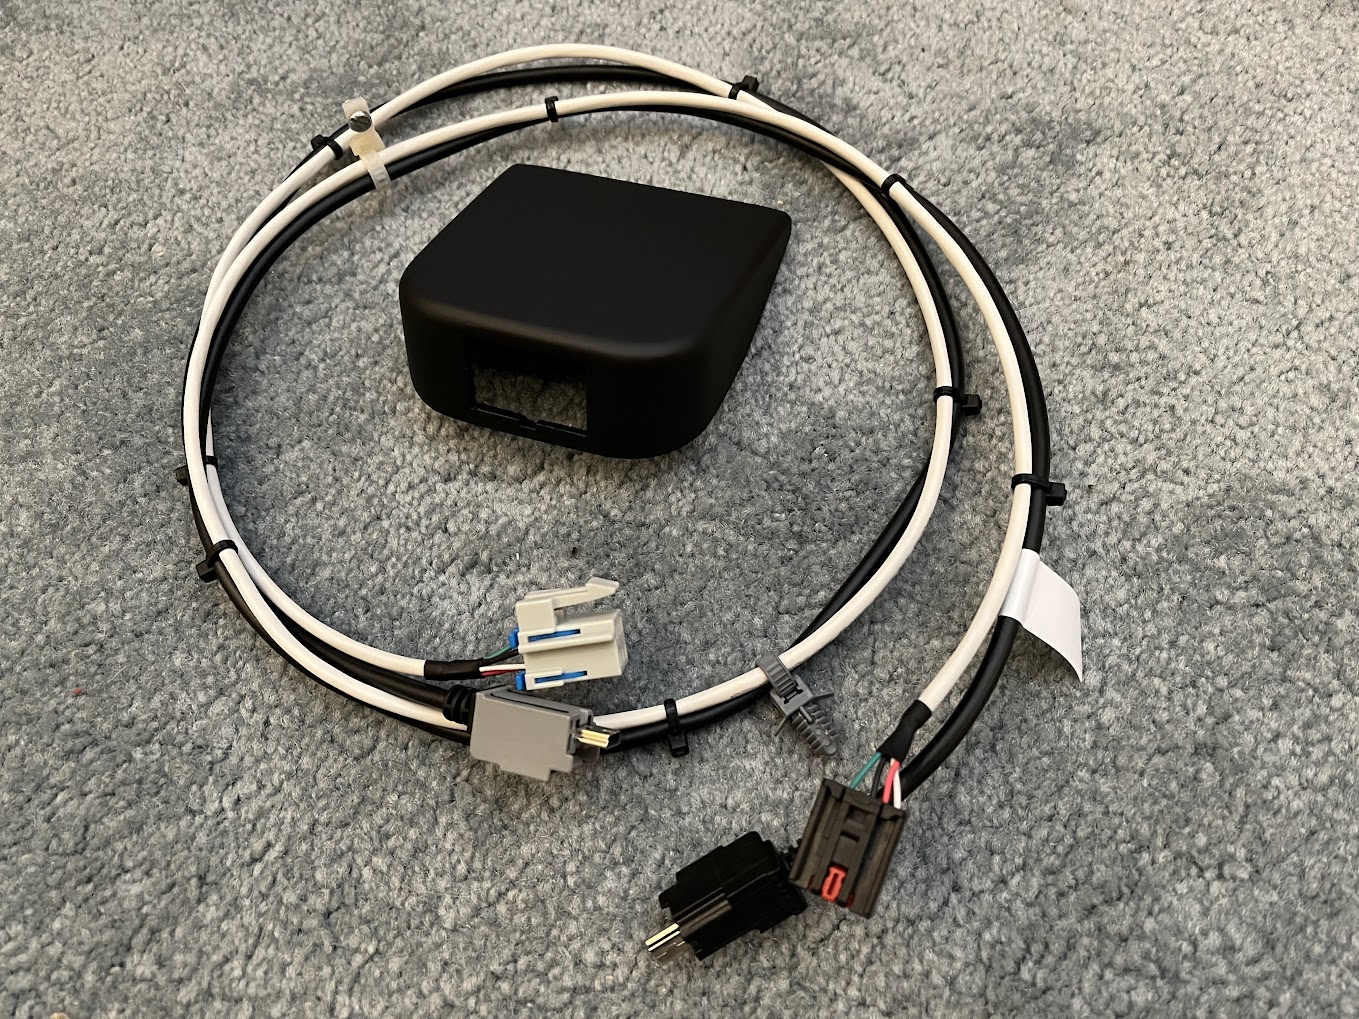
In the upper photo, the USB cable is a GM p.n. 22829190. These are now obsolete, so I now have to use a 19119050 USB cable. The new cable is no better and it's not even covered like the old cable, but the new ones cost me $20 more to purchase. I'm worried about even the new ones becoming obsolete. If they do, it might be difficult to find a substitute. Installation instructions remain the same.
This kit includes the audio pod with mounting screws and the custom wiring harness for both the USB and Auxiliary Input connections, with mounting clips.
Note: In addition to these items, you will still need the two harnesses described on the USB Nav Radio Installation page. These include the USB cable that attaches to the back of the radio, GM part number 22828130, and unless you have a 2011 or later Corvette with a non-Nav radio, you will need my NAV-4 installation harness. This GM USB cable and the NAV-4 harness will connect to the harness described above, exactly the same as it would connect to the OEM USB console harness. These details are described on the USB Nav radio installation page:
http://www.kawal.net/usb Nav.htm
STEP BY STEP INSTRUCTIONS:
Once you have your tools and parts, remove your center console following the instructions on the above USB Nav website.
1. Insulating Mat
Peel the rubber mat (if attached) off of the bottom of the console and place it on the drive tunnel in the original location.
2. Modify your Console
Modify your original console as described in the preceding section by drilling the 3/4" hole, the 1/4" hole near the front, and clipping plastic web with diagonal cutting pliers.
For the two 5/32" holes for mounting the pod, included in the kit is a piece of chalk. Rub the chalk on the two 4mm Phillips head screw heads:
Place the pod in position up against the back of the console and press down to leave chalk marks on the black felt on the console bottom. This will allow you to drill both holes in the exact place for mounting the pod:
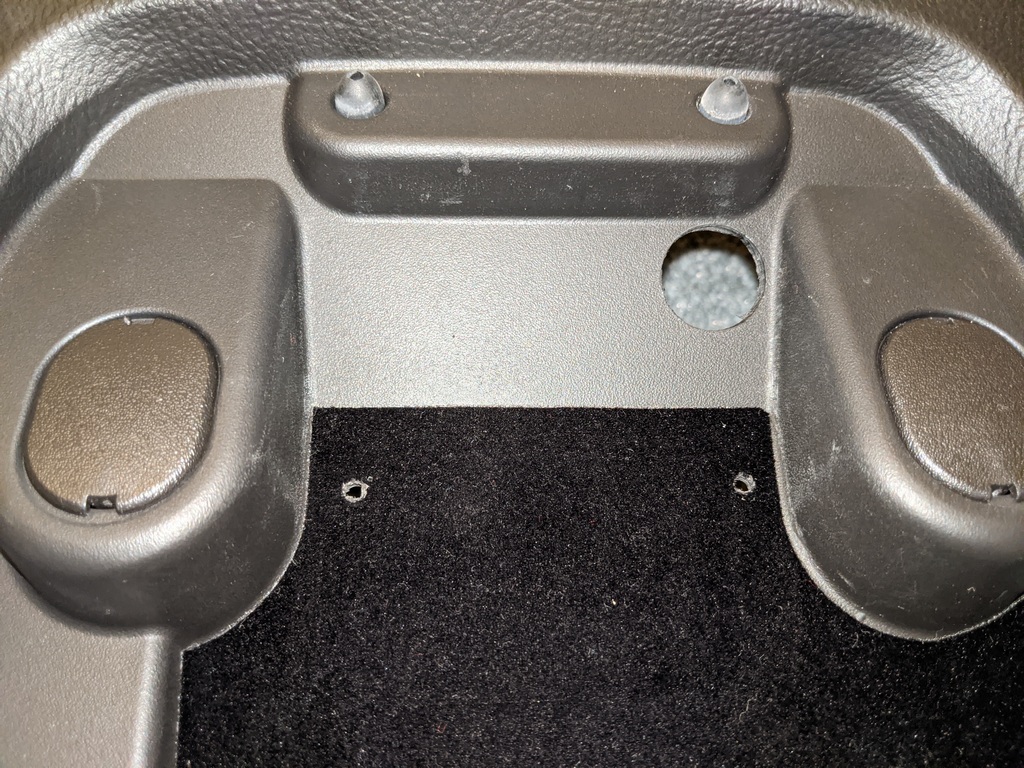
Here are the holes as shown from the bottom:

On the left of the above photo, you can also see the clipped plastic web.
3. Cut Insulating Rubber Mat as needed
Set your modified console in place on the rubber insulating mat, then examine the clearance you have for the wiring:
Your harness will be routed through the 3/4" hole like this:
If necessary to prevent mashing the cables, cut the rubber mat to provide a short path to the square mat opening for the console hold-down bolts. You might also want to smooth the edges of the plastic on the side of the 3/4" hole where the harness protrudes.
4. Route the harness through the 3/4" Hole
Route the custom harness through the 3/4" hole like this:
5. Install the USB/Aux Port
Install the USB/Aux port into the pod, then remove the two mounting screws:
6. Connect the wiring to the Port
Line up the port connectors:
Then plug in both connectors:
7. Mount the Pod
Taking care not to over-twist the wiring, mount the pod to the console with the two 4mm mounting screws:
8. Route the Harness
Route the harness along the side of the console and fasten the harness with the clip provided on the harness:
Route the harness around the front of the console and fasten the harness to the console using the 1/4" hole previously drilled:
Note that there is an additional fastener on the harness. You can leave it unused on the harness or cut it off.
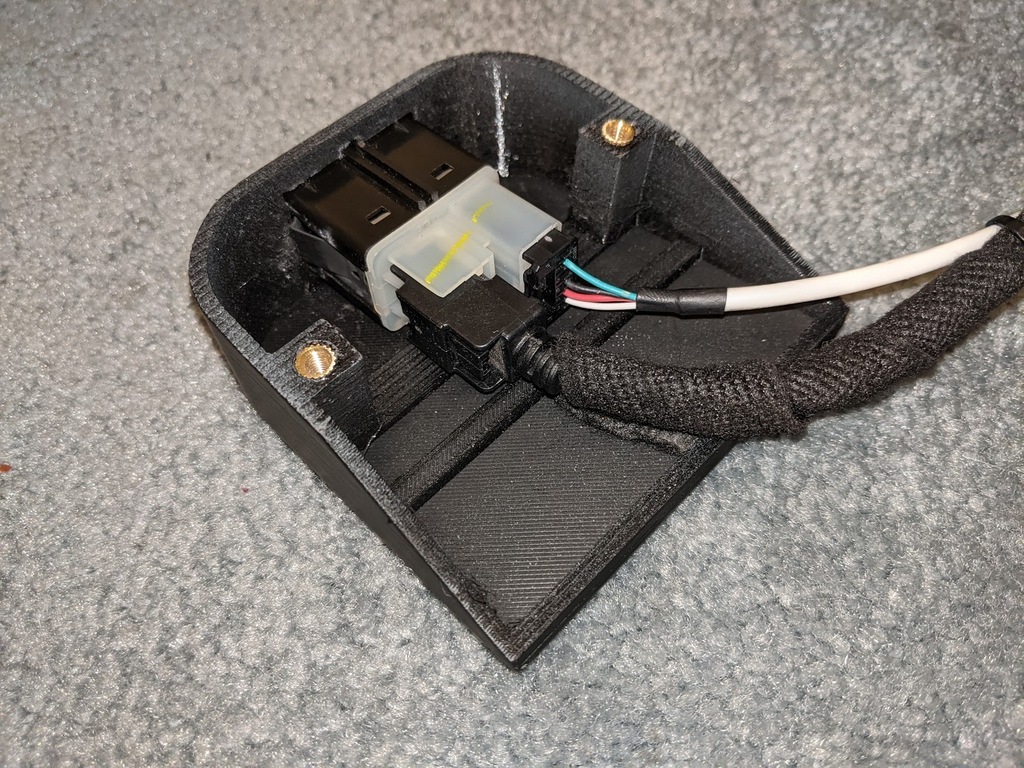
This completes the installation. Your harness routing should look like this:
and your console should look like this:
9. Install the Console
Install the console as described in the USB Nav website:
http://www.kawal.net/USB Nav.htm