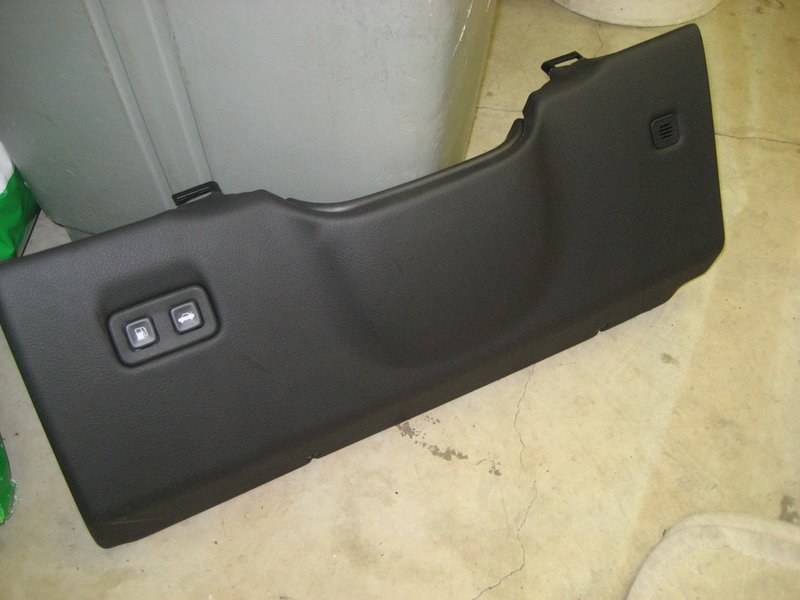
C6 Corvette Ipod Adapter Test
April, 2009
(updated 3/12/12)
![]() Click here for my main website
Click here for my main website
Introduction
This Ipod Adapter Review was originally completed a few months ago before GM finally released its own Ipod adapter, the Personal Audio Link, or PAL. This updated version includes all of the original aftermarket adapters, as well as the just released PAL.
There are a number of aftermarket Ipod adapters out there, and each one offers control of the Ipod, but many of the claims are exaggerated, especially for the Corvette. The Corvette uses "Class 2" technology, which isn't the latest out there, and it also somewhat limits what the radio/navigation head can do.
While the Ipod itself can display video and perform various types of searches, the Corvette audio system is just not capable of displaying everything an Ipod can, nor can it offer "complete control" of the Ipod. However, there are a number of control and display features that make it very useful if the Ipod interface adapter is usefully designed.
This review will provide details of installation, features, and performance of the most popular Ipod adapters so Corvette owners can decide which features are important to them and enable them to select the best choice.
The units reviewed are as follows (you can go to each individual review by clicking on them):
1. The GM Advanced Ipod Lockpick
5. The Peripheral (iSimple) PXAMG
6. The GM Personal Audio Link, or PAL
In addition, I also called and left email messages at Soundgate to see if they wanted to participate in the review, but they did not return my phone calls or emails. I don't want to be unfair, but from seeing the description of their unit, it appears to be identical to the Ipod Lockpick model. I only have to assume its functionality is the same as well.
Anyway, we now have six units to review and compare.
Here is a link back to the thread on the Corvette Forum:
Installation Note
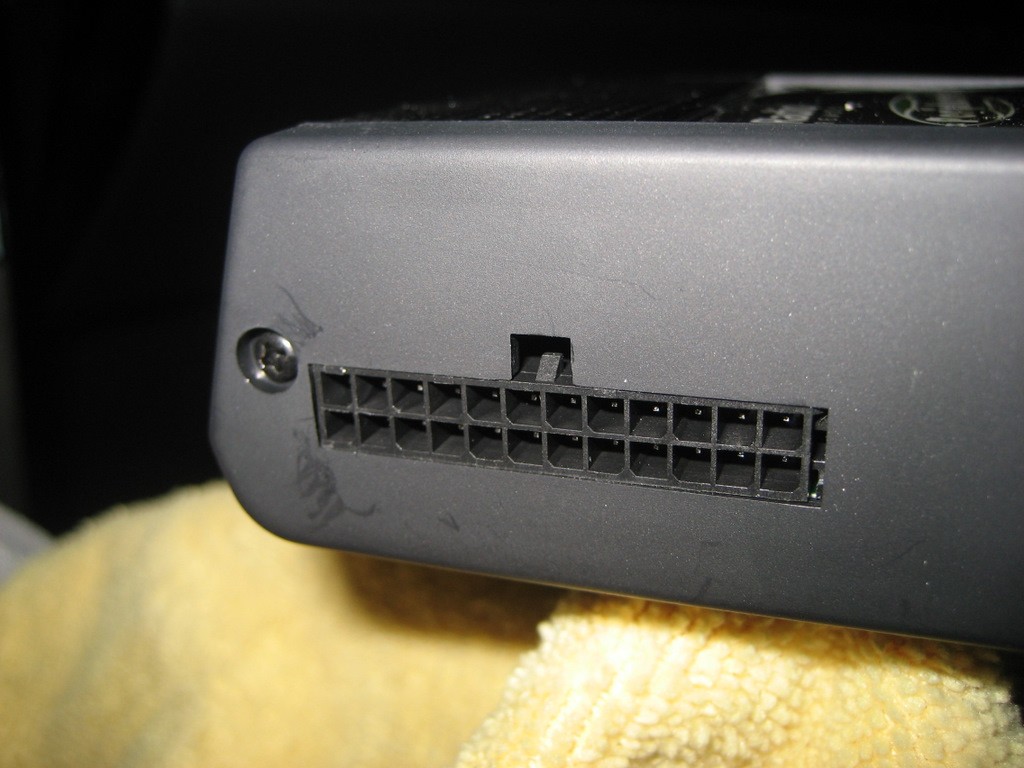
One of the nice features of most of these adapters is the ease of installation if you have the XM radio option. In this case, the first four units allow connection right at the XM receiver, which is very conveniently located above the left rear wheelwell in the Z06 and coupe and behind the waterfall in the convertible. There is a 16 pin male connector that plugs into the XM receiver. All you do is remove the connector and plug it into the female connector of the wiring harness that comes with the Ipod adapter, then plug the wiring harness male connector into the XM receiver.
To get to the XM receiver in the Z06 and coupe, just pull back the carpet and pull out the receiver after pushing on the two plastic holding clips.
If you don't have the XM option, you'll be forced to pull the center console and remove the radio or navigation module. It's not a big deal, but certainly not as simple as getting to the XM receiver. Console removal is probably a two hour job, compared to a two minute job at the XM receiver (and no tools either). For connection at the radio/nav head, a different wiring harness is needed.
The Peripheral (iSimple) PXAMG requires removal of the center console and Nav radio unit, which is considerably more difficult.
The GM PAL requires not only the Nav radio unit removal, but also the installation of a Class 2 data wire, which makes it by far the most difficult of the adapters to install.
(Update 9/6/09: New easy PAL
installation procedure is here:
http://www.kawal.net/PAL%20install.htm
Go to Alternative 5)
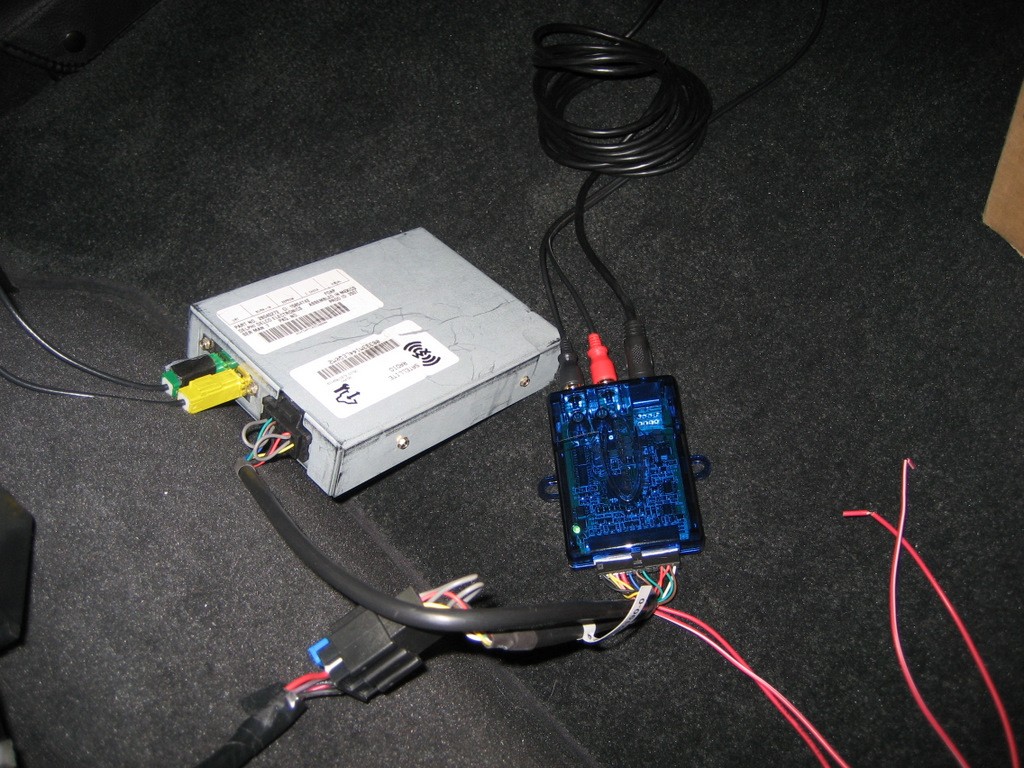
1. The GM Advanced Ipod Lockpick
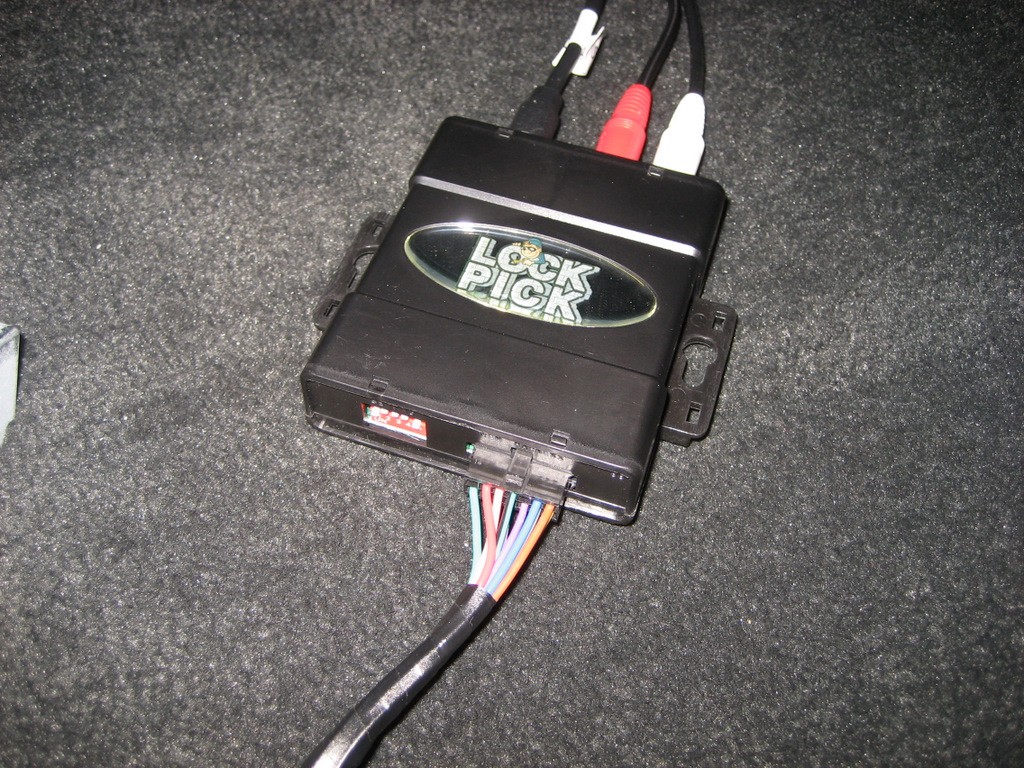
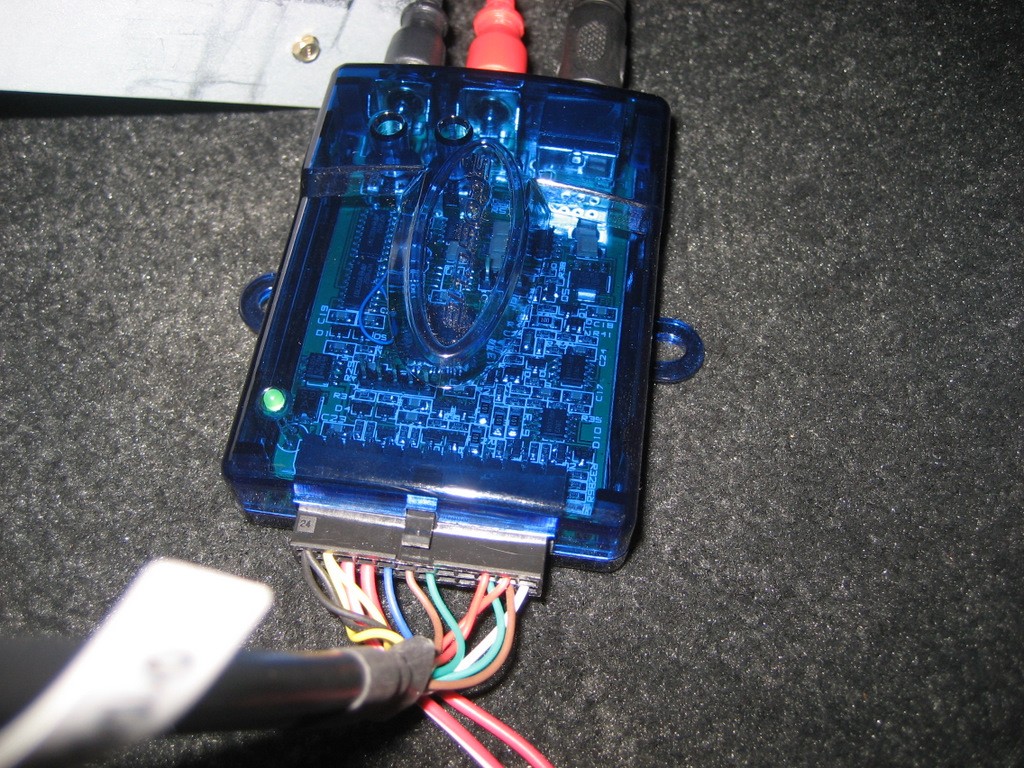
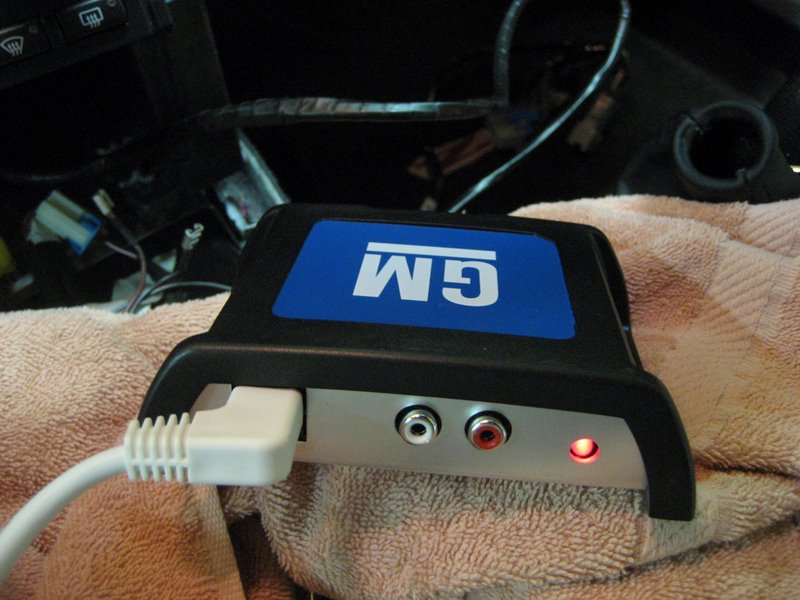
Let's start with this unit, since it happened to be the first one I received. As noted above, this unit connects at the XM receiver. Here it is pulled out from its mount behind the carpet. The Lockpick module is small enough it will fit in the space behind the carpet, near the receiver. Note that in this photo, I have both the Ipod cable (provided by Lockpick) and an auxiliary input cable (red and white RCA plugs) plugged into the Lockpick adapter:

You might note in the above photo that it may look a bit different than your car. The black wiring harness on the left is for the factory GM 6 disc external changer. It also plugs into the same 16 pin connector at the XM receiver. Whether or not you have the external changer, you simply unplug the factory 16 pin connector from the XM receiver and plug it into the Lockpick wiring harness. Then plug the Lockpick wiring harness into the XM receiver.
Here's a closer view of the receiver connection:
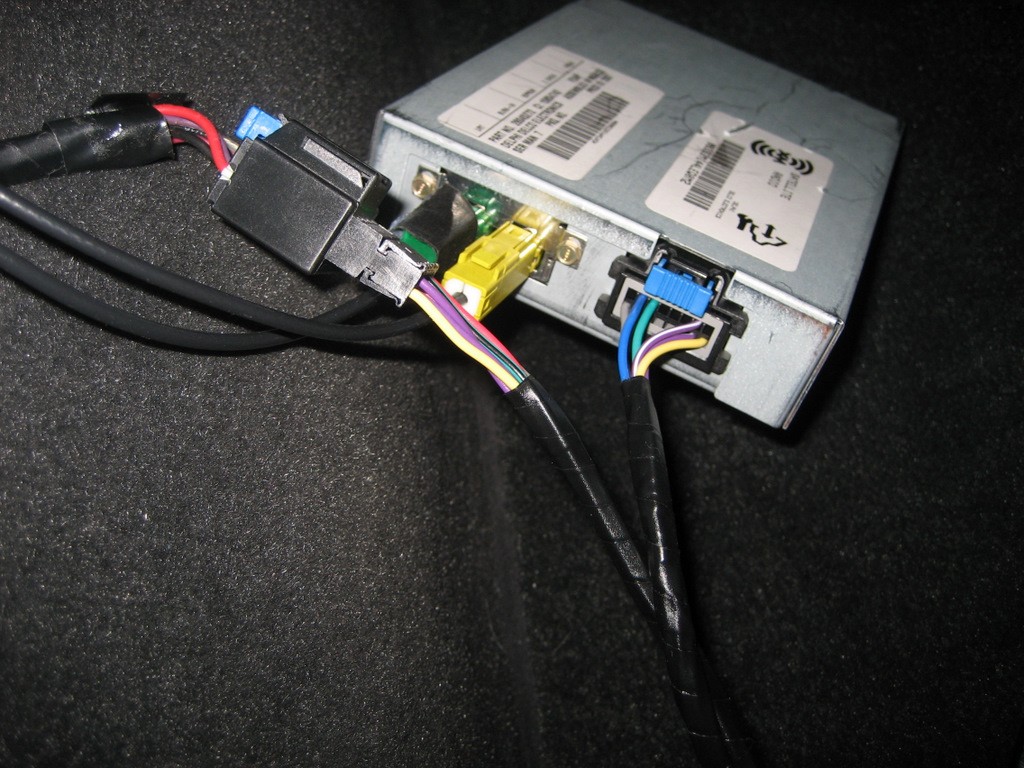
And at the Lockpick adapter:
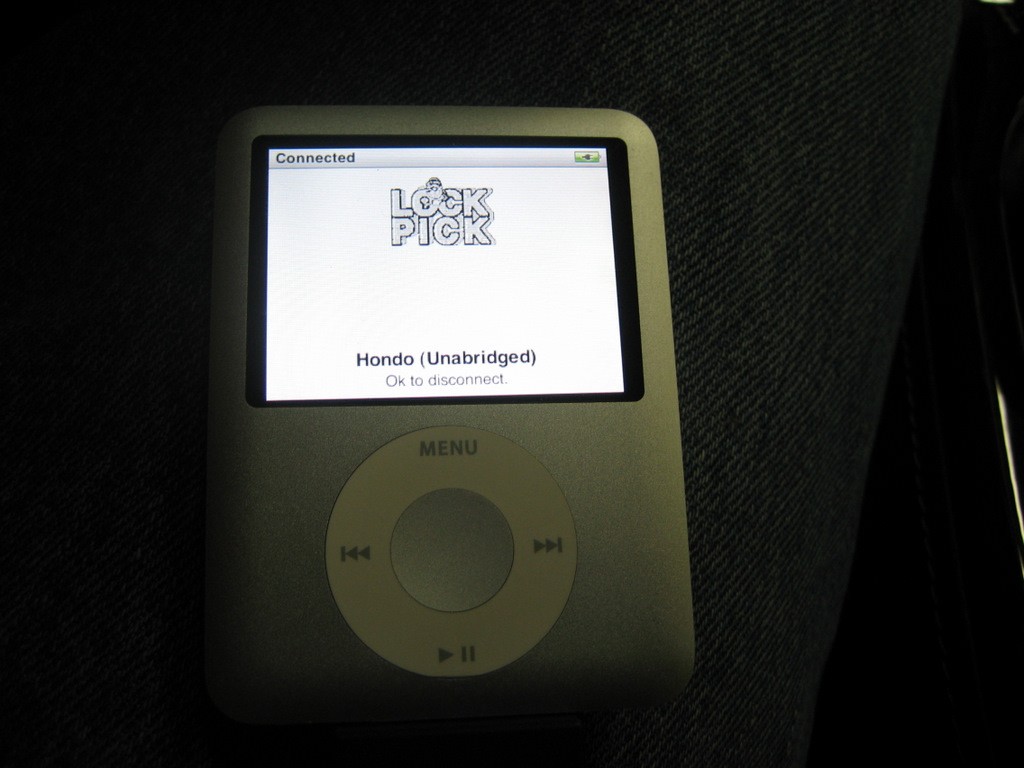
Ok, plug your Ipod into the Ipod connector
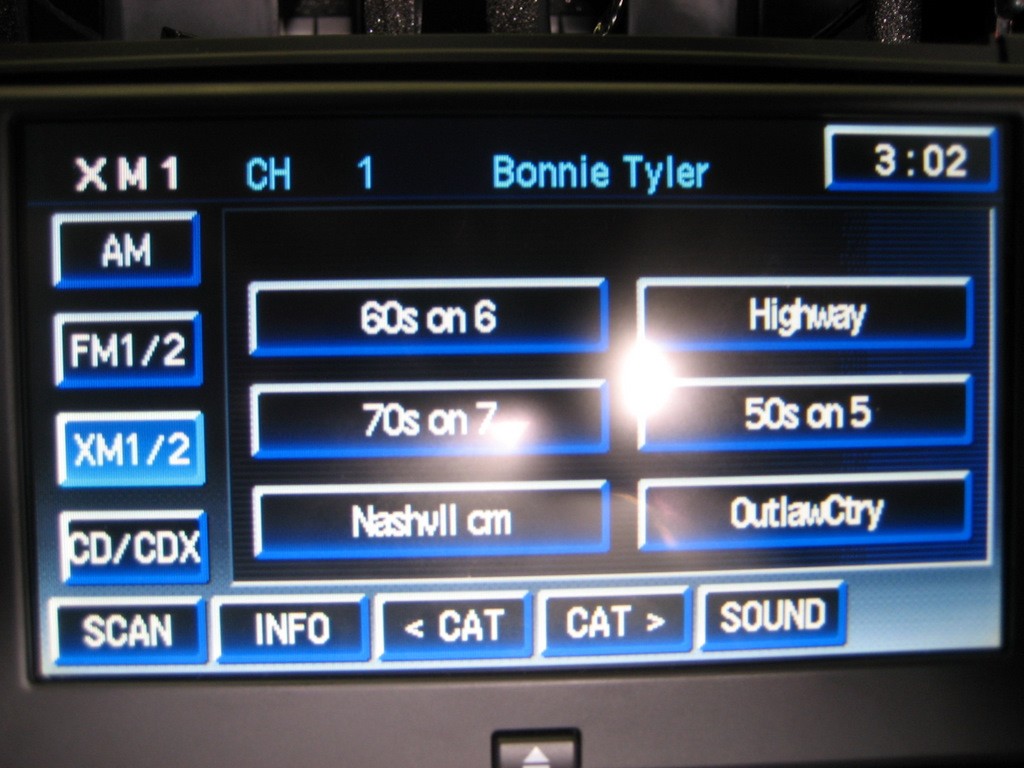
on the other end of the 10' cable and you'll see this (without the "Hondo
(Unabridged)".
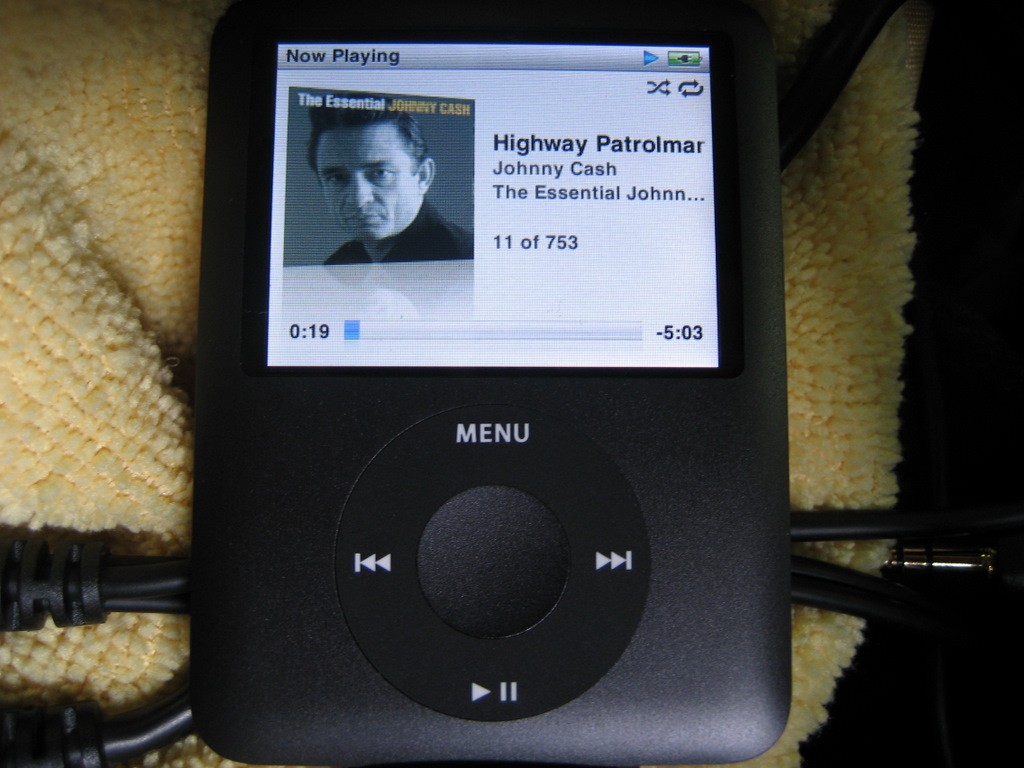
(I happened to be playing an audiobook at the time):
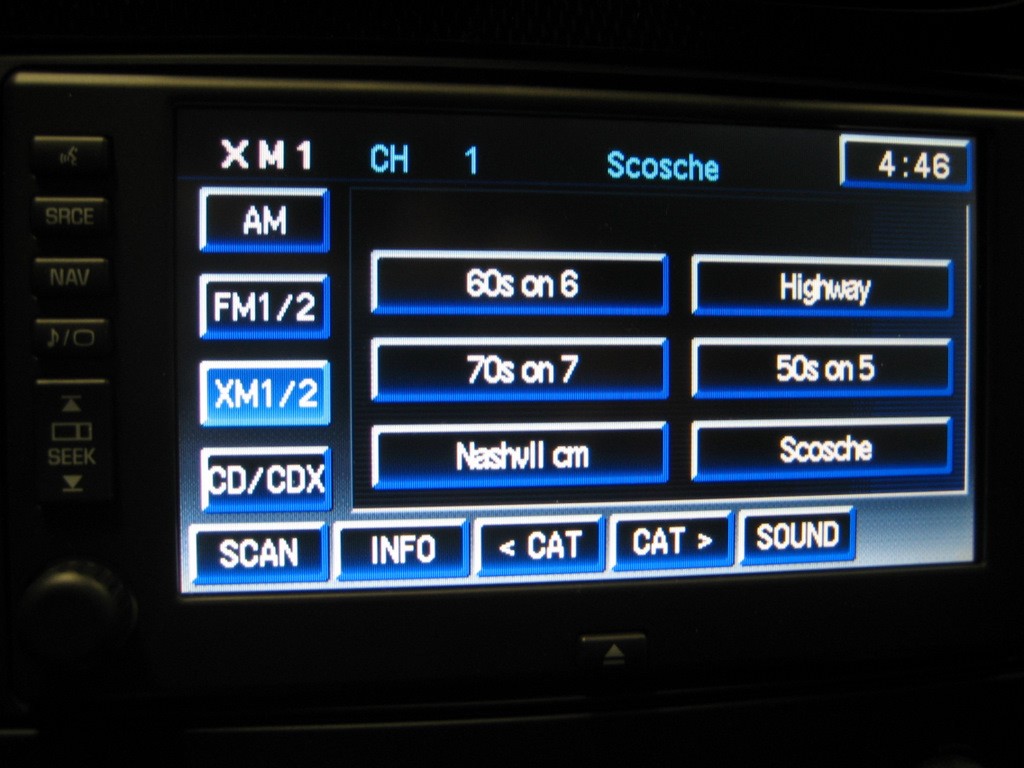
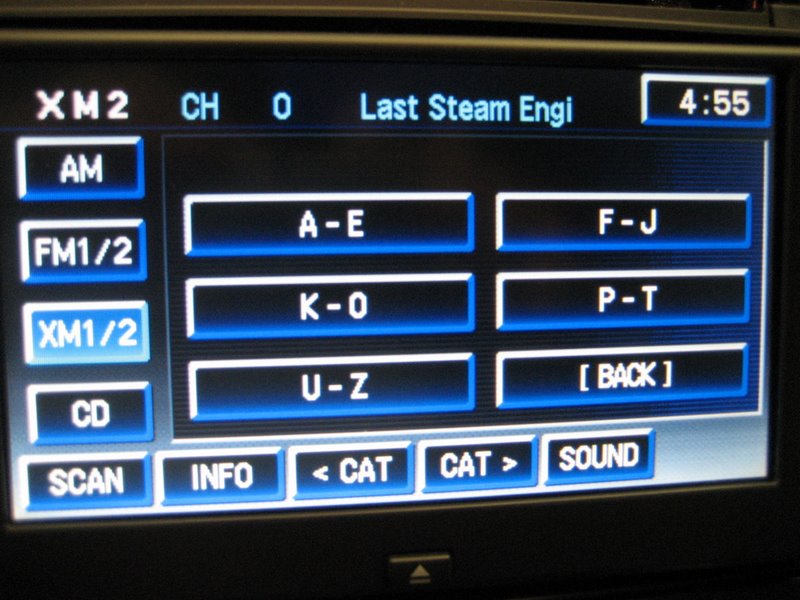
On your Nav screen, you use Preset 6 (lower right) to select the Lockpick input instead of your normal XM radio input. Press and hold Preset 6 and your Nav screen will show "iPOD" on it:
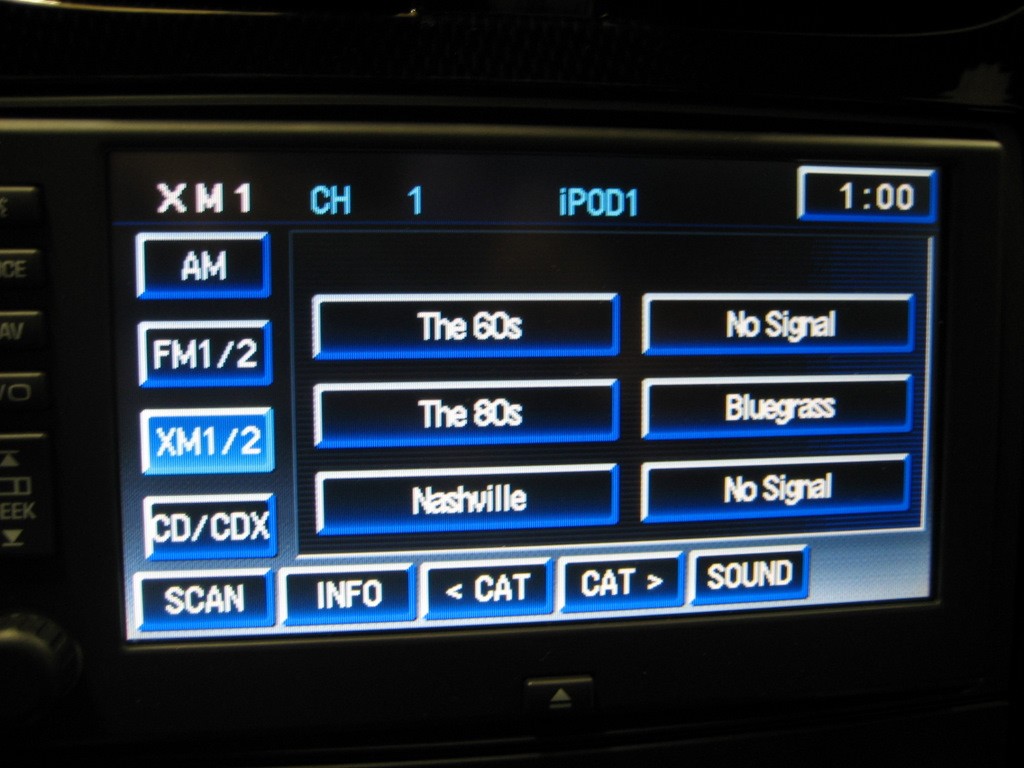
If you then press the XM1/2 button to select XM2, you can use the auxiliary input:
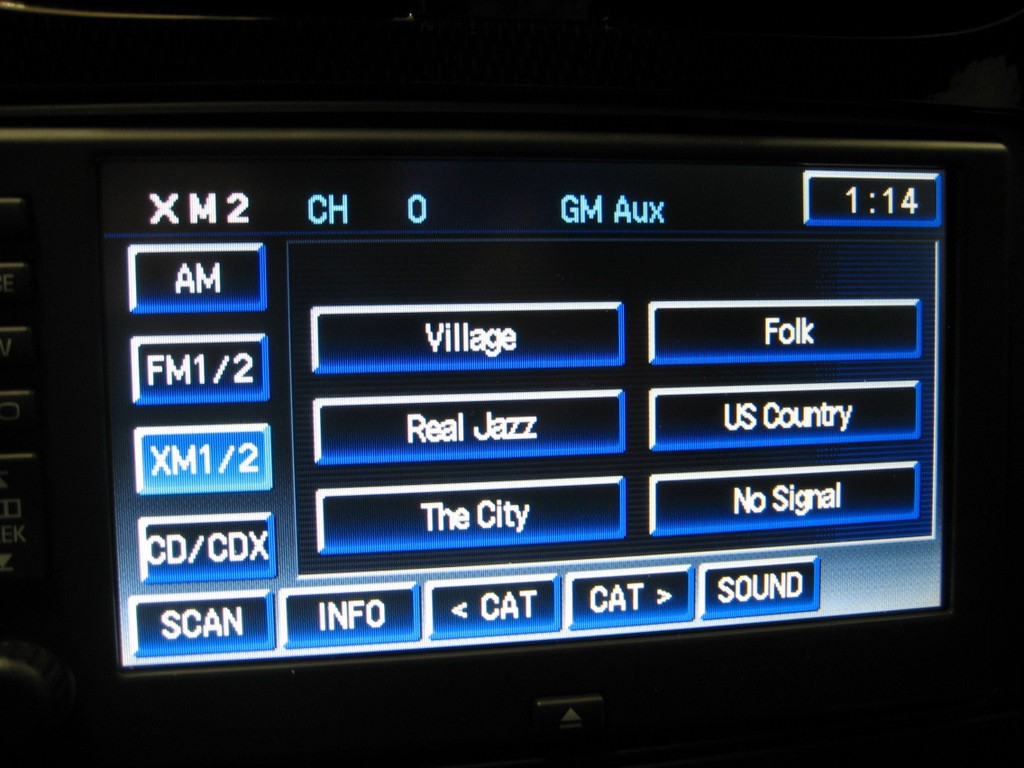
The auxiliary input allows you to connect most any device into your audio system. You will need an appropriate cable to connect your device (often an 1/8" stereo jack) to the two left and right channel RCA connectors on the Lockpick unit. Using the auxiliary input however, does not allow you to control anything from the radio or nav unit - it just allows you to listen to the sound through the audio system.
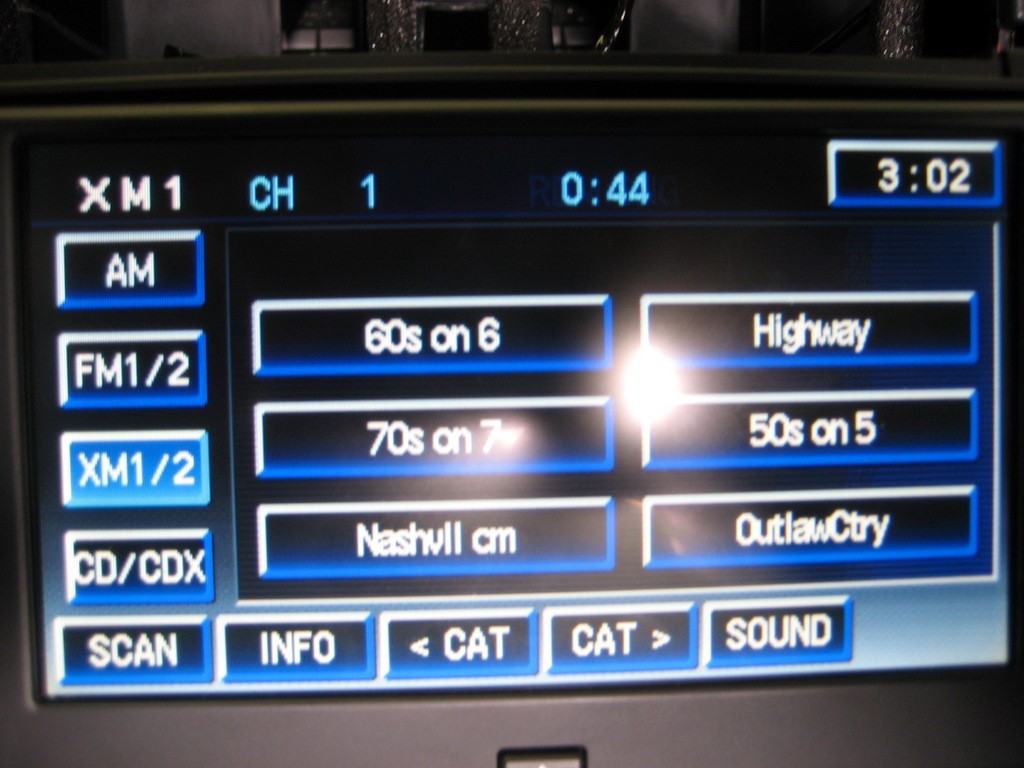
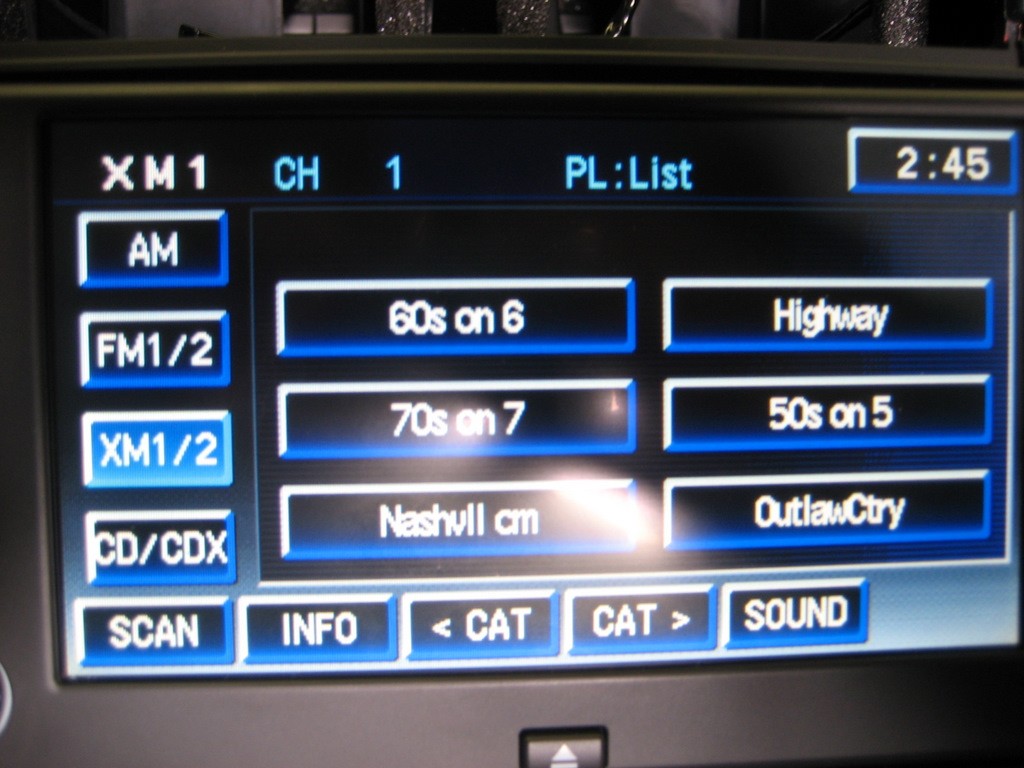
OK, back to XM1 and Ipod Control. Using one of the two "CAT" buttons at the bottom, you can select your Playlist. If you haven't created a Playlist in Itunes, "Songs" should come up as a choice. But you can cycle through your Playlists using the "CAT" buttons. Here, song #26 is playing:
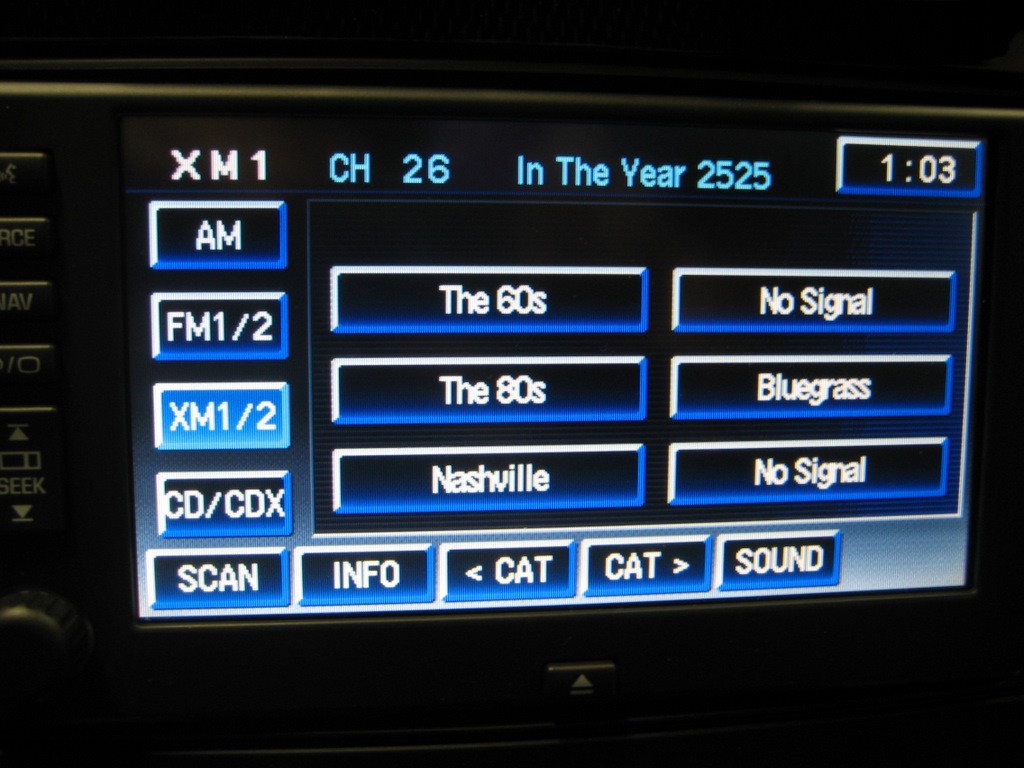
You can move to another song using the Up/Down SEEK button, shown on the far left. By holding the button down, you can fast forward or go backward through the list of songs. If you have hundreds of songs, it may take a while to cycle through them. Whatever song you choose, when you press the "INFO" button, it will first show the song title (shown here), then the artist. The Playlist name is not shown.
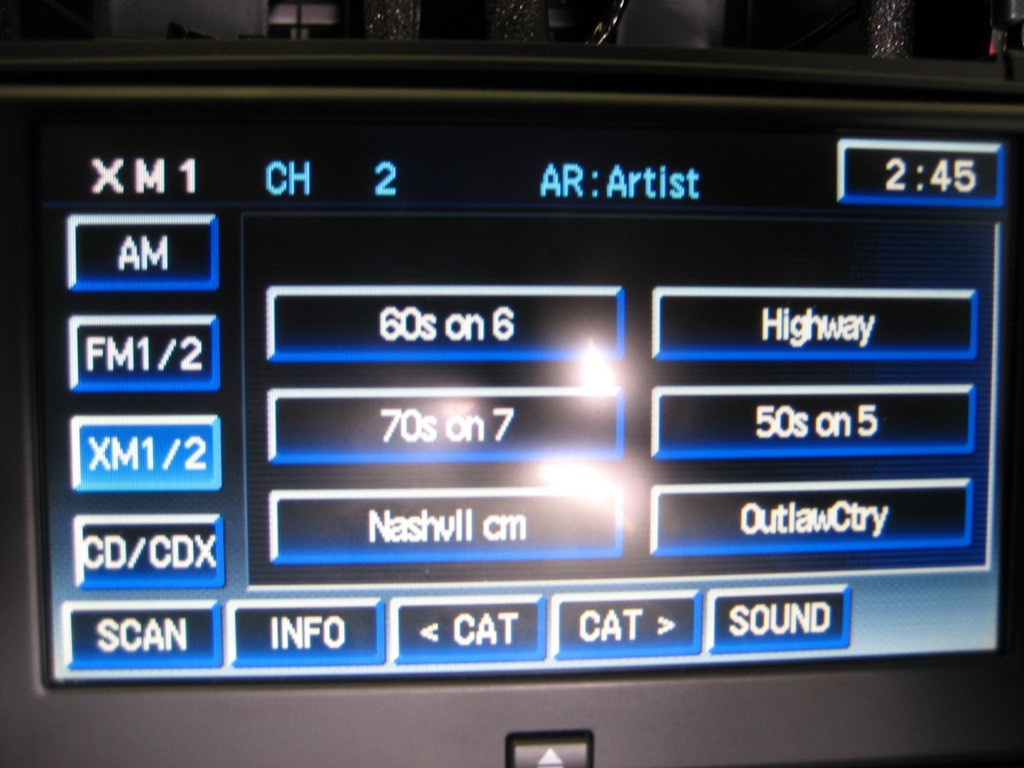
Here I have chosen another Playlist and it shows the Artist:

OK, that's about it. That is basically all the Ipod Lockpick will do. You can choose a Playlist, then cycle through the songs in the Playlist using the SEEK button. The sound is great. If that is all you want your Ipod adapter to do, the Lockpick unit will do it. Simple to install and simple to use.
By the way, if you have steering wheel controls, the volume and seek buttons work normally.
Here are some things I wish it could do:
1. Enable manual control of the Ipod. Since the control is so limited, I think many people will want to use search features requiring control of the Ipod. With the Lockpick adapter, you must physically disconnect the Ipod to regain manual control. Once it is doing what you want you can then connect it back up and begin playing through the audio system.
2. Audiobooks will play through the Ipod adapter, but you have no control whatsoever of what you are listening to. To select a certain audiobook, you must either manually select it on the Ipod, or create an individual Playlist for that book. But even then, once you start the book, you cannot advance or go back to any point in the book. It plays with no control of it. I was hoping that the SEEK button would at least go to a specific chapter, but no dice.
3. Have more control of the Ipod. If all you want to do is listen to a playlist with the order of music set already set up and continue playing until the end, this will do it. But if you want to go any particular song or artist, you will have to cycle through the songs blindly until you find that song. If you know that song is #245 (which you likely won't), you can hold the SEEK button until you get to #245 and start listening.
Other than these limitations, the Ipod Lockpick doesn't seem to have any negative issues. If you have another device plugged into the Auxiliary Input, the Lockpick easily allows you to switch to that device as described above, using the XM1/2 button. The Lockpick has the cleanest wiring harness of the group of adapters.
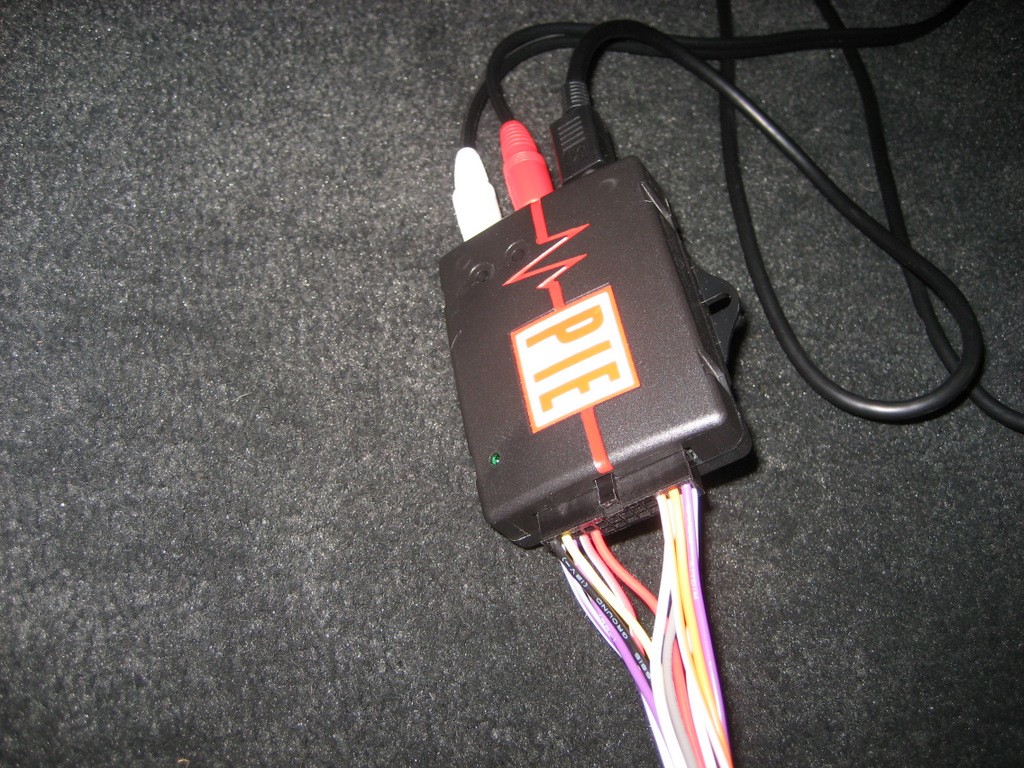
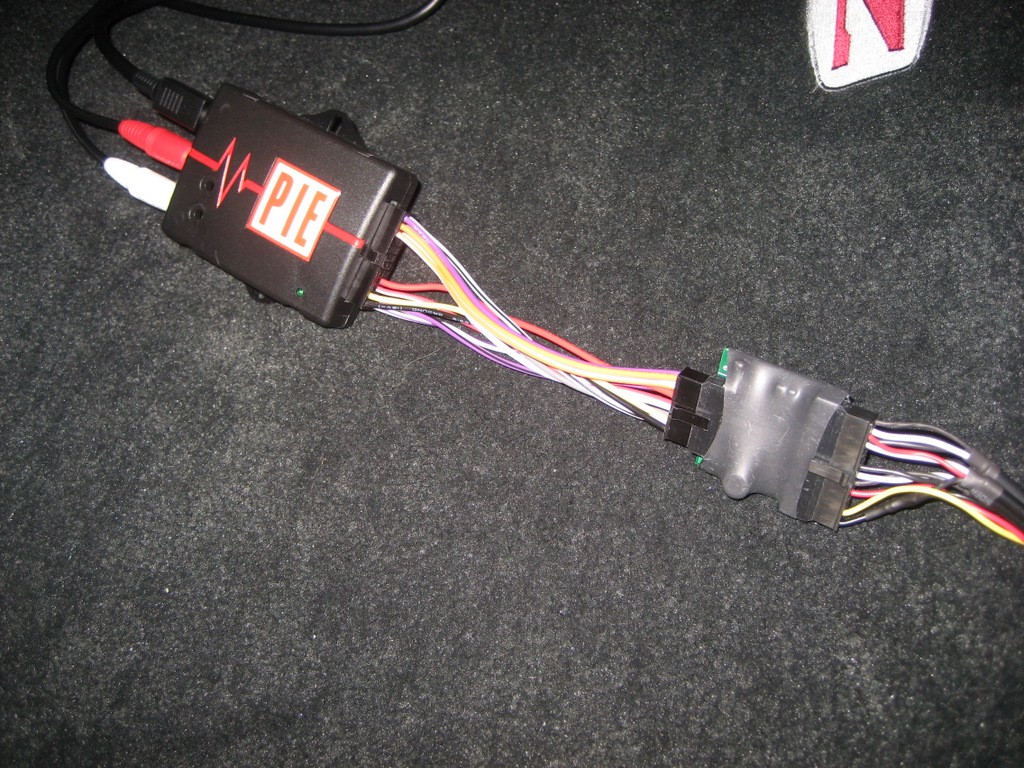
This Ipod adapter connects similarly to the Lockpick. There are two inputs - one for the Ipod and one for an auxiliary input, just like the Lockpick adapter. Here is the connection to the XM module 16 pin connector:
Like the Lockpick harness, you simply unplug the 16 pin connector at the XM module and connect the P.I.E. harness. In this case however, you must choose the P.I.E. GM12-X1 harness if you have XM and purchase the harness. If you do not have XM, you must purchase a different harness, the GM12-R1.
After connecting the module and turning on the audio system. I noticed noise being generated by the installation whenever I chose to listen to my factory external 6 CD changer. The optional factory changer is also plugged into the XM receiver at the 16 pin connector. When I spoke to P.I.E. Tech Support, they had warned me of this issue, so they included an optional adapter, their GM12-VCD. This adapter plugs in between the GM12-X1 harness and the GM12-POD/S module itself. Here is a photo:
It's simple to plug in, but you must be sure you order that adapter if you have the external CD changer, or you won't like the background noise.
Again, a long cable is supplied to connect the Ipod to the P.I.E. module. But this interface is quite different than the Lockpick.
The only touchscreen buttons that are used are the six preset buttons. Unlike the Lockpick, the CAT buttons are not used. You can use the INFO button to show song title and artist, but this information is usually displayed automatically. Each preset button has a different function with the P.I.E. unit. Unfortunately, none of them are labeled, so you must remember which button does what. It doesn't take long to memorize them, but a new person without the instructions wouldn't have a clue as to how to use the buttons. Preset #2 is supposed to be a "Help" button, but all it does is show the word "Help" - rather useless.
The P.I.E. unit has a few nice features. First, while the Ipod is plugged in, you have a choice of "Manual" or "Advanced" Mode. In Manual Mode, you have full control of the Ipod, just as if it was disconnected or you were listening to it with earphones. In Manual Mode (like Advanced Mode), you hear the Ipod sound output through your audio system, one of the basic features of any of these adapters. In addition, you can Fast Forward or Rewind to the next or previous song, using the SEEK button on either the Nav unit or your Steering Wheel Controls (if you have them).
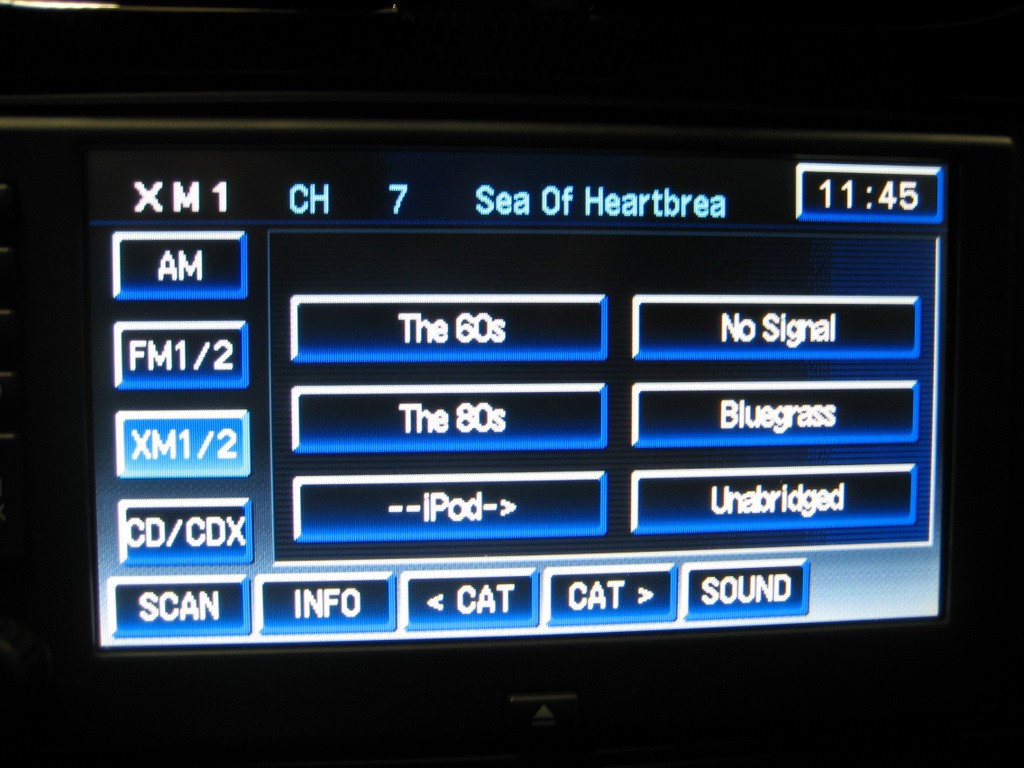
In Advanced Mode, you lose control of the Ipod itself, but you gain additional control at the Nav unit. You can select any number of playlists, or you can select a particular song, or you can select a particular artist. However, this selection is sequential, so it may take awhile. For example, if you are listening to Arlo Guthrie ("A"), and you decide you want Marty Robbins ("M"), you will have to cycle through all artists between A and M to get where to want. It is the same issue with a particular song. If you have a lot of songs, it will likely be easier to go into Manual Mode and find what you want on the Ipod, then return to Advanced Mode.
When you are listening to a particular song, the song title and artist show up on the Nav screen:
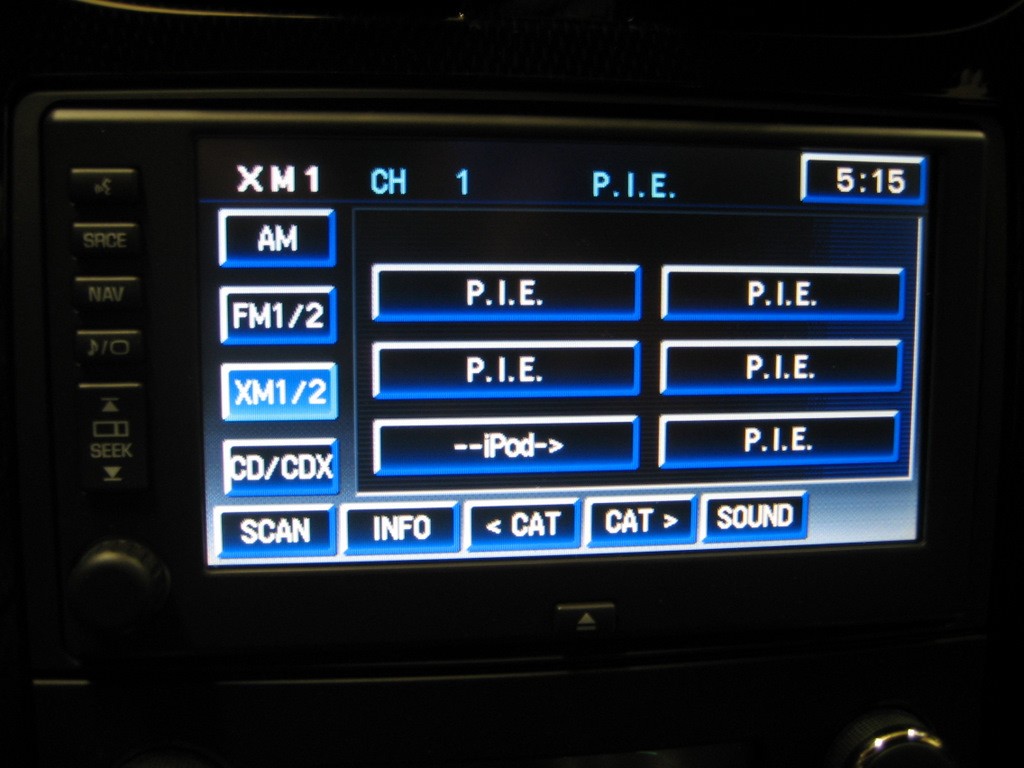
Note in the first photo, each of the six preset buttons was labeled "P.I.E." That was after I held each button in to save that label. But it really doesn't matter what you label the button, because you still have to remember what the button does. Whether Preset #1 is labeled "P.I.E." or "The 60s", it does exactly the same thing, as explained below.
Here is a photo of the Ipod in Manual Mode:

It looks and functions just like it would if it were disconnected from the P.I.E. module. Here is a photo in Advanced Mode:
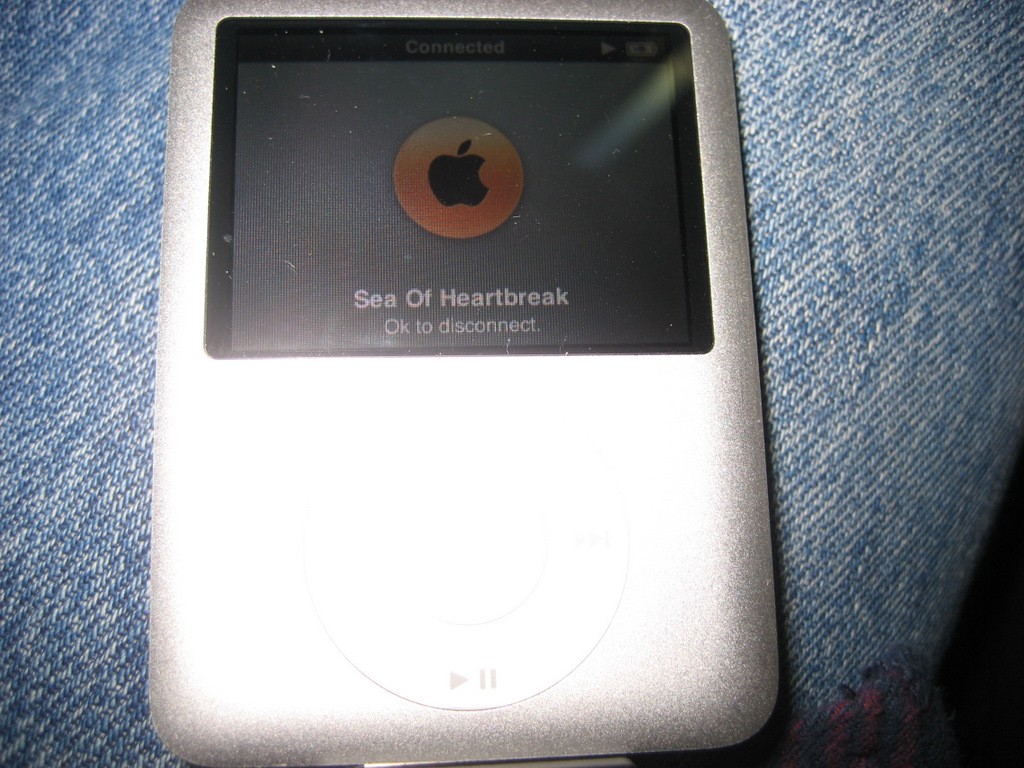
The song showing is what is currently playing, but you cannot control the Ipod itself.
OK, here is what each Preset touchscreen button does:
Preset 1: In either Manual or Advanced Mode, pressing this button will cycle through one of the following inputs - XM Radio, Ipod, or Aux In. If you have chosen Aux In, and a device plugged into the Aux In RCA jacks, you will hear whatever is playing through the audio system.
Preset 2: The useless "Help" button that doesn't do anything but display "Help".
Preset 3: You use this to select playlists, songs, or artists when you have chosen to select something. Pressing this button moves DOWN one item.
Preset 4: Similar to Preset 3, except you move UP one item.
Preset 5: You press this button when you see the item you have chosen to select.
Preset 6: This one is a bit complicated. When you press this button, you cycle though a number of selections. One selection is "Select Playlist". Next is "Select Artist". Next is "Select Album". Next is "Select Genre". Next is "5 to MAN" if you are in Advanced Mode, or "4 to NAV" if you are in Manual Mode. Those last two mean that you press Preset 5 to switch to Manual Mode (if you are in Advance Mode) or you press Present 4 to switch to Advanced Mode (if you are in Manual Mode). It sounds sort of complicated but it doesn't take too long to get used to it. The problem is since none of the presets are labeled, you have to remember this stuff.
Here's an example of how to use the selection features. Say you are listening to an Oldies playlist and you decide you want to listen to some songs by Marty Robbins, and you have 15 Marty Robbins songs on your Ipod. You would press Preset 6 until you get to Select Artist. Then you would press either Preset 3 or 4 (up or down) to cycle through the list of artists you have on your Ipod. When you get to Marty Robbins, you would press Preset 5 to Select Marty Robbins. A song from Marty Robbins will begin playing. You can then use the SEEK button on either the Nav unit or the Steering Wheel to fast forward or rewind to the next Marty Robbins song or just continue to listen to all of the Marty Robbins songs on your Ipod. Marty Robbins will continue to play until you again press Preset 6 to choose another artist, song, or playlist.
How convenient all of these options are depends on how you've chosen to set up your Ipod. If you have many many songs, or many many artists, you likely won't want to be taking the time to cycle through all of them in Advanced Mode. It will be much faster to enter Manual Mode and select what you want directly from the Ipod. But if you just want to listen to music and don't care much what is playing, you can stay in Advanced Mode and let it move from one song to the next. As it does, the Song title and Artist name will be displayed on the top of the Nav screen.
In the Lockpick review, I mentioned that Audiobooks are not handled well at all. With the P.I.E. unit in Advanced Mode, the situation is similar. You cannot advance chapters or fast forward or rewind. You can select an Author by selecting Artists. But basically, you can't control much. However, because it is pretty easy to enter Manual Mode (Preset 6, then Preset 5), you can get to your Ipod and go wherever you want in whatever audiobook you choose. While listening to the audiobook, you would likely remain in Manual Mode.
That about covers the P.I.E. unit.
Here are a few annoyances:
1. The SEEK button is supposed to advance you to the next song or previous song, depending on whether to press up or down. The up SEEK, however, fast forwards in jerky movements that are irritating. And it sometimes continues to do that into the next song, even skipping the beginning of the next song. Once it finally stops and plays normally, you can use the down SEEK to go backwards and get back to the song you missed. This SEEK button should work better. I think what most people want is just to skip a particular song, not advance through it - especially when you can't even stop it where you want to.
2. I already mentioned the Preset 2 "Help" button is useless.
3. Without labels on the Preset buttons, you have to learn what each of them does. You'll learn what they do only after you spend some time using the Ipod interface.
4. Occasionally, the adapter won't like something you do and it will lock up the Ipod, causing loss of control. The only option is to unplug the Ipod and reset it, using the Menu and Select button.
But even with these annoyances, the P.I.E. Ipod adapter offers you quite a few options for Ipod control.
I was interested in this unit, because I have a USA Spec Ipod adapter in my 2002 Tahoe. Because it is an older style radio, it is pretty basic in its functions, but it works well and allows either an Ipod to play (and be charged) or another device through the Aux Input. I believe USA Spec was the first aftermarket company to offer an Ipod adapter for the Corvette.
The PA11-Vette adapter also conveniently plugs into the 16 pin connector at the XM receiver:
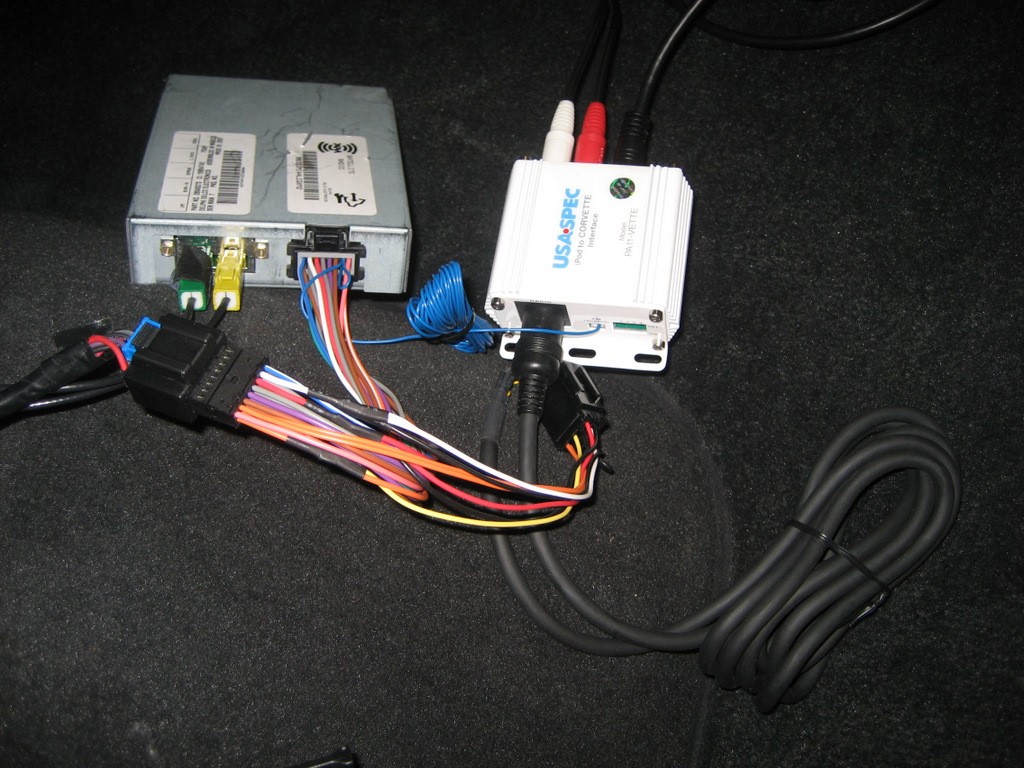
Note that unlike the previous units, there is an extra wire (blue) that must be connected from the wiring harness to the Ipod module. It is very easy to do however.
Here is a closeup of the module with the dip switches that must be set, depending on the user application:
The package I received from USA Spec included a Design Change Notice, dated 11/05/08. It turned out this was important, because the later model has some functionality differences from the earlier models. At first, I became very frustrated with the setup, because the installation instructions were so poorly written, I couldn't even understand them. I spent about two hours trying to get this to function "properly", before I gave up and decided to call Tech Support the following day. I finally got hold of a very knowledgeable fellow who knew their product inside and out. After about an hour on the phone, going over the poor (and incorrect) instructions and what they meant, I now feel comfortable with exactly what this unit will do and what the options are.
Now that I understand the design changes, I believe USA Spec made some improvements over their previous design. The new "dual mode" design allows the user to operate the Ipod adapter in either "Direct Mode" or "Playlist Mode". There are circumstances where the user may wish to choose one mode over the other. The earlier design required the installer to choose which mode he wanted during the installation by the setting of the dipswitches. Once set, your choice was made. And since the module is usually hidden out of site, neither the driver nor the passenger has access to it. Plus, the unit must be disconnected to change the dipswitches.
The "Direct Mode" allows the user full control of the Ipod at the Ipod itself. The only control at the radio/navigation head is advancing the track you are listening to by using the SEEK button. In addition, no information about the song title or artist is displayed. Is is somewhat like just using the Ipod through an Auxiliary Input, but the battery is still being charged.
The "Playlist Mode" allows the user to select three or four playlists (depending on a dipswitch setting explained below) and listen to only those playlists or "All Songs" on your Ipod. You can cycle through whatever playlist you choose to select the next or previous song using the SEEK button, or the XM Preset buttons 1 or 2.
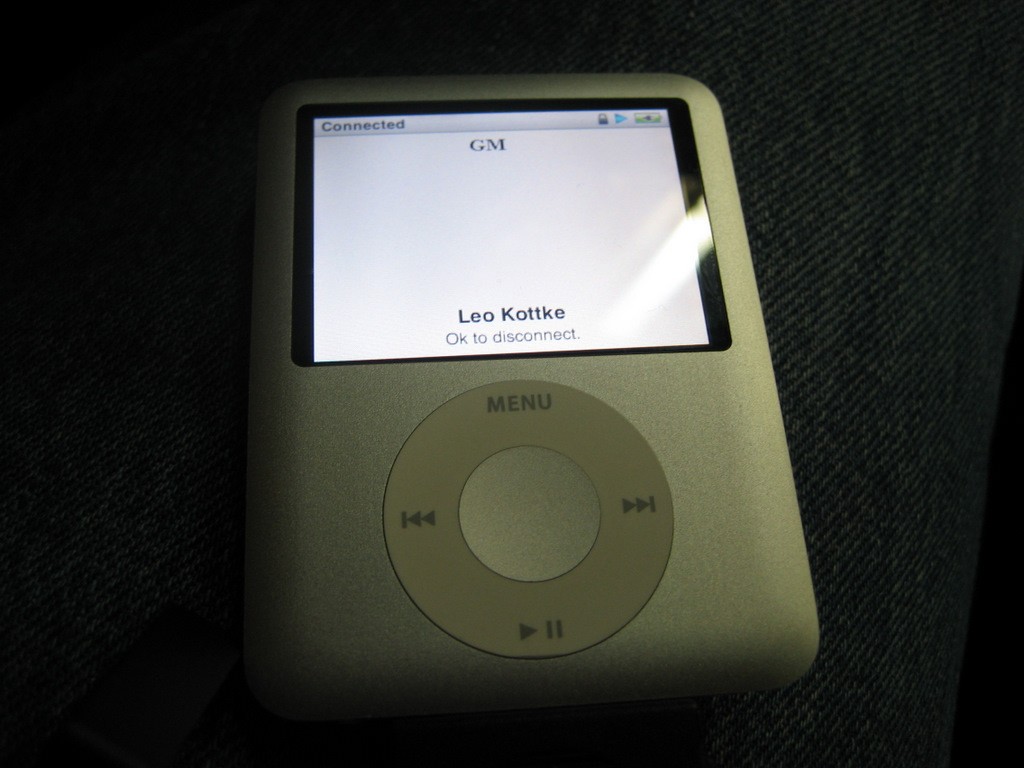
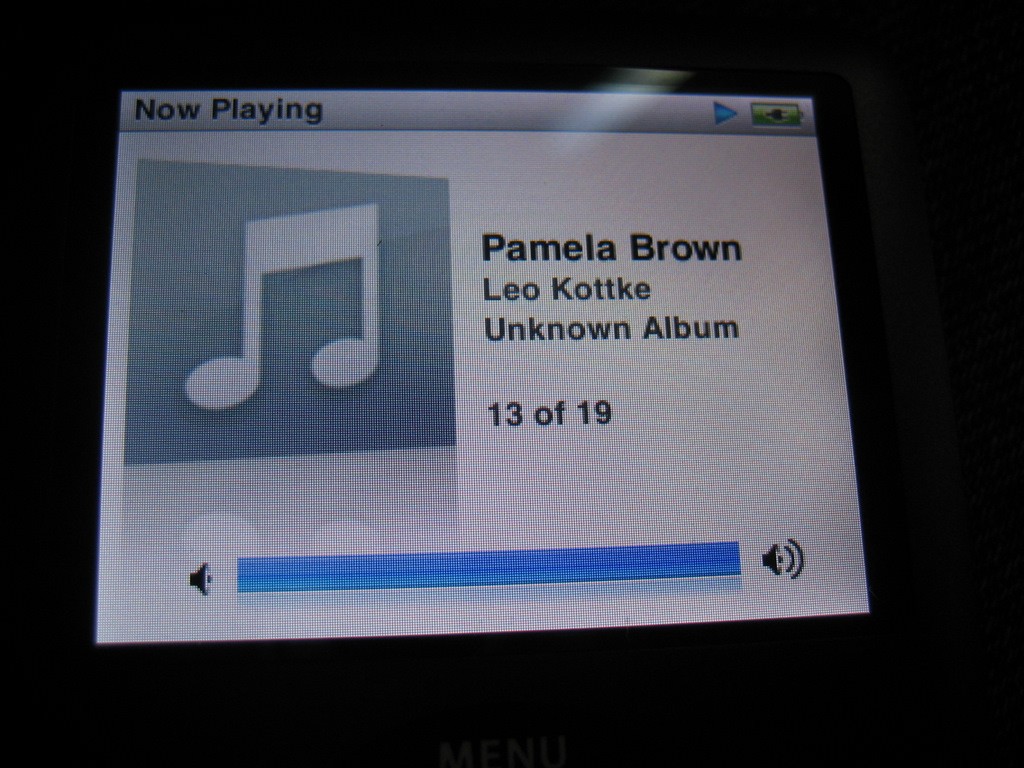
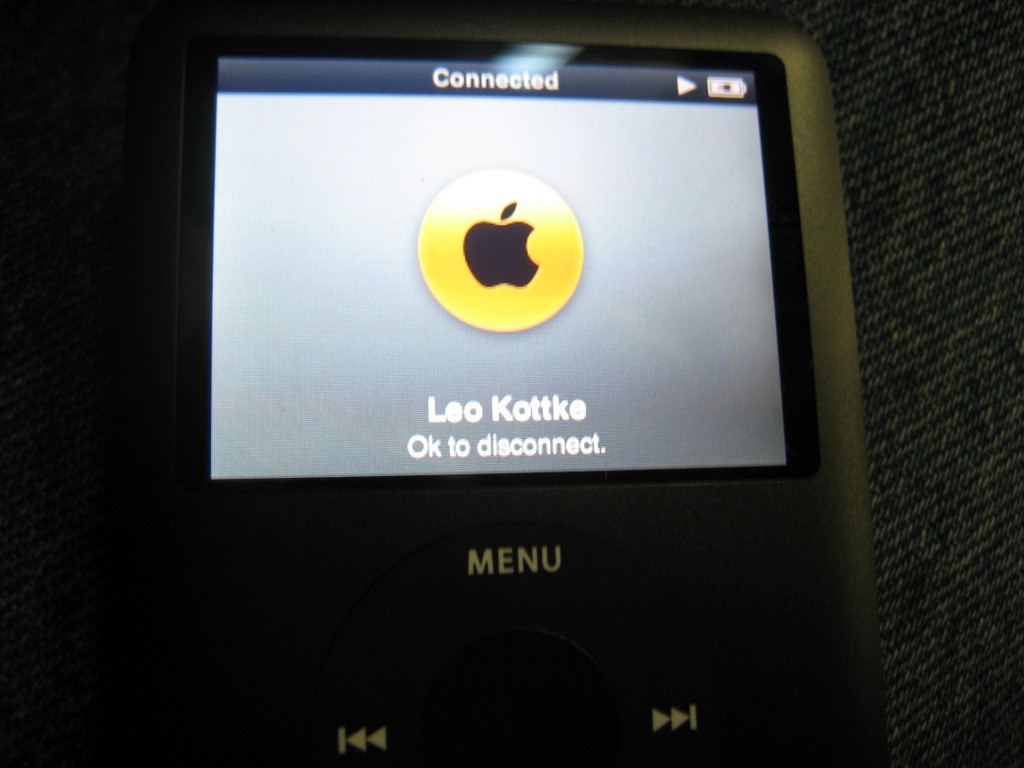
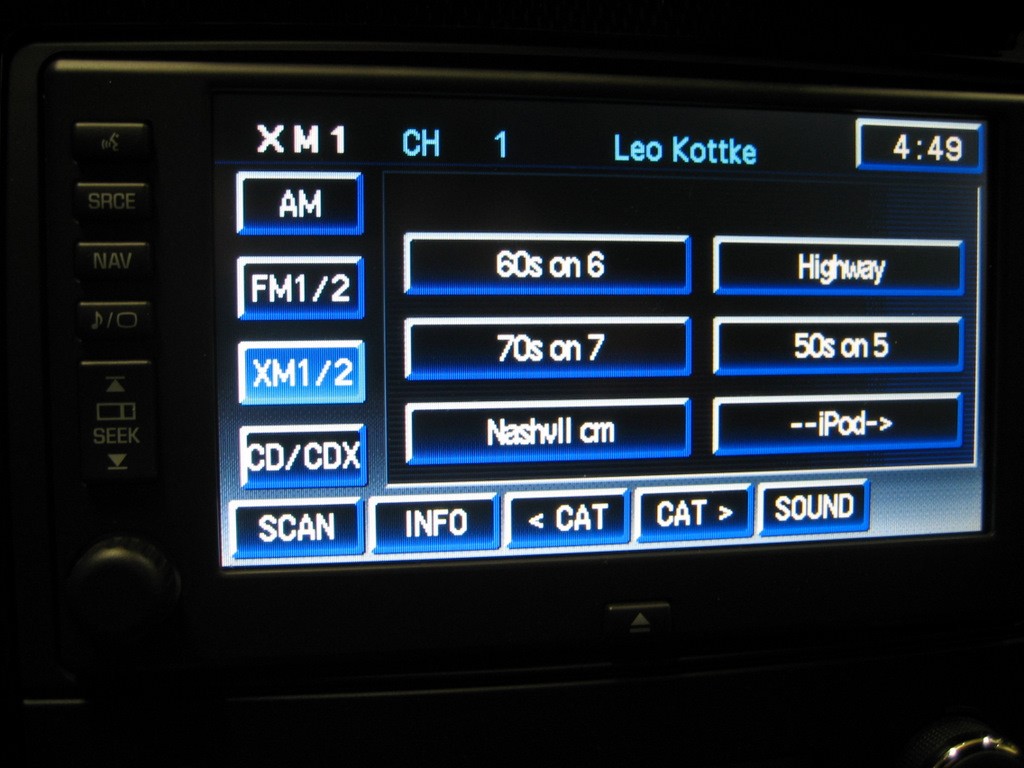
When you plug in your Ipod to the connector (supplied with the unit), your Ipod will look similar to this (not necessarily with Leo Kottke playing):
And your nav unit will look similar to this:
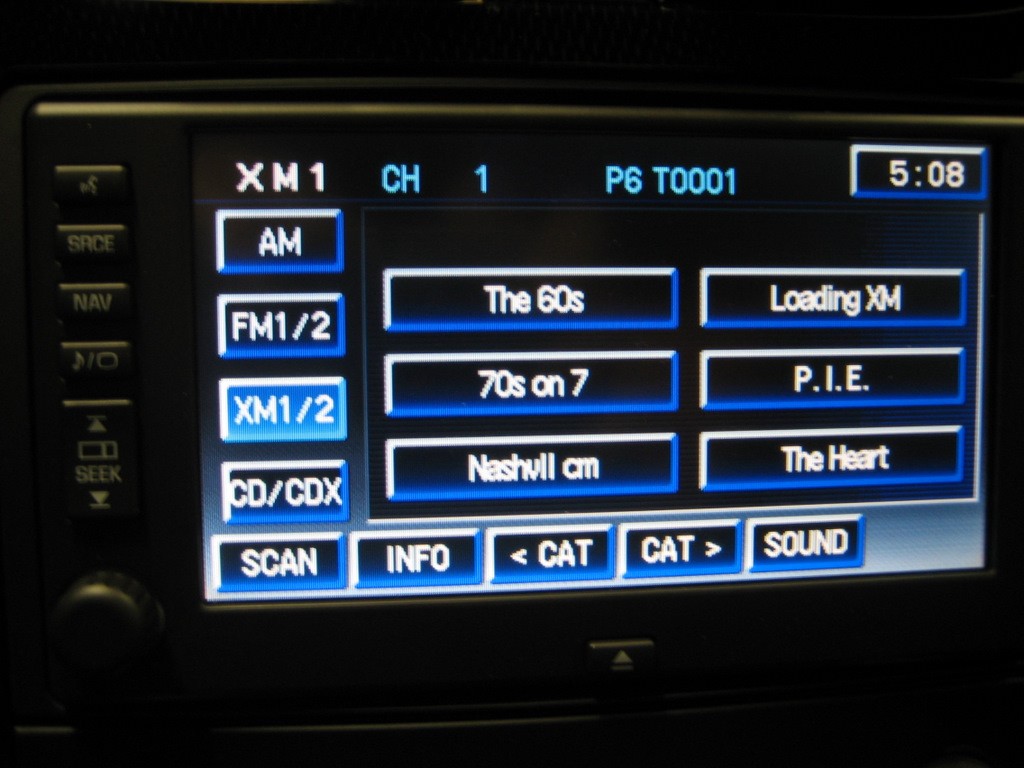
Like the previous Ipod adapters described above, the 6 preset buttons may say anything, so pay no attention to their labels. However, you must remember what each of the preset buttons do, as described below. The label at the top, "P6 T0001" just means position 6 title 1 (I think). But this area is where a song title and artist name will show up if you press the INFO button, near the bottom.
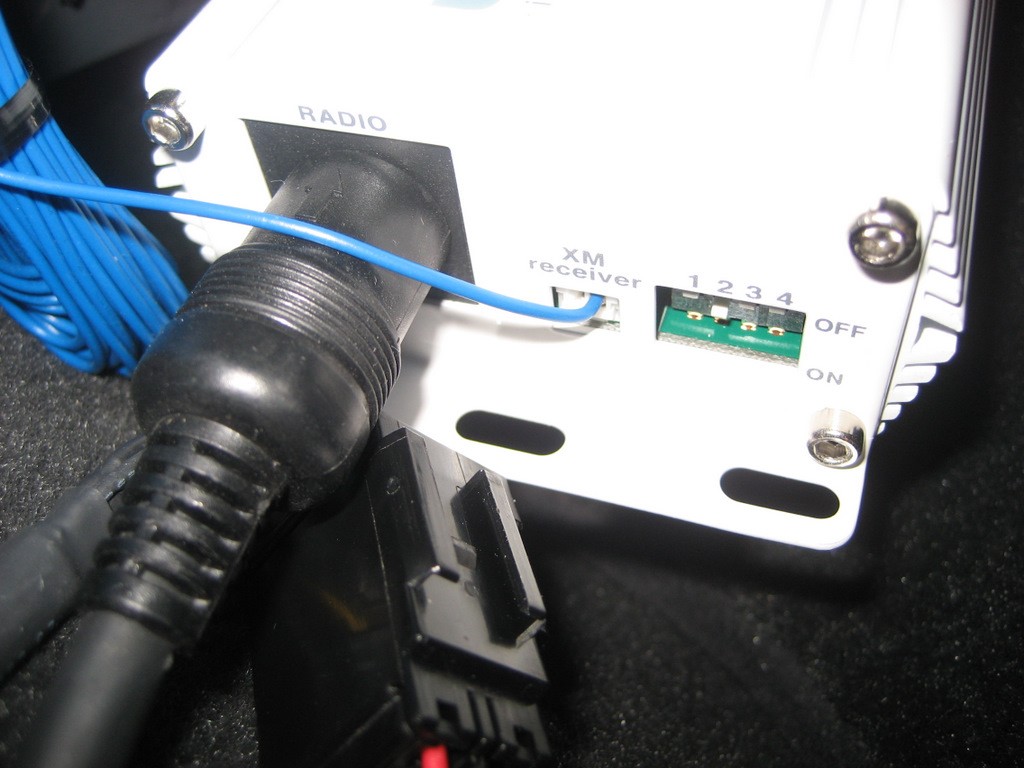
You have some choices to make during the installation. You can install it using the CD changer control or the XM radio control. I did not test the CD changer control operation because I already have the factory optional 6 CD external changer installed, so the Ipod adapter cannot work with it in the CD changer control configuration. Most users will likely use the XM radio control anyway, so you set dipswitches 3 and 4 to OFF, if you have the XM receiver installed. (Dipswitch 4 is ON without an XM receiver.)
If you choose to use the optional Auxiliary Input feature of the Ipod adapter (see the red and white RCA connectors in the first photo?), you set dipswitch 1 to OFF. If you choose not to use it, set dipswitch 1 to ON, and that allows you to select a maximum of four playlists instead of three playlists.
Dipswitch 2 determines whether you choose Direct Mode only or the new "dual mode", which allows you to select either mode at the radio. Most people will likely use "dual mode", so you will set dipswitch 2 to ON.
OK, you are in "dual mode" - now, how do you use this interface? You first need to know how to use the preset buttons. First, and most importantly, is Preset 5 (labeled P.I.E. in the above photo only). Preset 5 allows you to cycle through six "positions":
P1 is Playlist 1
P2 is Playlist 2
P3 is Playlist 3
P4 is All Songs
P5 is Ipod Direct Mode
P6 is the RCA Auxiliary Input
The PA11-Vette Ipod adapter allows you to select (in this setup) 3 playlists for your car. You create the three playlists in Itunes and each of the three must be named "GM1..., GM2..., and GM3...". The "..." means you can name it something after the GM1, GM2, etc. like "GM1-Oldies", but you must have the GMx name at first for the Ipod adapter to recognize them. You can have many playlists on your Ipod, but only these three can be accessed in Playlist Mode.
Back to the preset buttons: you press Preset 5 until one of the above six positions is chosen, then that choice will start to play. If you choose position 5 (Direct Mode), the Ipod screen will go back into its normal setting and you can control it any way you want to. If you have hundreds of songs or playlists, you might want to use Direct Mode a lot, because it is much faster than trying to use the nav screen or radio controls. Position 6 allows you to hear whatever is plugged into your Auxiliary Input.
For the other preset buttons, here is what they do:
Preset 1 goes back to the previous track
you have been listening to. This does the same thing as the SEEK down
button on the nav unit or the steering wheel.
Preset 2 advances to the next track. This does the same thing as the SEEK
up button.
Preset 3 is Fast Reverse.
Preset 4 is Fast Forward.
Preset 6 puts the Ipod Adapter in Random mode (an "R" will be
displayed instead of a "P" in the text area).
You must remember what each of these presets do, because they are not labeled as such. In fact, as you use them, you can easily end up with some pretty weird looking labels on the buttons:

Obviously, these button labels won't mean anything to you.
In actual use, you will likely only use Preset 5 and the SEEK button. One comment to note is that if you have steering wheel controls, Preset 5 is the same at the Disc 1-6 button on the steering wheel. Since you also have a SEEK button on the steering wheel, most all of your Ipod control can be done at the steering wheel rather than using any preset buttons, a nice feature, in my opinion.
The above explains correctly how to use the PA11-Vette, after discussing this a long time with their Tech Support representative.
Now, here are some observations and limitations:
1. I already mentioned the Owner's Manual and supplement for the new Design Change. The Owner's Manual might have been OK for the original design, but the new supplement was not even written in correct English, plus there were mistakes in it. It was confusing enough that even the Tech Support rep could not understand part of it. I spoke to one of the co-owners of USA Spec, and he acknowledged the problem and stated that they are actively working on this issue. I hope so, because it degrades from an otherwise well performing unit. None of these Ipod adapters are very intuitive to use, mostly because of the nav unit or radio limitations, so a clear set of instructions will go along way towards the satisfaction of the end user.
2. Unlike the previous adapters, this unit can select (in Playlist Mode) only three playlists (four if you choose to not use the Aux Input). The other adapters did not have this limitation. This may or may not be important to the user.
3. The Playlist mode has limited control over the content. Basically you can go up or down a list of songs in each playlist.
4. When you install this adapter, the Ipod control takes over all of the preset buttons in the XM1 mode. This leaves XM2 only for your control of the XM Radio, if you use it. Again, this may or may not be important to the user.
4. The cord connecting the PA11-Vette to the Ipod is only about six feet. While this will work just fine for the convertible, the coupe and Z06 will probably require that the adapter be mounted forward of the XM receiver, near the left rear speaker. This is a bit more trouble than installing it right next to the XM receiver, but not a big deal. If you decide to purchase the PA11-Vette, I'd suggest you request the Ipod extension cable. This will give you an additional five feet to get to the console area. USA Spec advised that all units shipped since January use the newer CBPA 85 Ipod cable, which will charge the newer Ipods and Iphones as well. That cable will have a blue and yellow band around the cable.
5. Like the other adapters, there is essentially no control of audiobooks. But since Direct Mode is easily accessible, you can listen to audiobooks in Direct Mode the same as you might with a set of earphones. Clarity though the audio system is excellent.
6. This adapter DOES offer a random mode, which allows you to randomly choose songs from a large playlist instead of having to start at the beginning each time.
This Ipod adapter appears to be made by the same manufacturer at the PIE GM12-POD/S. Here is the connection photo:
As stated in the Installation Instructions, "If the vehicle has an external factory 6 disc CD-changer present, the AXIPCL2 will NOT retain the factory 6 disc CD-changer." Since the unit appeared to be identical in function to the P.I.E. unit, I decided to try it with and without the external CD changer. With the changer, it worked fine, but like the P.I.E. unit, there was some noise present when the changer was used. Unlike the P.I.E. unit, there isn't an adapter offered to eliminate the noise. So only those owners without the external changer should consider the Scosche adapter.
The Scosche adapter also includes a second 12 pin harness in case your Corvette does not have the XM receiver. In this case, you will have to install the adapter by plugging it into the back of the nav unit or radio after you remove the center console. This is much more time consuming than the simple plug in at the XM receiver, but it is nice that both harnesses are included.
Here is a closeup photo of the Scosche adapter:
The same type of connectors are used to connect to both the XM receiver and the Ipod as the P.I.E. adapter. Here is a photo at the XM receiver:

Again, this is a very simple installation procedure, because the connections are right at the XM receiver, which is so accessible in the Corvette. All you do is unplug the factory 16 pin connector and plug it into the Scosche harness, then plug the Scosche harness into the XM receiver. A nice long Ipod connector cable is included, which will reach anywhere inside the car.
After connecting the adapter to the Scosche harness and turning on the nav radio, here is what you see:
At the top, the text area displays "Scosche" instead of "P.I.E."
The Scosche adapter, like the P.I.E. adapter allows you to choose either "Advanced" or "Manual" mode. In Manual mode, you have full control of the Ipod itself, but very limited control at the nav/radio unit. In Advanced mode, you lose control at the Ipod, but you gain additional control at the nav/radio unit.
Here is a photo of the Ipod in Manual mode:
and in Advanced mode:
This adapter functions identically to the P.I.E adapter as previously described.
You use the Preset 1 button to choose between XM radio, Ipod input, or Auxiliary Input.
You use the Present 6 button to cycle through the choices of Select Playlist, Select Artist, Select Album, Select Genre, then Select "5 to Manual" if you are in Advanced mode (or "4 to Nav Ipod" if you are in Manual mode).
Like the P.I.E. adapter, the Preset 2 button is the useless "Help" button. Here is a photo:

It is called "Demonstration" mode in the Scosche manual, but again, pressing it does nothing.
When you are in Advanced Mode, the song title and artist are displayed in the text area on top:
The song title and artist scroll across the top. The INFO button will also start the display.
The Preset 3, 4, and 5 buttons allow you to select the playlist, artist, album, or genre that you have chosen to list with the Preset 6 button. Identical to the P.I.E. adapter, you have the flexibility to choose any number of playlists, artists, etc. by cycling through the list, then selecting the one you want with Preset 5. The songs in that playlist, artist, album, or genre will start from the beginning and play through the end.
As previously noted in the P.I.E. review, if you have a large number of songs, artists, albums, etc., it will take a long time to cycle though them, using the buttons in Advanced mode. So in that case, you will likely choose to go to Manual mode and do your selecting on the Ipod itself. Fortunately, it is fairly easy to go into Manual mode by pressing Preset 6 until you reach "5 to Manual", then pressing Preset 5.
It is suggested that you read both this section and the P.I.E. section to gain a thorough understanding of exacting what these units will do.
The limitations of the Scosche adapter are exactly the same as the P.I.E. adapter:
1. The SEEK button is for fast forwarding/ rewind and for advancing to the next or previous track. Pressing it twice quickly sometimes advances it cleanly to the next track, but often fast forwards in jerky steps into the next track. With some practice, you could probably advance tracks better than I was able to, but the fast forwarding doesn't seem that useful to me.
2. Like most of these adapters, the touchscreen buttons are not labeled for their function with the Ipod adapter, so you must memorize what each of them does. The "Help" button is not the help it is designed to be.
3. If you press a button that "confuses' the adapter, you may lose control and then no button allows to you control the Ipod. However, you can usually get out of this situation by pressing Preset 6 and going to Manual Mode. This regains control at the Ipod.
But even with these few annoyances, the extra features of unlimited selection of playlists, artists, albums, etc. may be important to some users. If so, the Scosche adapter is simple to install and the sound is great.
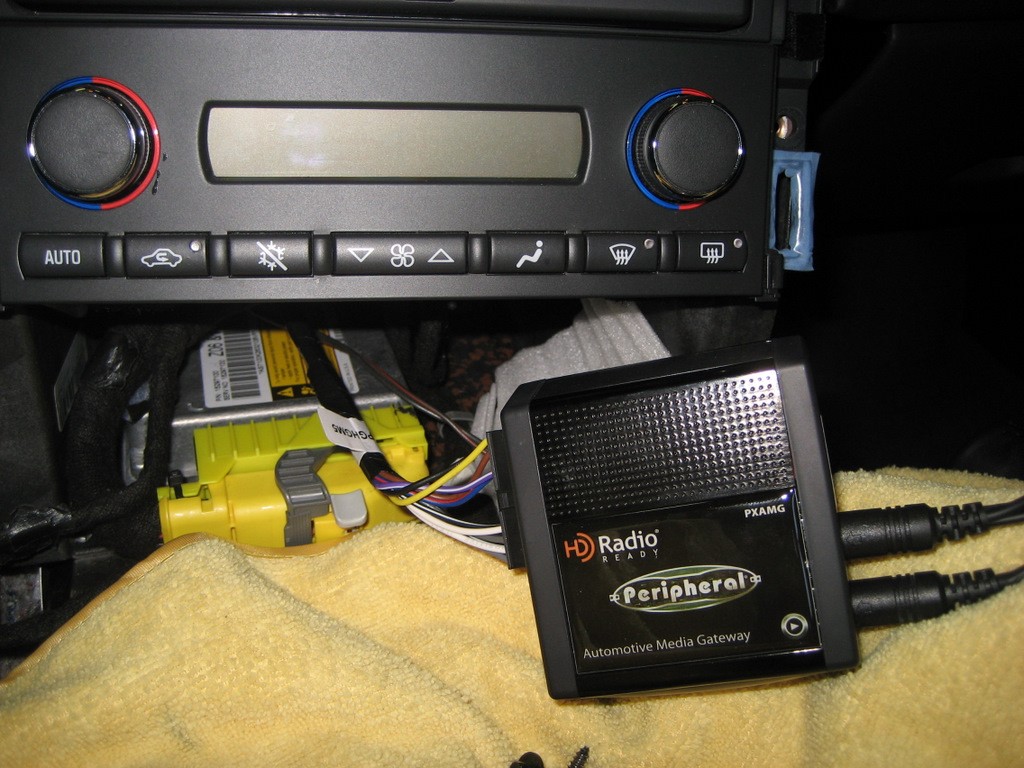
5. The Peripheral (iSimple) PXAMG
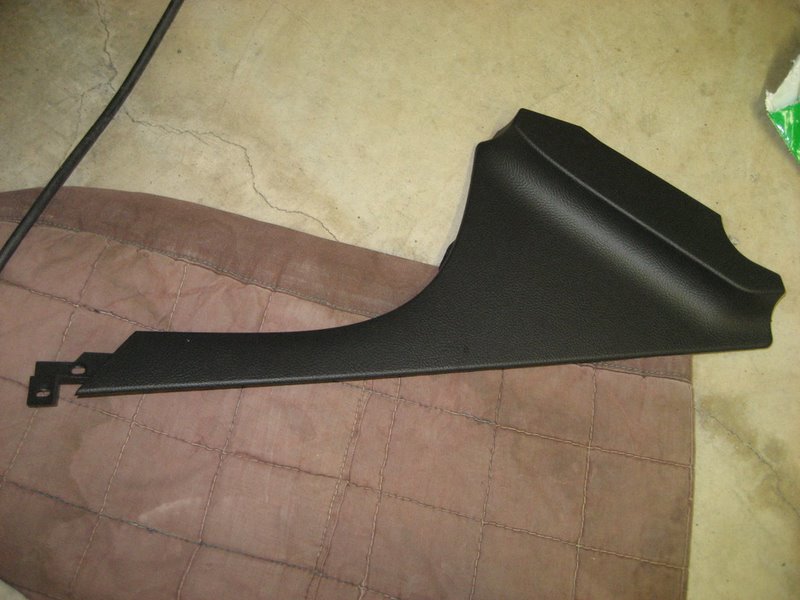
I saved this adapter for last, because it was the only one that required me to remove the nav unit from the dash. I've had my center console out a number of times for various reasons, so it isn't a huge deal for me, but for a first timer, it may be a bit daunting. There are numerous posts on the Corvette forum on how to remove the center console, but plan on at least a couple of hours for the first time. The main problem is just removing the electrical connectors from the switches underneath the center console - unless you know which unlocking tab to push, it can be a bit frustrating. Other than that, the center console comes out with just a few simple screws, and once out, you have immediate and simple access to the radio/nav unit.
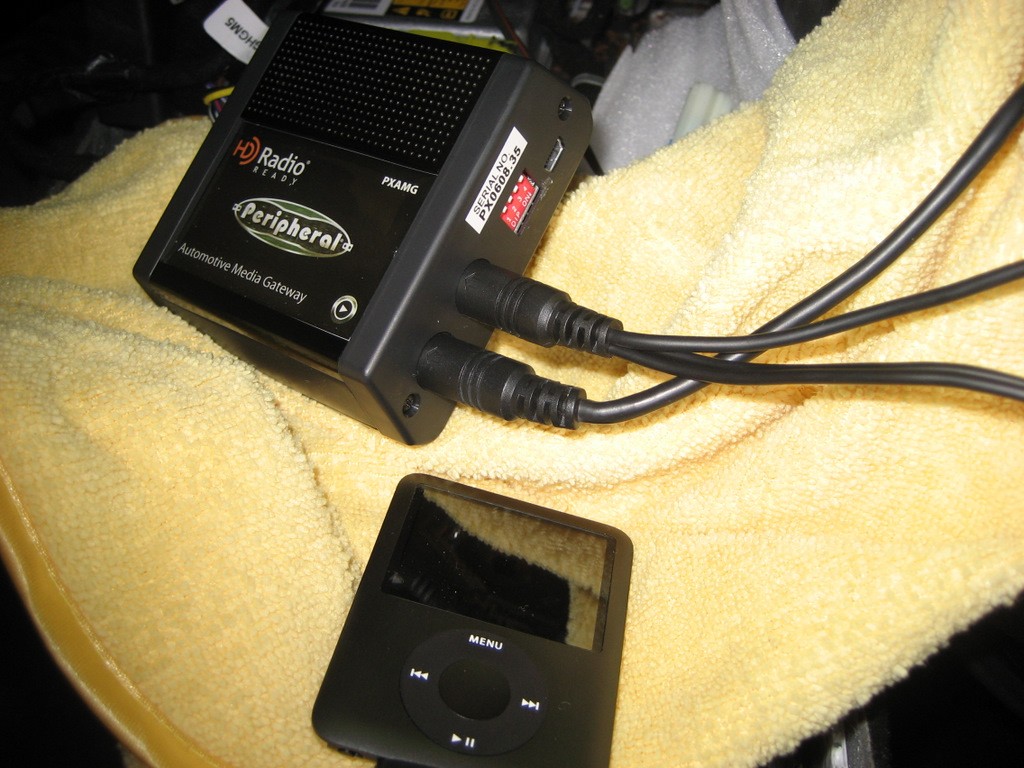
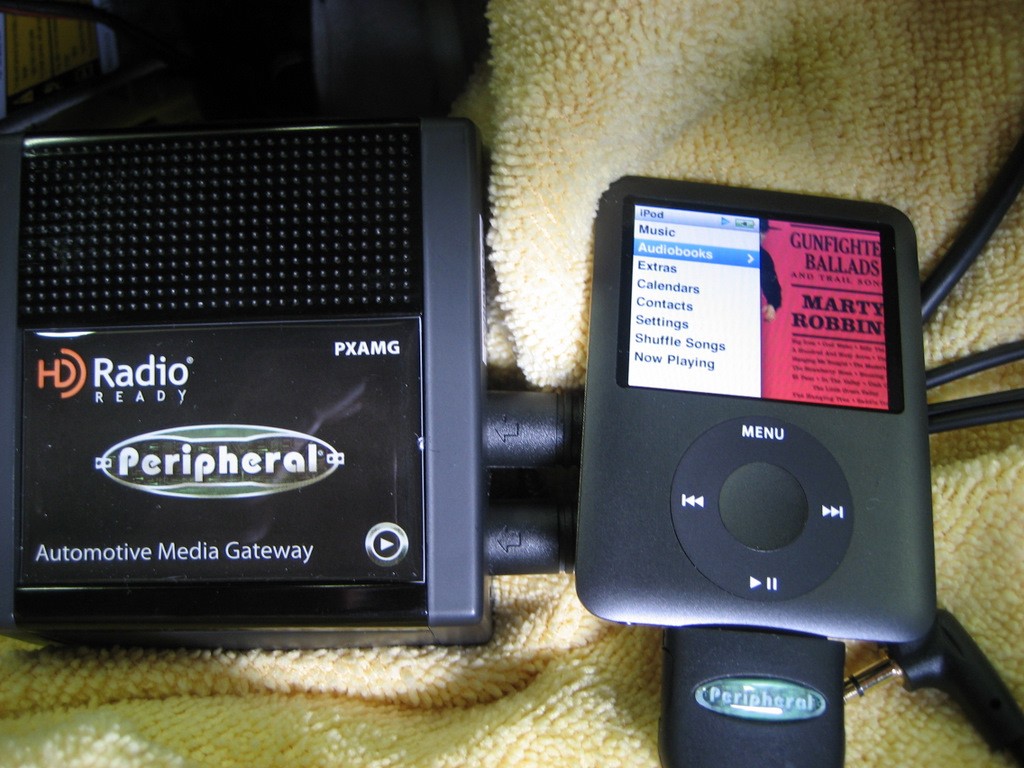
Here's what the unit looks like:
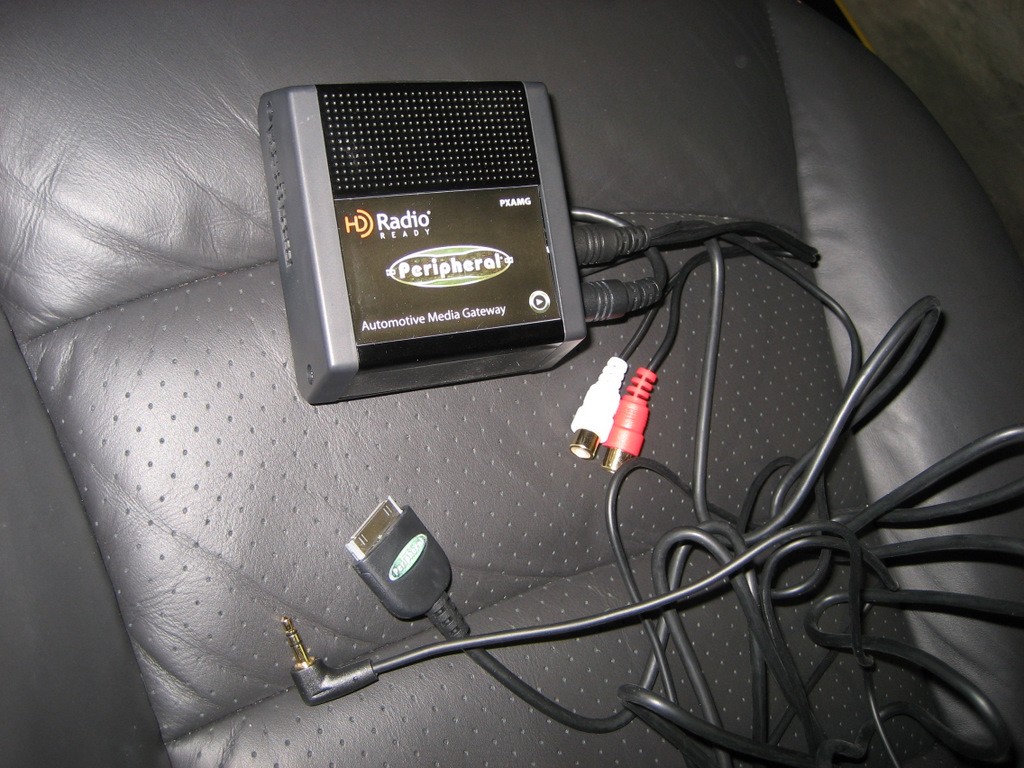
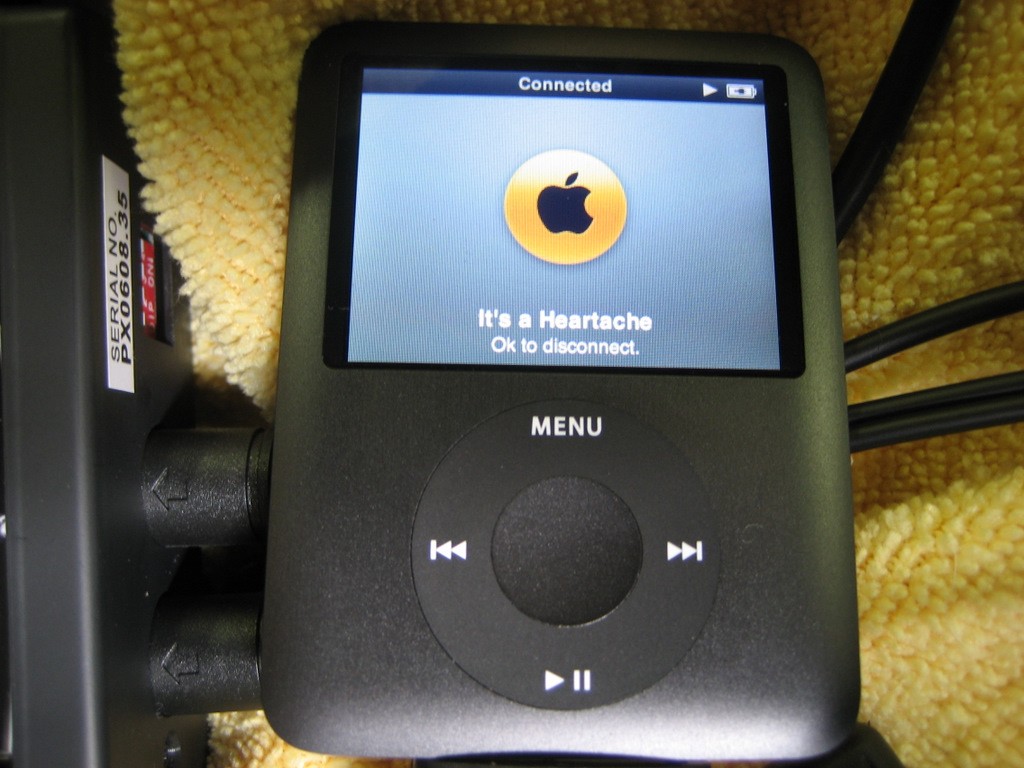
In the above photo, both the Ipod connector and the Auxiliary In connector are plugged into the Gateway. Both connecting cords are included. There are two ports in the Gateway, and in this installation, both are used. Also available is an HD (digital) Radio module, and Peripheral advises that a Bluetooth module will soon be available. I would have liked to test the Bluetooth module, but I'll have to wait. Since there are only two ports, you would have a choice of any two of these four inputs.
Here is a photo of the connecting harness, the PGHGM5:
In the above photo, the two connectors on the right plug into the back of the nav/radio head, and the two left connectors accept the factory plugs that normally plug into the nav/radio head. The black harness goes to the Gateway.
OK, here's how we install it. First, you must pull the center console. Here are all of the tools you need:
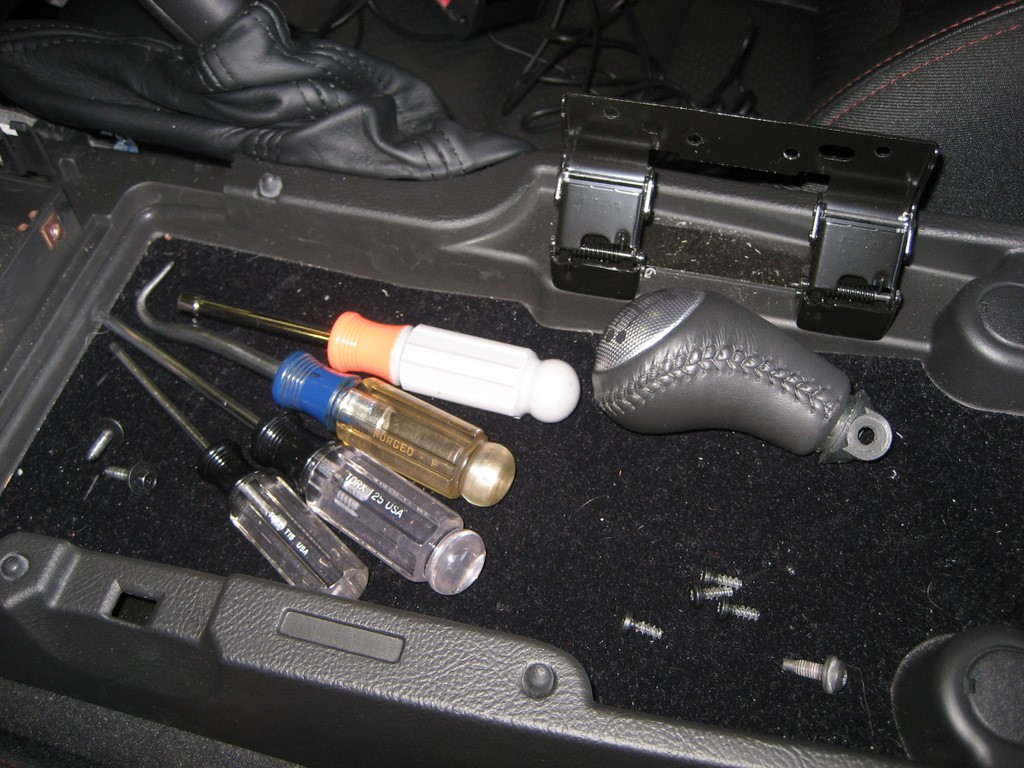
First use the T15 Torx driver to remove the four screws shown above to allow the console lid to be removed. Use the T25 Torx driver to remove the shifter knob (if you have a manual transmission). Use the 7mm nut driver to remove the two 7mm screws from the right side of the console - these are accessible by lifting up on the e-brake boot on the right. When you remove these two screws, you can them remove the right console trim plate by pulling down at the rear.
Next remove the two 7mm screws at the rear of the center console.
Lift up on the rear of the center console and it will come loose from the dash. Pull the shift lever back to allow the console to clear the shift lever (manual or automatic). At this point the only thing preventing removal of the console is the wiring. This is the tricky part. First pull the connector at the hazard warning switch near the top. Then pull the seat heater switch connectors (if you have them). Finally, pull the connector at the traction control switch - on this one, you lift a retaining tab rather than push the tab. The hardest connector to pull, if you haven't done it before, is the power plug (cigarette lighter) connectors. On these you must push a tab to release the connector - sometimes the tab is at the top, sometimes at the bottom. In the photo above, the bent awl works well for pushing the release tab.
You don't have to remove all of the plugs if you can manuever the console onto the passenger seat with part of the wiring harness still attached. Once you know how, it is a bit easier just to remove the whole thing and get it out of your way.
With the console removed, here is what it looks like:
This may look daunting, but it is quite easy to pull the console once the connectors are removed.
Here is the console sitting on the passenger seat:

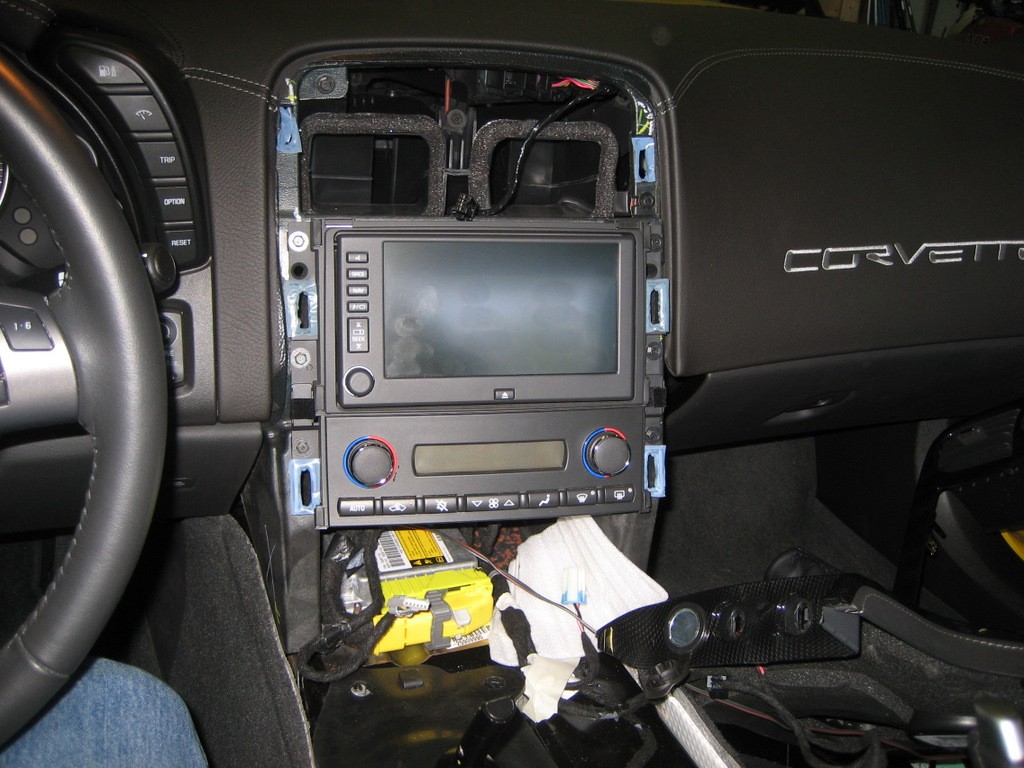
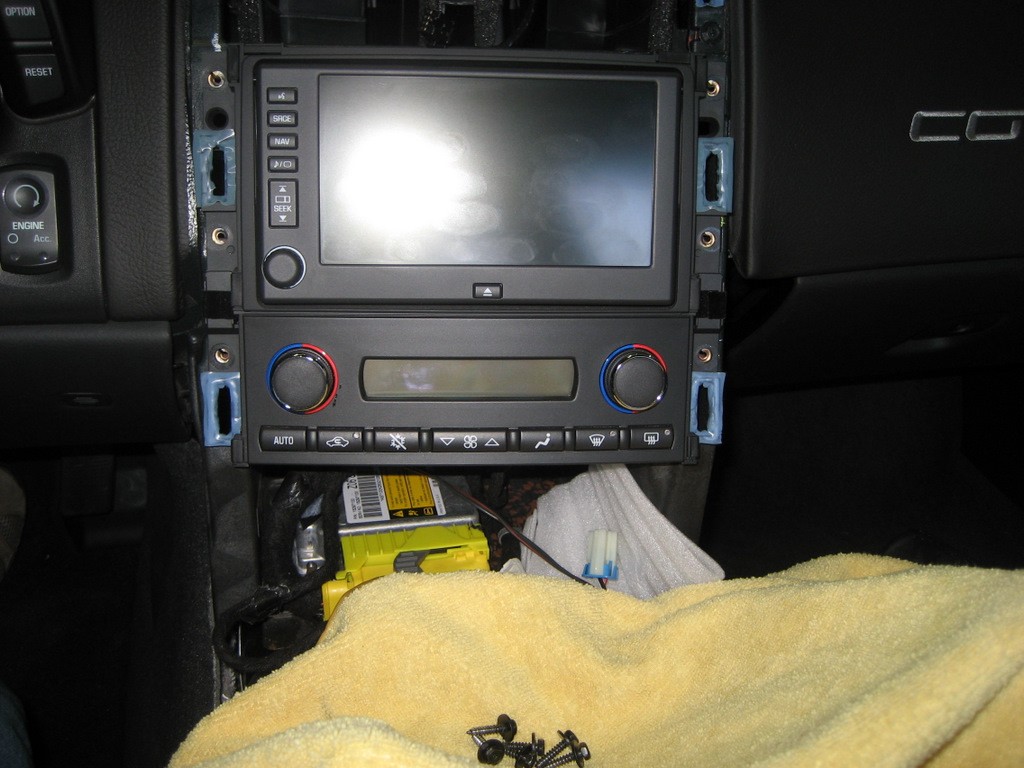
In the next photo, you can see the six 7mm screws removed that hold the HVAC controls and the nav radio in place:
A soft towel laying on the shift lever protects the units from being scratched when you remove them.
First, pull out the HVAC module:
It comes right out once the two screws are removed.
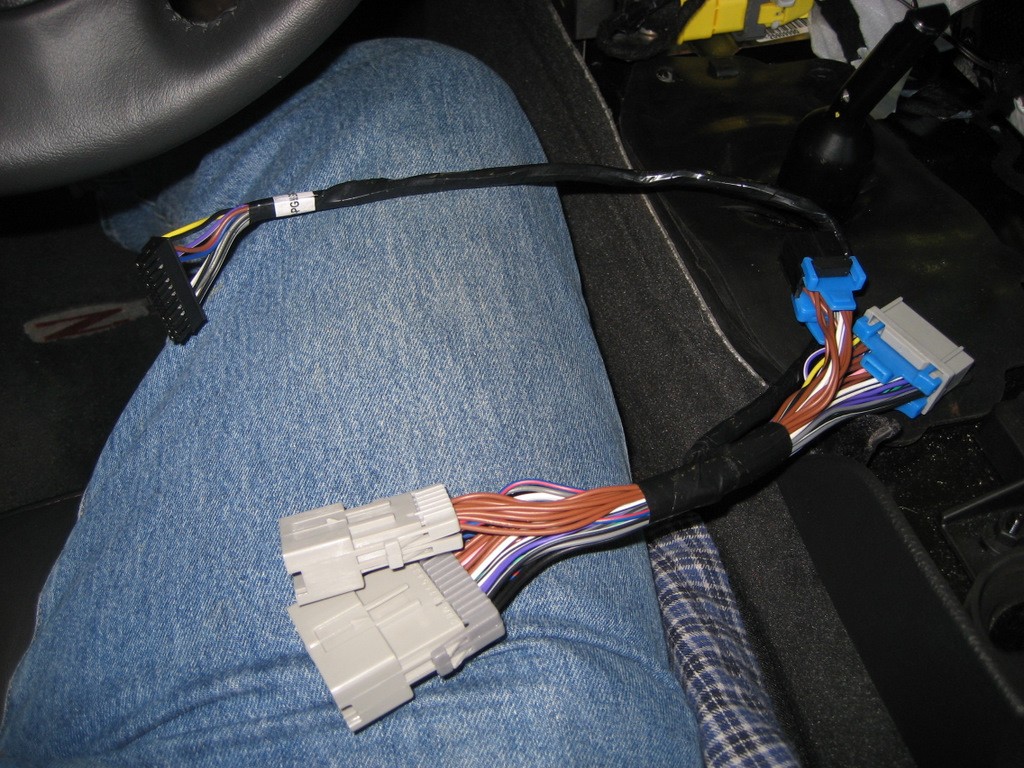
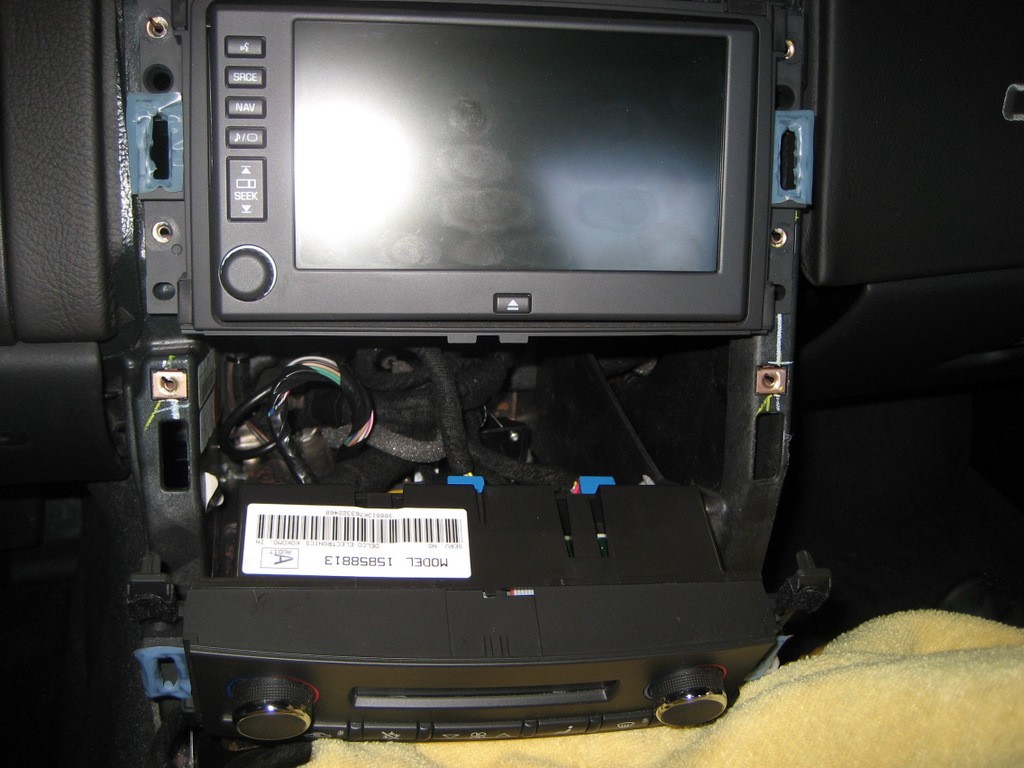
Next, pull out the nav radio unit and you'll see the two plugs in back:
Here's another photo from the rear:

Both the 24 pin plug on the left and the 12 pin plug on the right must be pulled.
Simply push down on the tabs and pull:
Next, plug the wiring harness into the nav/radio unit and plug the factory connectors into the harness:
Route the black Gateway connector under the nav/radio unit and push the nav/radio unit back in place:
See Gateway connector in the above photo? Next route that connector under the HVAC unit and set it back in place:

Here's a hint - when you install the six screws back in to hold the nav unit and the HVAC unit in place, push up as you tighten the screws. I found that sometimes the very small amount of play allows the HVAC unit to very slightly touch the ashtray below it and prevents it from working just right. If you push up to remove the play, it will clear the ashtray completely.
Next, connect the Gateway. Here is the Gateway connector:
Here is the male plug from wiring harness:

Here it is connected:
At this point, you can tuck the Gateway back under the HVAC unit, as well as the Ipod and Aux wiring and route the wiring wherever you want to. I chose to keep most of it under the HVAC unit and run enough out to the right so the passenger can easily manipulate the Ipod and whatever is connected to the Aux In 1/8" stereo plug (if you use this). Once tucked in place, you can reinstall the console.
Since I was testing this unit, I took the following photos before I reinstalled the console.
OK, now that everything is plugged in, how do you operate the PXAMG?
When you start your car (or turn on the Accessory position), everything looks normal. You still have your AM, FM, XM1/2, and CD (or CD/CDX) touchscreen buttons. If you plug in your Ipod, the way to access it is to leave the XM band by pressing FM, AM, or CD, then return to XM. Immediately (within a few seconds) push the SEEK button to cycle through your new choices:
SAT (XM radio)
AUX 1 (Ipod control from the Ipod itself)
AUX 2 (whatever is plugged into the AUX IN connector, if you use it)
IPOD
Wait a few seconds, and whatever you have chosen will start playing.
XM radio will start playing normally if you chose SAT. AUX 1 will allow you to control your Ipod and listen to it through the audio system. In this mode, you can only change to the next track by using the SEEK button - no text is displayed. In Ipod mode, you have considerable control at the nav unit, but you cannot control the Ipod itself.
Here is a photo once IPOD is selected:
When you select a song, the title is first displayed:
then the artist (wrong photo for above title):
then the song timer:
You can press the INFO button anytime to repeat the song information.
You can change the track to the next track using the SEEK up or down button on either the nav unit or the steering wheel.
In addition to just changing the track, you have considerable other options using the touchscreen preset buttons:
Preset 1 - rewinds the song (or audiobook)
playing 5 seconds for each push
Preset 2 - fast forwards the song (or audiobook) playing 5 seconds for each push
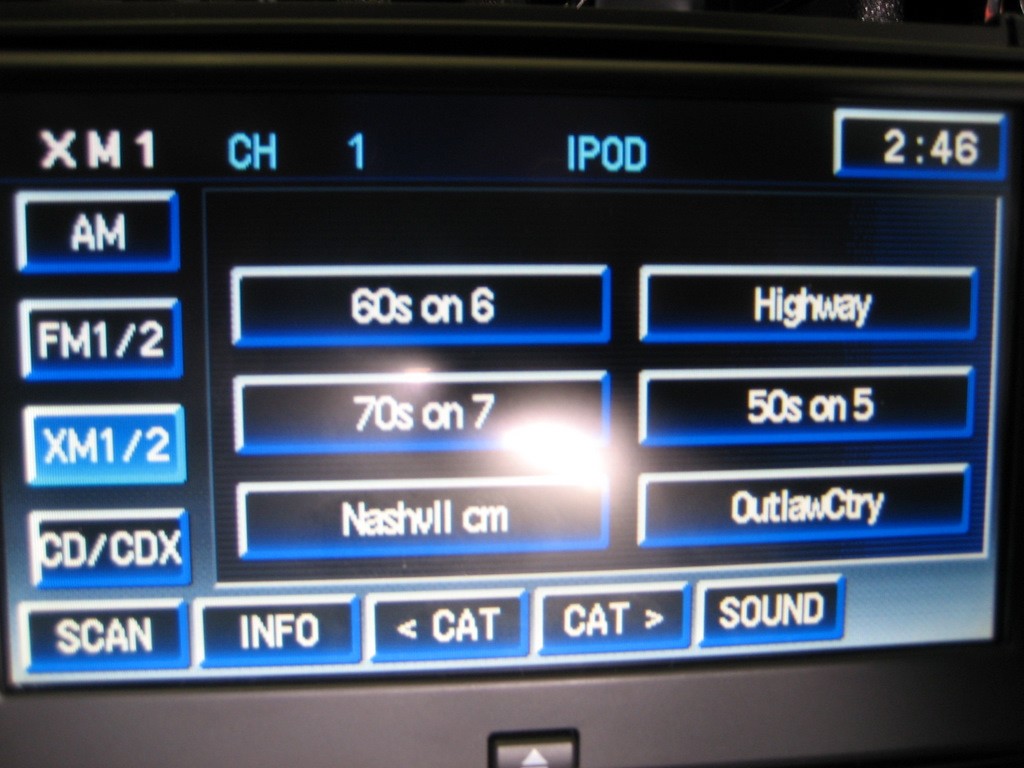
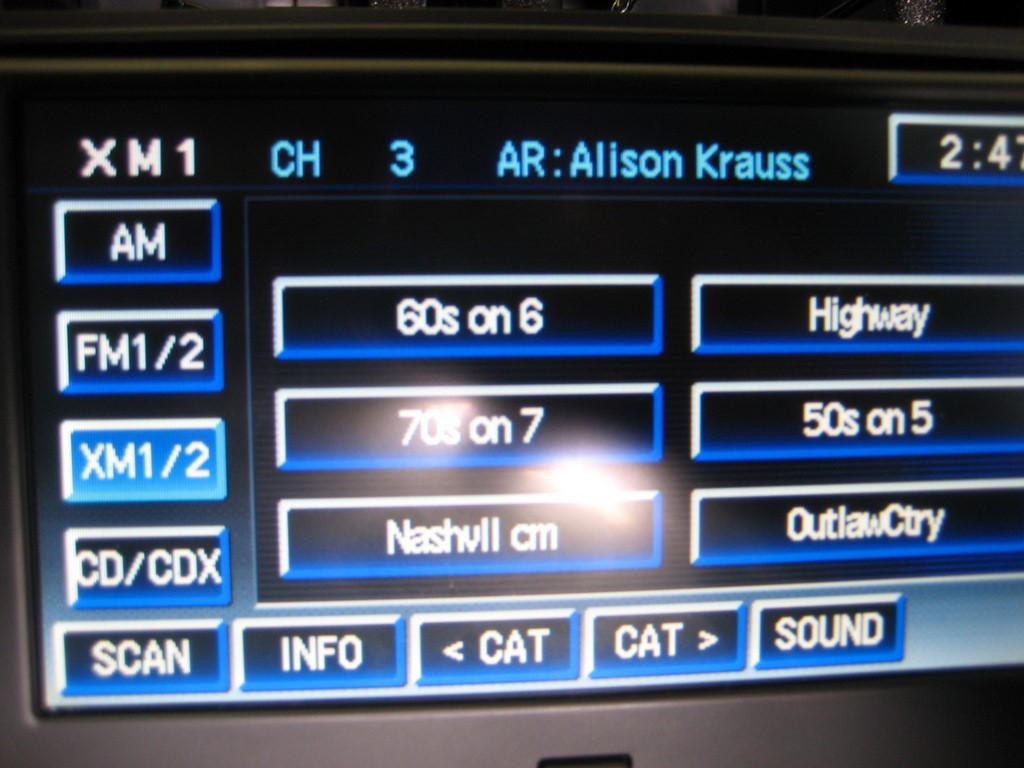
Preset 3 - This is similar to your MENU and SELECT button on your Ipod.
When you press it, it first allows you to browse your lists of Playlists on your
Ipod:
Each time you again press Preset 3 (shown here as Nashvll cm) you cycle through your Playlists. You can use the SEEK button to cycle through your songs and use Preset 3 to choose the song you want.
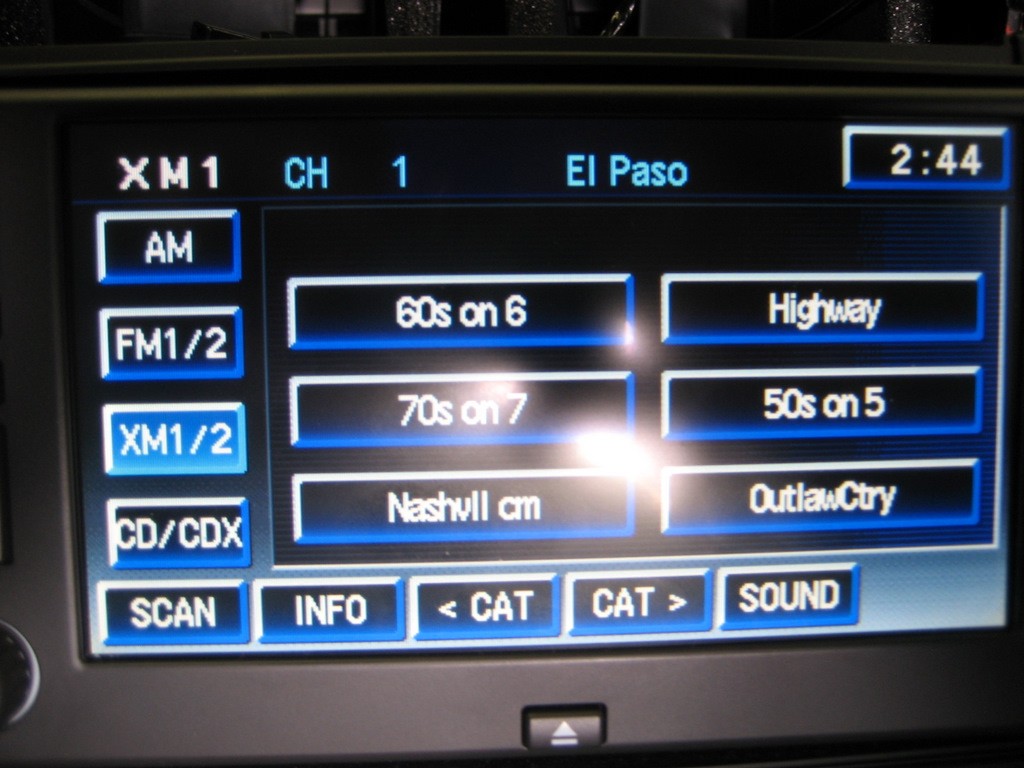
You can also browse through your Artists:
In this case, you would again use Preset 3, then use the SEEK button to cycle through the choices of Playlist, Artist, Album, and Genre. When you reach Artist (in this case), you press Preset 3 to choose Artist, then use the SEEK button to cycle through the list of Artists. If you have many Artists, you can hold down the SEEK button and it will move pretty fast through the list of Artists. Once you find the Artist you want, you again press Preset 3. Once that Artist is playing, you can change the track using the SEEK button again. Only songs for that Artist will play, until you select another Playlist, Artist, Album, or Genre.
Preset 4 - Moves back one step in the
Browse Menu. For example, if you press Preset 3 too many times and get to
Select Album, instead of Select Artist (where you wanted to be), press Preset 4
to take you back one step to Select Artist
Preset 5 - not active
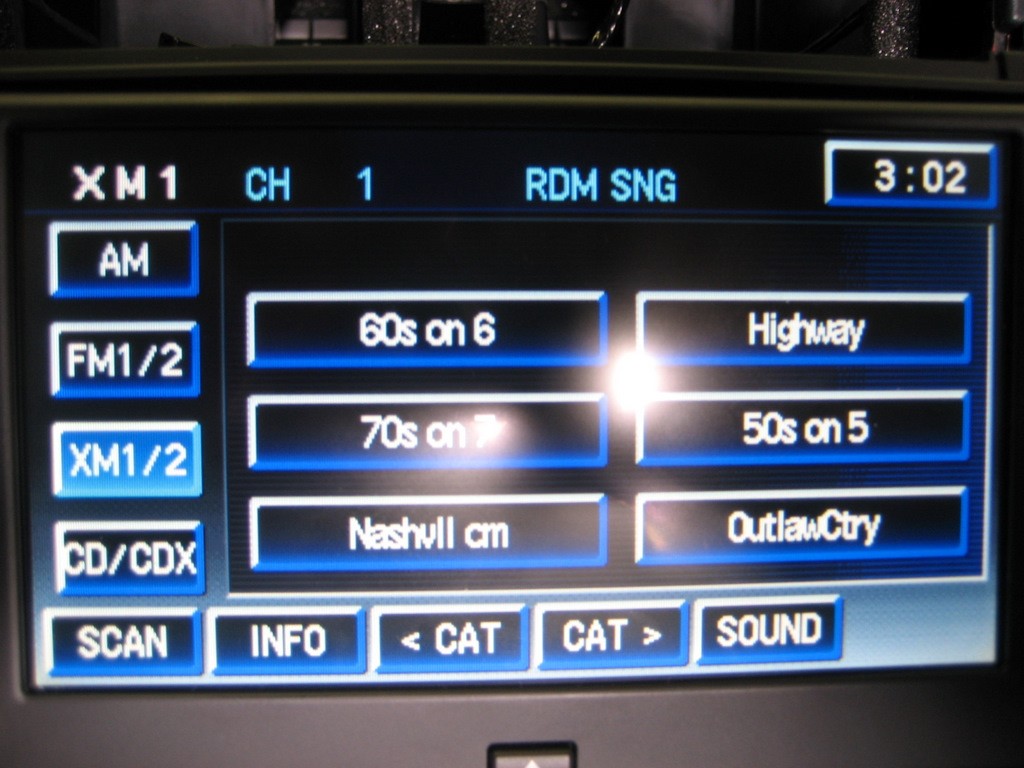
Preset 6 - Chooses Random Song, Random Album, Random OFF:
Here is a photo of the Gateway connections next to the Ipod:
The Ipod in IPOD Mode:
The Ipod in AUX 1 Mode:
Ipod also in AUX 1 Mode:
Note the Aux 1/8" stereo jack next to Ipod. This connecting cord is also included in the package. It is plugged into the second Gateway port.
Here is the finished installation:
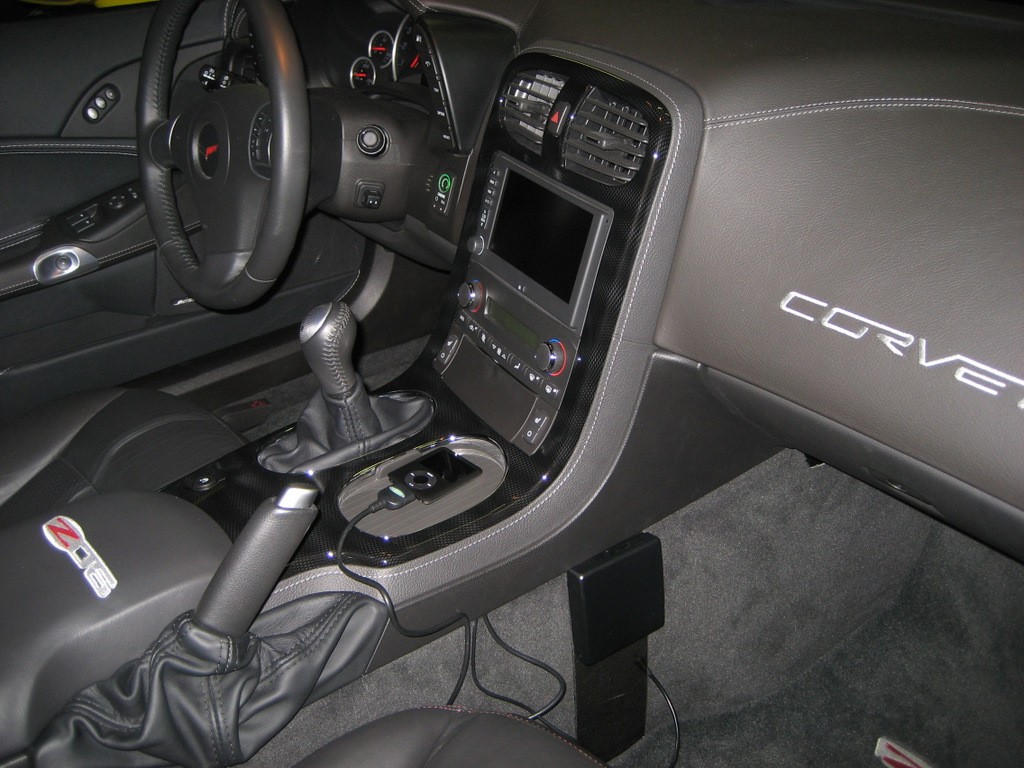
Note the wires exiting the right side of the console. One is for the Ipod and one is the Aux In connector. You can choose to exit most anywhere you want, even inside the console under the lid. For me, it is most convenient to have access to the Ipod itself, because I find myself, or my wife, wanting to occasionally access the Ipod, especially for Audiobooks.
Comments about the Peripheral PXAMG
1. This Ipod adapter, once installed and learned, works well. However, because you must remove the console to gain access to the radio or nav unit, it is considerably more difficult to install than the other adapters. Everything you need to install the adapter, however, is included. It is the only adapter that supplies the Auxiliary In cable.
2. The operating instructions are pretty good; however, I found I still had to call Peripheral's Technical Support to learn how to operate the unit properly. The manual failed to mention that when you are selecting the Mode you want to be in (SAT, AUX1, AUX2, or IPOD) you must press the SEEK button within just a few seconds after you exit and return to the XM band on your radio or nav unit. If you don't immediately press the SEEK button, you will remain in whatever Mode you left in. Once you get the hang of it, it isn't difficult, but the instructions should be more clear.
This adapter has a number of features not found in the other Ipod adapters and each function seemed to work well.
6. The GM Personal Audio Link (PAL)
(update 9/1/11)
The Version 2 PAL is now available that includes all of the features of the original PAL, plus more features and better performance. Also, installation couldn't be simpler - you can do it in a parking lot with no tools in a few minutes. But this review was for the original GM PAL first available in August, 2009.
Click here for a link to the new Version 2 PAL website.
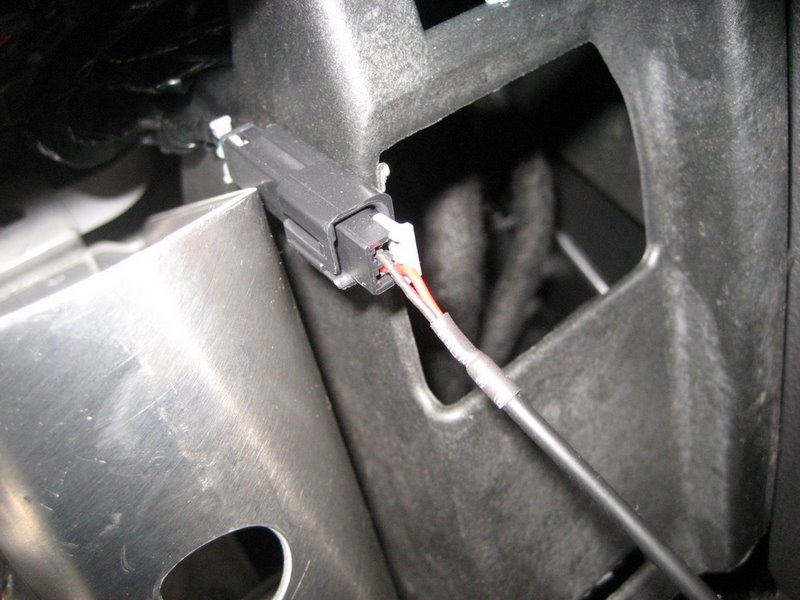
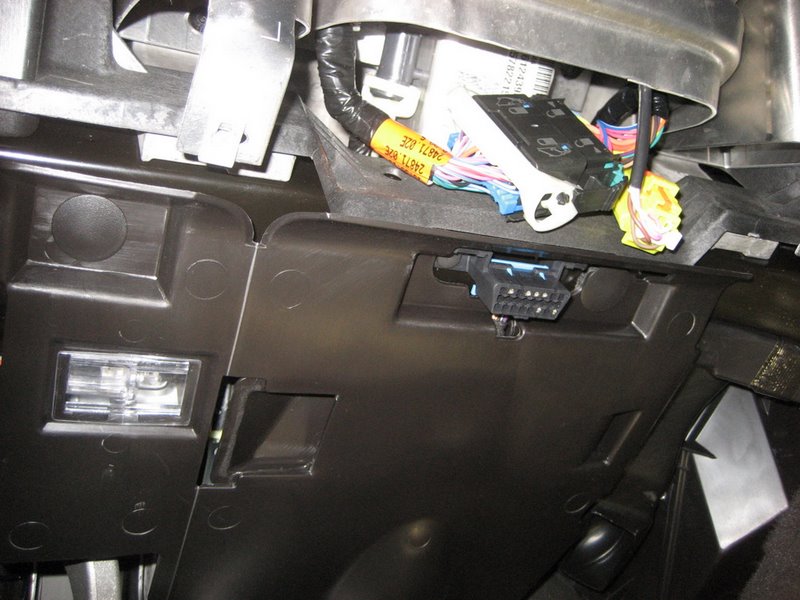
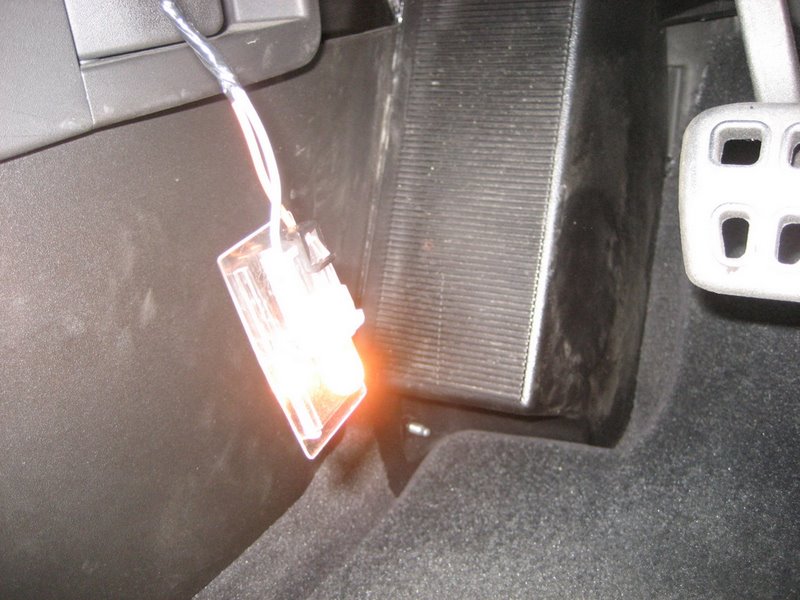
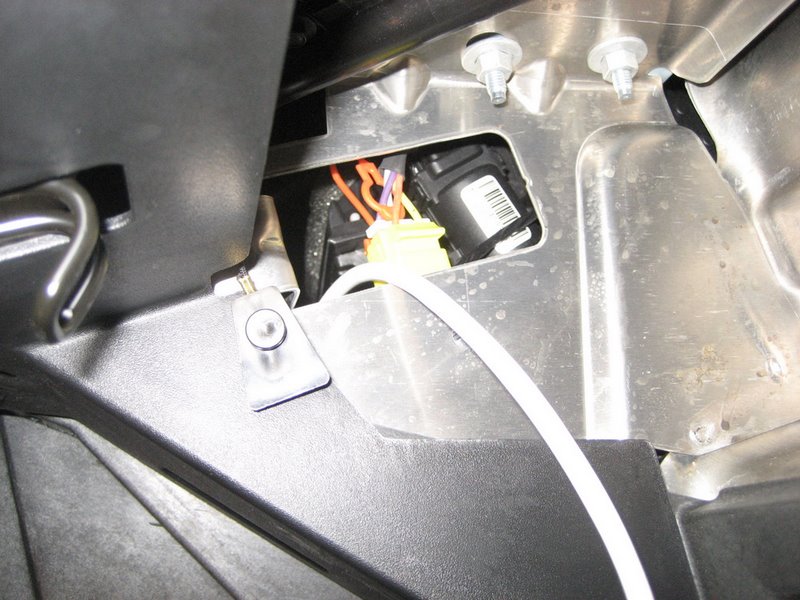
The installation of the GM PAL is far more difficult than the first five adapters because of one necessary step. The XM receiver (located above the left rear wheelwell in the coupes and Z06s and behind the waterfall in the convertibles) is connected to the Class 2 serial data bus via circuit 5781, a light blue wire in Pin 15 of the XM receiver 16 pin connector mentioned previously. When the PAL is installed, this circuit must be disconnected from the serial data bus and instead the XM receiver is reconnected to a new Class 2 circuit provided in the PAL wiring harness.
The PAL installation instructions direct you to disconnect the original circuit at a Splice Pack (SP205), which is very unfortunately located high up above the driver's dead pedal, a difficult location to get to unless you happen to be a midget! For a convertible, I might guess it would be considerably easier to get to the XM receiver behind the waterfall and make the required splice there, but since I have a Z06, I can't verify that option. Since my XM receiver is behind the drivers seat, the Splice Pack location is probably the best place to work, as directed in the instructions. This is NOT a fun place to work however!
(Note: for updated PAL installation alternatives, try this website: http://www.kawal.net/PAL install.htm)
Here's what the entire package looks like:
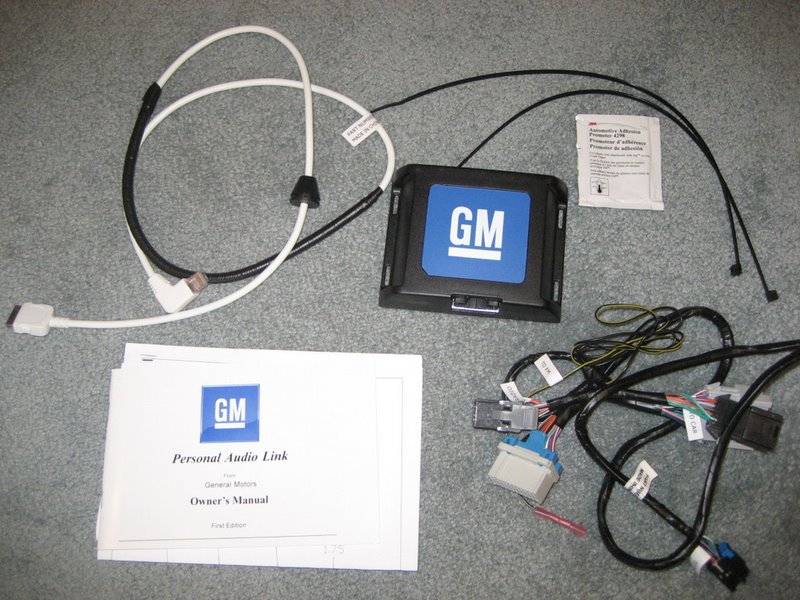
As mentioned above, this is the only adapter to require splicing into the factory wiring harness. It is only one wire, but it is the most difficult part of the entire installation. Let's start here, because the rest of the installation is similar to that of the Peripheral PXAMG.
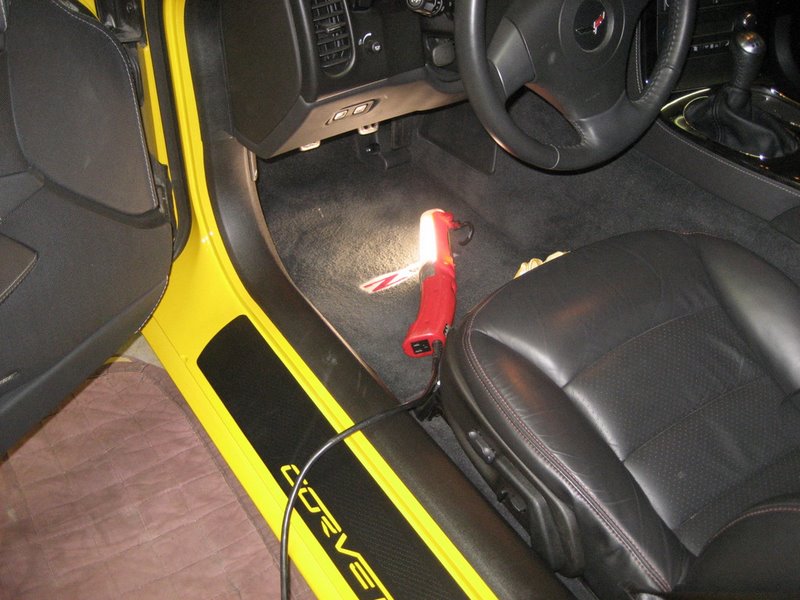
First get some padding, because you'll be on your knees for a while:
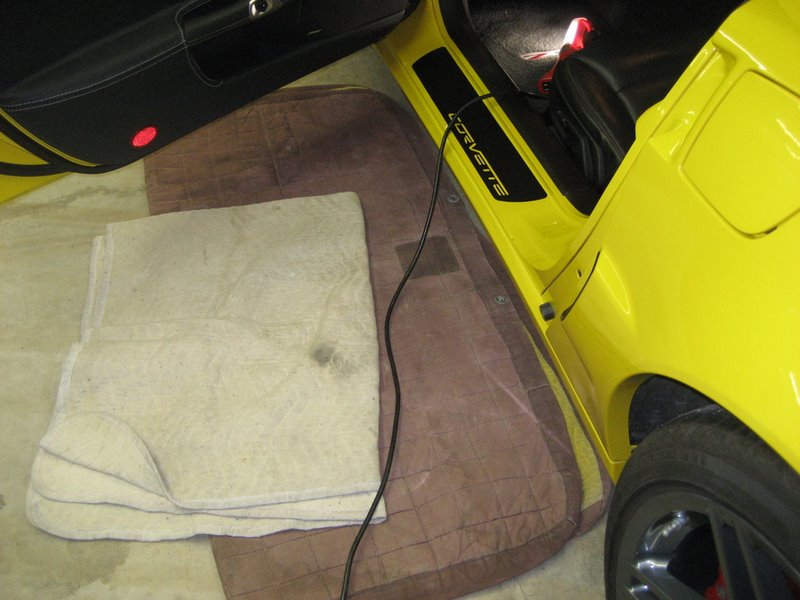
Next, you'll need a worklight to see under the dash:
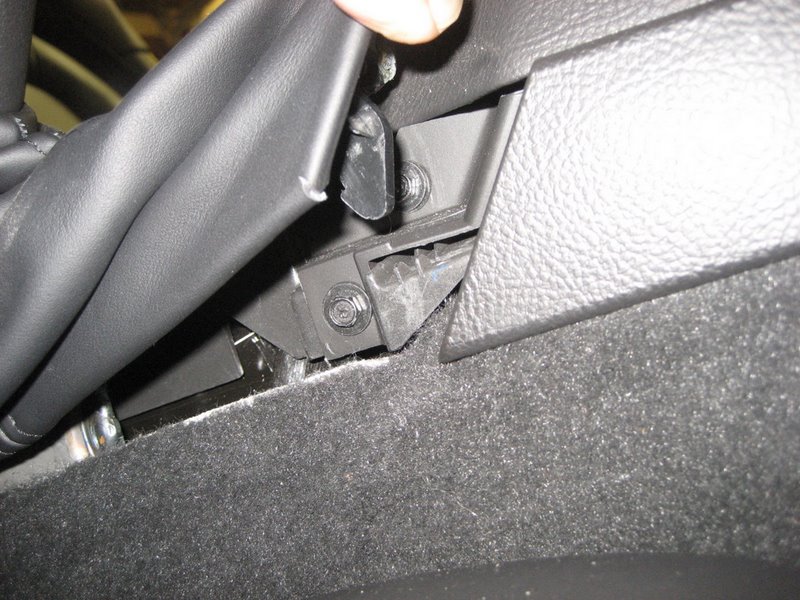
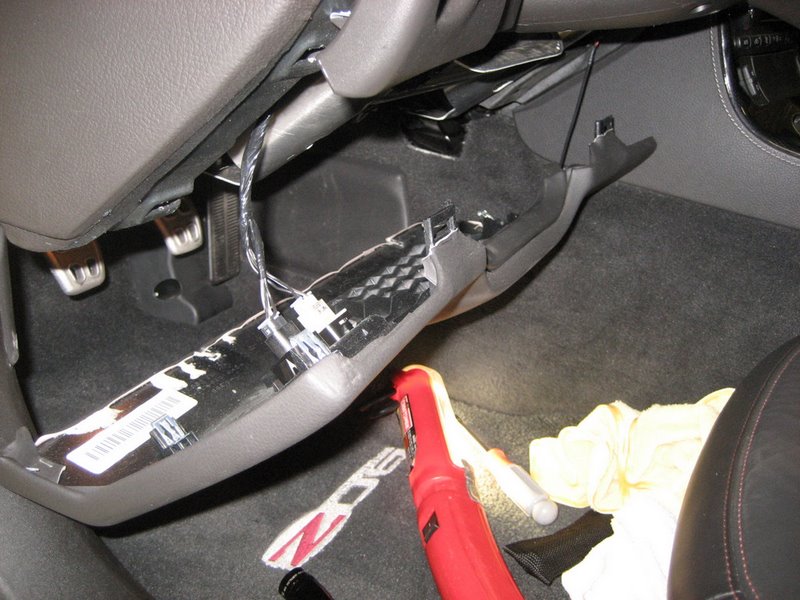
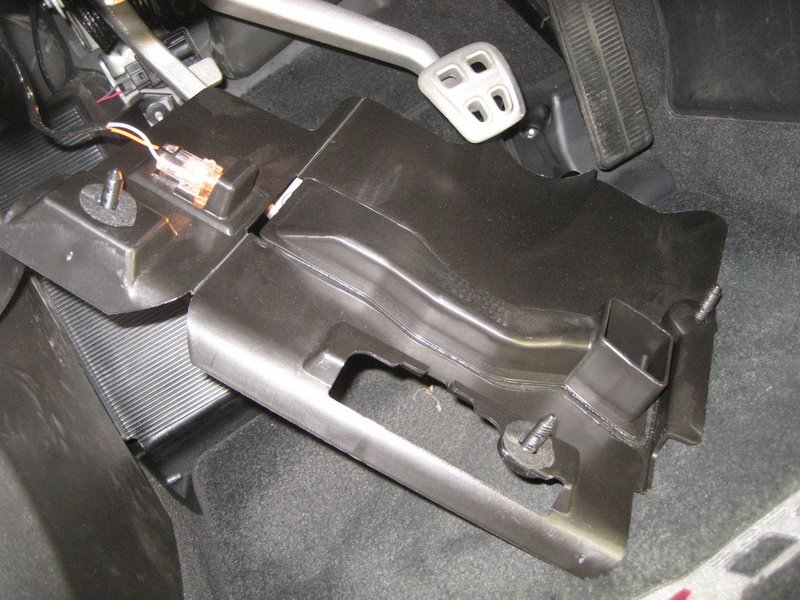
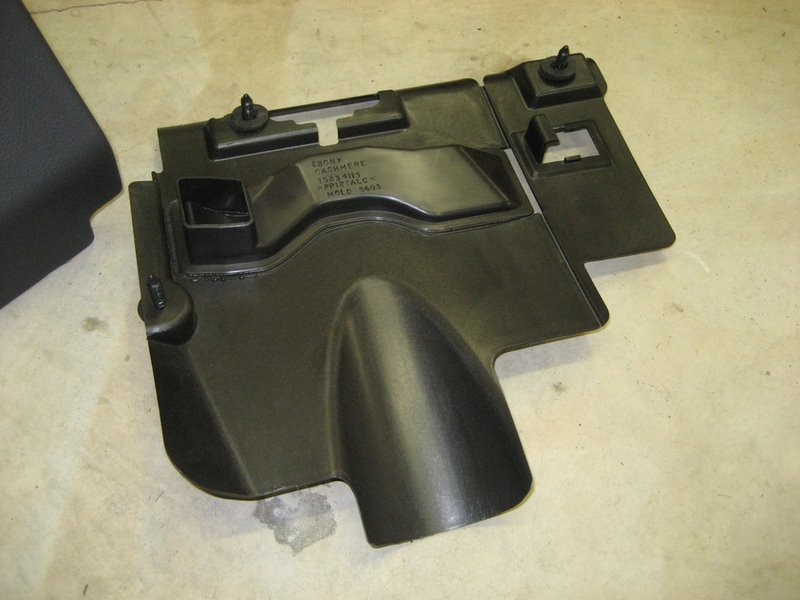
The knee bolster, above your knees when you are sitting, must be removed. There are two Torx T15 screws holding it at the bottom:
But the knee bolster can't be removed until you first pull the instrument cluster bezel loose. If you have a telescopic steering wheel, move it all the way back. Then pull on the bezel towards you to unclip it:
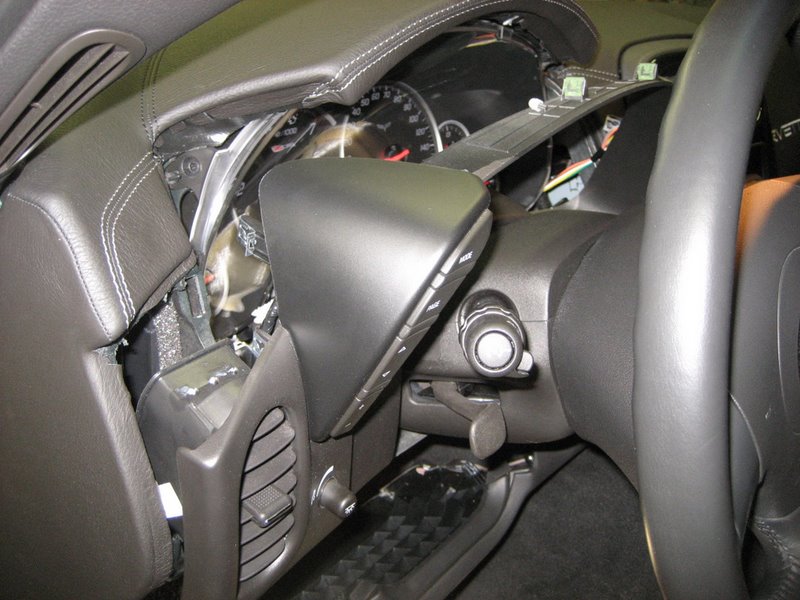
These clips on the back of the instrument cluster bezel prevent you from pulling the knee bolster out:

Once you pull out the cluster bezel a bit, the knee bolster can be removed:
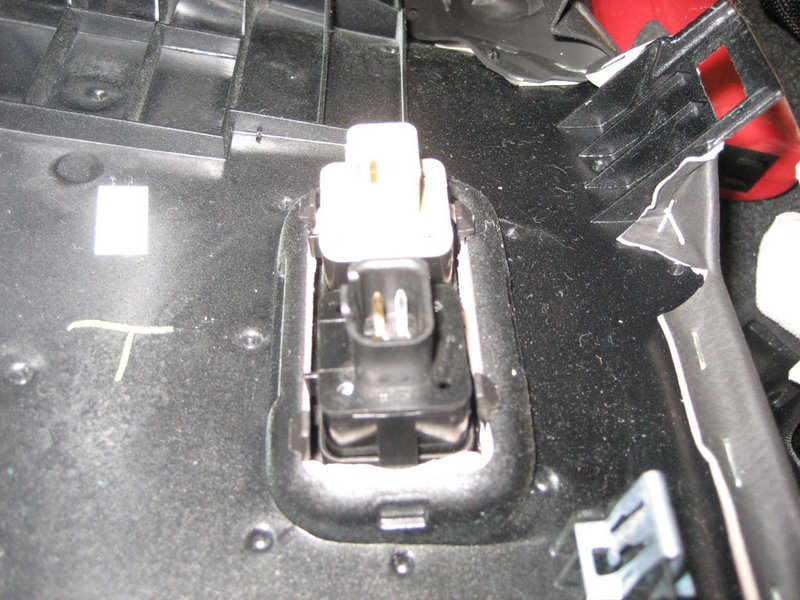
Notice the wire on the far right and two on the left. These must be unplugged. Here is the far right one.
This is attached to the Radio Volume Compensation Microphone that is screwed to the knee bolster:
See the locking tab on the left?
Here are the other two connectors:
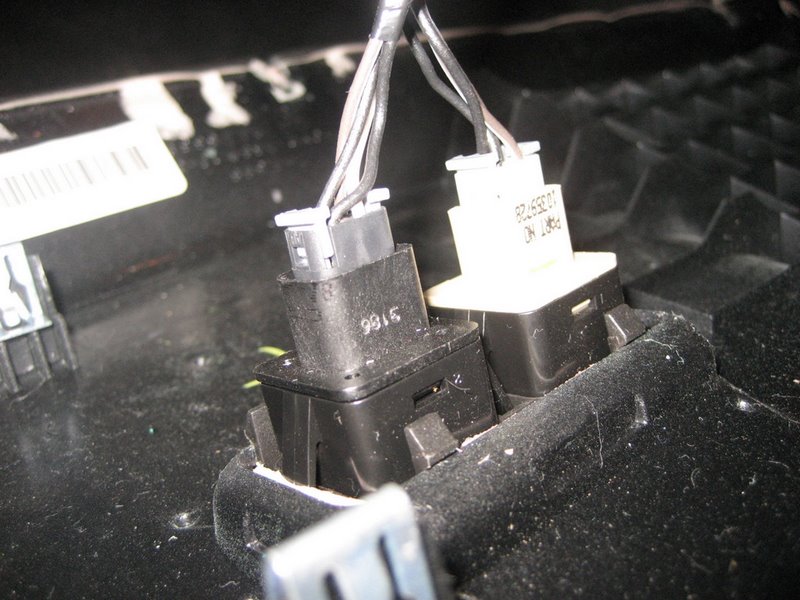
Here they are removed:
Here is the knee bolster removed:
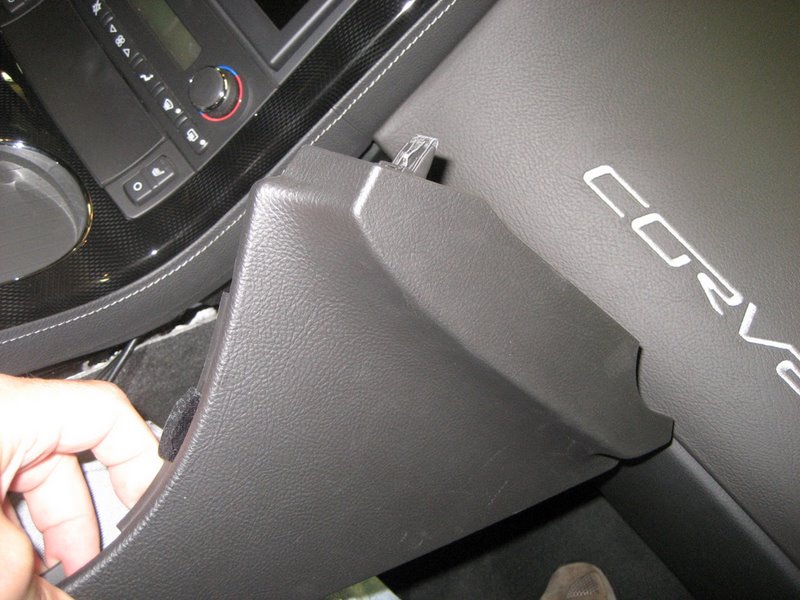
Next, this plastic panel must be removed. You can see two of the three round plastic clips holding it in place:
Here is another photo with one of the round clips:
Pull hard straight down and the panel can be removed:
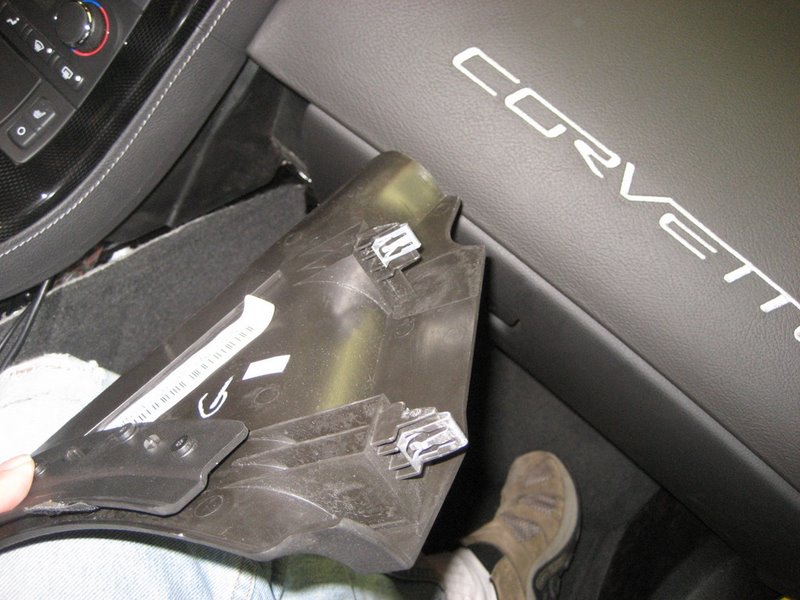
Unclip the lamp:
Here is the panel removed:
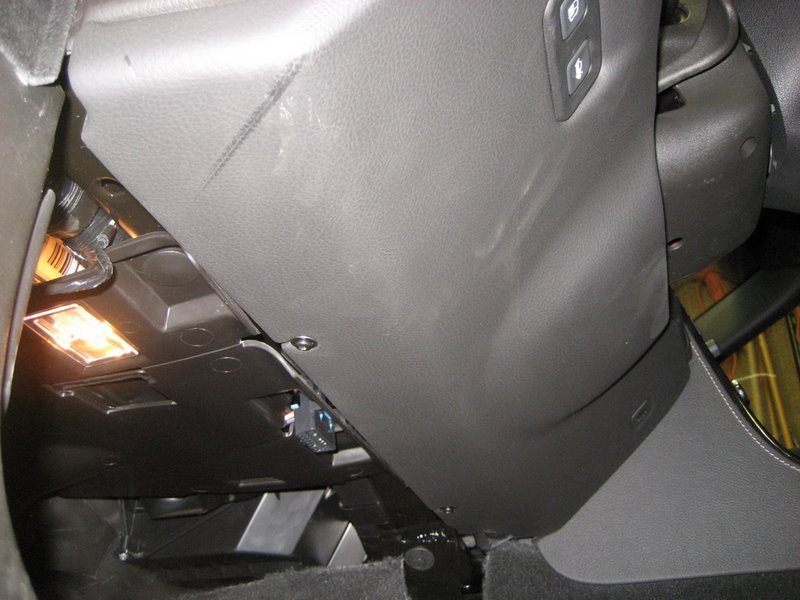
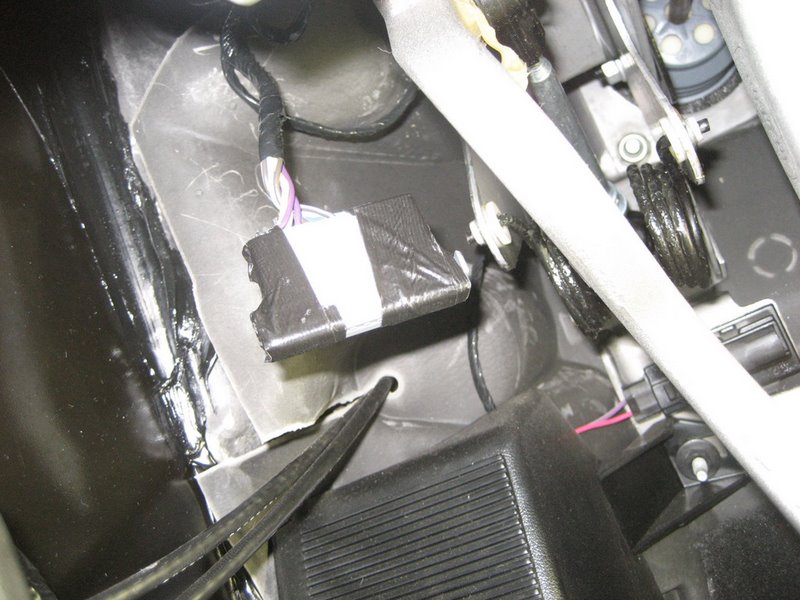
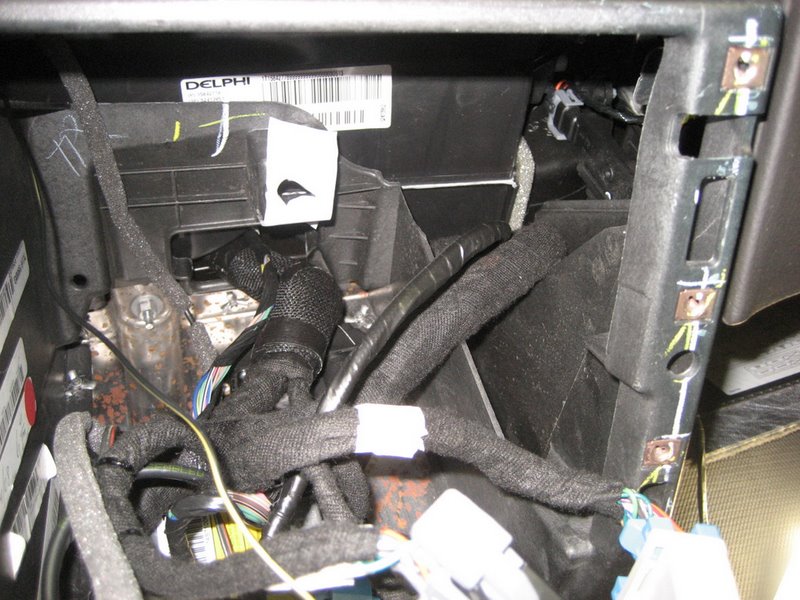
Next comes the hard part. Contort yourself under the dash and look high above the dead pedal. You'll see the Splice Pack taped to the wiring harness:
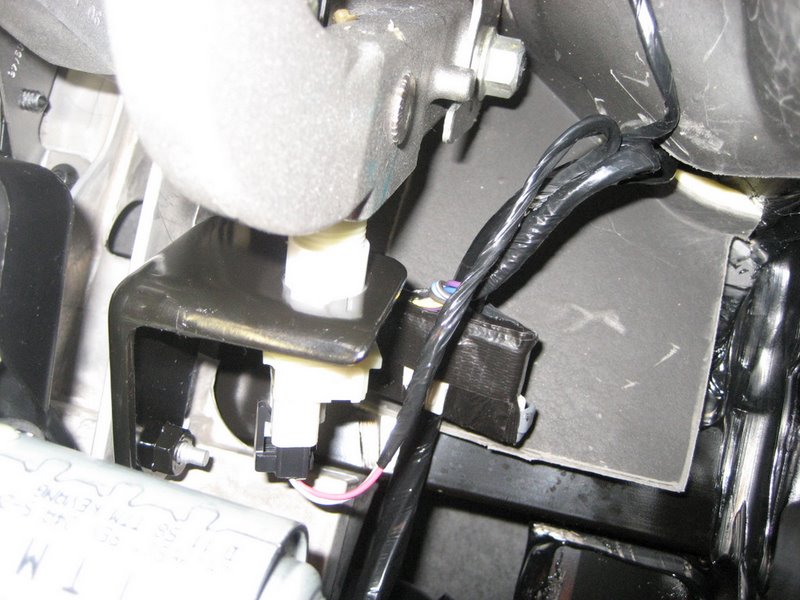
Pull it down away from the harness:
Pull it down as far as possible:
These photos may make it look easy, but reaching in there is WORK!, especially when you need two hands. Now, here's a controversial part of the instructions. The instructions direct you to remove terminal K connected to the light blue wire from the Splice Pack. Then you cut off the terminal from the light blue wire and connect the light blue wire to the wire from the PAL wiring harness. This disconnects the XM receiver serial data wire from the main bus and reconnects it to the PAL serial data wire. But why pull out the terminal? There is no real reason to, since all you do is throw it in the trash can. Instead, it makes more sense to simply cut off the light blue wire right at the terminal and leave the terminal installed in the Splice Pack.
For those of you who insist on the following the instructions, you will NOT have fun completing the following steps:
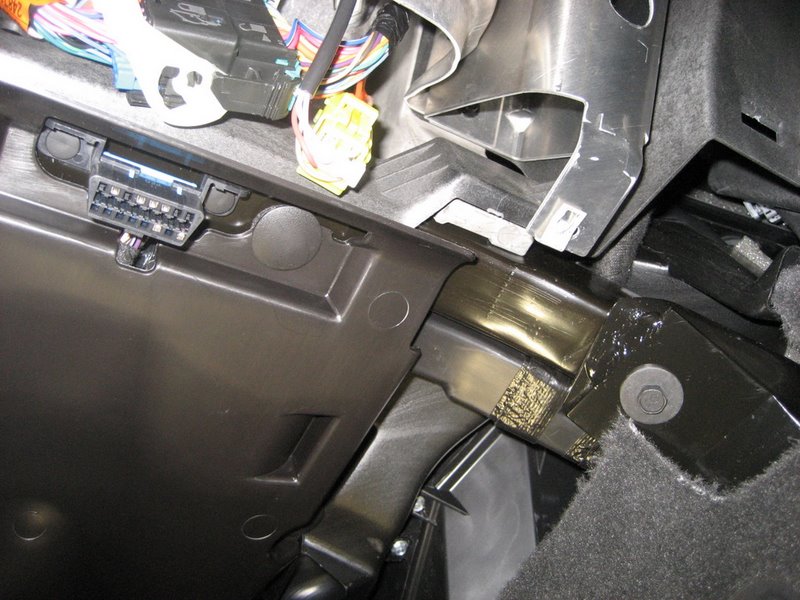
First, untape the Splice Pack:
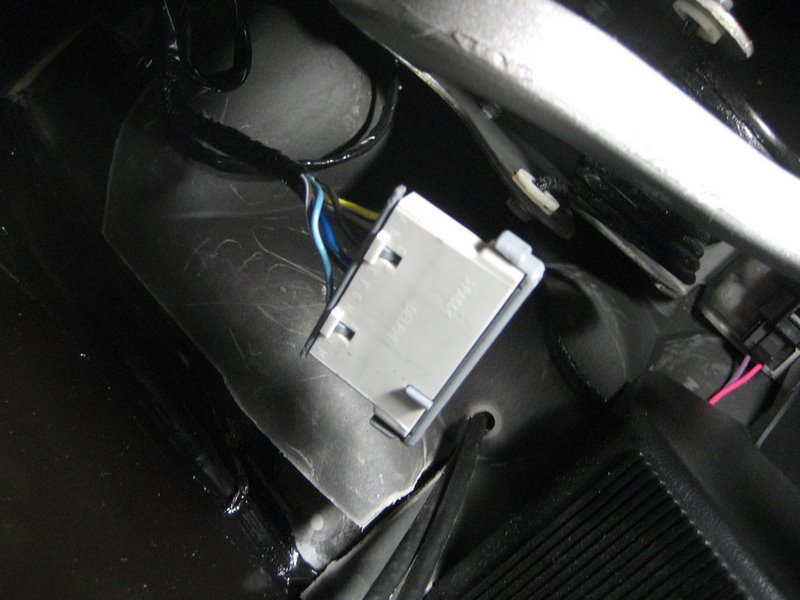
Next, pry out the comb (notice the light blue wire on the left):
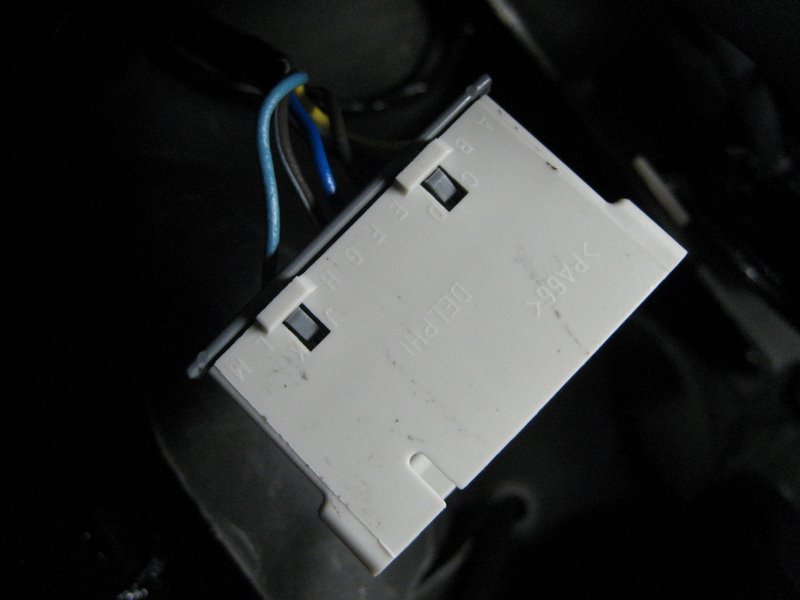
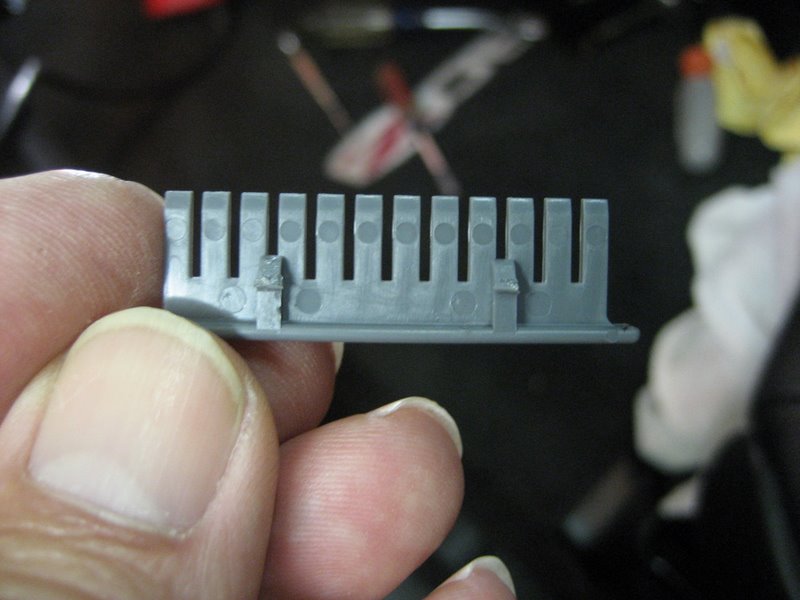
Here is the comb. All of the terminals connected to the wires into the Spice Pack connect to the comb and the main serial data bus:
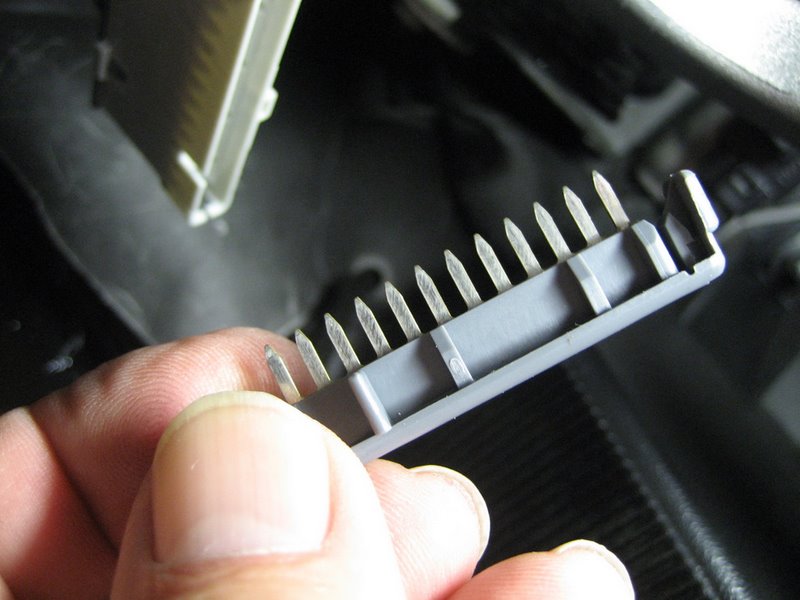
Next, you must remove the gray TPA (for
terminal protection assurance). The terminal will not come out unless you
remove the TPA
(unfortunately, the installation instructions do not explain this):
Pry it out with a small flat screwdriver. Do not try to unlock the two locking tabs - just pry out the TPA. Here it is removed:
Once the TPA is removed, pull hard on the light blue wire and it will come out of the Splice Pack:

At this point, you must reinstall the TPA and the comb, then tape up the Splice Pack as before. These steps disconnected the XM receiver Circuit 5781 from the main data bus. While the above photos may make it look easy, getting under the dash and actually doing it will have you grunting a lot! Instead, it would be far simpler to leave the terminal connected to the splice pack comb and just cut off the light blue wire. You could add a bit of electrical tape over the cut off wire, but otherwise you could have left the Splice Pack all taped up without ever pulling it apart. You still have to connect the light blue wire to the PAL harness wire anyway.
Whether or not you choose to remove the terminal from the Splice Pack, you end up with the light blue wire. Cut off the terminal and toss it. You now have the bare end of the light blue wire to connect to the PAL harness wire.
Next, let's get to the installation of the PAL wiring harness. Like the Peripheral PXAMG, you must remove the Nav unit to make the connections. So the center console must be removed. This isn't difficult, but it does take some time and patience.
I'll repeat some of the steps shown in the Peripheral PXAMG installation, since they are basically the same.
Here are the tools you need:
First use the T15 Torx driver to remove the four screws shown above to allow the console lid to be removed. Use the T25 Torx driver to remove the shifter knob (if you have a manual transmission). Use the 7mm nut driver to remove the two 7mm screws from the right side of the console - these are accessible by lifting up on the e-brake boot on the right. When you remove these two screws, you can them remove the right console trim plate by pulling down at the rear.
Next remove the two 7mm screws at the rear of the center console.
Lift up on the rear of the center console and it will come loose from the dash. Pull the shift lever back to allow the console to clear the shift lever (manual or automatic). At this point the only thing preventing removal of the console is the wiring. This is the tricky part. First pull the connector at the hazard warning switch near the top. Then pull the seat heater switch connectors (if you have them). Finally, pull the connector at the traction control switch - on this one, you lift a retaining tab rather than push the tab. The hardest connector to pull, if you haven't done it before, is the power plug (cigarette lighter) connectors. On these you must push a tab to release the connector - sometimes the tab is at the top, sometimes at the bottom. In the photo above, the bent awl works well for pushing the release tab.
You don't have to remove all of the plugs if you can manuever the console onto the passenger seat with part of the wiring harness still attached. Once you know how, it is a bit easier just to remove the whole thing and get it out of your way.
With the console removed, here is what it looks like:
This may look daunting, but it is quite easy to pull the console once the connectors are removed.
Here is the console sitting on the passenger seat:
In the next photo, you can see the six 7mm screws removed that hold the HVAC controls and the nav radio in place:
A soft towel laying on the shift lever protects the units from being scratched when you remove them.
First, pull out the HVAC module:
It comes right out once the two screws are removed.
Next, pull out the nav radio unit and you'll see the two plugs in back:
Here's another photo from the rear:
Both the 24 pin plug on the left and the 12 pin plug on the right must be pulled.
Simply push down on the tabs and pull:
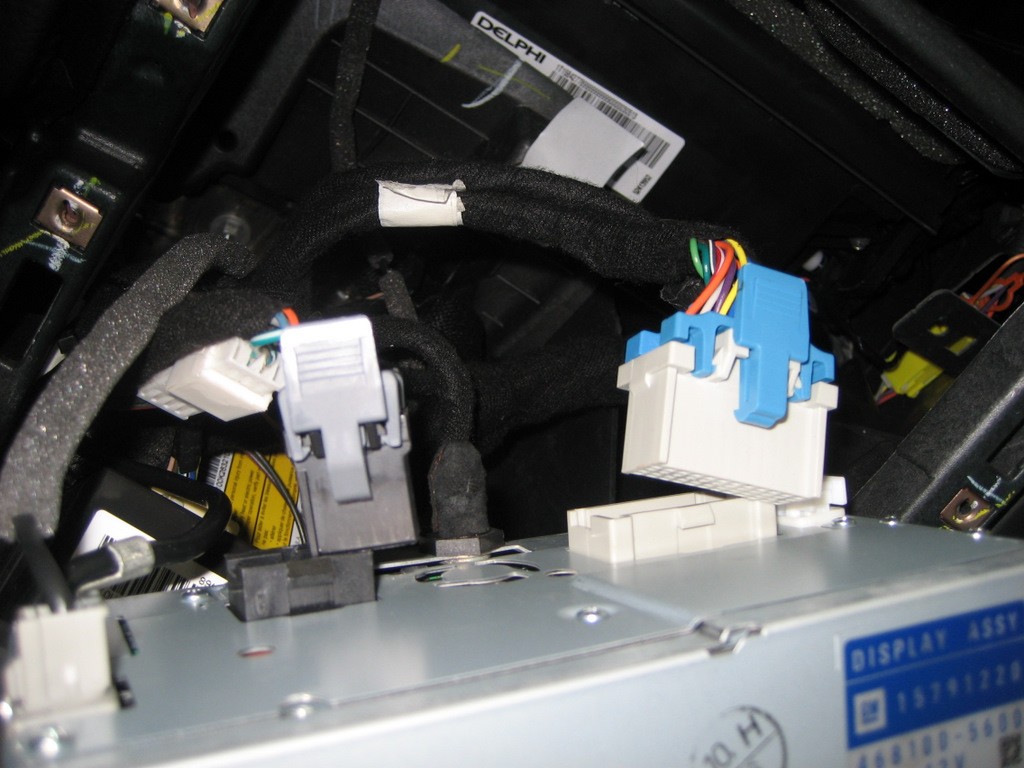
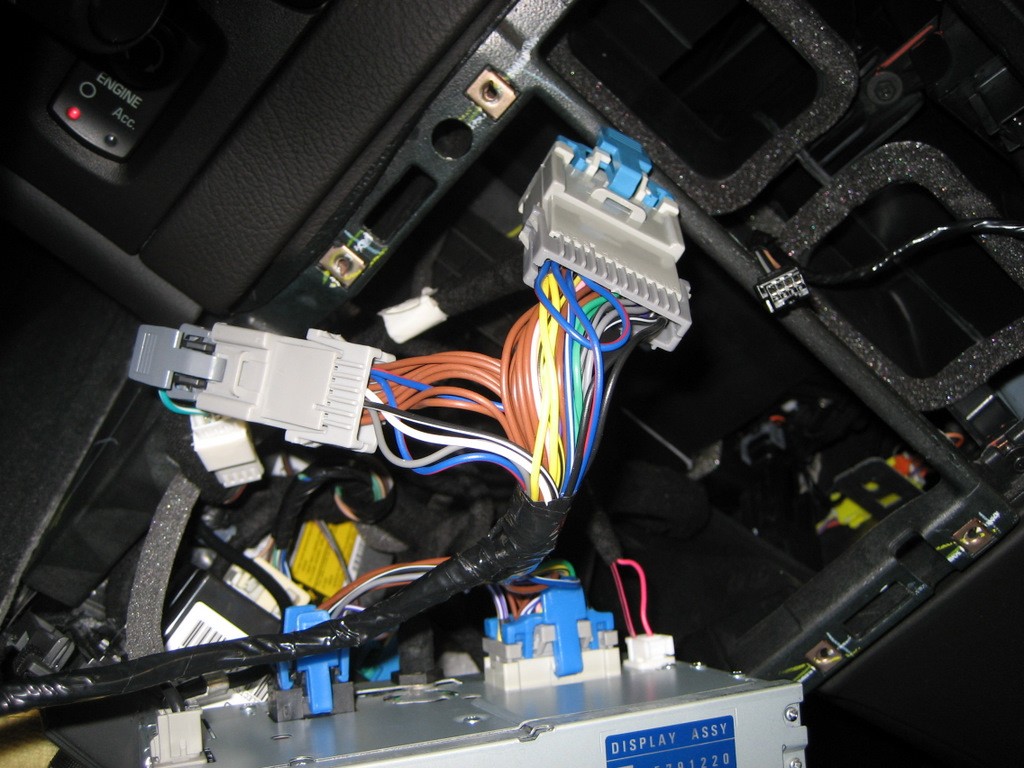
Next, plug in the PAL wiring harness:
Route the single Class 2 Data wire as shown in the instructions and the remainder of the harness with the 16 pin connector down behind the Nav unit and out the right side of the console:
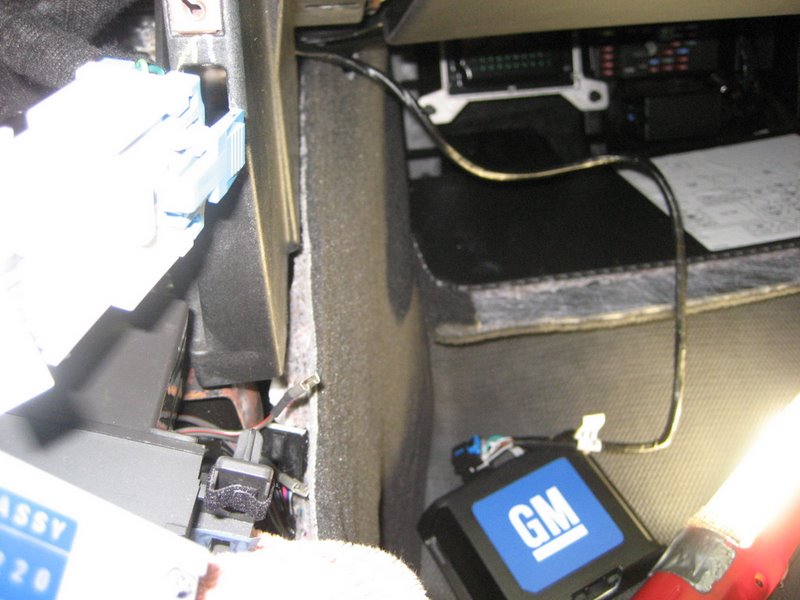
At this point, you need to decide where you want to locate your Ipod. Since you won't have control over the Ipod when it is plugged in, the glove box probably makes the most sense. And this is what the installation instructions direct you to do. So the following steps should be taken for a glove box installation.
Do not reinstall the Nav unit at this time because you will need access to the center cavity to route the Ipod cable from the glove box.
The installation instructions direct you to remove the glove box, but if you haven't done it before, the following photos may help. The glove box is hinged to the instrument panel on three pins (shown in the center of the photo):
These tabs latch onto the pins:
First push up on the right side to release the right tab from its pin. Then push up on the left side to release that tab. Then pull down to release the center tab and the glove box will come out. You will need the glove box out to modify it for the Ipod cable.
Notice the supplied template is different from the one in the instructions:
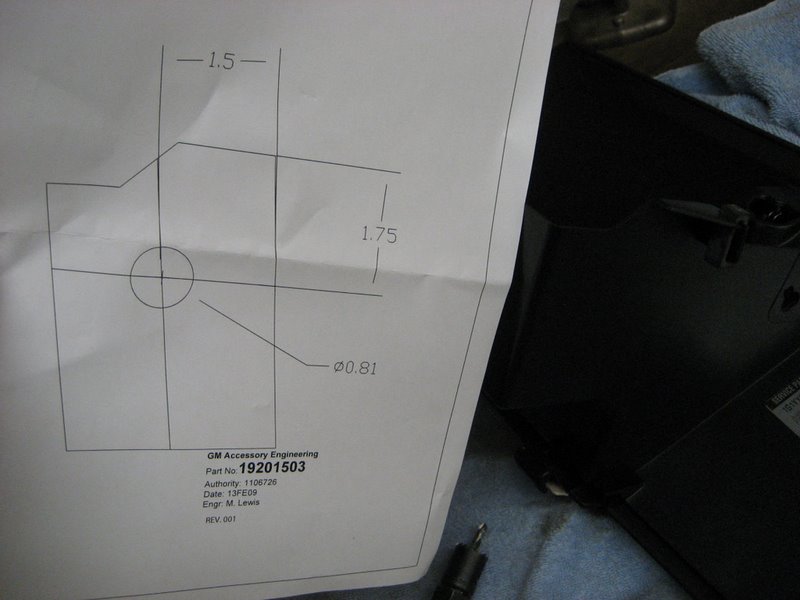
Hold it up against the side of the glove box to see where the hole goes:
Drill a 13/16" hole here:
And push the Ipod cable in place:
Next, route the cable through the instrument panel:
Here, the taped section is pulled through and routed down alongside the cable with the 16 pin connector:
Pull both cables out at this location:
Reinstall the glove box with the Ipod cable routed through here:
Another view also showing the second cable with the 16 pin connector:
Here are both cables pulled through:
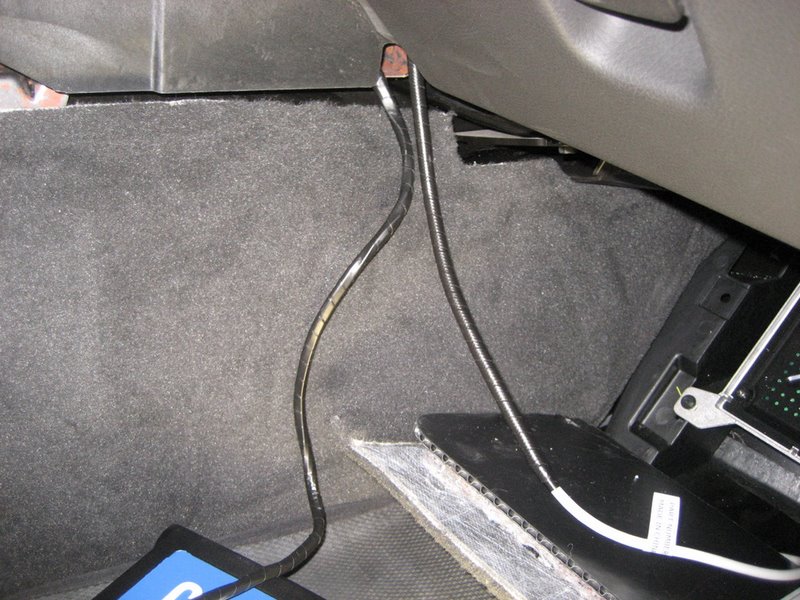
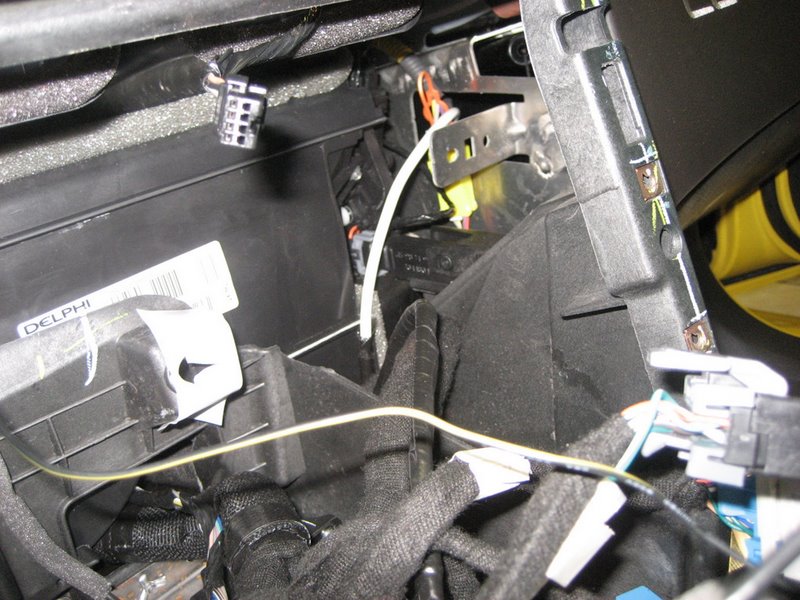
Pull back the side carpet and route them under the foam block:
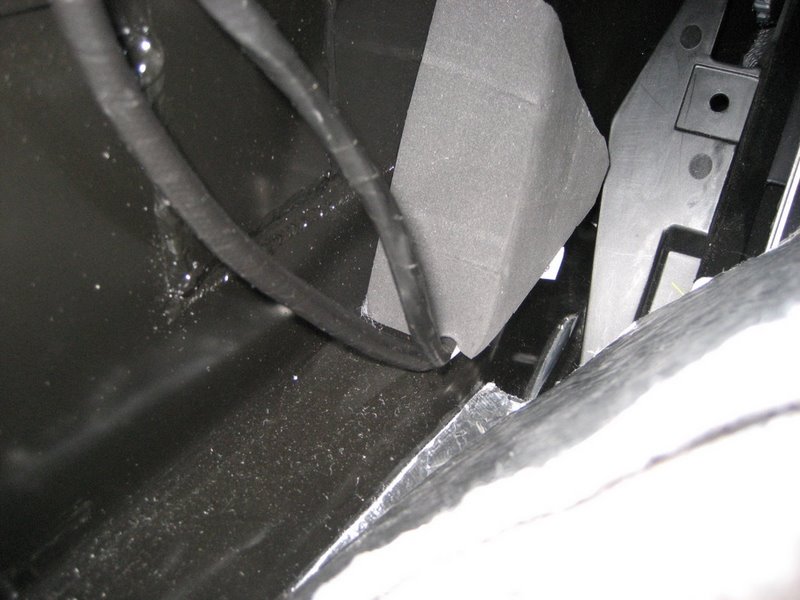
Fish them back under and behind the electrical panel (it isn't easy!):
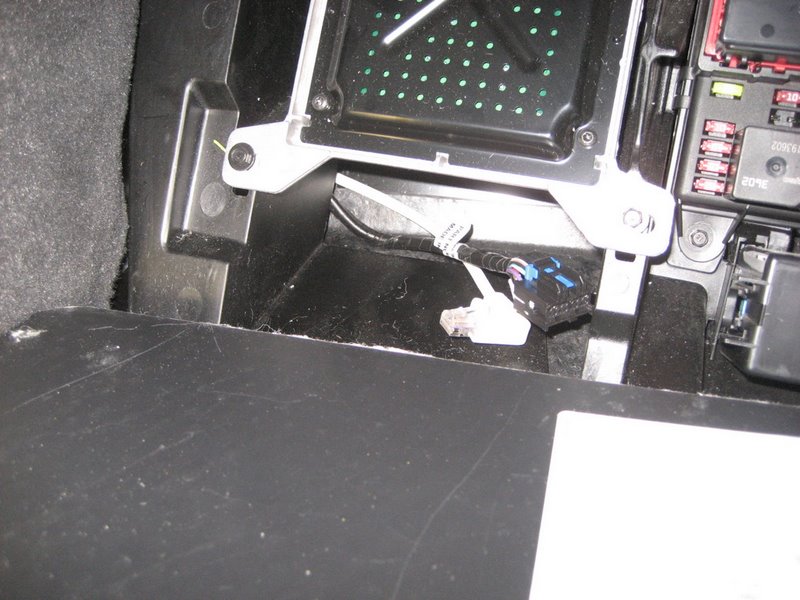
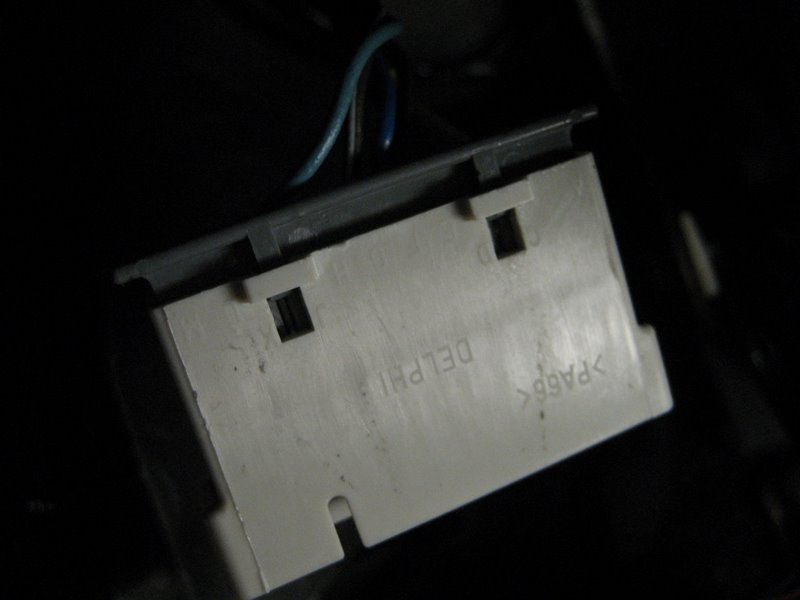
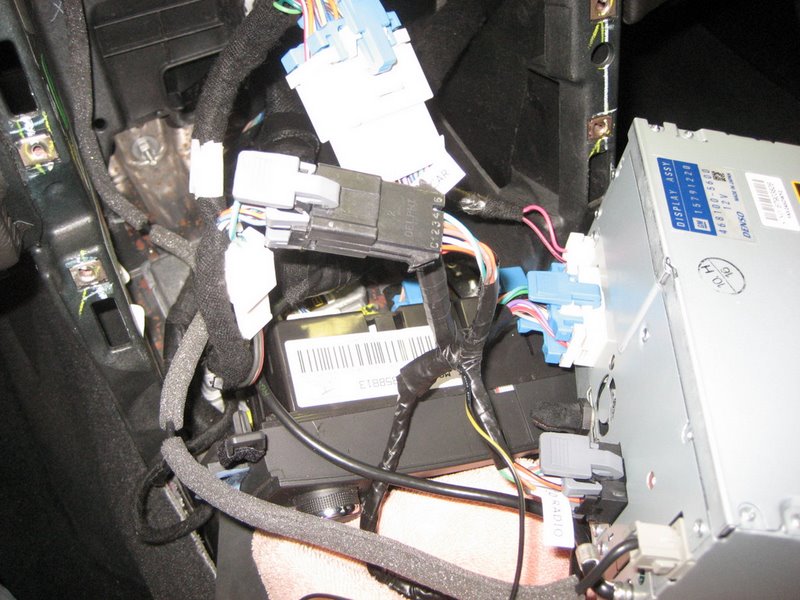
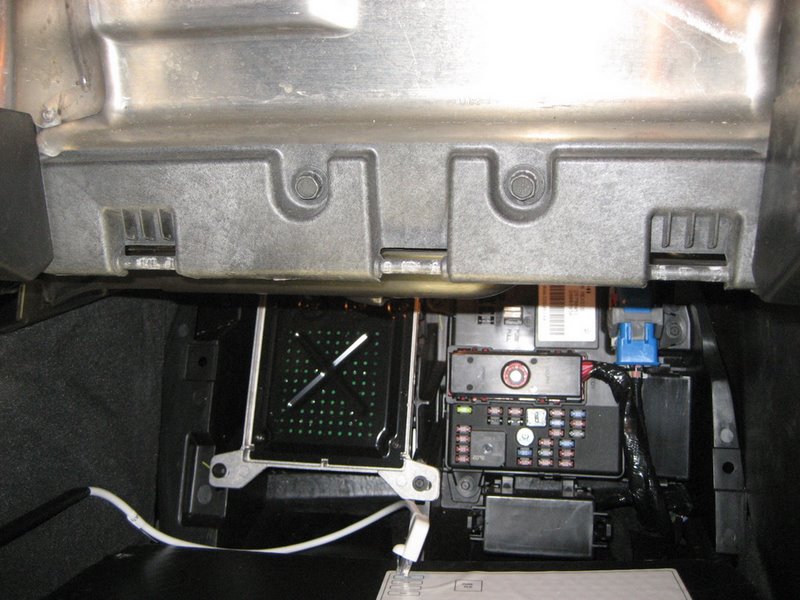
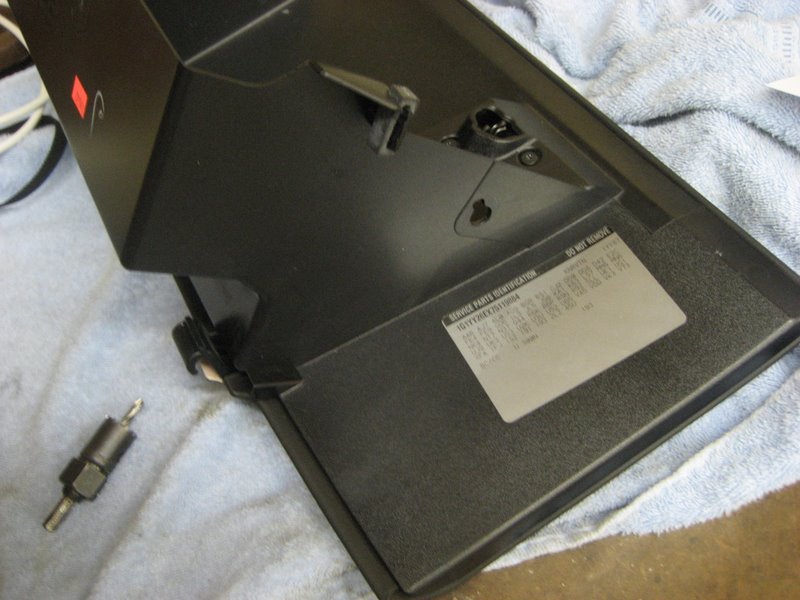
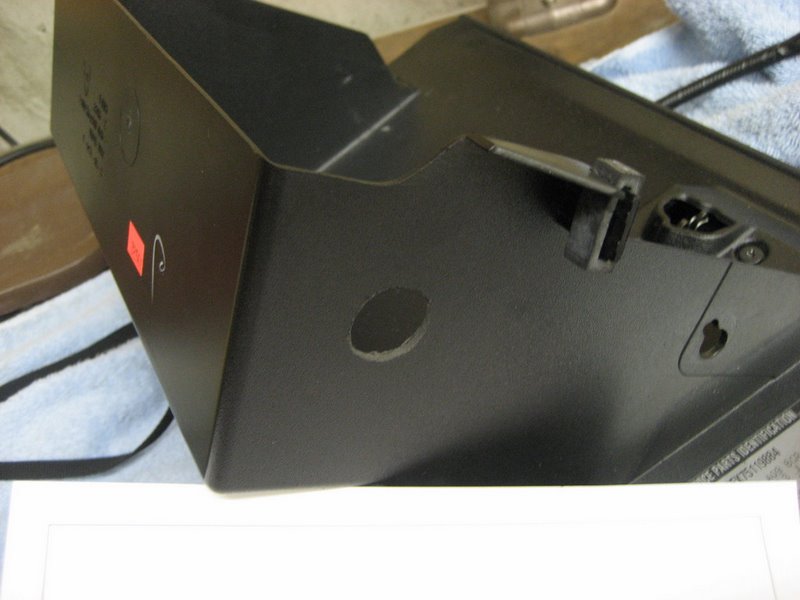
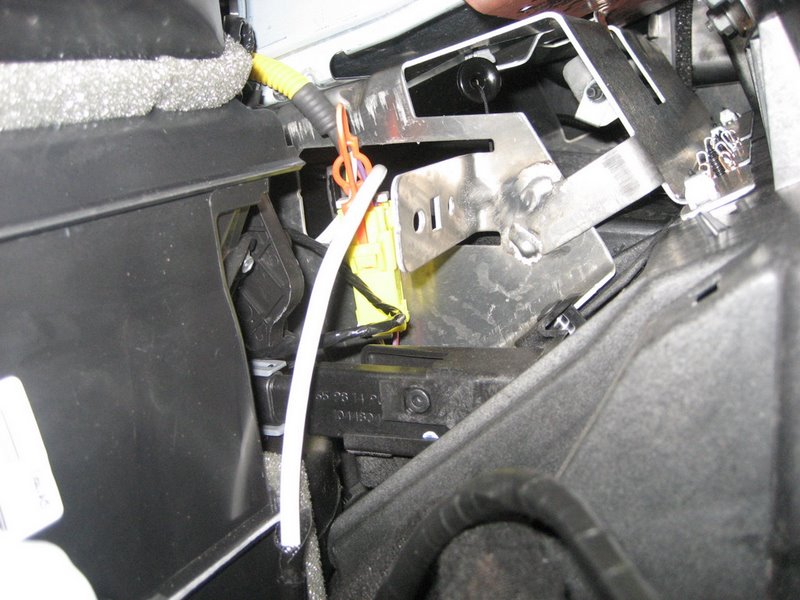
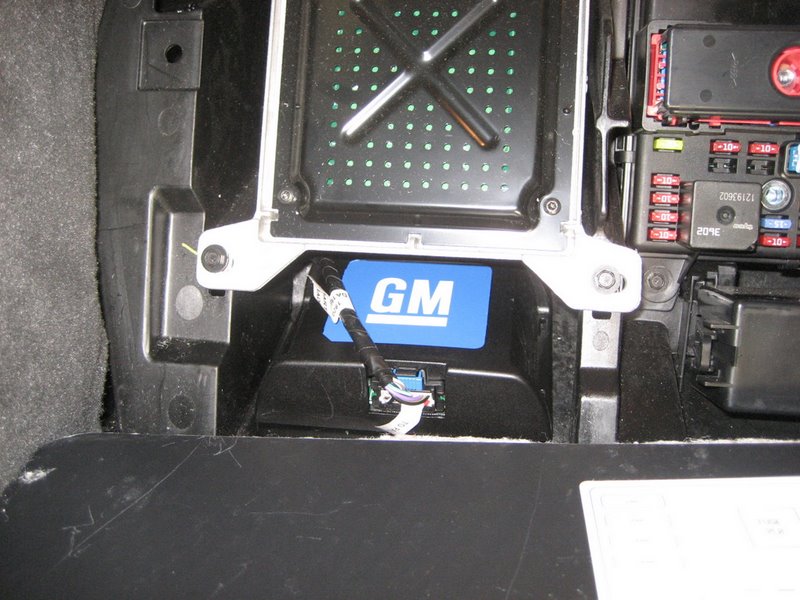
Finally, plug them into the PAL module and stick the module in place:
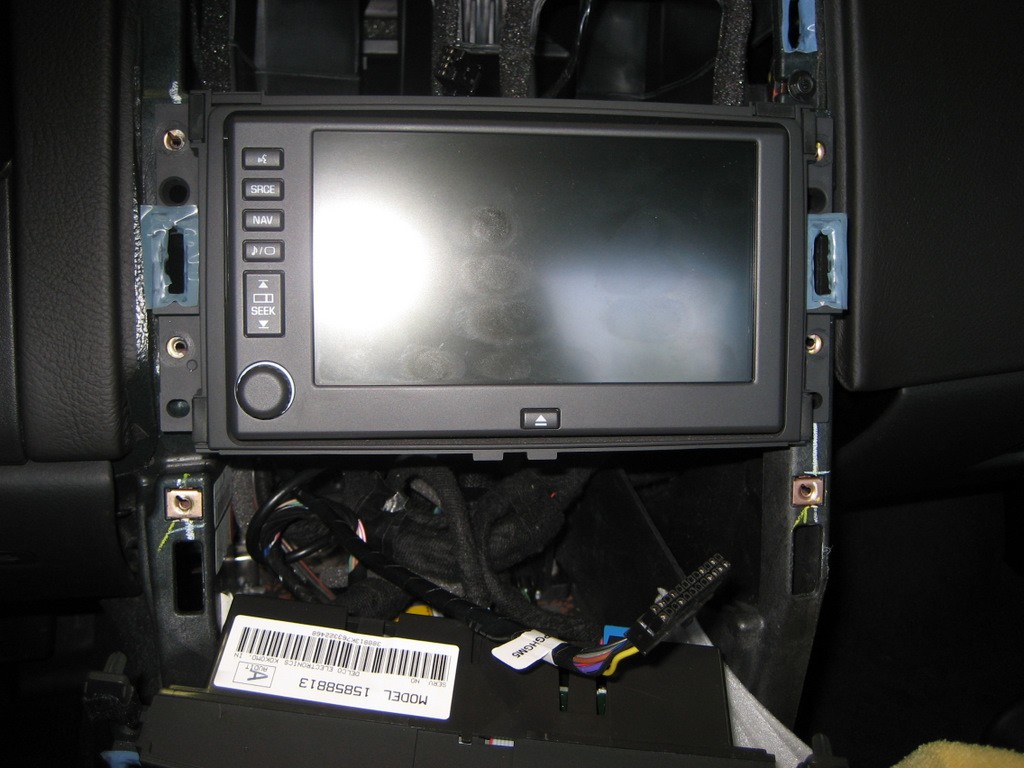
Now that all of the module wiring is done, you can finally reinstall the Nav unit. Making sure the connectors don't get crunched, push the Nav unit back in place and loosely screw in the four 7mm screws holding it in place. Also reinstall the heater controls:
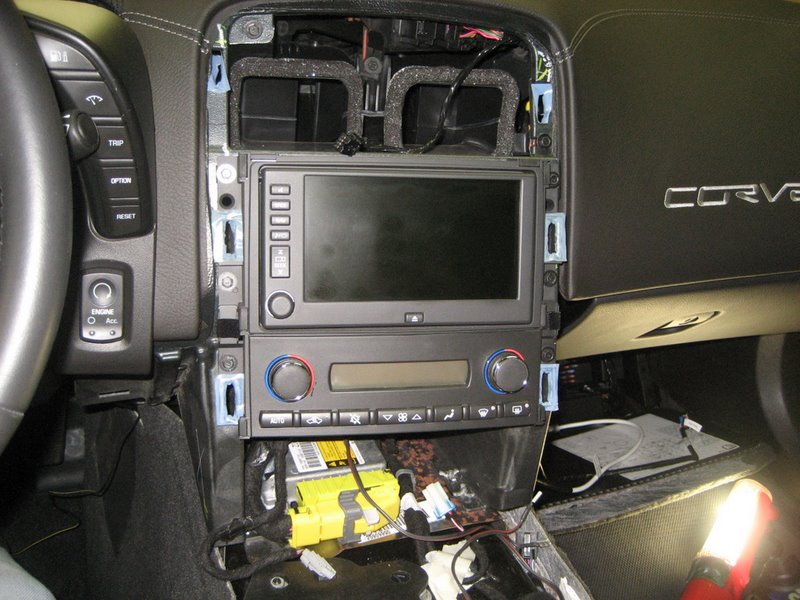
As a hint, before tightening the six screws holding the Nav unit and heater controls in place, push up hard to take any slack out of the screw holes. I found if you do not, sometimes the ash tray will very slightly contact the bottom of the heater controls and not close perfectly.
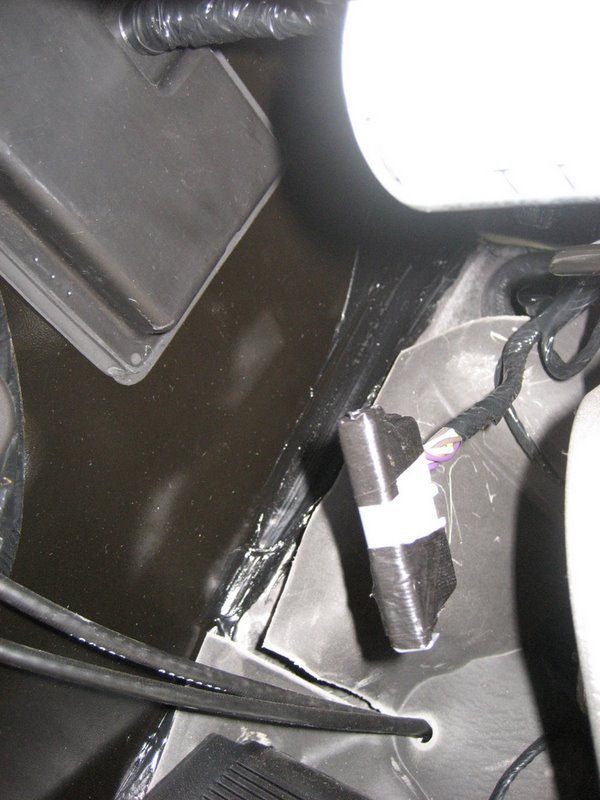
At this point, most of the hard work is done. You route the Class 2 data wire under the dash to the light blue wire and connect it using the crimp connector.
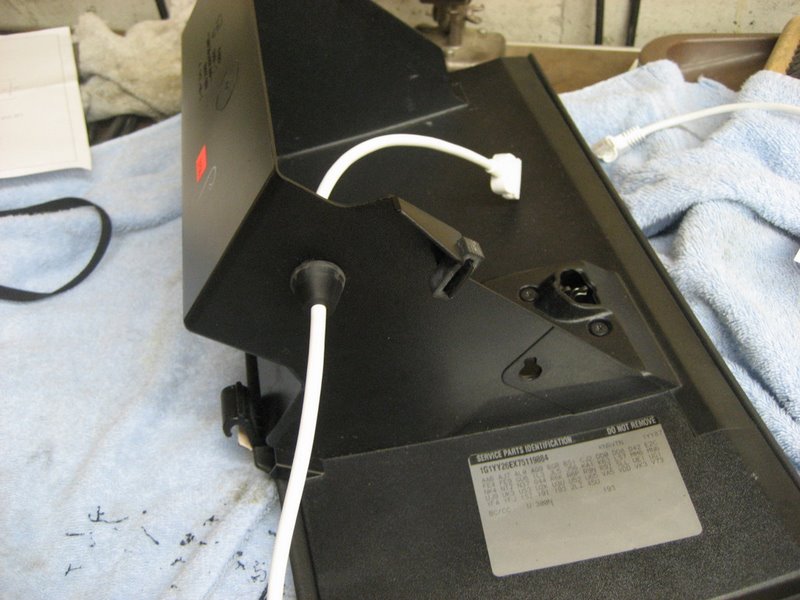
Prior to putting my car back together, I connected up the PAL module to show some photos of the connections.
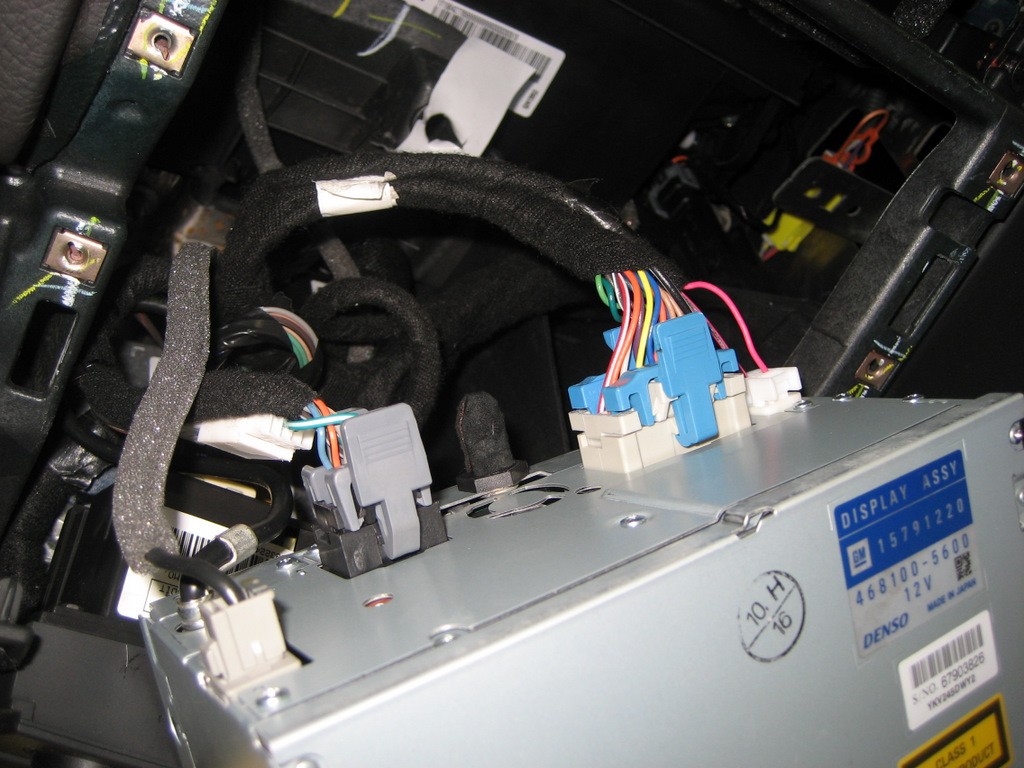
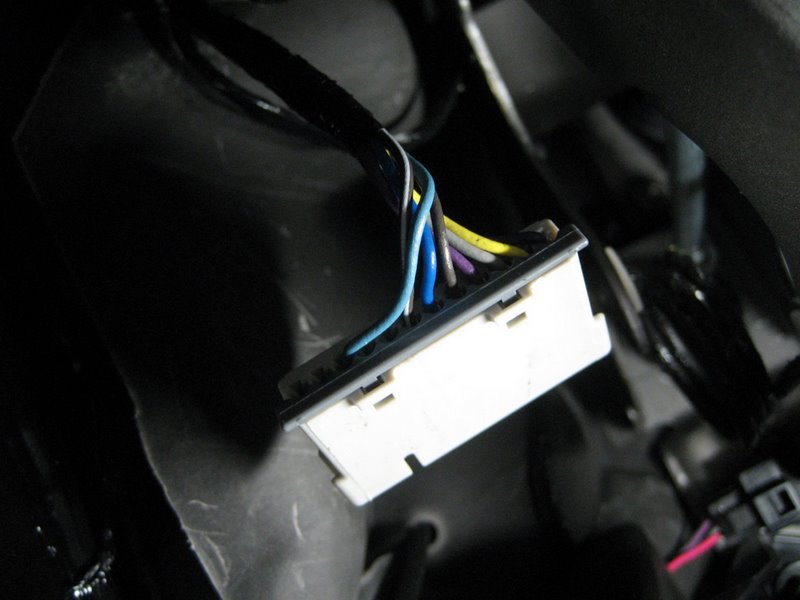
First, the PAL module connected to the 16 pin connector:
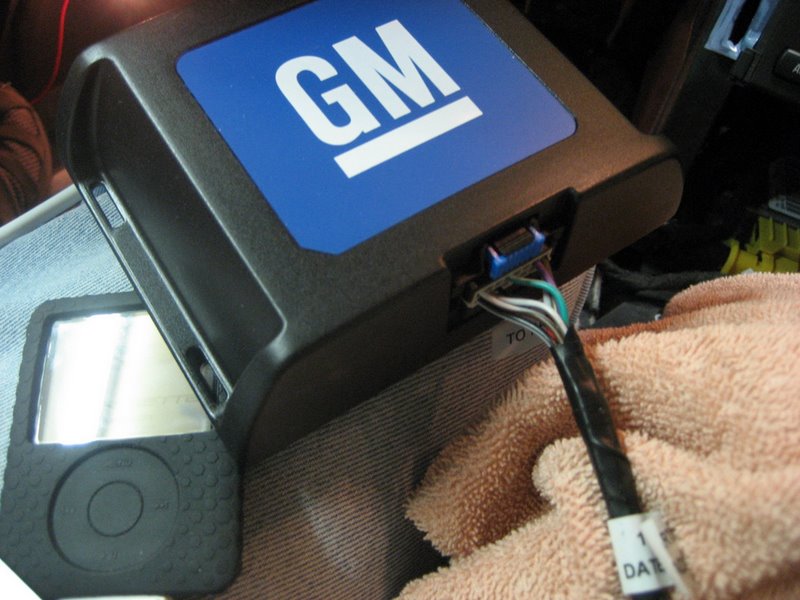
Here's a shot of the Ipod wiring connector plugged into the module:
With all of the wiring connected, we turn on Nav unit and see what is different about the PAL controls. At first, it looks like the standard Nav screen:
Push the XM1/2 soft button with the Ipod connected and you enter the Ipod mode (which replaces the XM2 mode):
This is the Ipod Player screen. (For those of you with the factory external 6 CD changer, notice you lost the CD/CDX soft button. You get it back when you re-enter the XM1 mode, as in the first photo.)
The Player screen is the default screen, giving you a number of choices with the six soft buttons. Unlike all of the other Ipod adapters, these buttons actually read what they do!
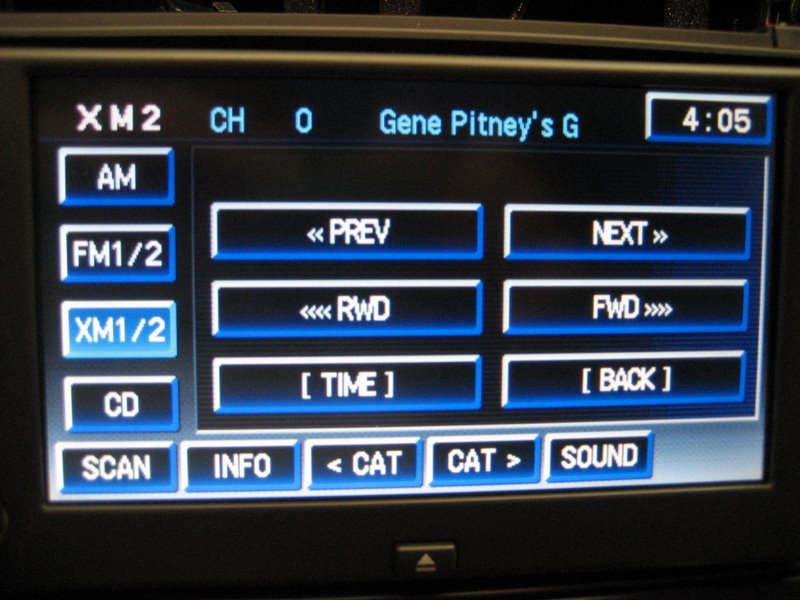
The INFO button gives you the artist, song (or book) title, and the album.
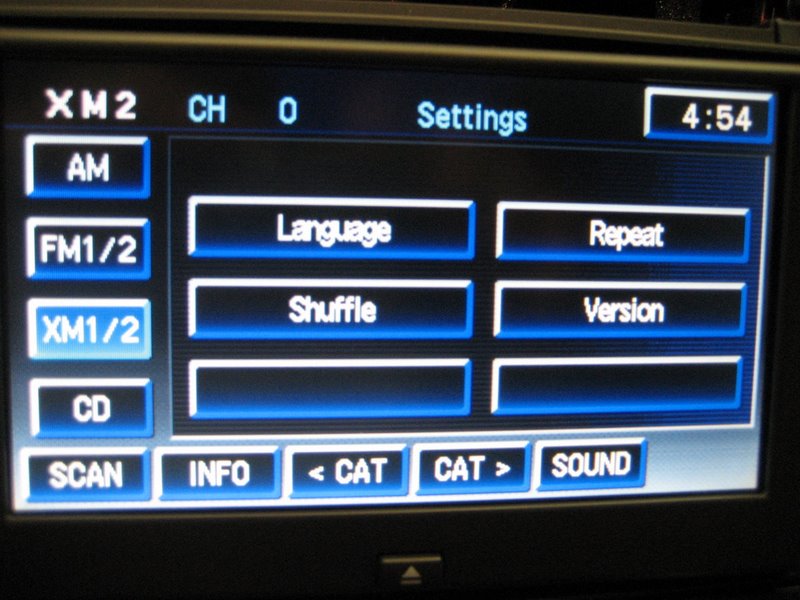
The SCAN button allows you to enter two other screens. First, the Settings screen:
Another push of the SCAN button puts you into the Music screen:
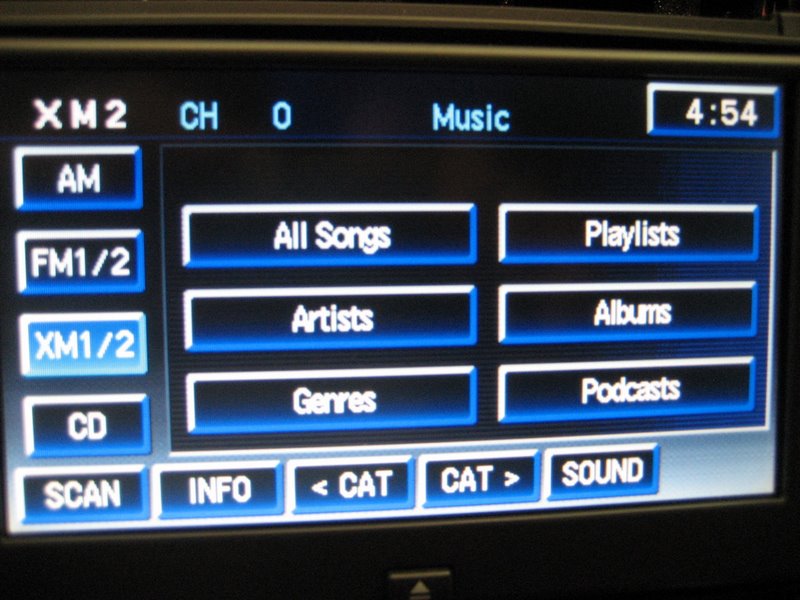
Here is where you can do your searches of music tracks, Playlists, Artists, Albums, etc. Audiobooks are in the Genre's category:

Here is an Artist search:

You can choose "All", then use the CAT > or < button to cycle through them, or do an "ABC search":
Each button narrows down your choices until you find the artist you want, then it lists the tracks or "All" to choose from.
Notice another nice feature is that most screens also have a "BACK" button, which allows you to go directly back to the previous screen.
Finally, here is what the Ipod screen looks like when connected to the PAL:
Pretty cool, huh?
Comments about the GM PAL
(update 9/1/10)
Many of these comments below are outdated, since the new Version 2 PALs became available. The Version 2 PALs resolve all of the negative issues with the original GM PAL and provide by far the most features and simplest installation of any iPod adapter for the C6 Corvette.
1. It would be nice if the PAL allowed manual control of the Ipod. Like the Lockpick adapter, once you plug in the Ipod, your only control is from the Nav unit. Because the Ipod controls are so good, with its clickwheel, it's too bad these are not accessible. However, unlike the Lockpick, and all of the other adapters for that matter, the PAL is very well integrated into the overall audio system and the PAL software, with its well labeled buttons, allow very good control of the Ipod.
2. Audiobooks will play through the PAL, and you do have a timer feature that shows your location in the book. You can't go to individual chapters, but control is sufficient to allow you to listen to the book with reasonable convenience.
3. The PAL module is comparatively large, so its only reasonable location for mounting is behind the passenger footwell, where it is designed to be placed. The Ipod cable is relatively short, but it will reach the glovebox area just fine, again where it is designed to be placed.
4. The glovebox area is not too accessible to the driver; however, since there is no Ipod control with it plugged in, there really isn't much reason to place it in an accessible position.
5. The PAL will not charge the latest generation of Ipods and Iphones. However, there are solutions for this problem as noted at the end of this review.
6. One of the drawbacks of the PAL is its difficult standard installation. As of 9/6/09, see this website for a very simple and quick installation:
http://www.kawal.net/PAL%20install.htm
Go to Alternative 5.
So now, what to choose?
First of all, each of these six adapters does three important functions:
A. They allow your Ipod to play high
quality sound through your audio system.
B. With one connecting cable, they connect your Ipod to the audio system
AND keep the Ipod battery charged.
C. They allow some limited control of the Ipod through the buttons of the
nav/radio.
For the above reasons, any of them are worth the cost, because of the almost unlimited amount of high quality music that becomes readily available to your audio system.
But to choose, let's recap the strong and weak points of each adapter:
1. The GM Advanced Ipod Lockpick
What I liked about this unit was the ease of installation and the simplicity of its user interface. The Lockpick had a very clean and easy wiring harness to install, and few buttons to learn for operation.
You could select a Playlist and move up and down the Track list of songs in your Playlist.
But, because of this simplicity, the Lockpick was also very limited on what you can do. I believe most people will likely have a lot of songs and artists on their Ipod, because the Ipod has so much storage capacity. When this is the case, I think owners of the Lockpick will often get tired of starting their same old Playlists at the beginning of the playlist and go through Track 1 through Track whatever. It takes a long time to work through a Playlist and if you want song #246, for example, you won't want to keep hitting the SEEK button 246 times to get there.
The problem with the Lockpick is that you can't control the Ipod itself without disconnecting it. So if you want song #246, you must disconnect the Ipod and quickly get to whatever song you want on the Ipod using the easy Ipod click wheel and search features, then reconnect the Ipod and begin listening to it through the audio system. This is the only adapter that does NOT allow you control the Ipod with a Manual or Direct Mode.
There are no search features or random (shuffle) mode to allow you a variety of selections from your large music collection.
Because of these important limitations, this is the one adapter I cannot recommend.
When choosing among the remaining five adapters, the user must think about how he or she is going to use the Ipod. Will there likely be a passenger to help control the Ipod? It makes a difference, because as can be learned from the above discussions, none of these adapters allow you anywhere near the convenience capabilities of the Ipod itself. The ingenious design of the Ipod menus and click wheel allows to you quickly find a song or artist among perhaps thousands of songs stored in its memory. There is no way the relatively clumsy nav or radio interface can give you that search capability.
This means that you need to have either a passenger to help navigate through your large musical (or audiobook) selection or you need a simple and easy interface with limited control while you are driving. Each of the following adapters are better at some things than others. Let's discuss them.
2. The P.I.E. GM12-POD/S
This adapter has a number of search features, but they are somewhat difficult to use. They can be learned fairly quickly, which is a strong point, but a new user will find it impossible without a lesson from someone. The HELP button is useless. But a nice feature is the ability to quickly move from Advanced Mode to Manual Mode so you (the passenger?) can easily control the Ipod directly. Then you can move back into Advanced Mode and go from there, while seeing your song titles and artists displayed in the text area.
The fast forward and rewind buttons don't work very well, in my opinion, and manually moving to the next track is sometimes not very clean and consistent.
This adapter, because of its relatively extended capabilities, should be considered for those users who often have a passenger. The passenger could then either control the Ipod in Manual Mode or use the search features in Advanced Mode. Without a passenger, I think most drivers will likely leave the adapter in Advanced Mode and use a limited number of features in that mode. They will likely choose a playlist and just listen to the tracks in that playlist until they wish to switch.
This unit works well with the factory external CD changer if the extra GM12-VCD module is included. You must also purchase the correct wiring harness, depending on your application.
3. The USA Spec PA11-Vette
What I liked about this adapter was the simplicity and consistency of operation. Like most of the other adapters, it was very easy to install, although the wiring harnesses didn't fit the Corvette quite as nicely as the others. For example, some of the cables were too long and some too short, plus there was an extra wire to connect to the adapter. These are very minor complaints, because extensions are available from USA Spec and too long of a harness isn't much of a problem because it is hidden anyway. If you decide to buy this one, ask for the 5' extension cable for the Ipod if you have a coupe or Z06.
But I liked the way the unit worked. When you hit the SEEK up button to go to the next track, it went there immediately and cleanly. When you hit the SEEK down button it went back to the beginning of the track immediately and cleanly. And if you have the steering wheel controls, you not only have the SEEK button there, but also the Disc 1-6 button, which works the same as the Preset 5 button, which, with a few pushes, puts you immediately in Direct Mode to give you control at the Ipod if you want it. Basically you can control most everything this adapter can do right from the steering wheel.
I didn't find the fast forward and rewind preset buttons too useful, but the Preset 6 button I did find useful, because this allows Random mode. If you are driving alone without a passenger, as mentioned above, you aren't likely to want to fiddle with either the Ipod or a bunch of poorly named buttons to get to your music. Most of the other adapters start playing a Playlist at the beginning of that Playlist each time to select it. If your Playlist starts with "House of the Rising Sun", you are going to hear "House of the Rising Sun" a lot, until you're probably sick of hearing it after a while. The Random feature allows you to listen to songs from anywhere on your playlist so you don't get tired of hearing the beginning songs every time. To me, the Random feature is a good one.
You can't select any Artists with this adapter, and the other limitation is the few number of playlists you can select (in Playlist Mode). You are limited to only three if you use the Aux In feature, or four if you don't. That isn't very many playlists, when the other adapters allow you an unlimited number. But you still have the choice of All Songs and three (or four) selected Playlists. If you like to use the Random Mode and can live with these limited number of playlists and no search features, this adapter is the easiest adapter of the five to use. You don't need a passenger and you have all of your (limited) control right at the steering wheel. If you don't have steering wheel controls, you still have the easily accessible SEEK button on the radio or nav unit. In that case, you will likely use Preset 5 ( to get to Direct Mode) and Preset 6 (Random Mode) a lot.
If you decide on this adapter, be sure to purchase the one with the new "dual mode" design. The instructions are terrible, but the adapter is a good one. The old design required you to set a dip switch to choose between Playlist or Direct Mode. With that setup, I likely would have not recommended it, because it had the similar limitation to the Lockpick model.
4. The Scosche AXIPCL2
As mentioned in the discussion above, the Scoshe Ipod adapter is basically the same as the P.I.E. adapter. The installation is quite easy, and the adapter comes with the necessary wiring harnesses for both XM and non-XM equipped radios. The Scosche adapter does not offer the module that allows the use of the external CD changer, but most owners don't have the changer so it shouldn't be much of an issue.
The Scosche adapter, as previously described in detail, allows search features by artist, album, etc. And most importantly, it allows quick access to the Ipod by selecting Manual Mode with the preset buttons.
Like the P.I.E. unit, this has more features than the USA Spec adapter, but it is not as easy for a driver alone to use these features. This has unlimited playlists, so those drivers who travel with passengers might choose this one.
5. The Peripheral (iSimple) PXAMG
First, you've got to be willing to tear into your dash or pay someone to do it to install this adapter. As detailed above, it isn't a big deal, but compared to installing any of the other adapters back at the XM receiver (assuming you have an XM receiver) this one is considerably more time consuming. So if you're willing, read on.
I like the PXAMG a lot. Actually, except for the installation difficulty, there isn't much to dislike about anything. The unit comes with the necessary cables, which are clean and just the right length. Both the Ipod and the Aux In cables are included and they are plenty long to reach anywhere. The Gateway module itself is well made.
If you are into HD Radio, this unit may really attract you - I didn't test it, but I can only assume it works well. The upcoming Bluetooth module also sounds very interesting, and I hope to test it when it becomes available - in June perhaps.
I like the timer feature on this unit, which displays where you are in a particular song. It isn't a big deal for songs, but for audiobooks I can see this feature is a bonus because it tells you where you left off in a book so you can start there again if necessary. Also, the fast forward and rewind features work well - 5 secs in either direction with each push of Preset 1 or 2.
The Browse menu by Playlist or Artist using Preset 3 and the SEEK button are fairly easy to use, although a driver alone may not wish to use these features a lot because of the distraction. If he or she has a passenger, again this is a nice additional set of search features.
Also, like the USA Spec adapter, this unit has a Random Mode, using Preset 6. Whether or not you like this feature is of course a personal preference, but it is there for those who want to mix up their extensive song lists. Since most playlists start at the same beginning song every time, it seems that one might tire of the first songs after a while.
This adapter has a lot of features and it works well.
6. The GM Personal Audio Link
Like the Peripheral PXAMG, you've got to be willing to tear into your dash or pay someone to do it to install this adapter. It is by far the most difficult adapter to install because of the Class 2 data wire you need to splice, as well as the modification of the glove box and the mounting of the PAL module. Quite a few C6 owners have already installed the PAL, and many of their comments are very positive. But it certainly isn't a quick "plug and play" like some of the adapters.
UPDATE 9/6/09: For a very simple and quick PAL installation, see this website:
http://www.kawal.net/PAL%20install.htm
Go to Alternative 5
But if you're willing to do the work or have it done, the PAL is certainly the most well integrated Ipod adapter for the C6 Corvette. It is the only adapter to have buttons on the Nav screen that actually say what they do! All of the other adapters require you to remember a series of steps to accomplish what you want from your Ipod. Some are easier than others, but they are also more limited in functionality.
The PAL interface is well designed and it functions well with the Nav unit. You can do most anything you want even though its search features and general Ipod navigation can't compare to the Ipod itself.
This adapter is certainly a good one.
So, which is "the best"?
Hopefully this review has covered your questions about the various Ipod adapters available for the C6 Corvette. If you think about your own personal choices in how you use your Ipod and how you travel (alone or with a passenger), you should be able to make a choice among the above.
If you usually drive alone, and can live with some limited features, the USA Spec PA11-Vette is solid, easy to install, and very easy to control.
If you want more features, and perhaps travel with a passenger, and need a very simple installation, consider either the P.I.E. GM12 POD/S or the Scosche AXIPCL2.
If you don't mind the installation issues of the Peripheral PXAMG, you'll have a lot of features that work very well for either the driver or his passenger. And there are some interesting expansion possibilities.
The GM Personal Audio Link (PAL) is the most well integrated adapter and has the most features of any adapter. This makes it the most powerful solution for the C6 Corvette (with Nav), in my opinion. The only reasons not to choose it are if the installation is too difficult for you or you decide you MUST have control of the Ipod at the Ipod itself.
Click here for the simple-to-install Version 2 PAL with all of the latest features
Since I have all of the Ipod adapters available to me, I chose the GM PAL as the adapter for my '07 Z06. The PXAMG is my second choice, because of its Ipod control, search features, and general operation. The PA11-Vette is my third choice because of the simplicity of both its installation and its operation.
Where to get these adapters or information about them?
1. Lockpick adapters are available from www.CoastalEtech.com. Coastal Electronics phone number is (800) 507-2234. Try this link:
http://www.coastaletech.com/CORVETTEIPOD.htm
2. Jay Coban at Discount Car Stereo, www.discountcarstereo.com, sells the P.I.E., the USA Spec, and the Peripheral adapters. He can be reached at (804) 717-5717. Here are some links:
http://www.discountcarstereo.com/detail.aspx?ID=1092
http://www.discountcarstereo.com/detail.aspx?ID=994
http://www.discountcarstereo.com/detail.aspx?ID=1215
Jay knows his products - his email address is info@discountcarstereo.com
3. Dan Geil at USA Spec can answer some of your questions about their adapters. He can be reached at (866) 929-1806, website:
4. Brandon Boll at Scosche can help you out with their units. His phone number is (800) 363-4490, ext. 147. Their website is at:
http://www.scosche.com/scosche.ipod
5. Peripheral doesn't sell direct to consumers, but Discount Car Stereo and even online stores like amazon.com and Best Buy sell their products.
Here is a website for the PXAMG:
http://www.isimplesolutions.com/CES/default.asp
6. The original GM PAL is available from all GM dealers, but the Version 2 PAL is now available.
Click here for the new Version 2 PAL with simple installation and the latest features