Adding an Auxiliary Input
to a C6 Corvette
(revised 4/17/17)
Rather amazingly, the C6 Corvette, GM's premier sports car, didn't even offer an auxiliary input to the audio system until 2011 in their cars equipped with the factory Navigation system. In 2008, Vettes with a non-Nav radio got an auxiliary input, but most owners have the factory nav radio. So the result is most C6 owners can't even connect an iPod or a smartphone to their audio system. In 2009, factory Bluetooth became available, but only for handsfree calling. Current smartphones are capable of both music storage and wireless Bluetooth audio streaming from either stored music or from apps like Pandora. You will need an auxiliary input to your audio system to take advantage of these great features.
If you have a C6 Corvette equipped with an XM satellite receiver (XM was optional in 2005 and became standard in 2008), you can use the XM band to provide an auxiliary input to your audio system. The harnesses described below offer some alternative ways to connect.
These modification alternatives will allow an auxiliary input to be added to the C6 Audio system:
Alternative 1. You have an XM receiver installed but do not subscribe to XM
Alternative 2. Adding a 3.5mm jack to plug in your music device
Alternative 3. Same as Alternative 2, but connection at the radio or Nav unit
![]()
![]() PLEASE NOTE:
PLEASE NOTE:
Each of these alternatives to add an Auxiliary Input to your car require that you have an XM receiver installed. You do not have to have a subscription to XM, but the working XM receiver provides the XM band on your radio that can be used as an Auxiliary Input instead of XM. Without the XM receiver, your radio will not show an XM band. Without an XM band, you cannot use these harnesses.
If you do not have an XM receiver, one possible alternative is to install one of the Sirius SIR-GM1 tuners, which will create an XM band on your radio. Some Vette owners have had success with this option, but I have not tried this myself. Some have found that programming with a Tech 2 is necessary to activate the XM bands. You can find these tuners on eBay for less than $50. You do not need to connect the antenna - the important thing is to get the XM band on your radio. Then you can use one of the AUX-x harnesses below. Most of the 2005 C6s already have the 16 pin XM connector in place, so all you have to do is plug in the Sirius tuner. But again, I have not tested this option myself.
![]() If you have a 2005 Vette, check out THIS
PAGE for adding an XM receiver.
If you have a 2005 Vette, check out THIS
PAGE for adding an XM receiver.
Alternative 1 - XM Receiver but no subscription
(The AUX-1 harness)
With the first option, you will use the XM audio input to your factory radio instead of the XM radio stations.
The Auxiliary In harness will allow you to plug in any music device that has a standard 3.5mm (1/8") stereo jack for headphone or speaker output.
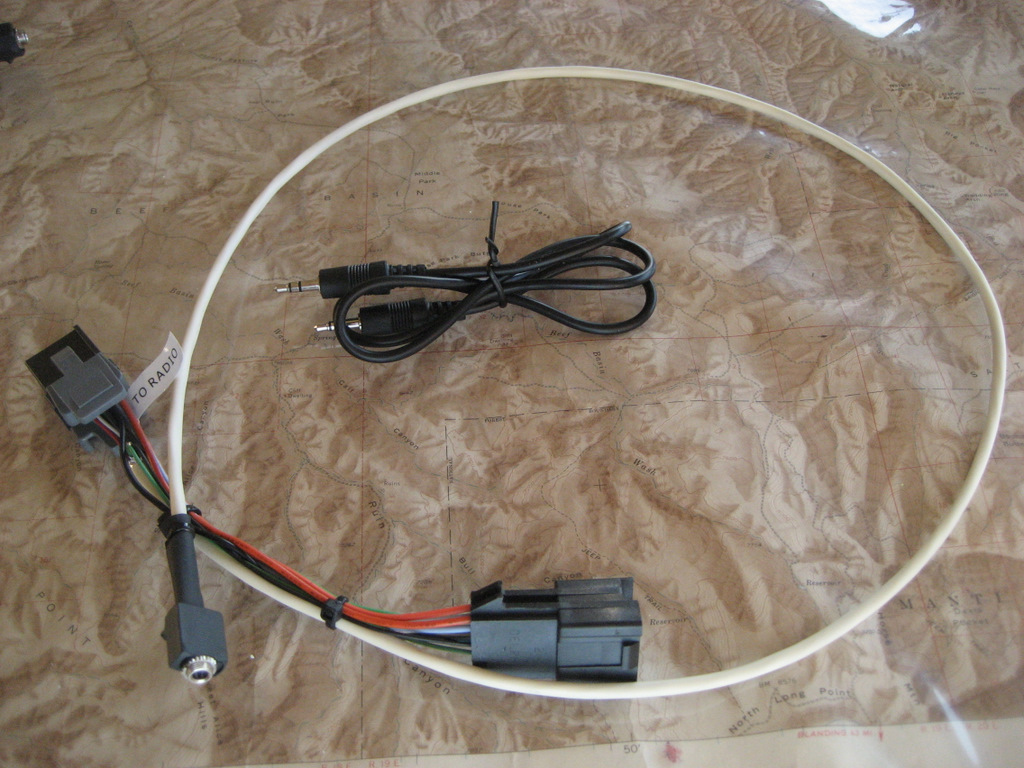
Take a look at the harness below:

(shown above is the latest model using OEM quality Delphi and Yazaki connectors and terminals)
This AUX-1 harness plugs into your XM receiver between the OEM body harness connector and the receiver.
It intercepts the left and right audio signals normally coming from the XM receiver and instead inputs the audio signals from your music device.
Remember, you DO lose your XM audio input.
Here is how to install the AUX-1 harness.
Remove the XM receiver from its tray in the coupe or Z06 or behind the waterfall in the convertible.
(For detailed photos, click here for another website)
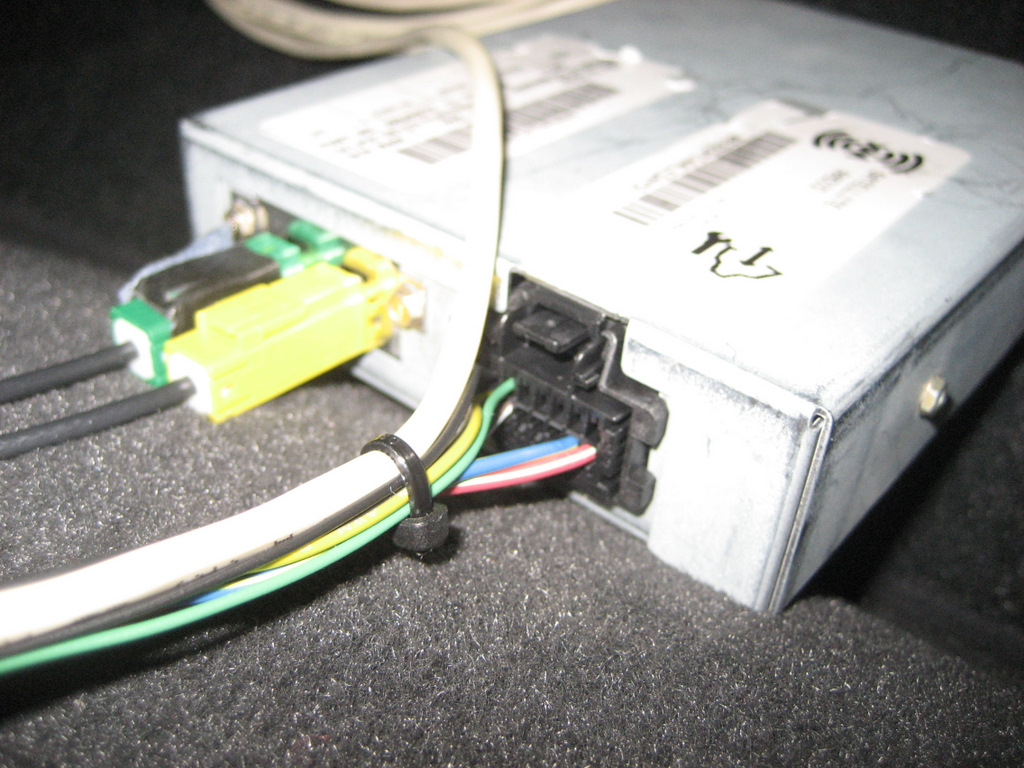
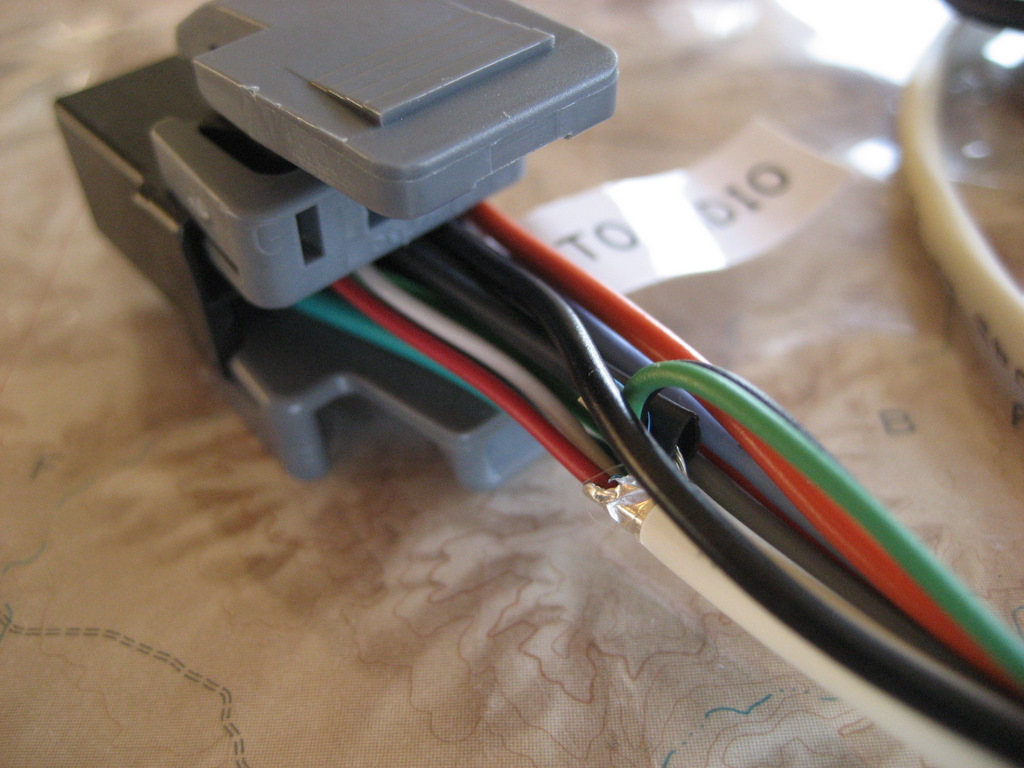
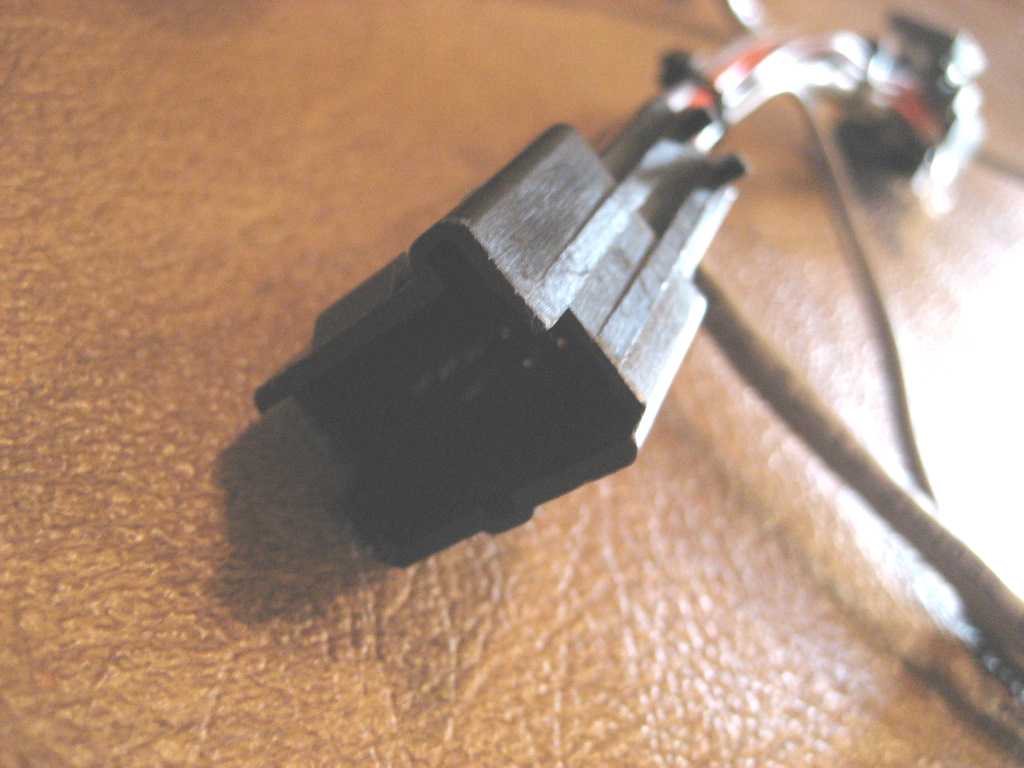
Remove the 16 pin connector from the XM receiver and plug in the same connector on the harness:

Then plug the original 16 pin connector into the body harness connector.
Here's a closeup:
Once you plug in the harness and your music device, you can listen to your device whenever you press the XM button on your radio.
Here's how the harness works.
The wiring for the XM receiver is as follows:
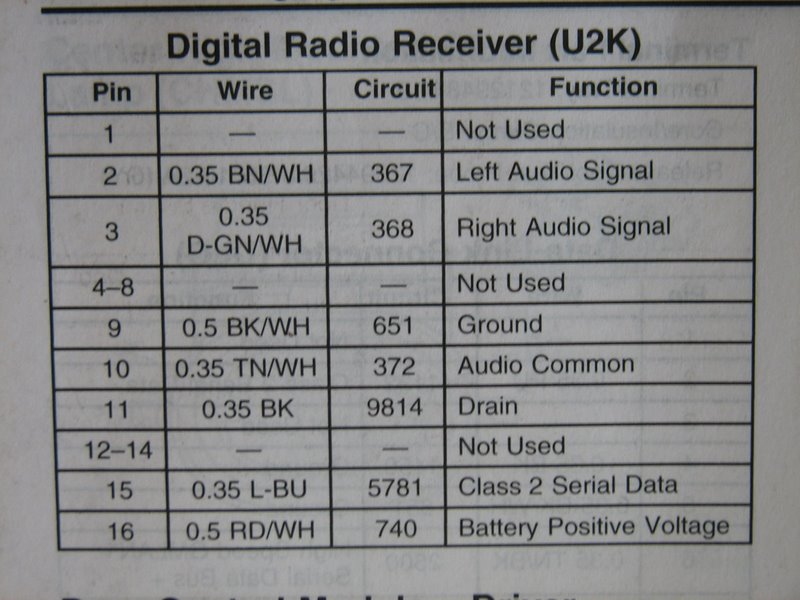
Pins 2, 3, and 10 are the audio left, right, and common signals from the XM receiver to the radio or Nav unit.
This harness simply disconnects these pins from the XM receiver and instead connects them to your music device though the 3.5mm (1/8") stereo connector plug.
You could do this without a harness, but you would have to cut the factory wires and solder or splice your connector cable leads to the factory wiring harness. This custom harness allows a simple installation without any wire cutting or splicing.
For the XM receiver to be displayed on your radio or Nav unit, you must retain power and communication to the XM receiver. That is why Pins 9, 11, 15, and 16 must remain connected through the harness.
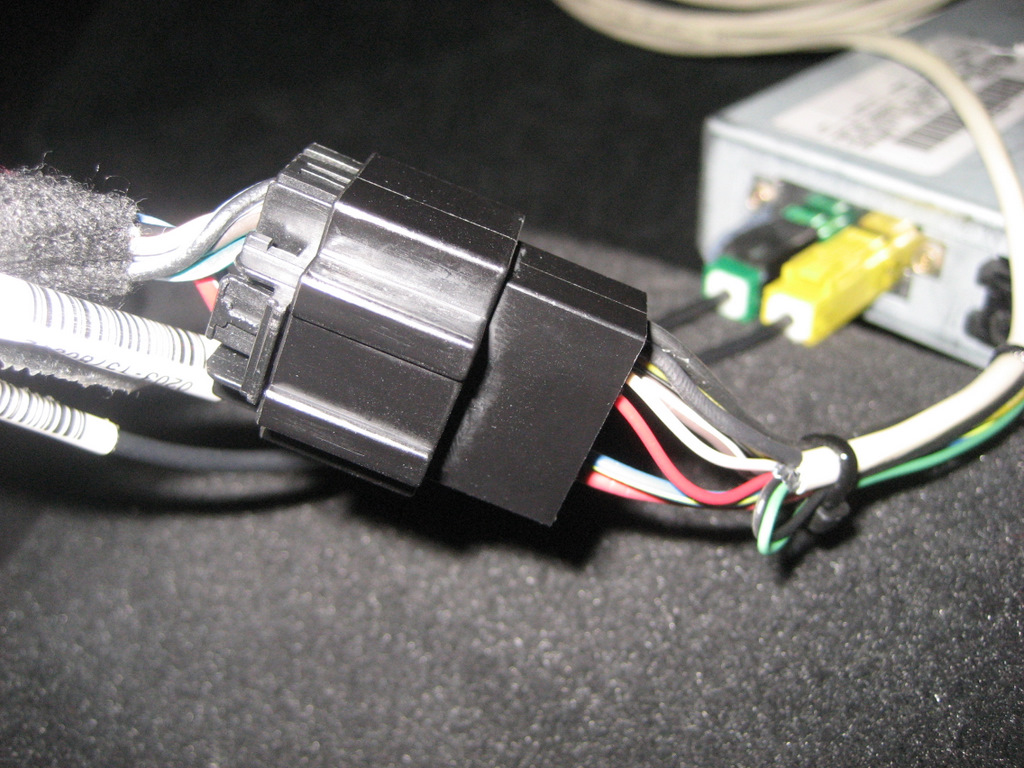
Here are some more photos of the custom harness.
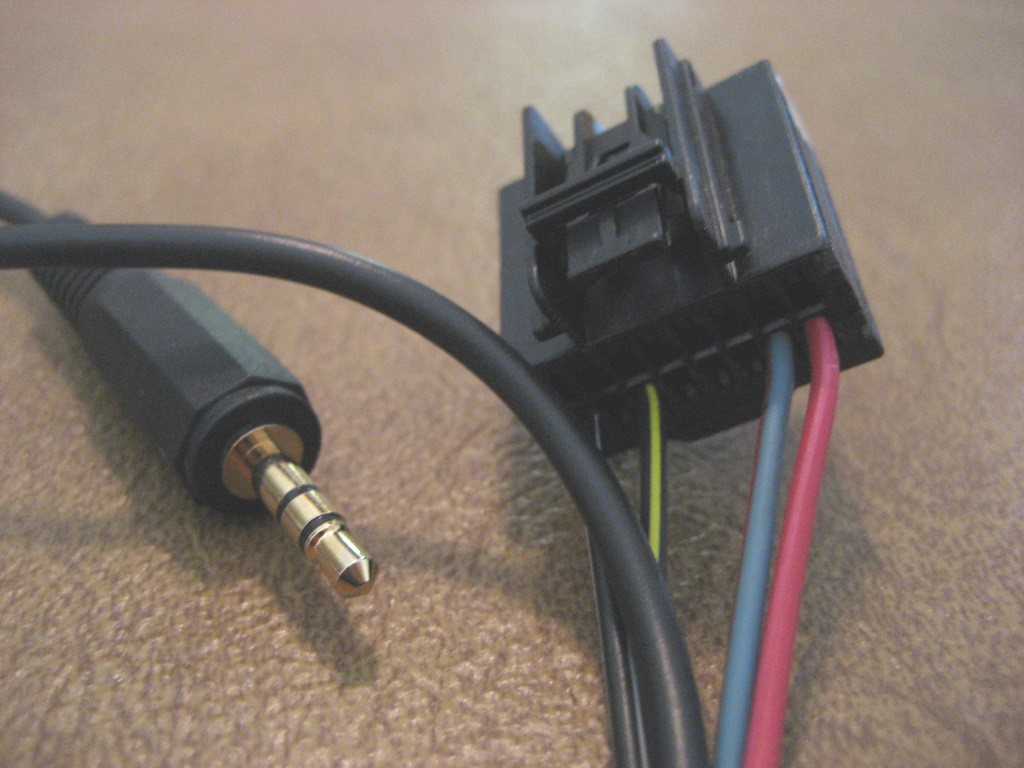
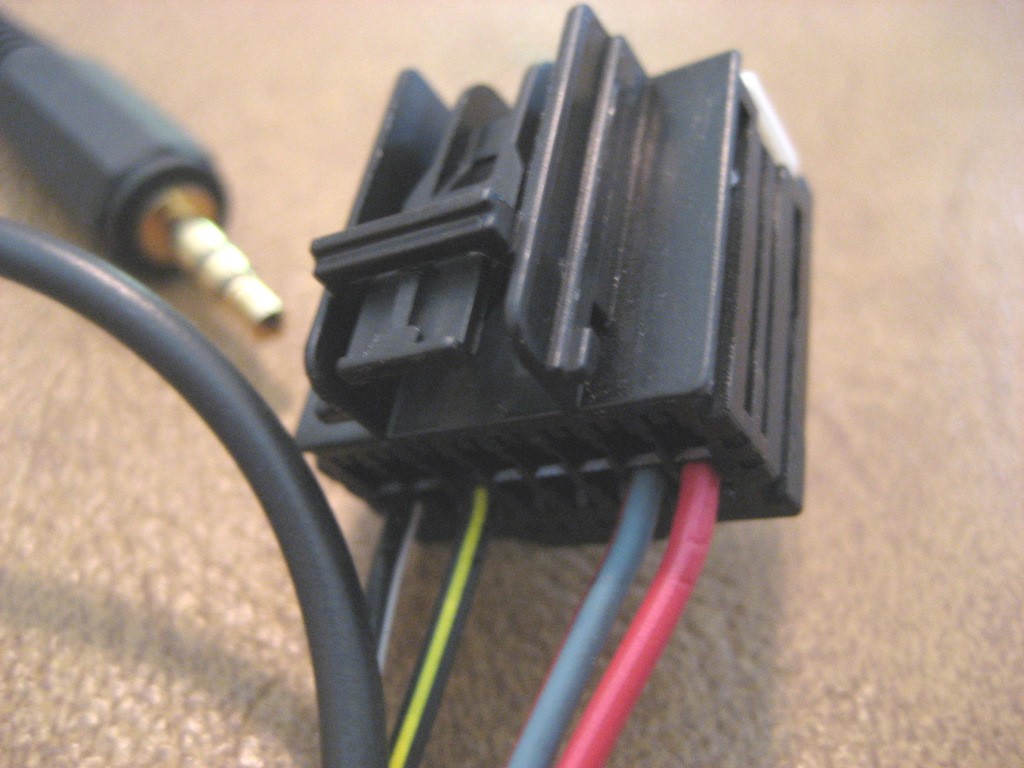
First, the XM connector and the Aux In plug to your music device:
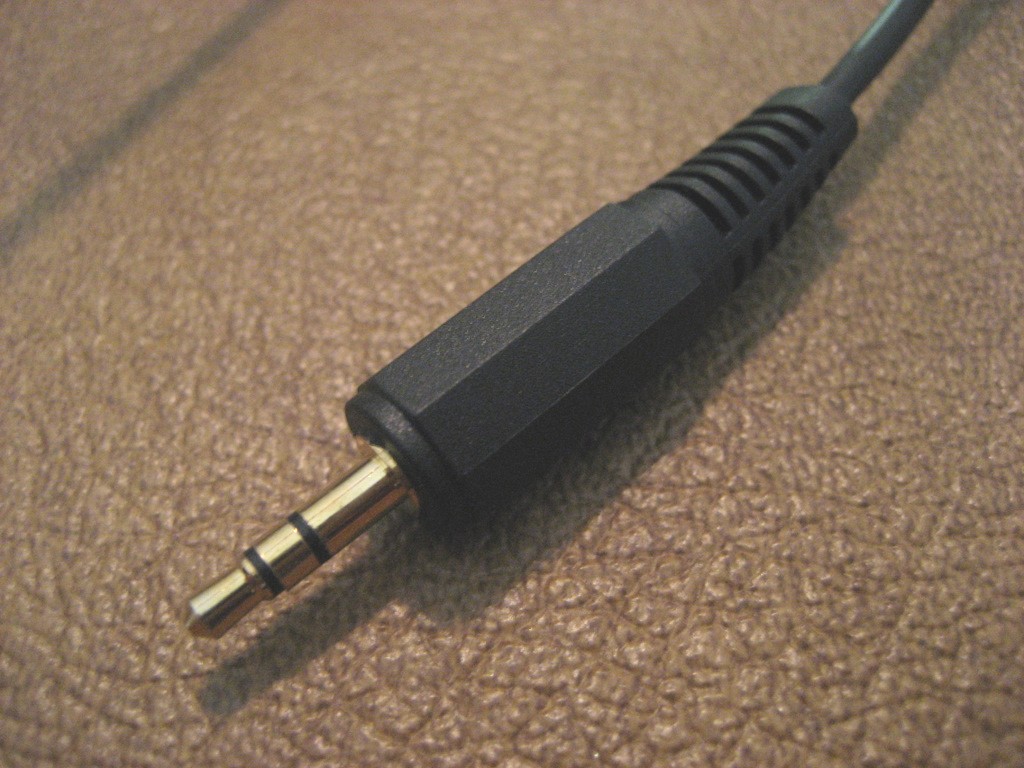
A closeup of the Aux In plug:
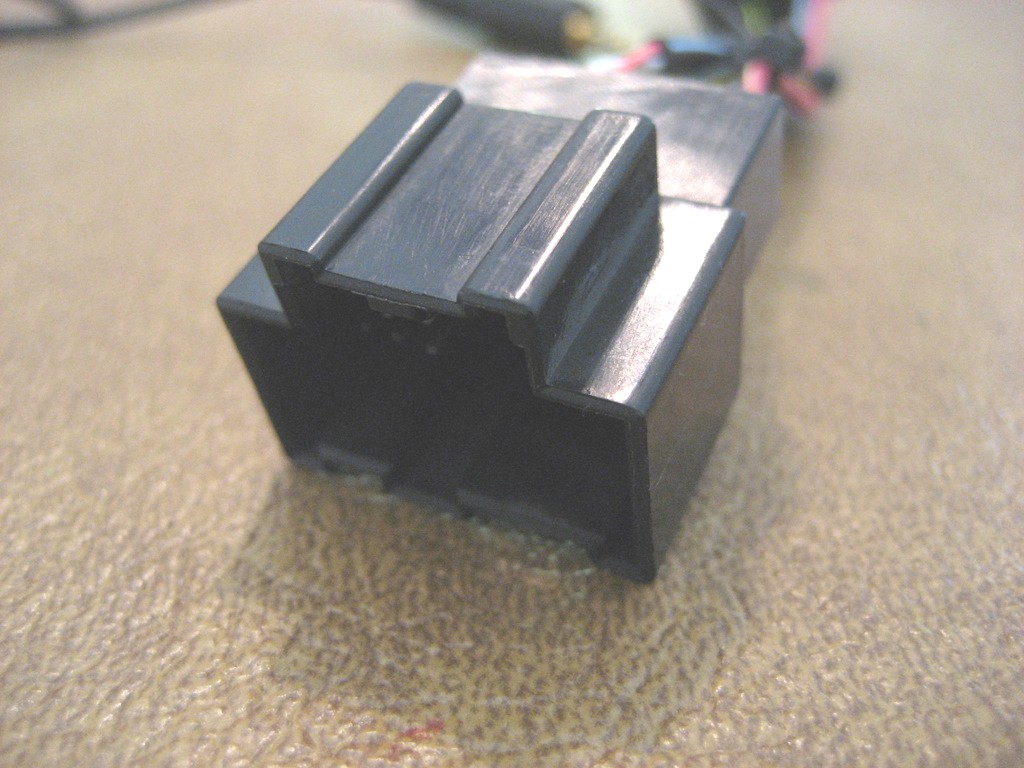
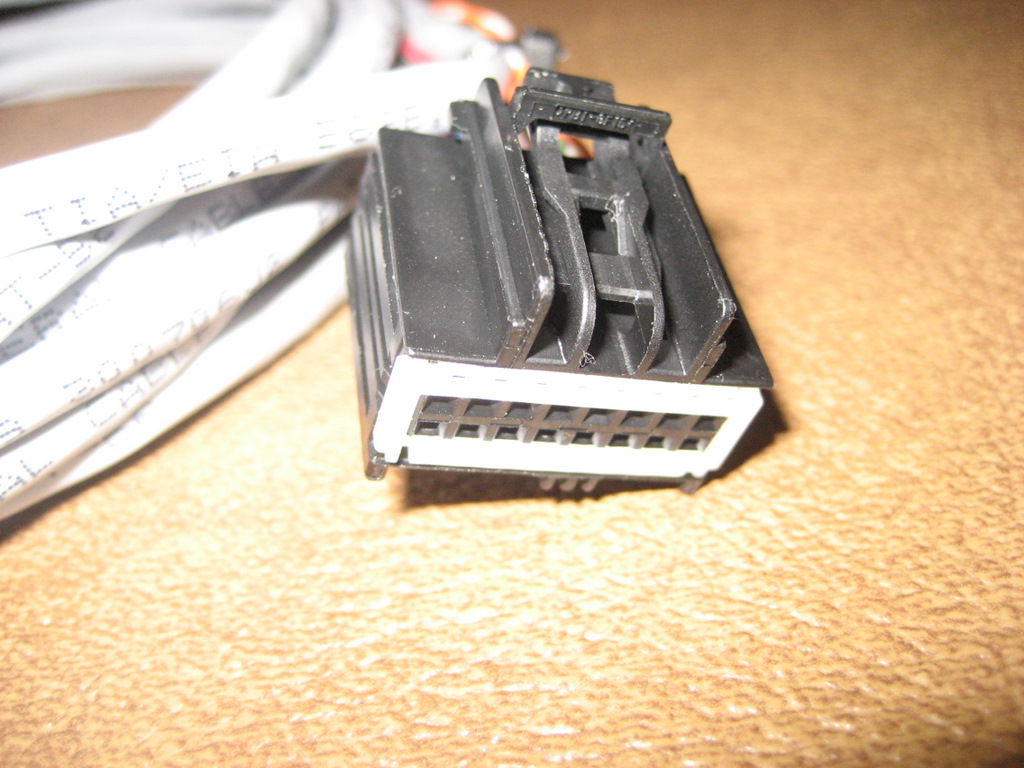
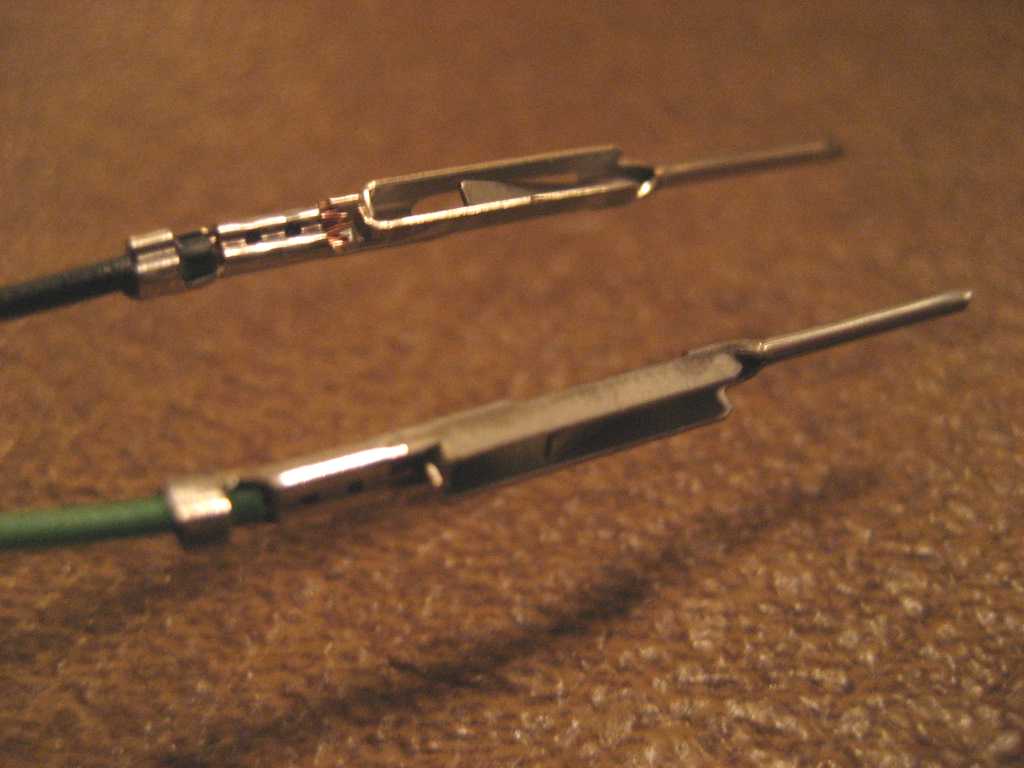
Closeup of the XM receiver connector:

This is the same connector as the OEM body harness connector that you remove from the XM receiver.
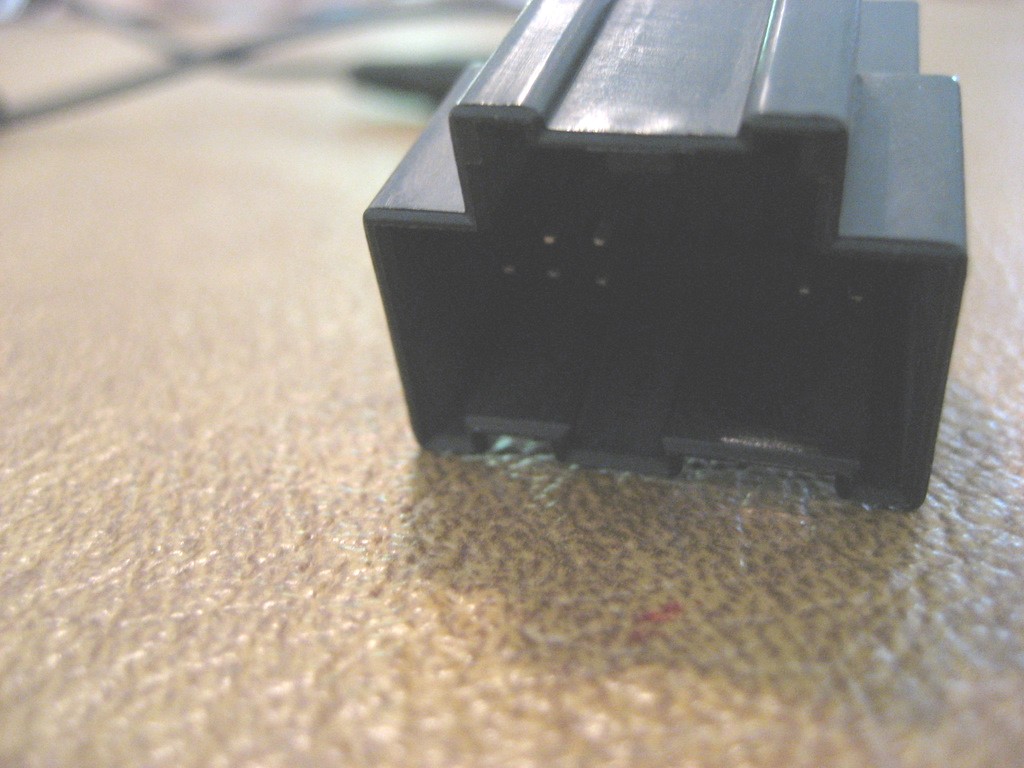
A closeup of the back of the XM connector:
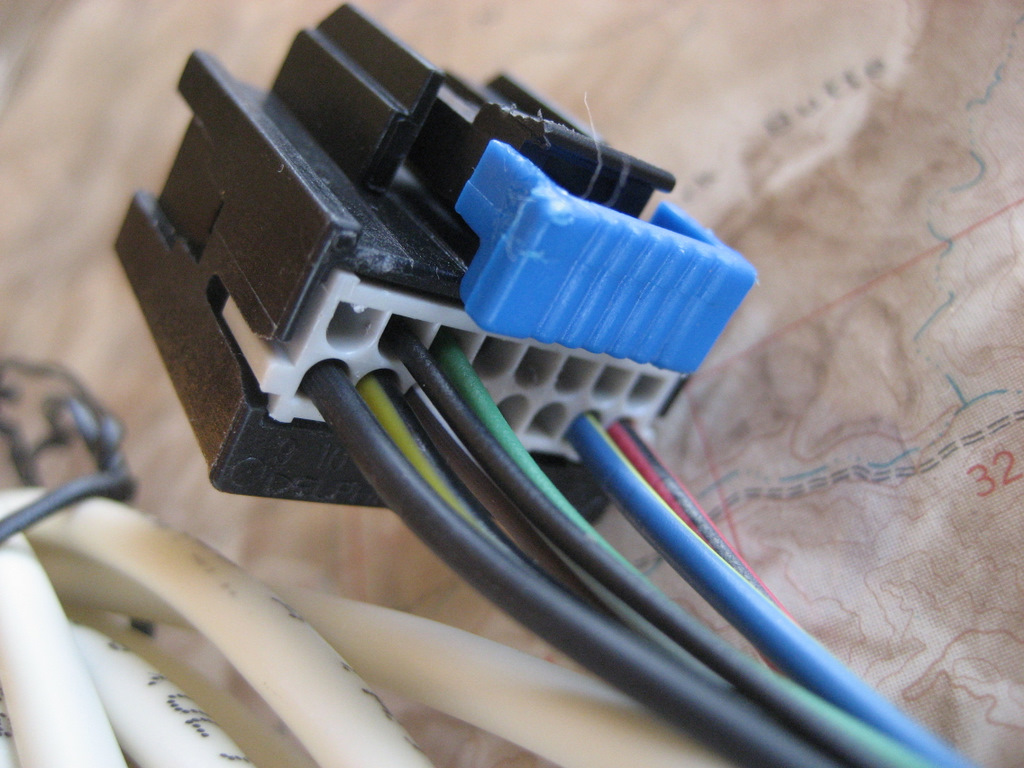
Here is the new body harness connector that you plug your original XM receiver connector into:
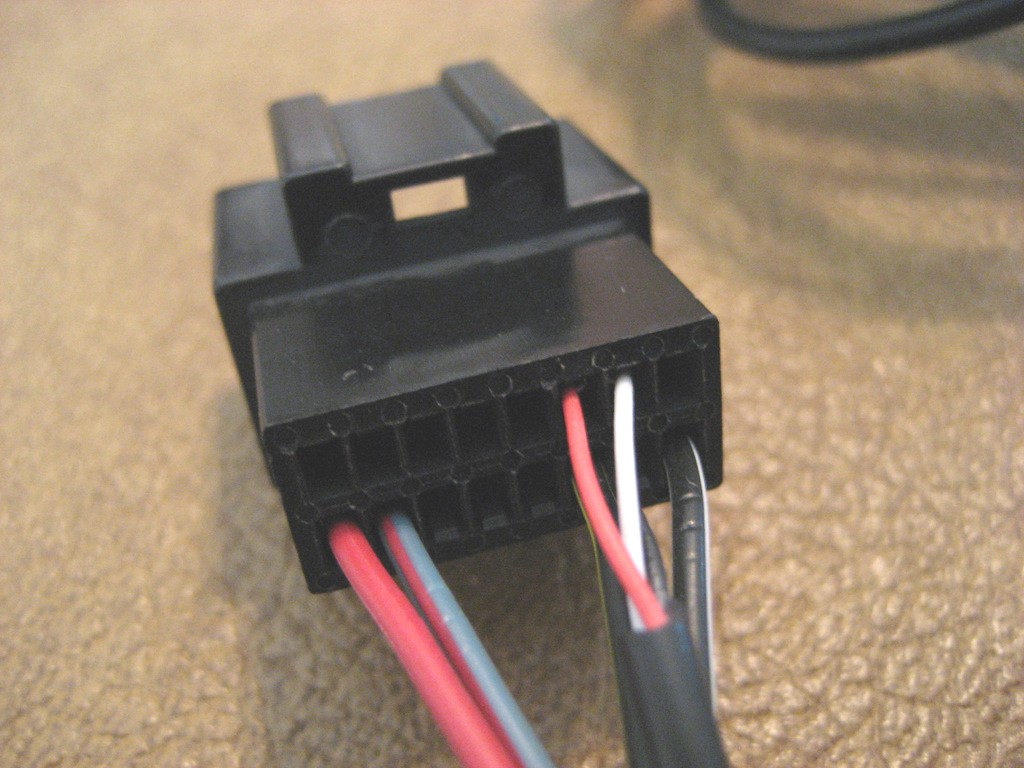
Note the red and white audio wires in Pins 2 and 3.
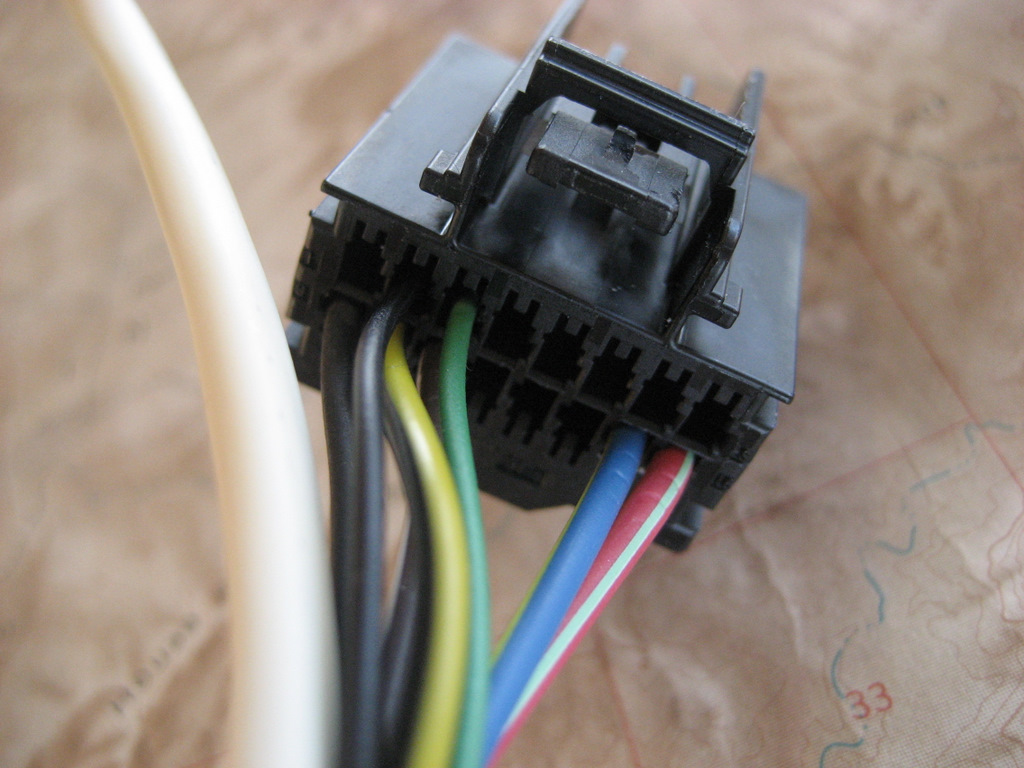
Here is the front of the body harness connector:
You plug your original 16 pin connector into this.
Another view:
A view of the cable ties of the harness:
These are important so you don't accidentally pull a wire out of a terminal.
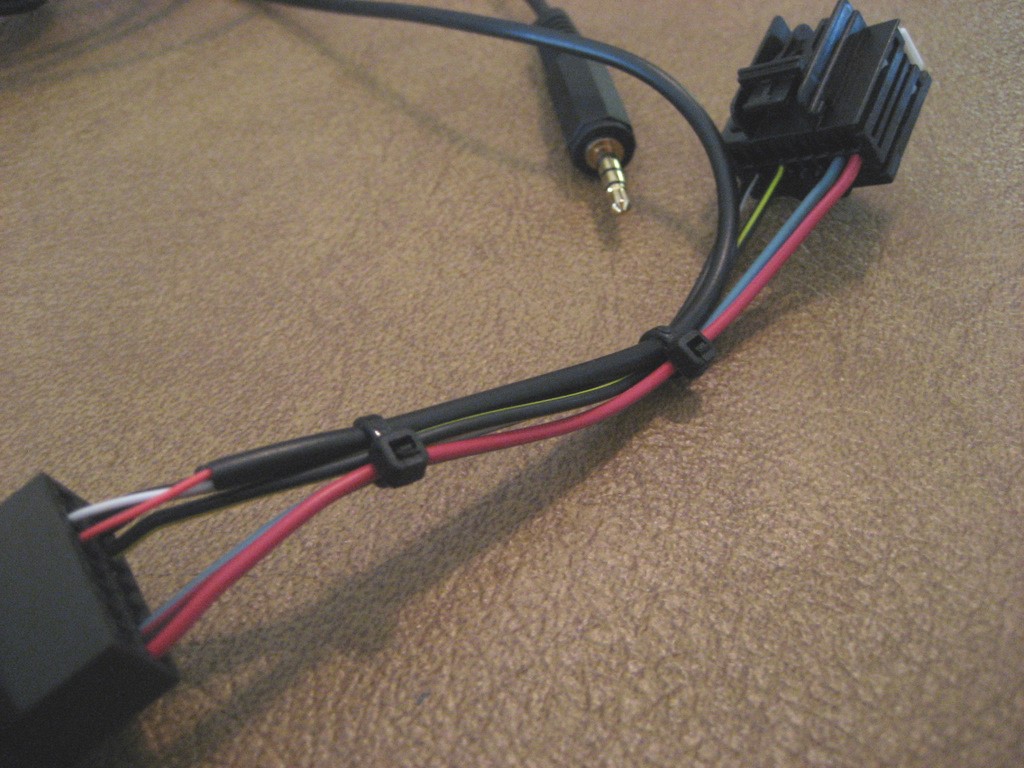
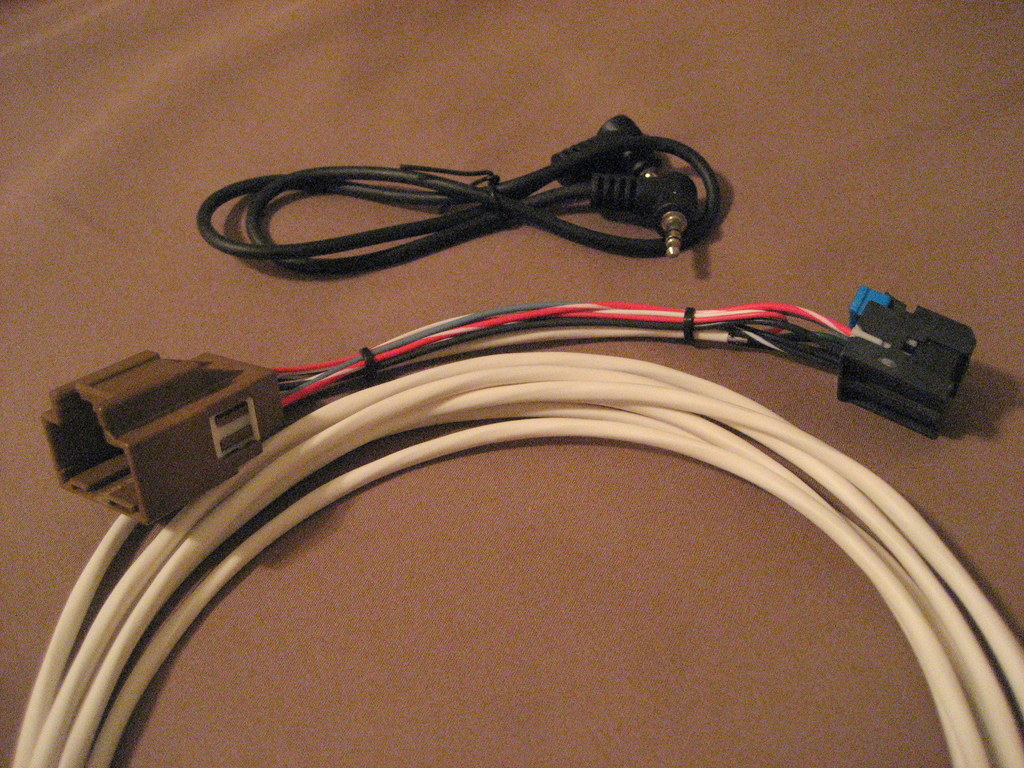
Here is the entire harness (latest version):
The cable to the Aux In plug is 11' long so it will reach anywhere in the car.
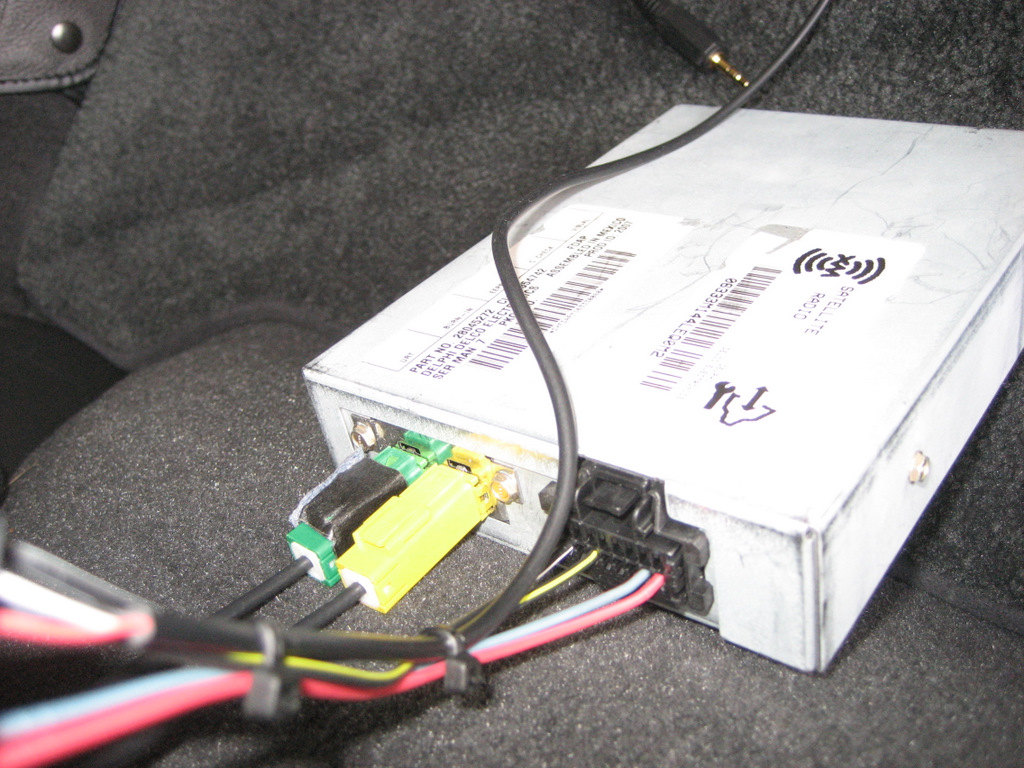
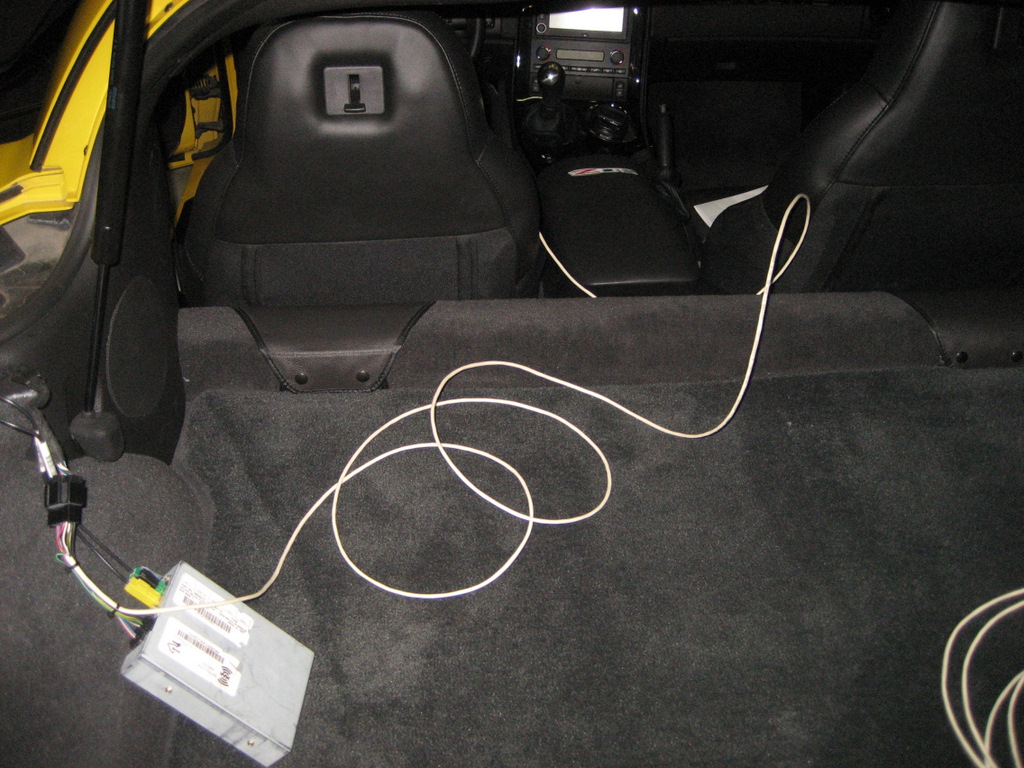
Here is the complete harness installed:
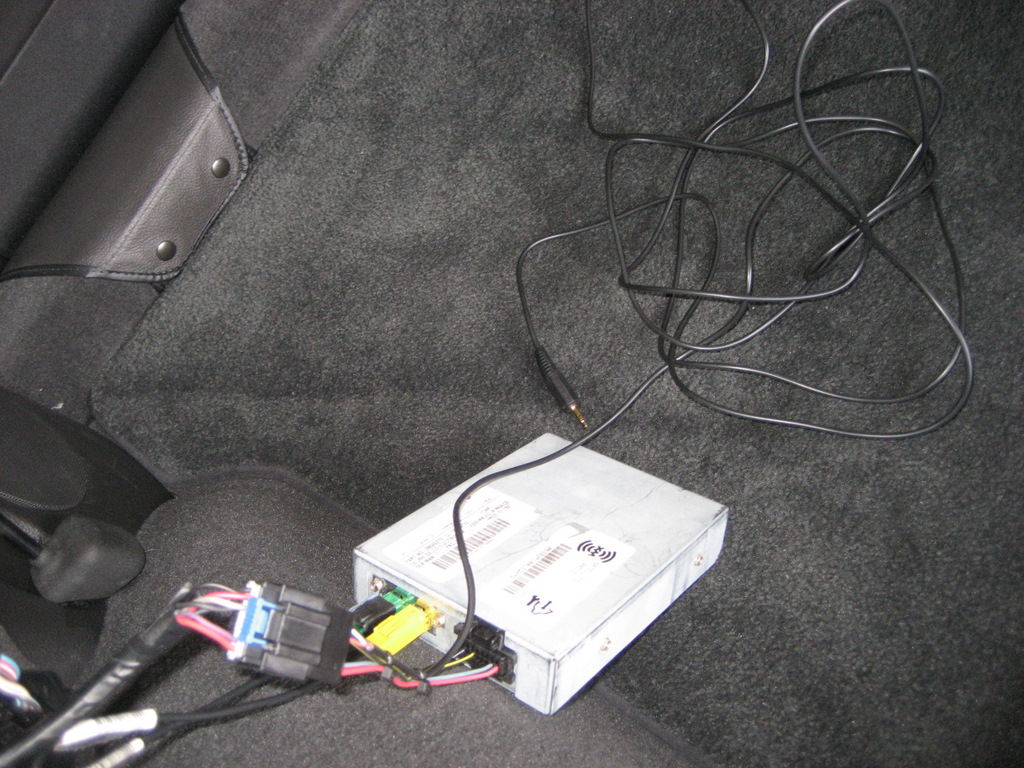
The photo above shows the AUX-1 harness plugged into the factory external 6 CD changer connector, but without the changer, the harness connects exactly the same into the factory 16 pin body harness connector.
This Auxiliary Input harness will work with the factory changer and/or the GM PAL (Personal Audio Link).
The only thing you lose is the XM receiver audio.
Click here for Ordering Information
Alternative 2 - Adding a 3.5mm jack to plug in your music device
(The AUX-2 harness)
This Auxiliary Input AUX-2 harness is similar to the first harness, but it adds a jack that is made to mount somewhere near your center console.
When nothing is plugged into the jack, you receive audio from your XM receiver.
When you plug in your music device using a patch cable, the audio from the XM receiver is disconnected at the jack and audio from your music device is inserted.
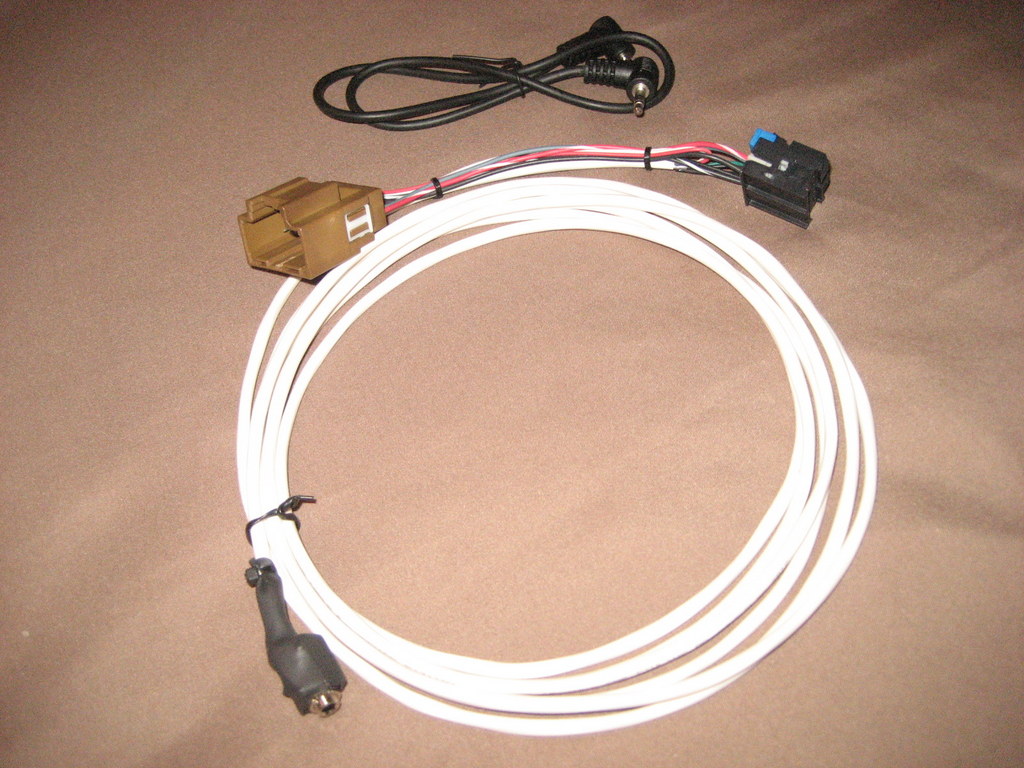
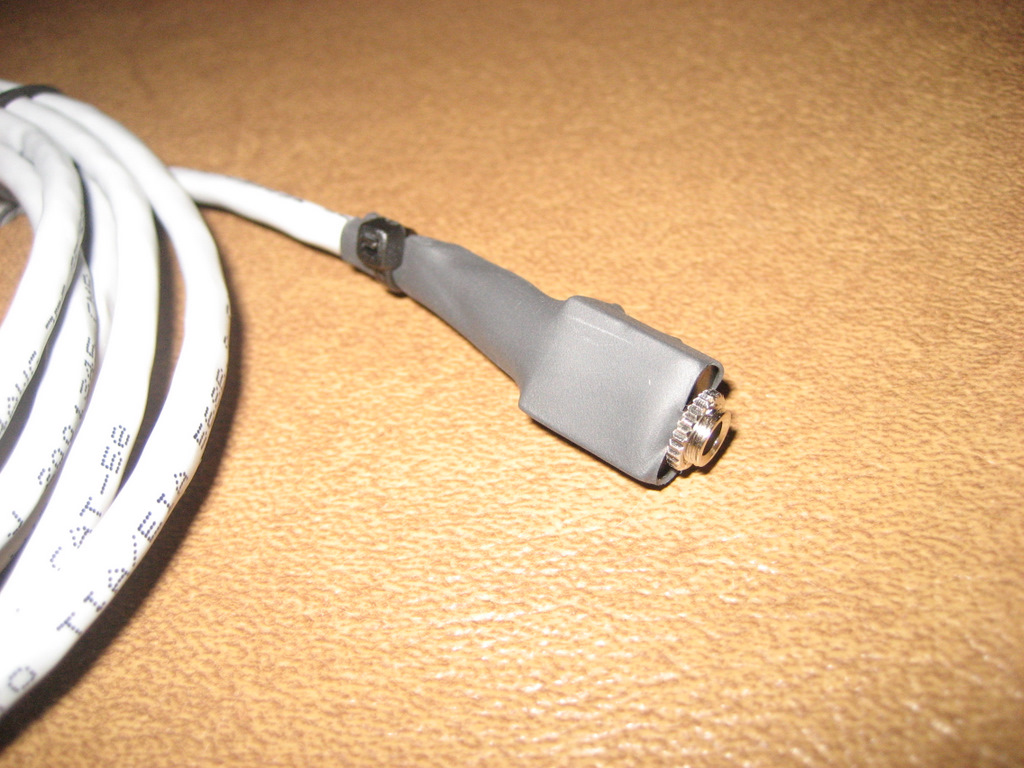
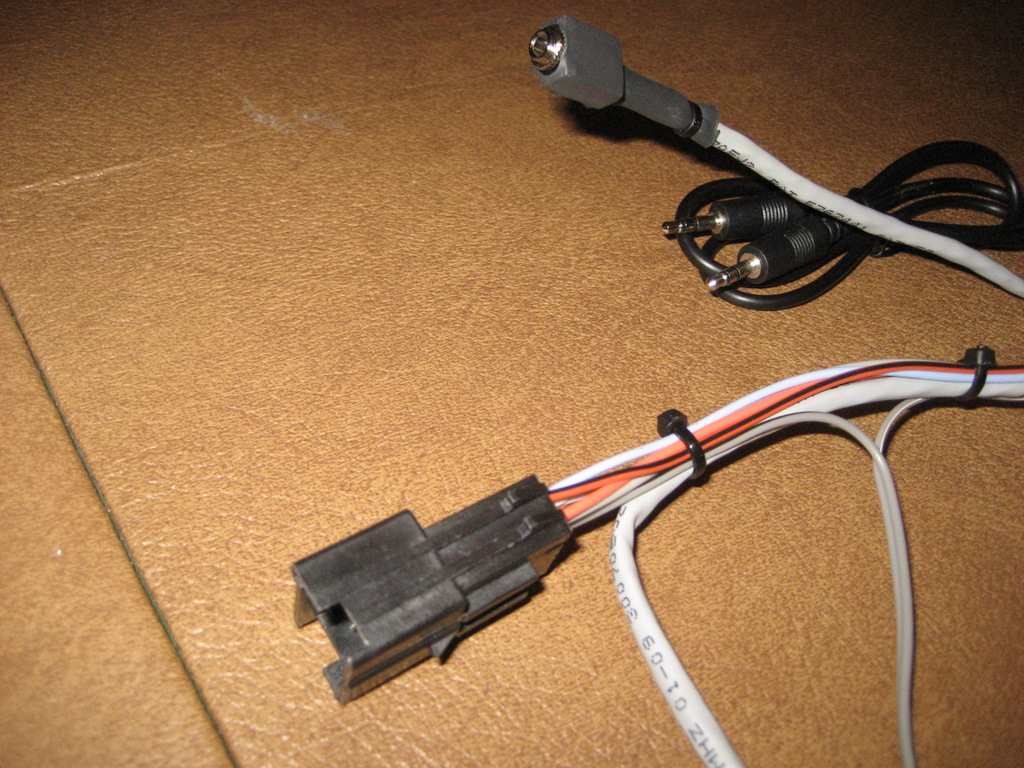
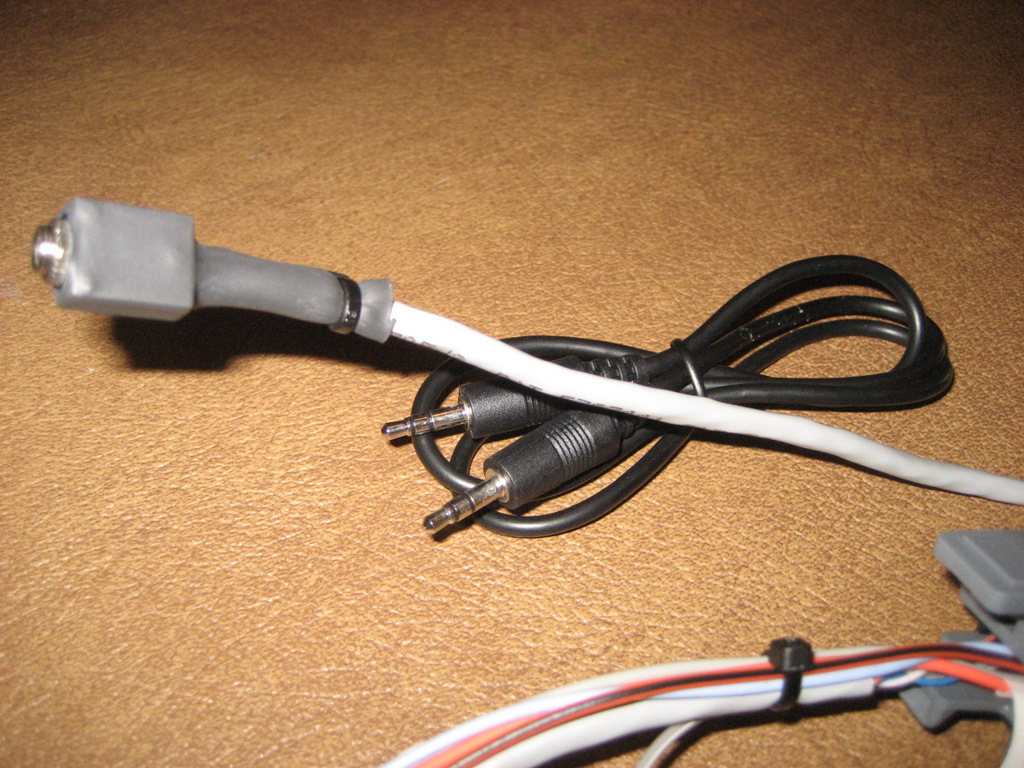
Here is a photo of the AUX-2 harness:
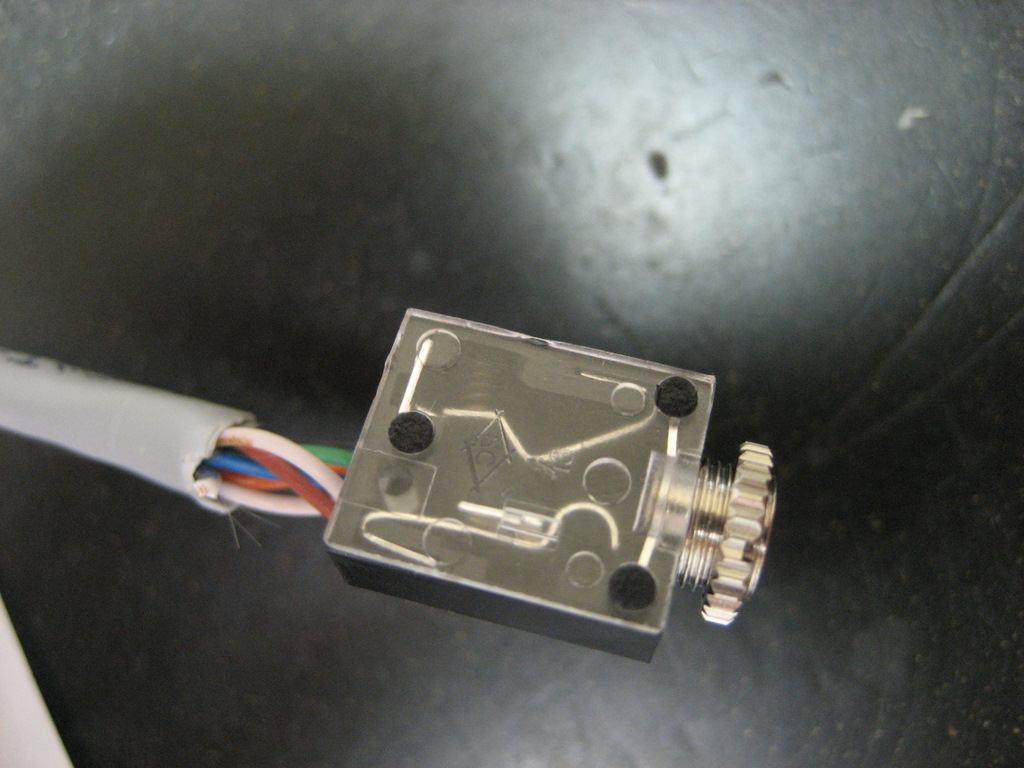
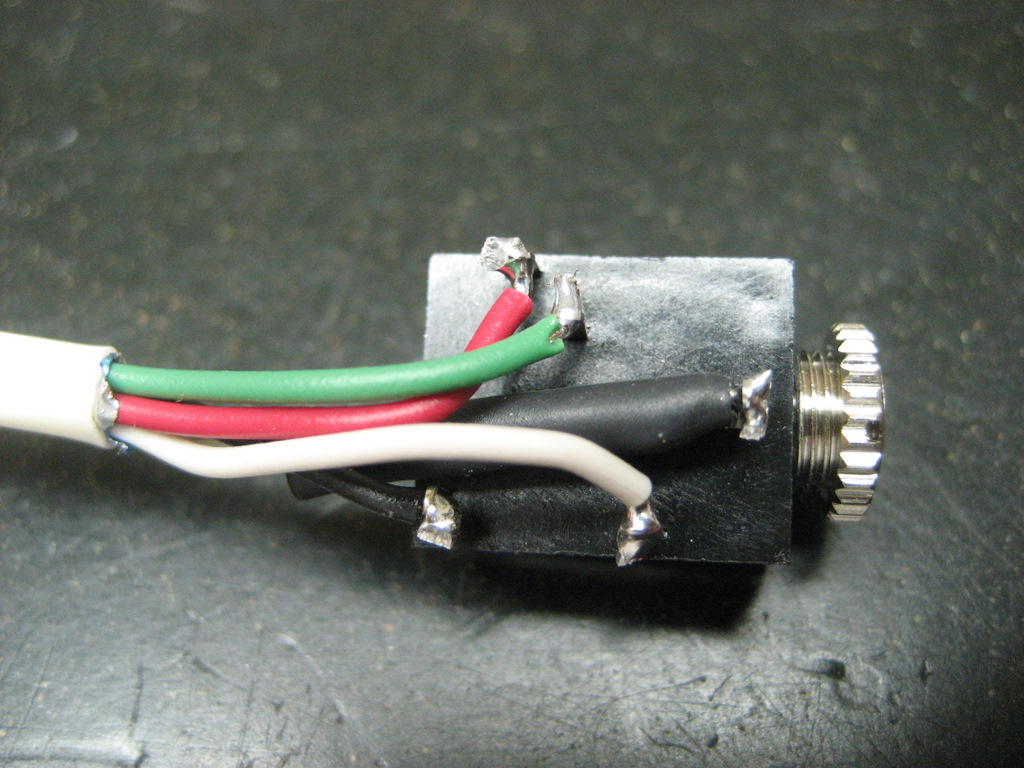
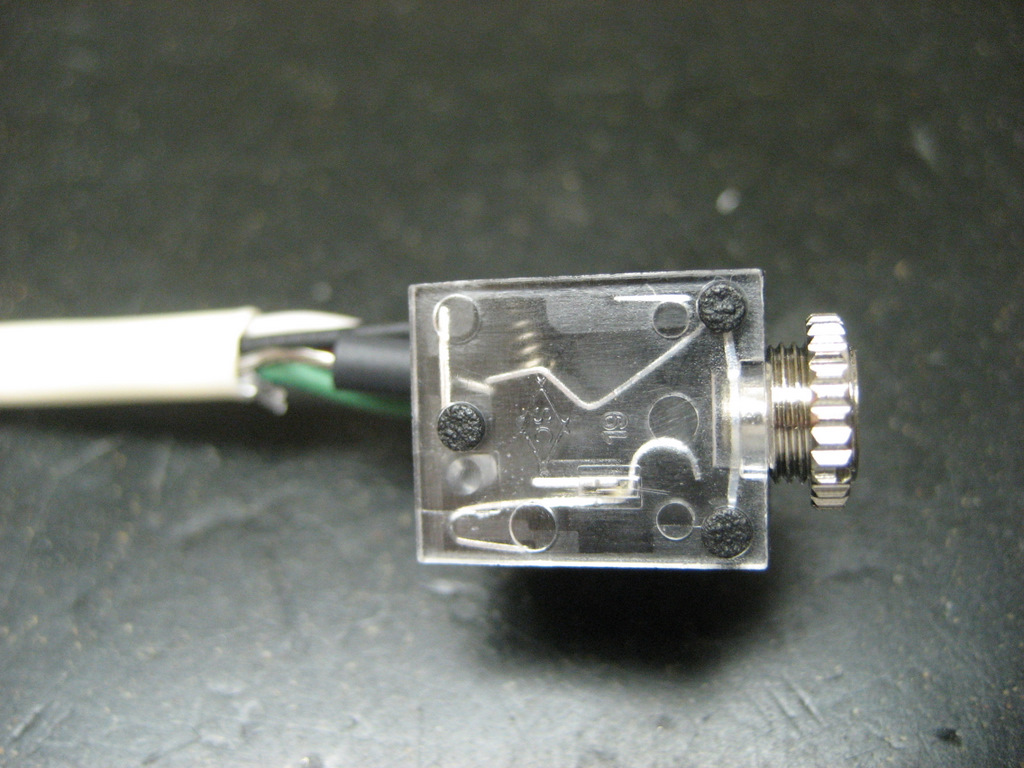
Here is a closeup of the jack:
Click here for a .pdf file showing the jack and wiring details
When a 3.5mm stereo plug is inserted into the jack, audio from the XM receiver is disconnected and audio from the plug is connected.
When this AUX-2 harness is compared with the AUX-1 harness, there are advantages and disadvantages:
1. The advantage is that you can maintain XM radio reception when your music device is disconnected.
2. The jack is not quite as neat as the molded plug on the flexible cable of the AUX-1 harness. Ideally, the jack should be permanently mounted somewhere using a 1/4" hole so the cable can be hidden.
3. The AUX-2 harness is very time consuming to make because of the number of connections and the required soldering of the jack terminals.
Here is a photo of the jack wiring:
Like the Alternative 1 AUX-1 harness, this AUX-2 harness is connected between the XM receiver and the 16 pin body harness connector into the XM receiver.
Here are some additional photos of the harness and the connectors.
First the 3.5mm (1/8") jack:
The soldered wires are under the heat shrink tubing.
Here is the XM connector (This one happens to be a Yazaki connector rather than Delphi):
And wiring from the rear of the connector (Delphi Micro 64):
Rear wiring for a Yazaki Connector (interchangeable with the Delphi):
Here is the body harness connector and rear wiring to accept the original 16 pin XM receiver connector:

The above photo shows the latest OEM quality Yazaki connector.
And a photo of both connectors:
The included patch cable is also shown.
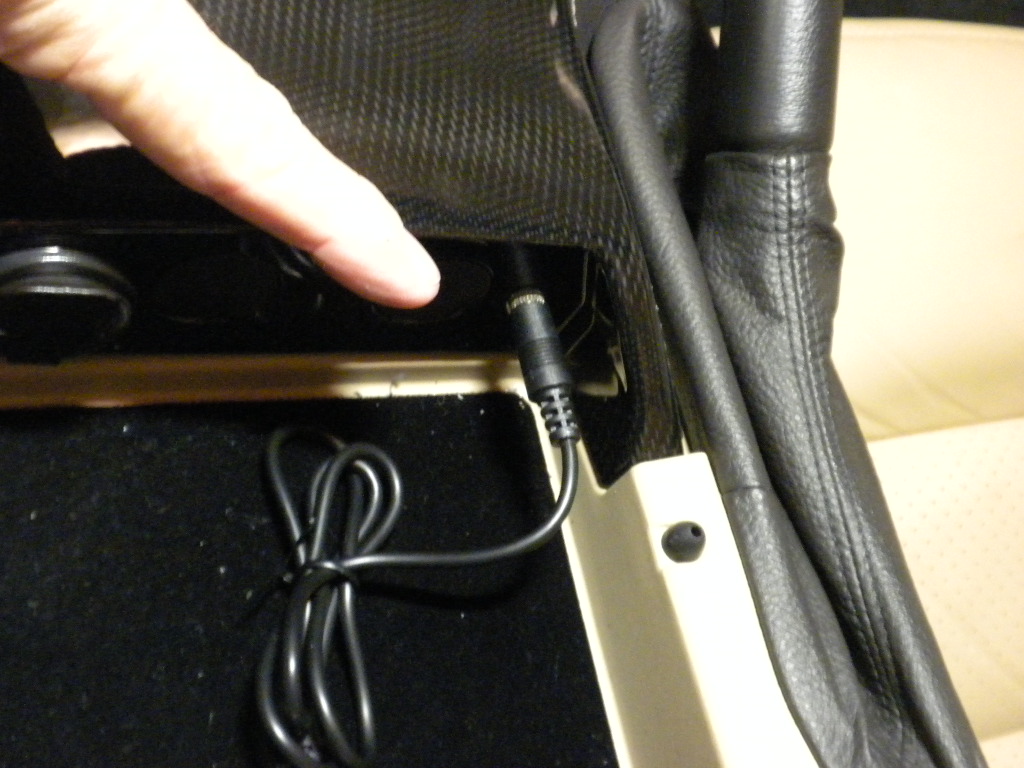
Here is the AUX-2 harness connected in a Z06:

Here, the 12' cable is run to the front of the car:
The cable can be hidden under the carpet and run alongside the passenger seat or up inside the console.
Ideally, it should be mounted (perhaps on the side trim panel shown below).
Otherwise you can leave it loose and available for connection.
Here is a photo of an HP Ipaq connected with the 2' patch cable, but most any music device can be connected:
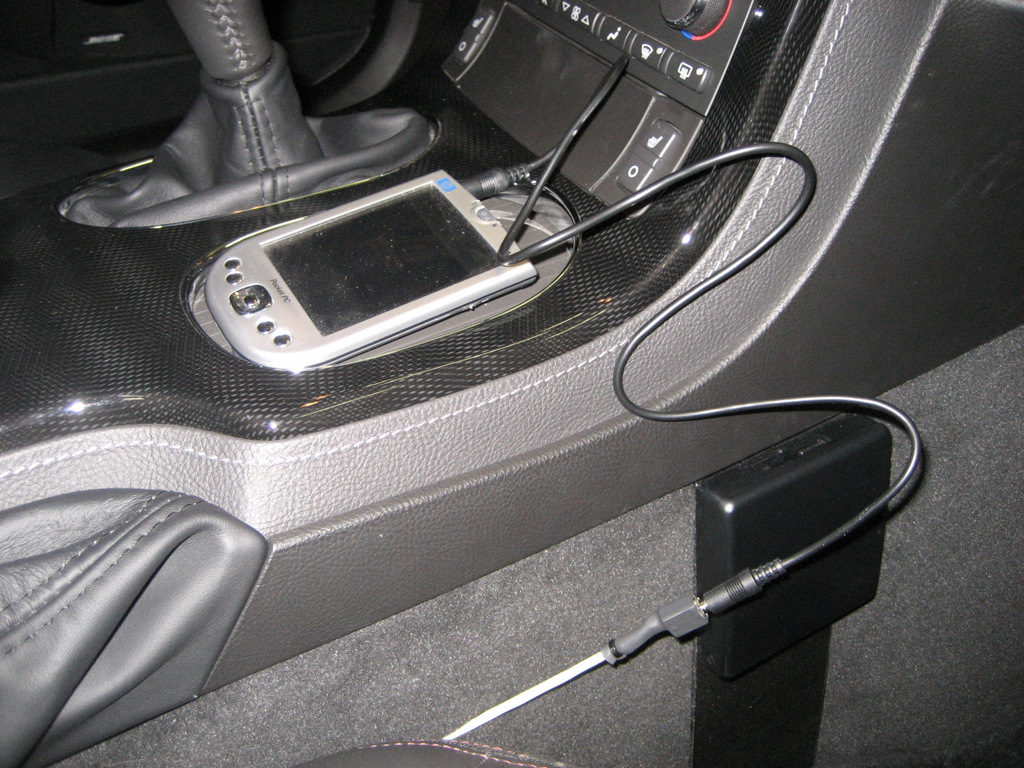
This AUX-2 harness has an 11' cable to allow the 3.5mm jack to be mounted anywhere near the center console.
The two male and female connectors will be located at the XM receiver.
The XM receiver is located above the left rear wheel well in the coupe and Z06.
Since the XM receiver in the convertible is located behind the waterfall between the seats, a short version of this harness is available with a 5' cable.
The patch cable with a stereo plug on each end will connect the jack to your music device.
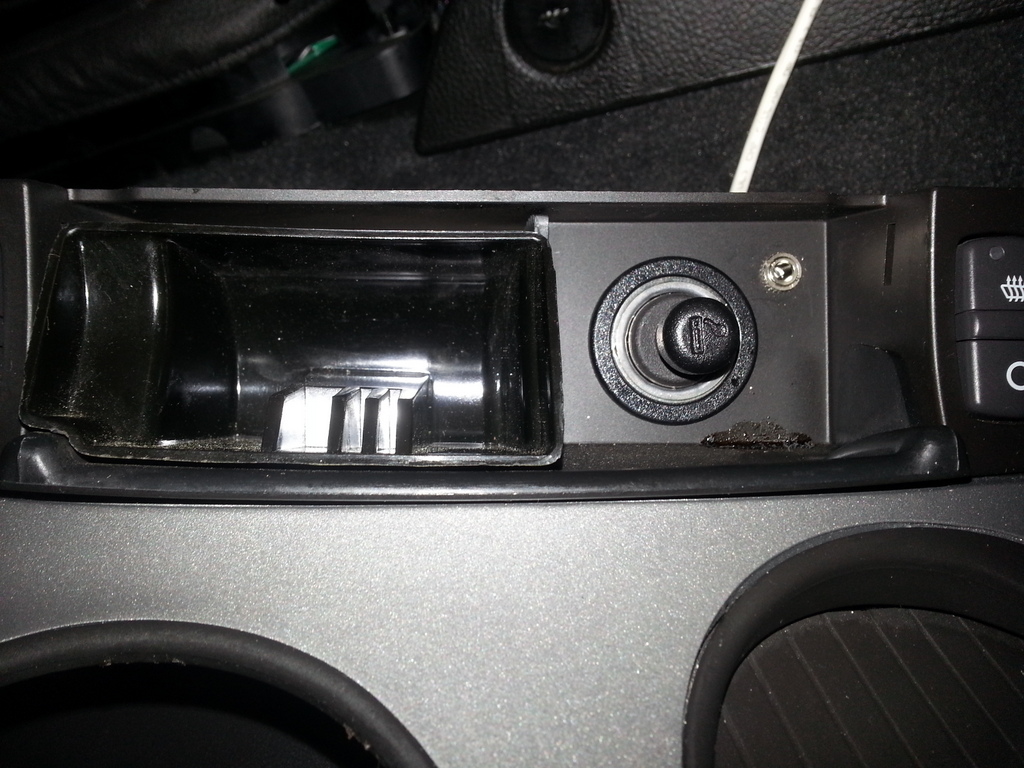
Here are some photos of Les Wilson's Aux Jack installation
(he chose to mount inside the center console):

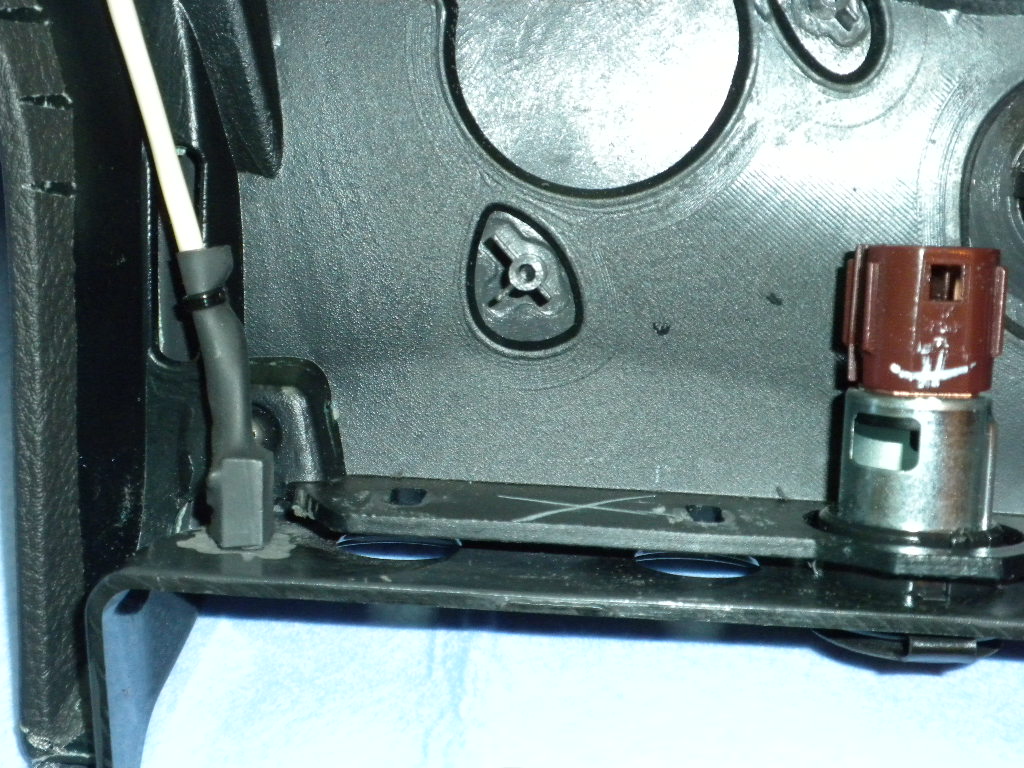
On the left, above, is the Aux In jack mounted in the console.
All you need is a 1/4" hole. But note that the threads on the jack are pretty short and the jack is really made for a panel about 1/8" thick.
Les used a Dremel tool to grind a bit of the console to make it a little thinner so the jack would fit.
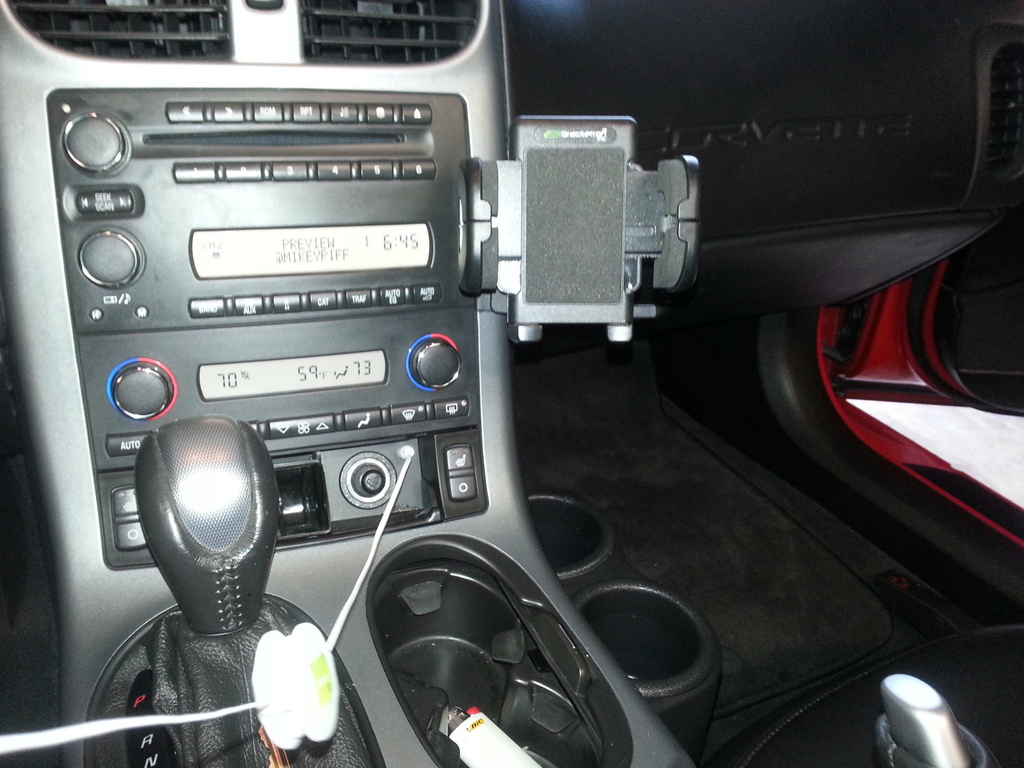
And here are a couple of photos from Chuck Kennedy's AUX-3 installation:
Click here for Ordering Information
Alternative 3 - Adding a 3.5mm jack to plug in your music device, but connecting at the radio or Nav unit
(The AUX-3 harness)
This alternative is basically the same harness, but using different connectors to allow connection at the back of the radio.
This is a bit neater solution because the cable is shorter and mounting the jack will usually require removal of the center console anyway. The shorter cable can be run directly from the radio or Nav unit to the jack location, thereby hiding the cable and protecting it as well.
The Alternative 3 harness is almost identical to the "NAV-3" harness that I offer to allow installing a switch to disconnect the Speed Sensor of the Navigation Unit. This feature allows you to enter destinations while you are moving. It is described in a separate website -
Click Here if you are interested in this Navigation modification.
Here is a photo of the AUX-3 harness:
The AUX-3 harness can be used on non-Nav radios as well.
Here are some closeup photos of the AUX-3 connectors. First, the 12 pin connector to plug into the back of the radio/Nav unit:
This connector is identical to the OEM radio connector, Delphi part number 12064799.
It uses Delphi Micro 100 female terminals:
Here is the connector wiring:

Note that Pins H, J, and K are the audio wires we need to intercept in the harness.
The wires from the 3.5mm jack connect to Pins H, J, and K.
Here is a photo of the body harness connector that accepts the OEM radio connector:
This connector is a Delphi 15356627. It mates with your original 12 pin radio connector (12064799).
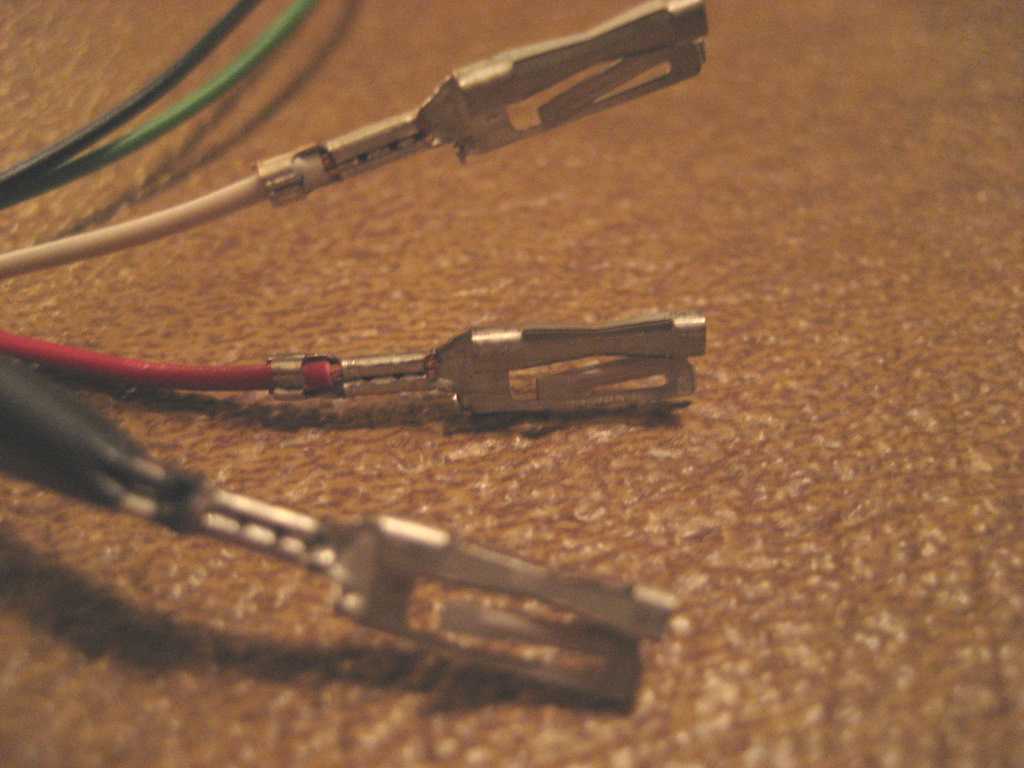
Here are the male Micro 100 terminals for this connector:
Here is a closeup of the connector:
And the wiring from the rear:

Again, the wiring from the 3.5mm jack is routed to Pins H, J, and K - shown on the connector as positions C3, 4, and 5.
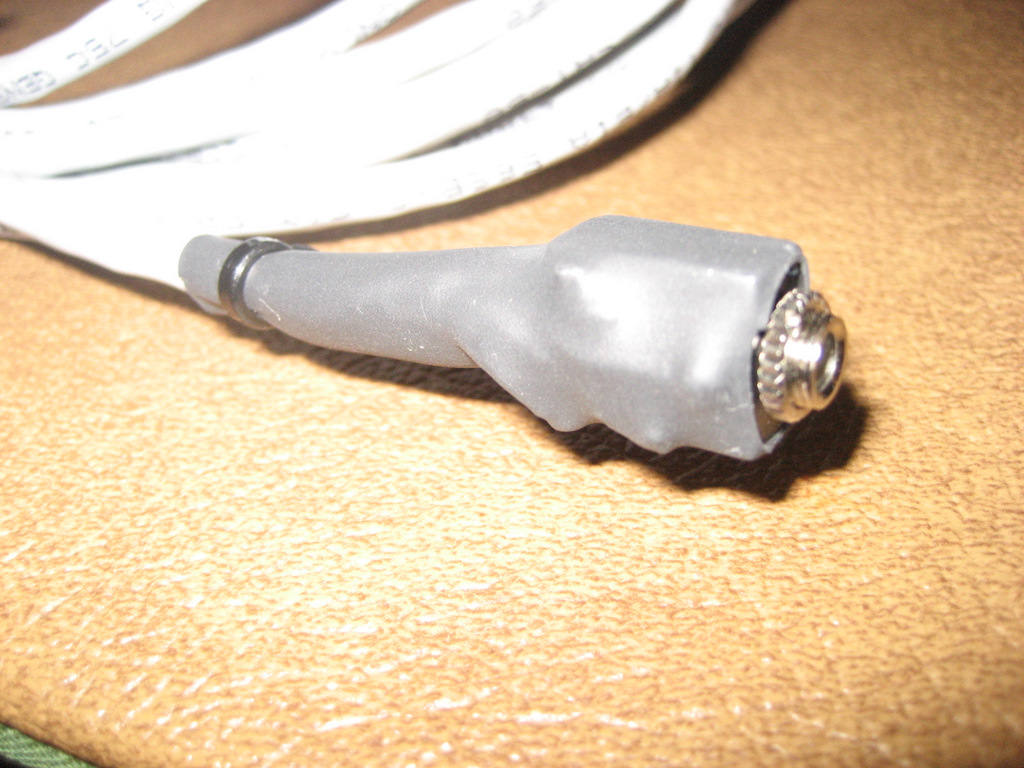
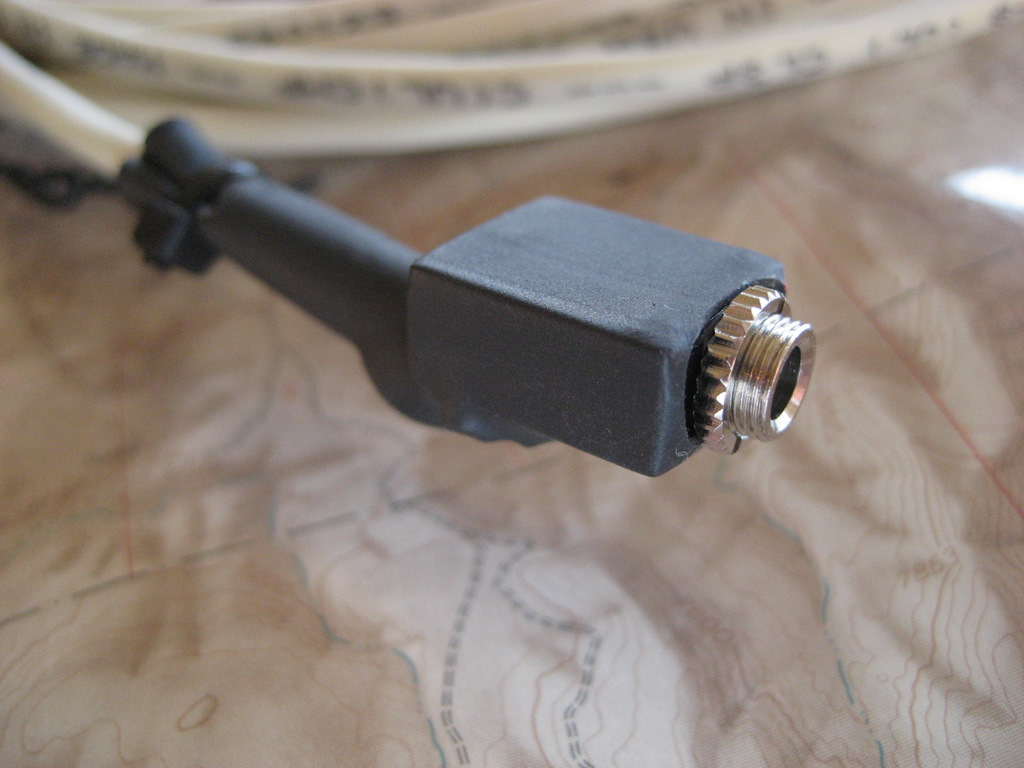
Here is a photo of the AUX-3 3.5mm jack and included patch cable:
Here's a closeup photo of the jack:
And the jack wiring:
And a wired jack closeup:
The AUX-3 harness makes a nice neat solution to adding an auxiliary input if you subscribe to XM radio.
It is compatible with the external factory 6 CD changer and PAL (Personal Audio Link).
Here are some photos of Les Wilson's Aux Jack installation
(he chose to mount inside the center console):
On the left, above, is the Aux In jack mounted in the console.
All you need is a 1/4" hole. But note that the threads on the jack are pretty short and the jack is really made for a panel about 1/8" thick.
Les used a Dremel tool to grind a bit of the console to make it a little thinner so the jack would fit.
And here are a couple of photos from Chuck Kennedy's AUX-3 installation:
FOR A COMPLETE HARNESS:
If you are interested in a complete harness, please see the Ordering Page link below for current pricing. I can ship any of the harnesses to any U.S. address for $8 in a Flat Rate Priority Mail box. For Canada and other international shipments, please see the International shipping prices below the harnesses on the Ordering Page. The AUX-2 and AUX-3 harnesses include a 2' patch cable with a male plug on each end. I also have 6' patch cables if you would prefer the longer length.
You can either use Paypal to my email address or send me a check or money order. Email me with your complete shipping address, and I will fabricate a complete harness and ship it to you as soon as I receive your payment.
When I receive your Paypal payment or check, I will email you to let you know I received payment and again when I ship.
![]() Click here for the ORDERING
PAGE
Click here for the ORDERING
PAGE
If you have any questions, you can email me at ray@kawal.net
FOR A KIT TO BUILD YOUR OWN HARNESS:
The AUX-2 and AUX-3 harnesses are labor intensive, so for those of you who have the experience to build your own, I can offer a complete kit of parts to build either harness. I don't promote the kits because you need three things to build them:
1. A complete understanding of the wiring described above so you know how and why the harness works.
2. Expert soldering skills. The terminals on the jack are tiny for the 22 gauge wire.
3. A suitable terminal crimper for the Delphi or Yazaki terminals. Cheap crimpers you find in most auto part stores won't do the job.
If you have ALL THREE of the above, email me with your request.
The AUX-2 kit is $30 plus $8 for Priority Mail shipping. The AUX-3 kit is $40 plus $8 for Priority Mail shipping. The kit will consist of the following:
Male and female connectors for either harness (16 pin or
12 pin)
Terminals to fit the connectors
3.5mm switched jack
4 conductor plus shielded 22 gauge stranded wire (10' for AUX-2, 3' for AUX-3)
2" piece of heat shrink tubing for the jack
3 nylon cable ties
To install the terminals, you will need a crimp tool. If you don't have one, click here for a suggested tool from Ballenger Motor Sports.
If you have any questions, please email me at ray@kawal.net.